Are you feeling overwhelmed when considering how to set up Google Analytics on your website? Is your goal to better understand your audience, track your traffic, and enhance your online presence?
You’re not alone. Many website owners realize the importance of data but feel discouraged by the technical parts of adding such tools to their sites.
But here’s the good news: setting up Google Analytics is simpler than you might think, and it’s an invaluable tool for anyone looking to grow their online presence.
In this guide, I’ll walk you through the process of adding Google Analytics to your website, step by step. I’ll go over everything from creating your Google Analytics account to connecting it correctly to your site.
Why Is Google Analytics Important for Your Website?
If you’re looking to make your website more successful, whether it’s for business, blogging, or anything else, Google Analytics is a tool you can’t ignore. It’s like having a secret assistant that shows you exactly what’s happening on your site.
Imagine trying to improve your site without knowing what your visitors like or how they found you. It’s like shooting in the dark, right?
With Google Analytics, you’re no longer guessing. You get actual data about what’s happening on your site.
This means you can make smarter decisions about what to change or improve. For instance, you might find out that people love a specific type of post on your blog or that a particular product in your online store is a hit.
With this kind of info, you can focus on what works and skip what doesn’t.
And it’s about more than just the good stuff. Google Analytics can also show you where you’re losing visitors or which parts of your site might be causing confusion. Fixing these can make a massive difference to your site’s success!
Here are some of the critical insights you can gain from setting up Google Analytics:
- Understand your visitors – Google Analytics shows you who’s coming to your site, where they’re coming from, and what they like. This helps you understand what works and what doesn’t.
- Track your best content – Find out which pages or blog posts are the most popular. This way, you know what your visitors love and can make more of it.
- Helps with ad optimization – If you’re spending money on ads, Google Analytics tells you if it’s worth it. It shows which ads are effective and which aren’t, allowing you to focus your budget and save money.
- Avoid guesswork – Google Analytics gives you the real picture instead of guessing what your visitors like. This means you can make smarter decisions about your website.
- Spot and fix problems – If something’s wrong with your setup, like double tracking codes, Google Analytics can help you spot these issues before they mess up your data.
How to Set Up Google Analytics
Getting started with Google Analytics is easier than you might think, and the best part? It’s completely free! All you need to do is sign up for a Google or Gmail account.
If you’re worried about complicated steps, don’t be – the process is straightforward.
We’ll guide you through each step of how to set up Google Analytics 4 (GA4).
1. Create a Google Analytics Account
First, you need to create a Google Analytics account. This is where all your website’s data will live, so it’s crucial.
We’ll walk you through how to set up a Google Analytics account, making it simple.
Step 1: Go to Google Analytics
To begin, go to the Google Analytics website to sign up. Once there, click the “Get started today” button in the top right corner.

Step 2: Sign into Google
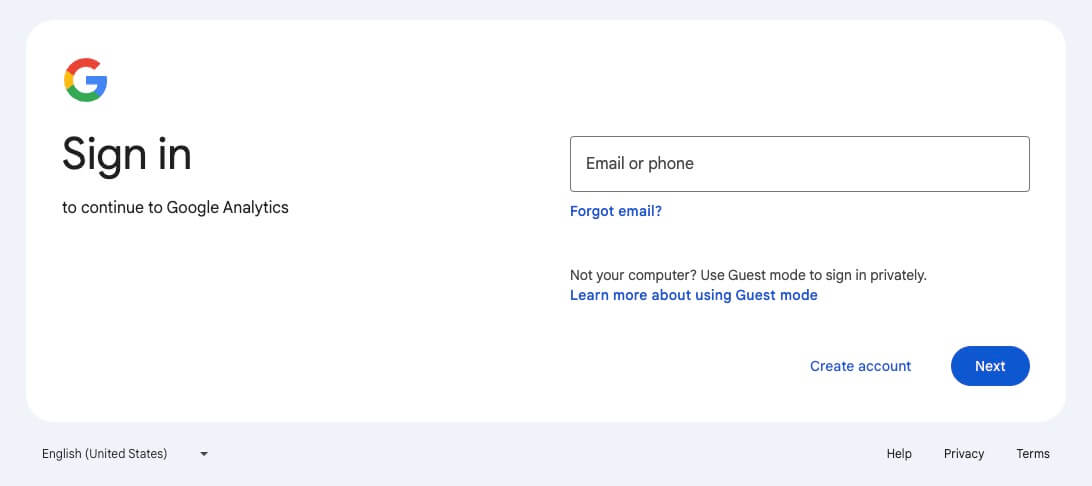
In the next step, you’ll be asked to sign in using your Google account. If you have an existing Google or Gmail account, you can use it. If not, you will need to create a new one.
Step 3: Create Your Google Analytics Property
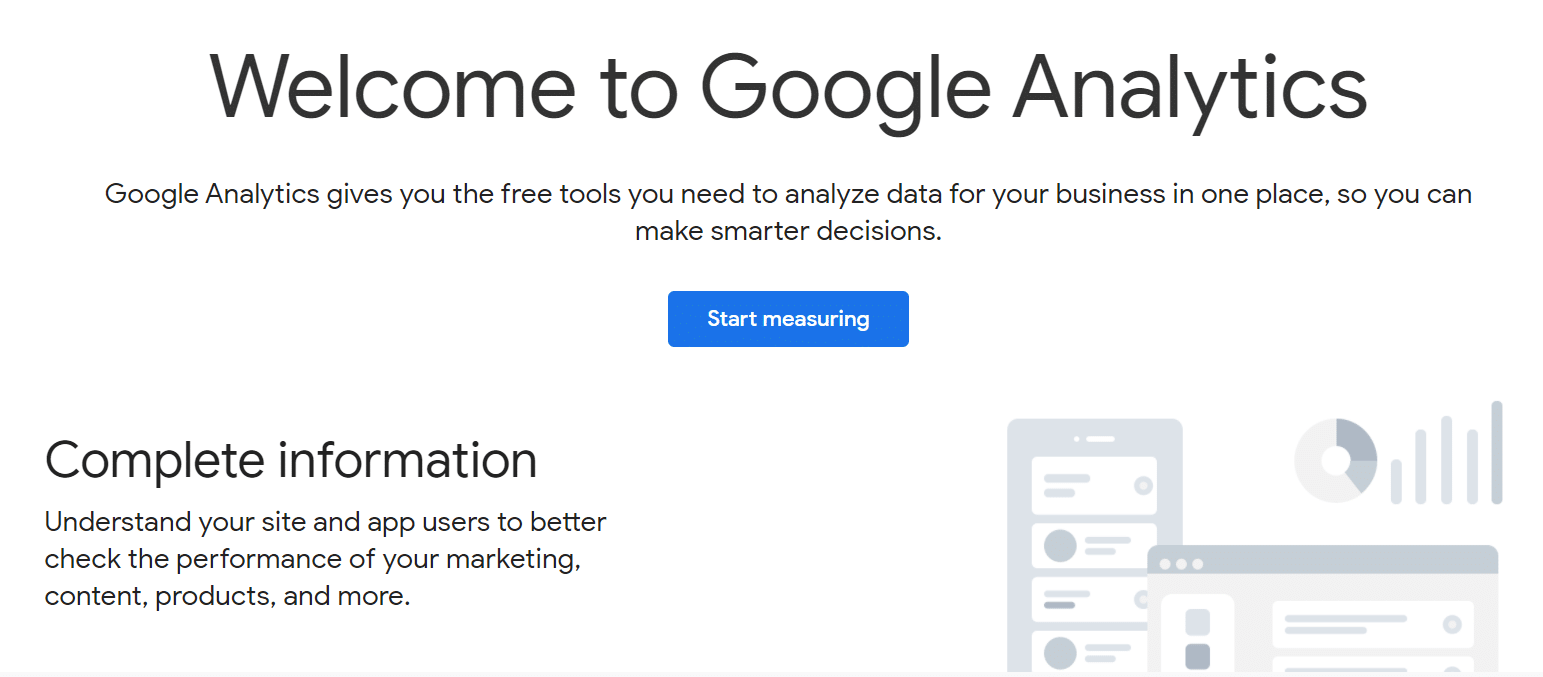
When you have signed in with your Google account, you need to click the Start measuring button.
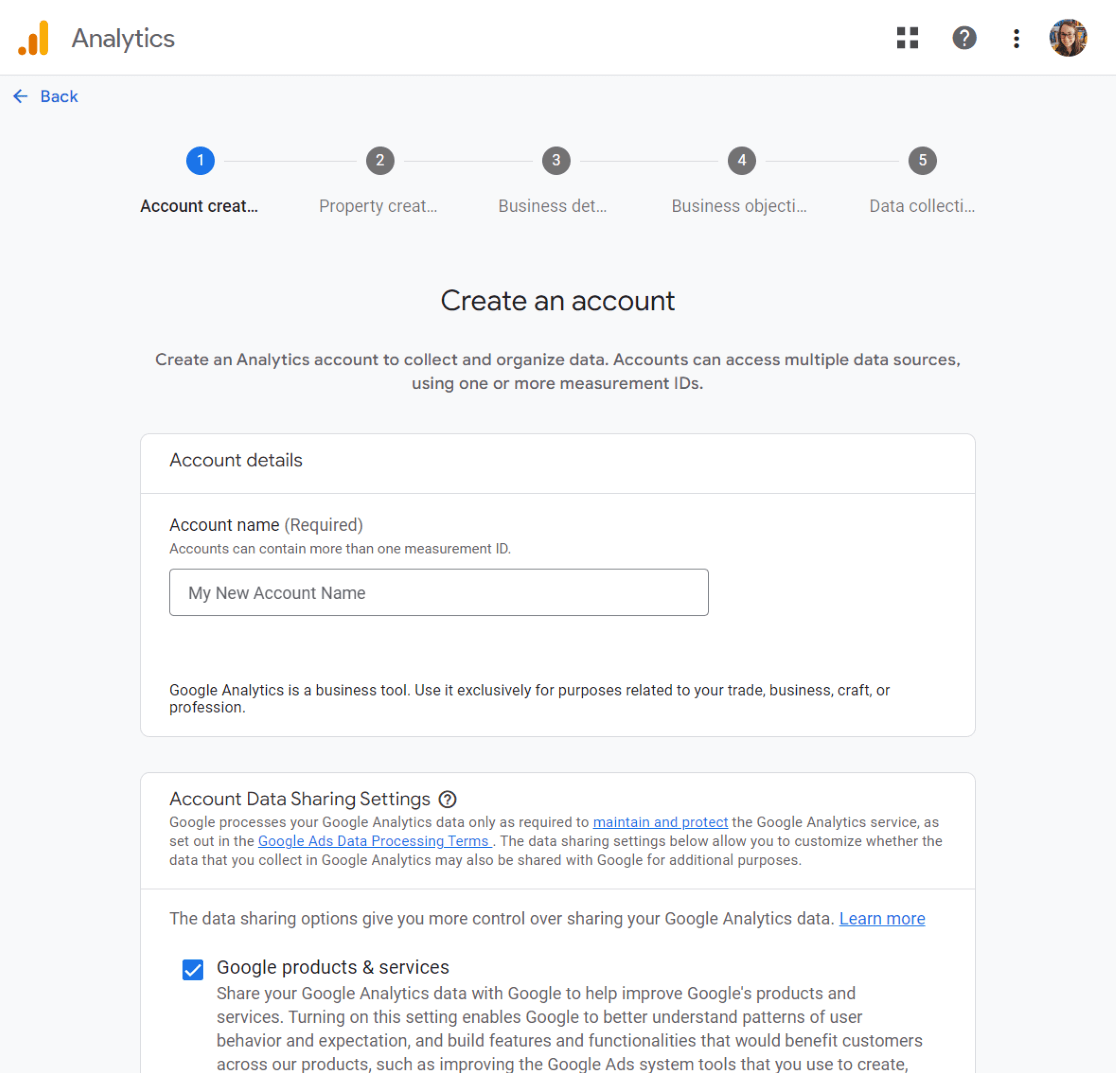
Next, you must select an Account name for your Google Analytics account. Additionally, you’ll see various data-sharing options. It’s important to set all these options before clicking Next.
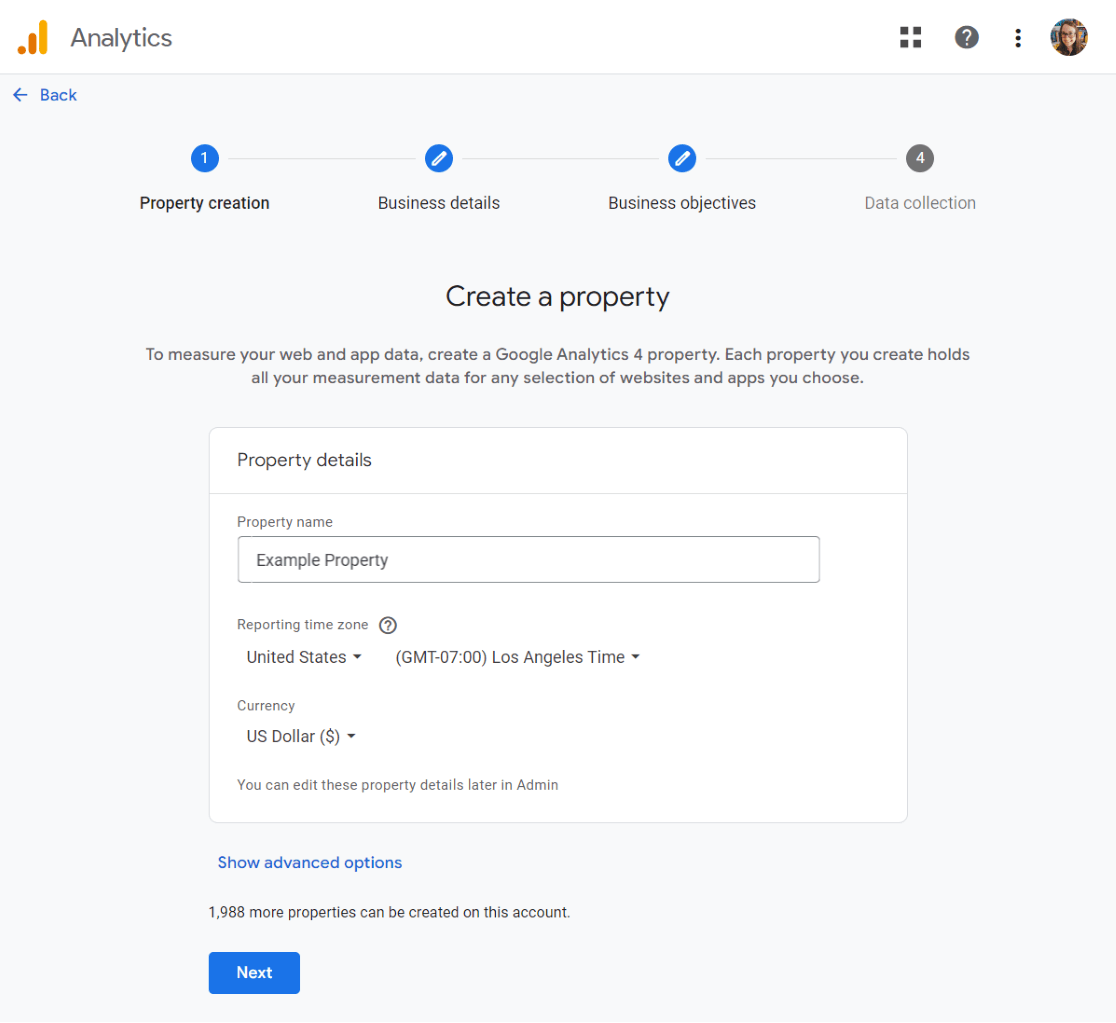
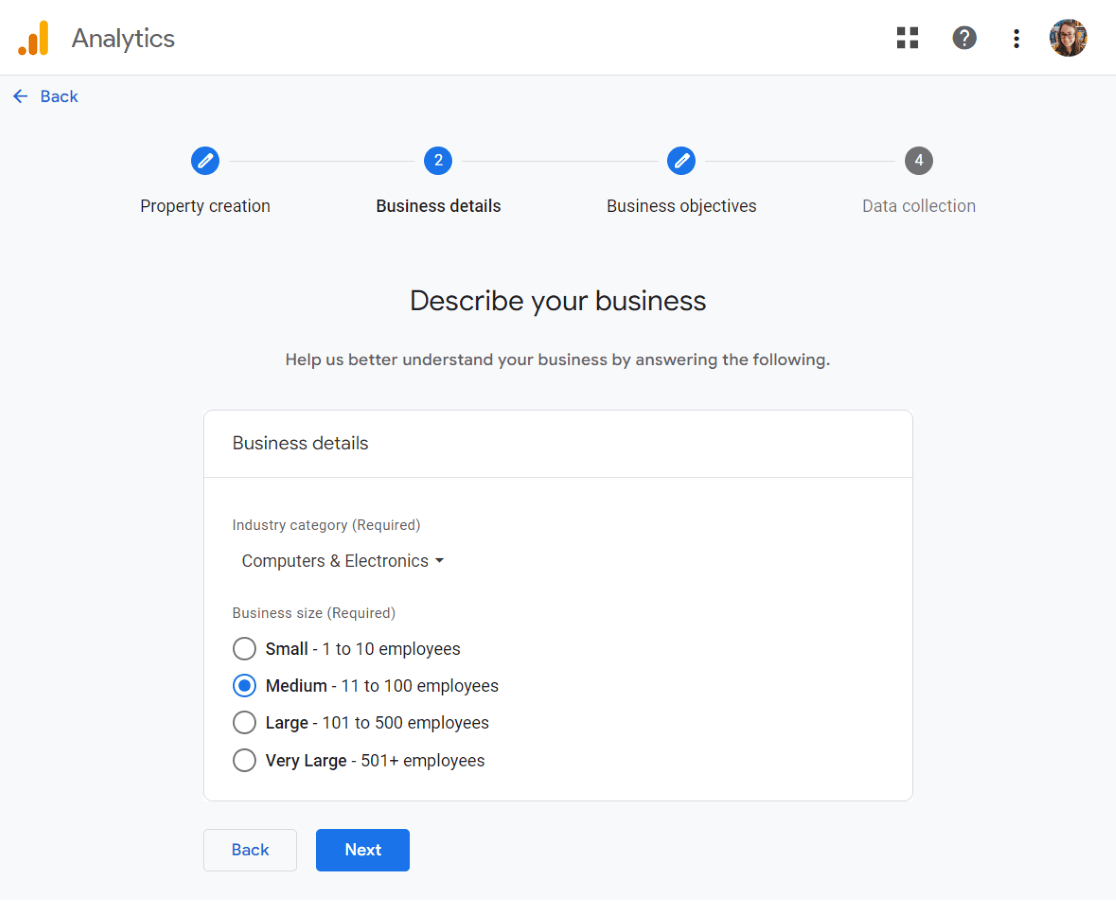
Now, select your specific industry category and the size of your business. After that, proceed by clicking Next.
Lastly, choose the objectives of your business. You should choose “Get baseline reports” to get all the Google Analytics data and reports in your account.
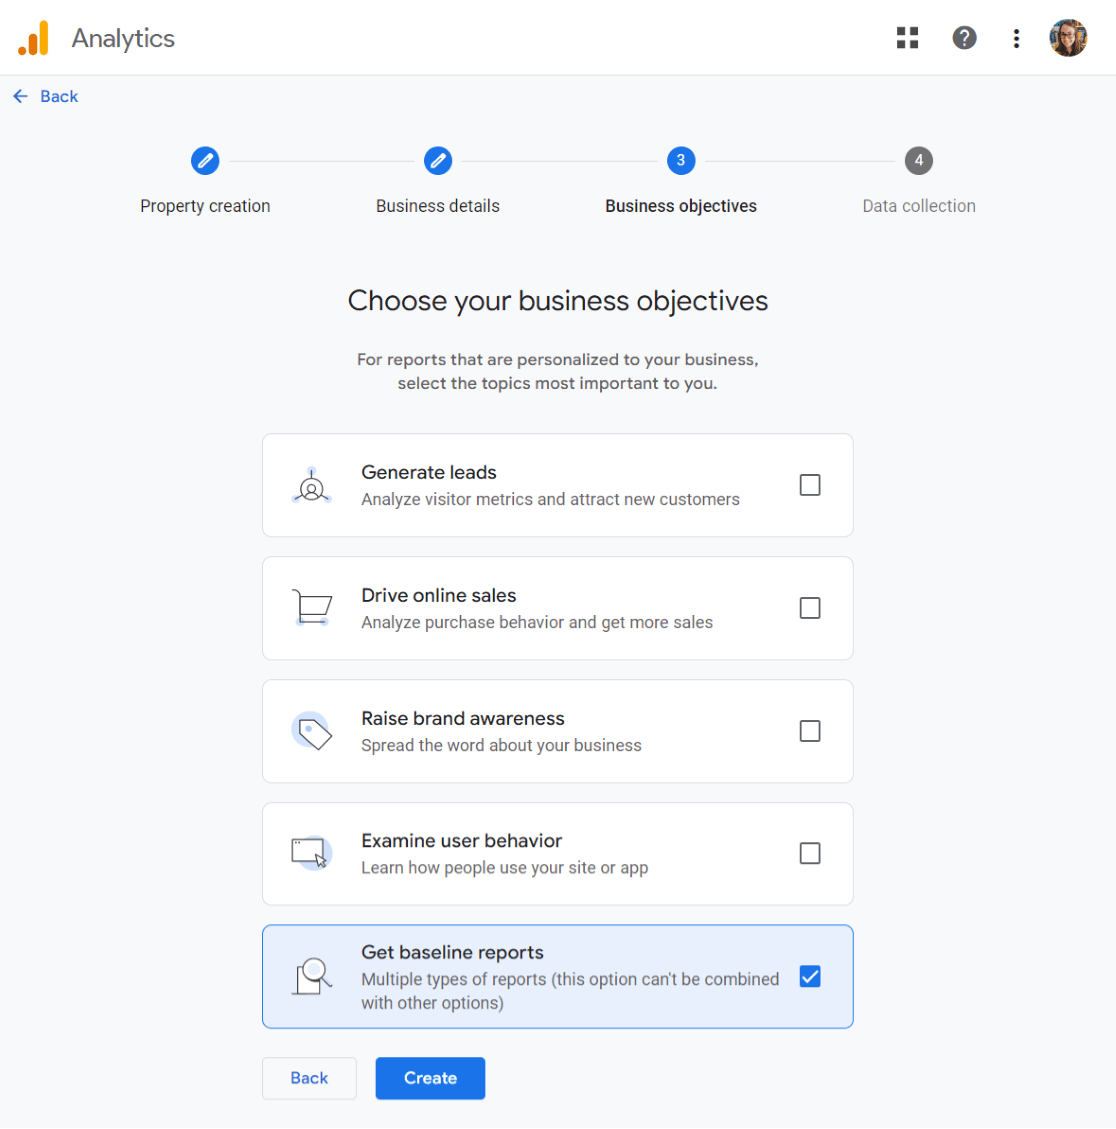
Now click Create.
That was pretty easy, right? You’re now ready and signed up for Google Analytics.
Next, we need to choose and set up your web stream.
Step 4: Choose Web Stream
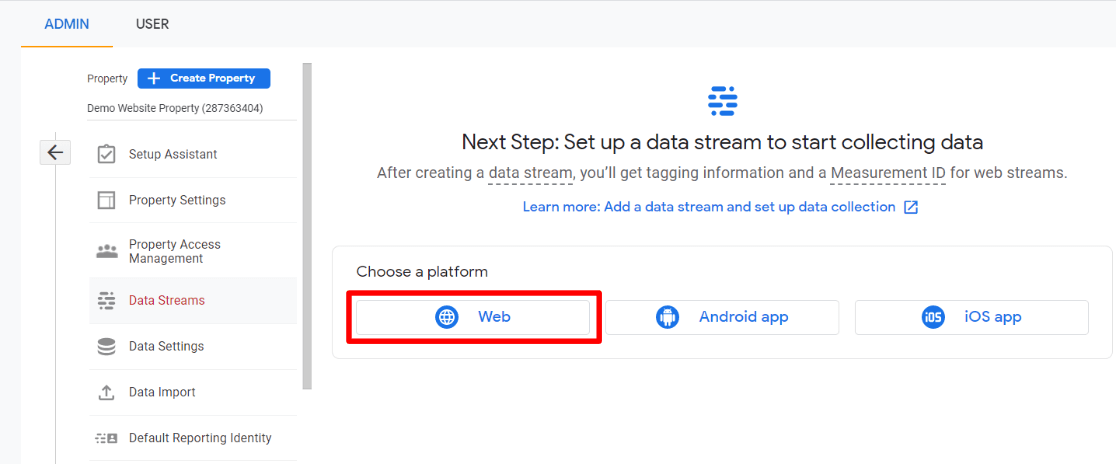
At this point, you will see your Google Analytics web stream options.
Because we’re setting up GA4 for a website, select Web as your platform.
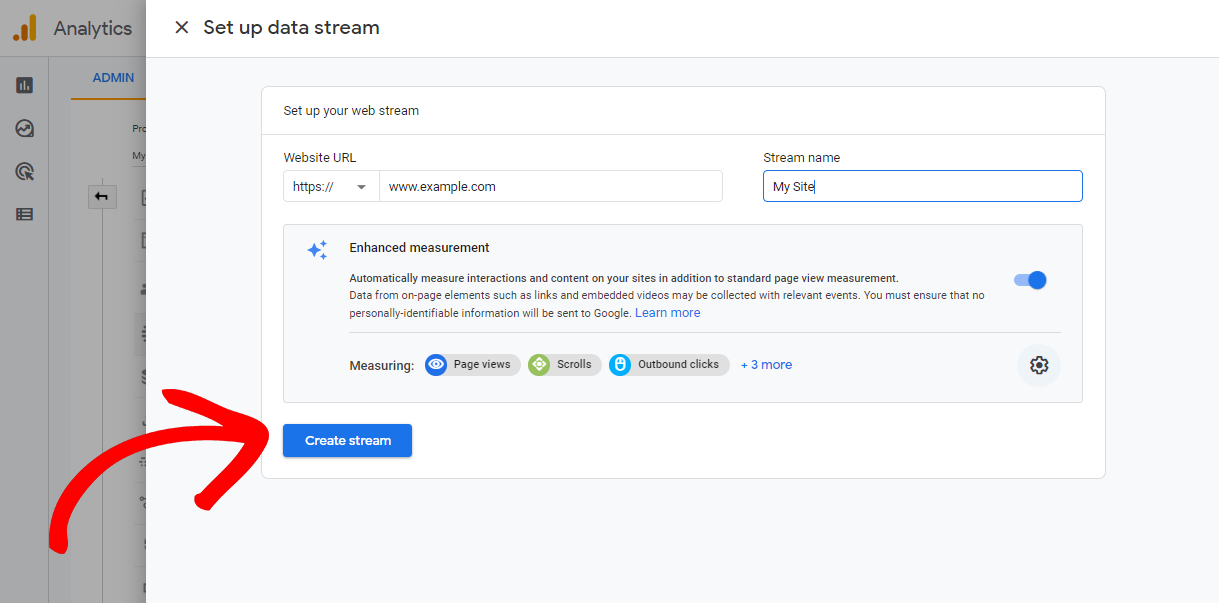
You’ll have to enter your website URL and Stream name.
As a default, Google Analytics has the Enhanced measurement option enabled. This lets you track visitors, scrolls, outbound clicks, and much more.
However, note that some of these tracking settings don’t work how you want them to. Check out our GA4 Enhanced Measurement Guide (+ Alternatives) for more details.
Next, click the “Create stream” button.
Now you can see your Stream name, ID, URL, and Measurement ID. Additionally, it also shows the different enhanced measurements that it will track.
At the top of the page, you will see a bar that shows you how to set up Google Analytics on your website.
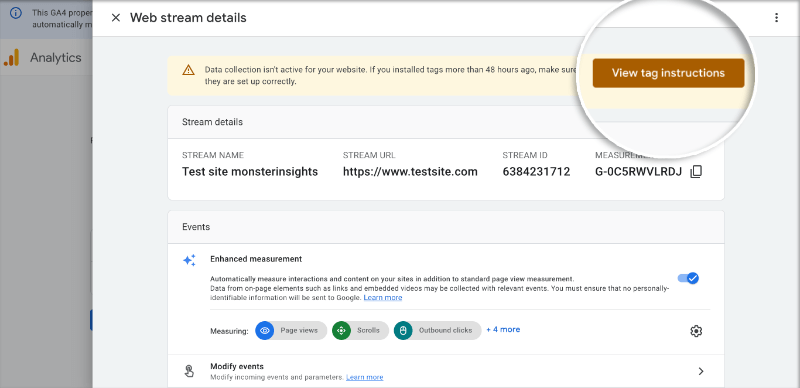
Click the View tag instructions button. You will then be presented with different ways to add the Google Analytics tracking code to your website.
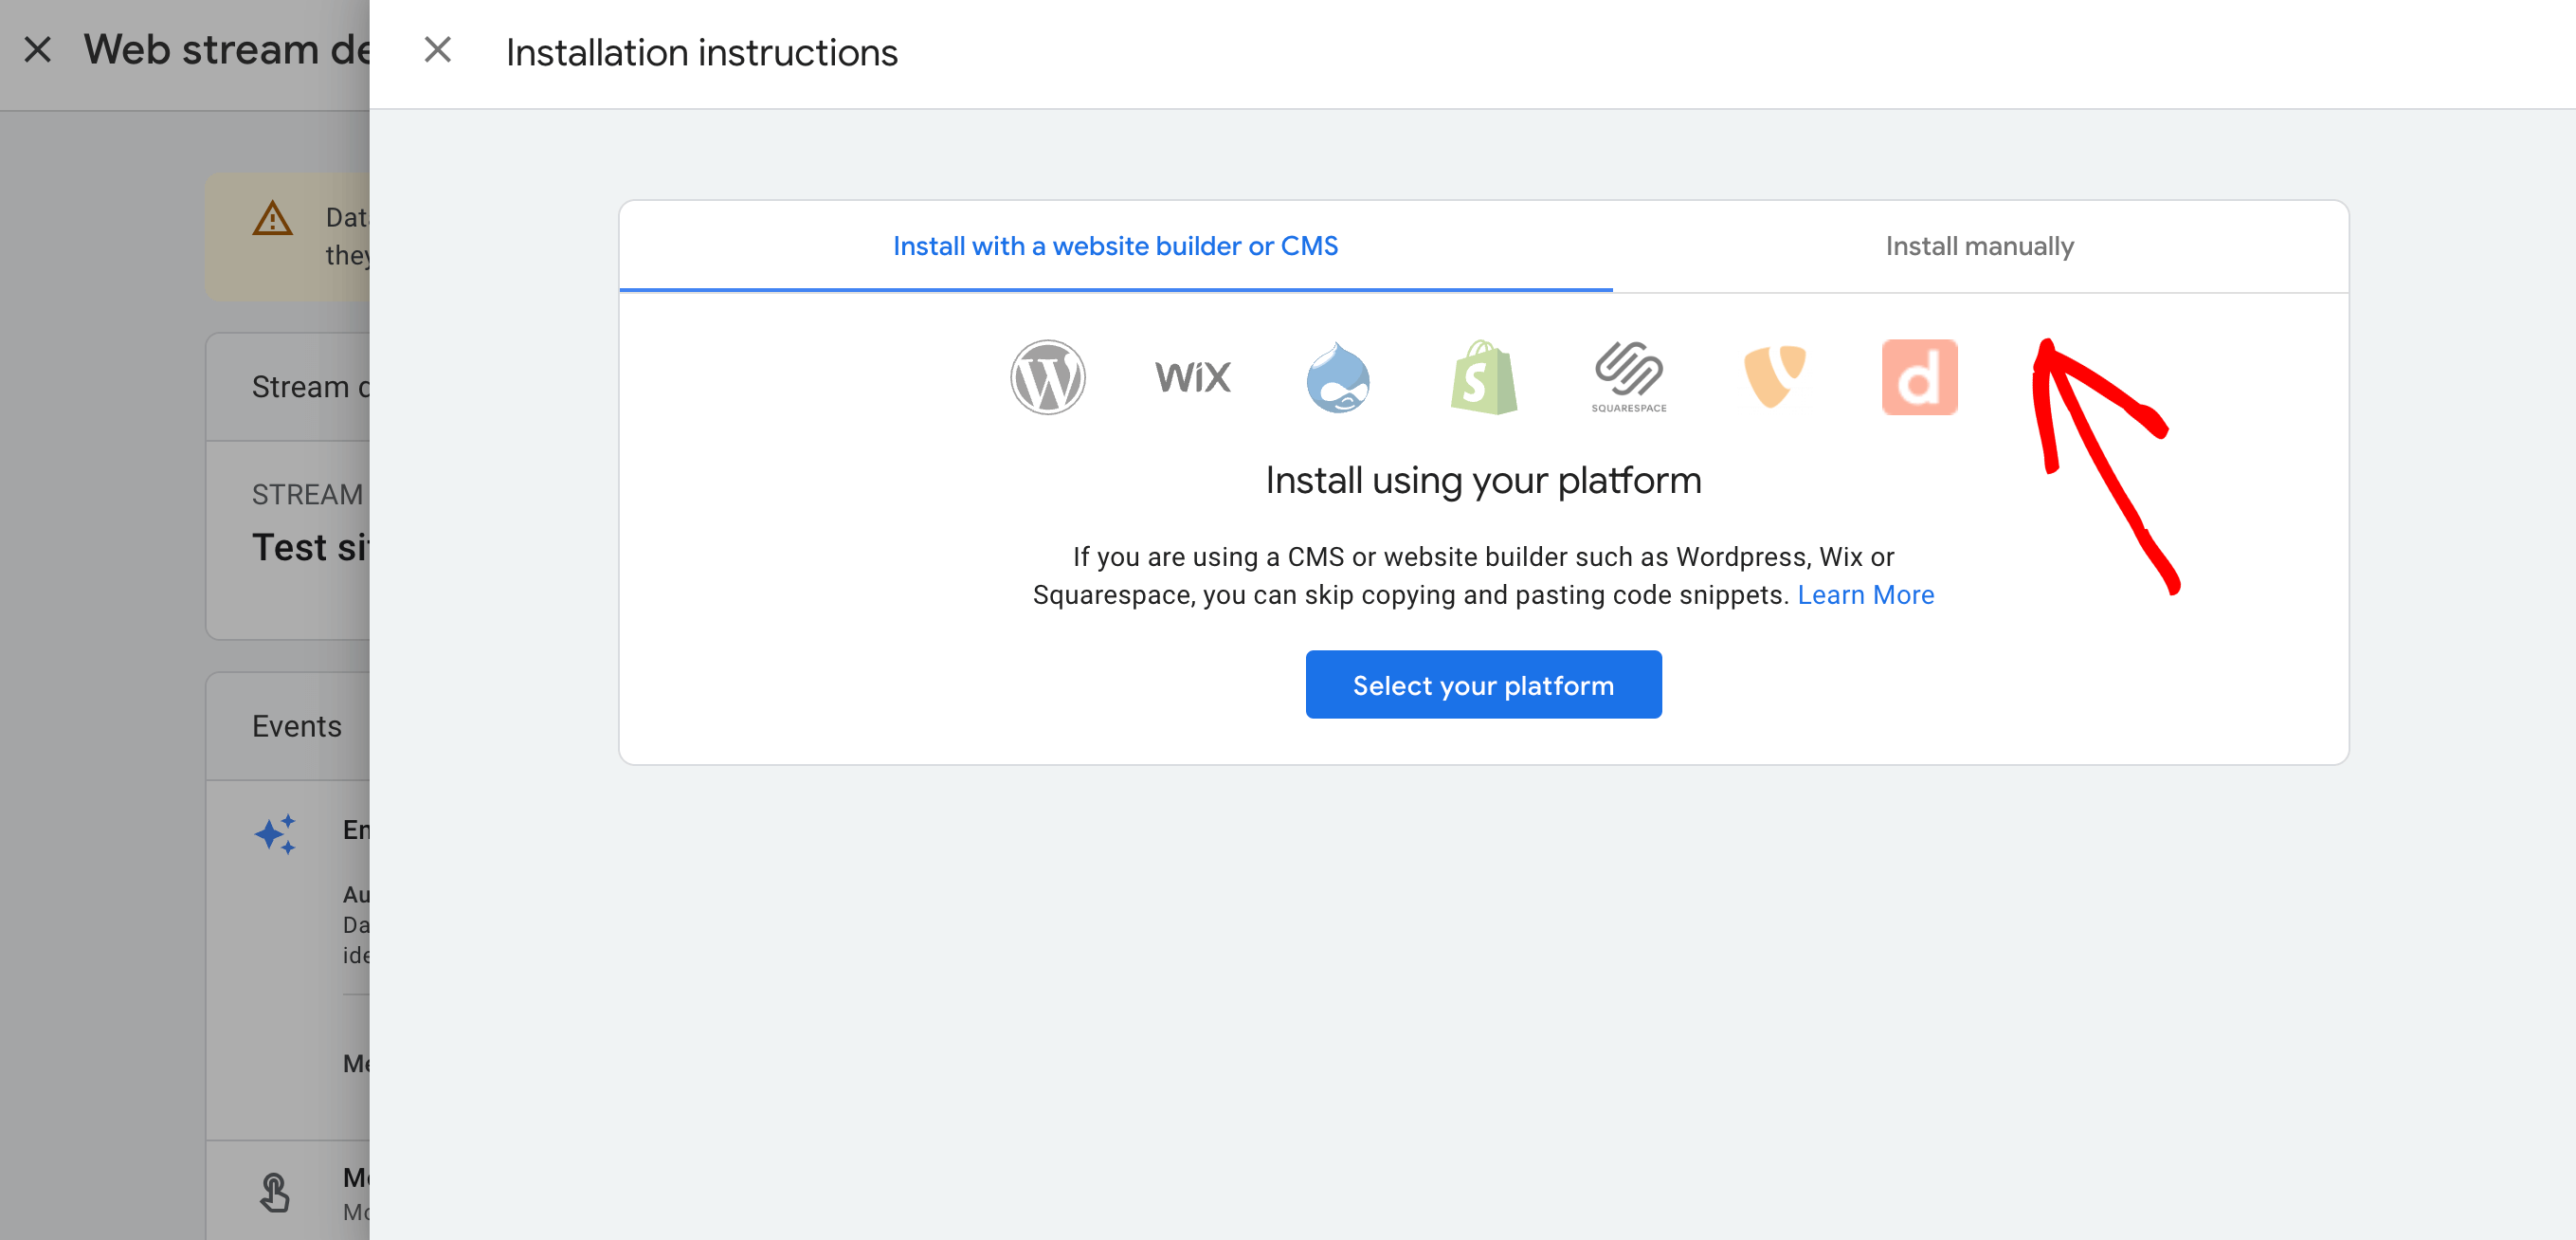 Switch to the “Install manually” tab.
From here, you will be able to see your Google Analytics tracking code.
![]()
Make sure you copy the tracking code they give you. Depending on how you choose to do it later, you’ll have to put this code on your website.
It’s a good idea to keep the Google Analytics page open. You might need it again after you add the code to your site.
Now that you’ve got your Google Analytics account ready, let’s look at how to add Google Analytics to your website.
2. Install Google Analytics on Your Website
When adding Google Analytics to your website, you’ve got a few different options to choose from.
I’ll walk you through three different methods. Pick the one that feels right for you and your site.
You must only use one of these methods on your website. Using more than one could mess up your data by double-tracking your pageviews in Google Analytics.
How to Set Up Google Analytics With Code
When it comes to adding Google Analytics to your site using the tracking code, know that the process can vary depending on your website type.
Whether you run your site on WordPress, WIX, Shopify, or any other platform, each platform has unique steps for integrating the tracking code.
Don’t worry, though – we’ll help you understand the basics so you can apply them to your specific website setup.
Let’s dive into how to set up Google Analytics with code for different types of websites.
For WordPress Sites
If you have a WordPress website, the easiest way to set up Google Analytics is by using MonsterInsights.
With MonsterInsights, you do not have to use any code, and it is possible to get started for free.
Head to your WordPress dashboard and go to the plugins section. Search for the MonsterInsights plugin, click Install Now, and Activate the plugin.
Or, to get a ton of extra tracking features like eCommerce tracking, form tracking, PPC ads tracking, and more, grab a MonsterInsights license and install the plugin by downloading the file from your MonsterInsights account and uploading it to WordPress.
From there, the plugin will take you through a step-by-step guide on connecting Google Analytics to your WordPress site.
For more on using MonsterInsights to set up Google Analytics, jump to Set Up Google Analytics With a Plugin.
If you just want to install the code, the easiest way is to use the WPCode plugin.
First, you must copy your Google Analytics tracking code you saw earlier when creating your GA4 account.
![]()
After this, you need to install and activate the WPCode plugin. For help with this, see this guide on installing a WordPress plugin.
After you activate the plugin, go to the Code Snippets » Header & Footer page. In this section, you have to paste the Google Analytics tracking code into the Header section.
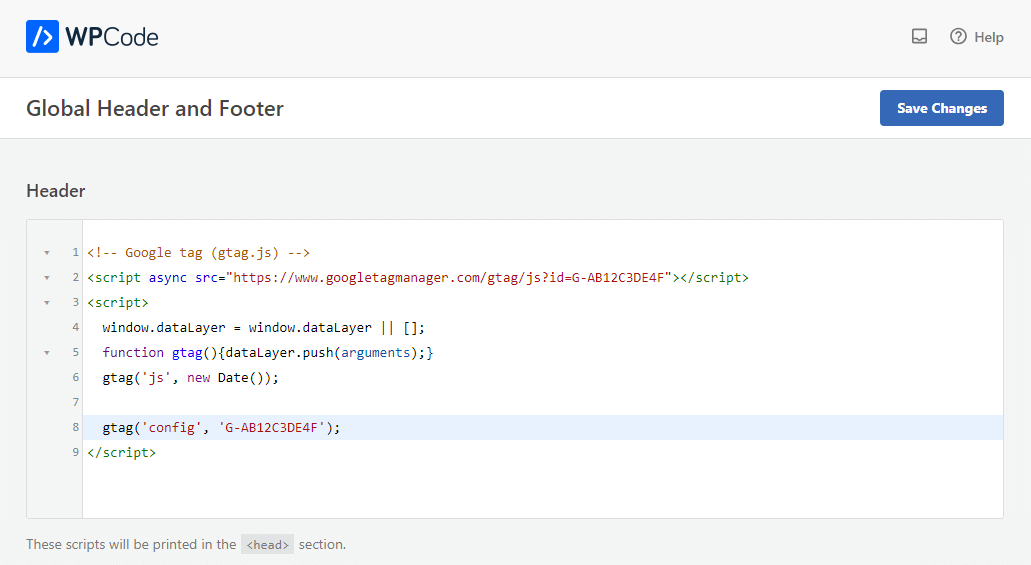
Now click the Save Changes button to save your settings.
That’s all! You have now installed Google Analytics on your website.
For Other Websites
If you’re using a platform other than WordPress, like WIX, Shopify, or something else, the process for adding Google Analytics will be slightly different. Still, the general idea is the same.
Like with WordPress, you’ll start by copying your Google Analytics tracking code from your GA4 account.
![]()
Once you have this code, the next step is to find the right place on your website’s platform to add it.
Each platform has its own way of letting you edit your site. For instance, WIX has its own site editor, where you can add code snippets, and Shopify allows you to edit HTML and CSS directly.
You’ll need to look for an option to add HTML or edit your header in your website builder’s settings or dashboard.
Once you find where to add the code, paste your Google Analytics tracking code into the header section of your site. This is typically done in a global header so that the tracking code loads on every page of your website.
After you add the code, please make sure to save your changes.
You have now successfully added Google Analytics to your website.
How to Set Up Google Analytics in a WordPress Theme
This approach is a bit more technical and best suited for those comfortable with coding. One important thing to note is that this method can be risky.
Why?
If you change or update your theme, your Google Analytics code might disappear with the old theme. That means you’d have to do the whole process over again, and nobody wants to do that, right?
But if you’re still interested, here’s how to add the Google Analytics tracking code directly to your WordPress theme files.
First, copy the Google Analytics tracking code like earlier.
![]()
From here, you have two options, which we will describe below. Remember, you only need to pick one of these two methods, not both!
1. Adding Code to header.php File
Open the header.php file of your WordPress theme and paste the Google Analytics tracking code you copied right after the opening <body> tag.
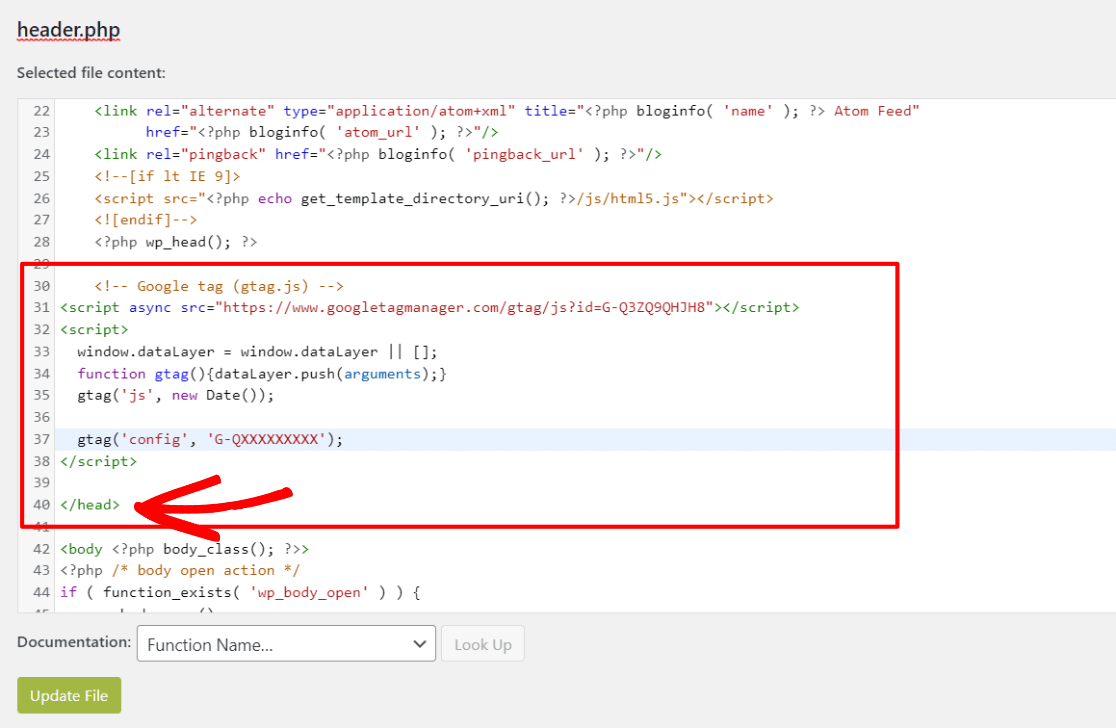
It’s essential to save your changes and re-upload the file to your server.
2. Inserting Code via Functions File
Another way is to put the Google Analytics tracking code into your theme’s functions.php file.
This method automatically inserts the tracking code on every WordPress site page.
You’ll need to add a specific code snippet to the functions.php file.
![]()
Make sure to replace the placeholder in the code snippet with your actual Google Analytics tracking code from earlier.
For more on adding your Google Analytics code to your site, see our guide on where to add the Google Analytics code in WordPress.
How to Set Up Google Analytics With Google Tag Manager
Using Google Tag Manager to set up Google Analytics is another route you can take.
To start, you must create an account with Google Tag Manager. Once you’ve set up your account, Google Tag Manager will provide you with two pieces of code. These are the snippets that you’ll need to integrate into your website.
In the next step, you must configure your GA4 within Google Tag Manager. This part requires some know-how and careful attention to detail.
Keep in mind that this process is more complex than other methods. If you’re not overly confident with technical setups, there might be better methods.
If you would like help, you can see this complete guide on how to set up Google Analytics using Google Tag Manager. This guide will walk you through each step of the process.
3. Test That Google Analytics is Working
Now, after you’ve set up Google Analytics, you should start seeing data about your site’s traffic and user behavior in your GA4 account.
The next important step is to check and see if it is working and data is flowing. Wait 15 to 30 minutes after setting up. Next, head over to the Data Streams page to see if it says ‘Receiving traffic in the past 48 hours’. You should start seeing data streaming into your account.
Remember, it might take Google between 24 to 48 hours to gather complete data for all reports. So, if you don’t see much data initially, don’t worry. It’s just Google Analytics doing its thing.
If you still do not see any data being collected, you should repeat your preferred method.
Still not working?
In that case, you will need to contact Google support.
How to Set Up Google Analytics With a Plugin
Now, if all this sounds overwhelming and you have a WordPress website, there’s good news for you.
You can set up Google Analytics much more easily with the MonsterInsights plugin.
MonsterInsights stands out as the top Google Analytics plugin for WordPress users. It simplifies linking your WordPress site with Google Analytics, enabling you to access all the essential data directly within your WordPress dashboard.
The best part about MonsterInsights is how easy it is to set up. No coding is needed, and you can even skip the whole process of setting up your web stream. MonsterInsights automatically completes this step for you.
You must create your GA4 account from steps 1-3 and connect it with MonsterInsights.

It only takes a few minutes and clicks, and you will quickly see the most valuable reports directly in your WordPress dashboard.
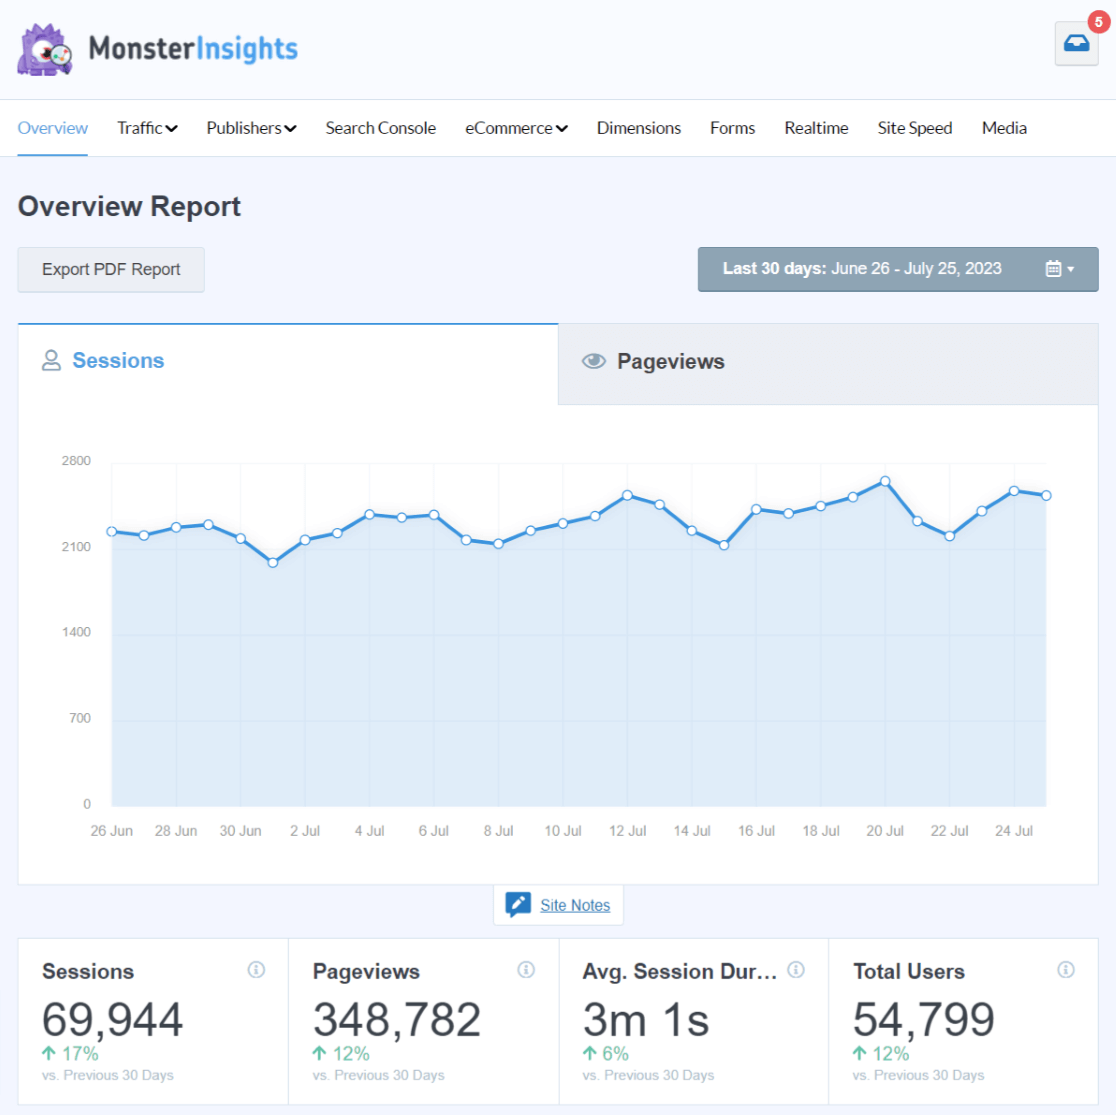
Without it, you’d have to navigate Google Analytics separately, figuring out where to find the relevant stats.
MonsterInsights provides tailored reports for various needs, including Real-time analytics, eCommerce analytics, site speed evaluation, Search Console keywords, media (such as Video) tracking, and much more.
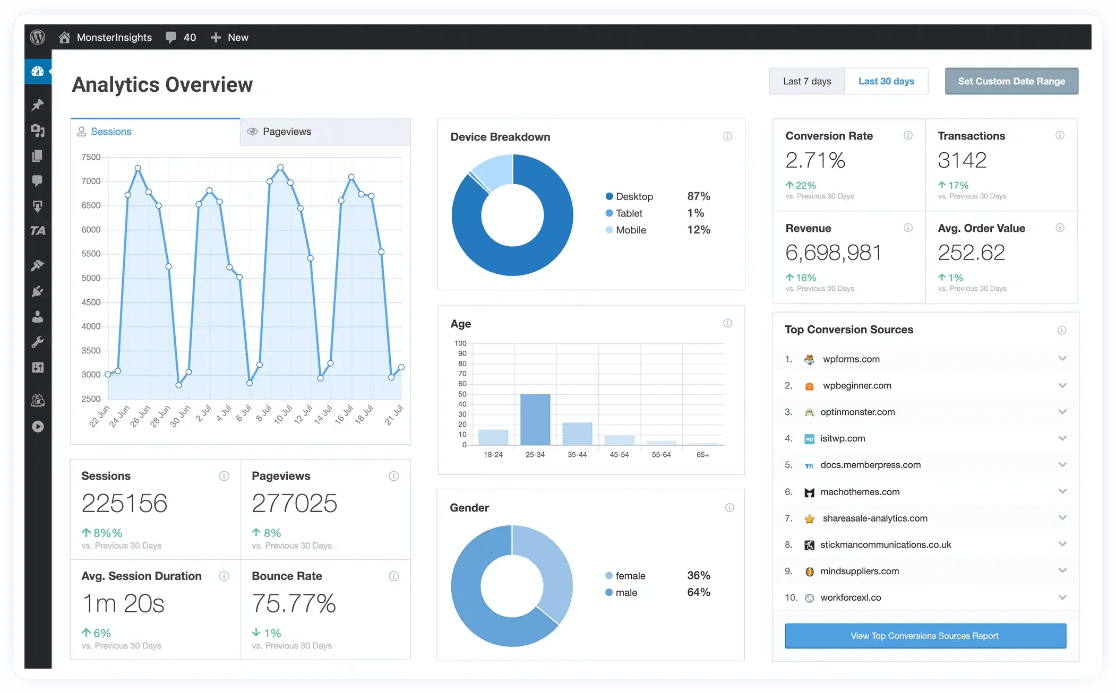
Additionally, MonsterInsights allows you to quickly activate advanced tracking functionalities like form submissions tracking, event tracking, author tracking, outbound link tracking, WooCommerce tracking, tracking of custom dimensions, and more, all with just a simple click.
Gone are the days when you needed to set aside a hefty sum for a developer to set up these tracking functionalities. Now you can easily do it yourself!
MonsterInsights simplifies processes that would otherwise be complex. For instance, use its eCommerce tracking for your WooCommerce or other online stores, enabling easy sales tracking with just one click and no coding required.
It brings vital insights like overall conversion rates and top-selling products directly to you.
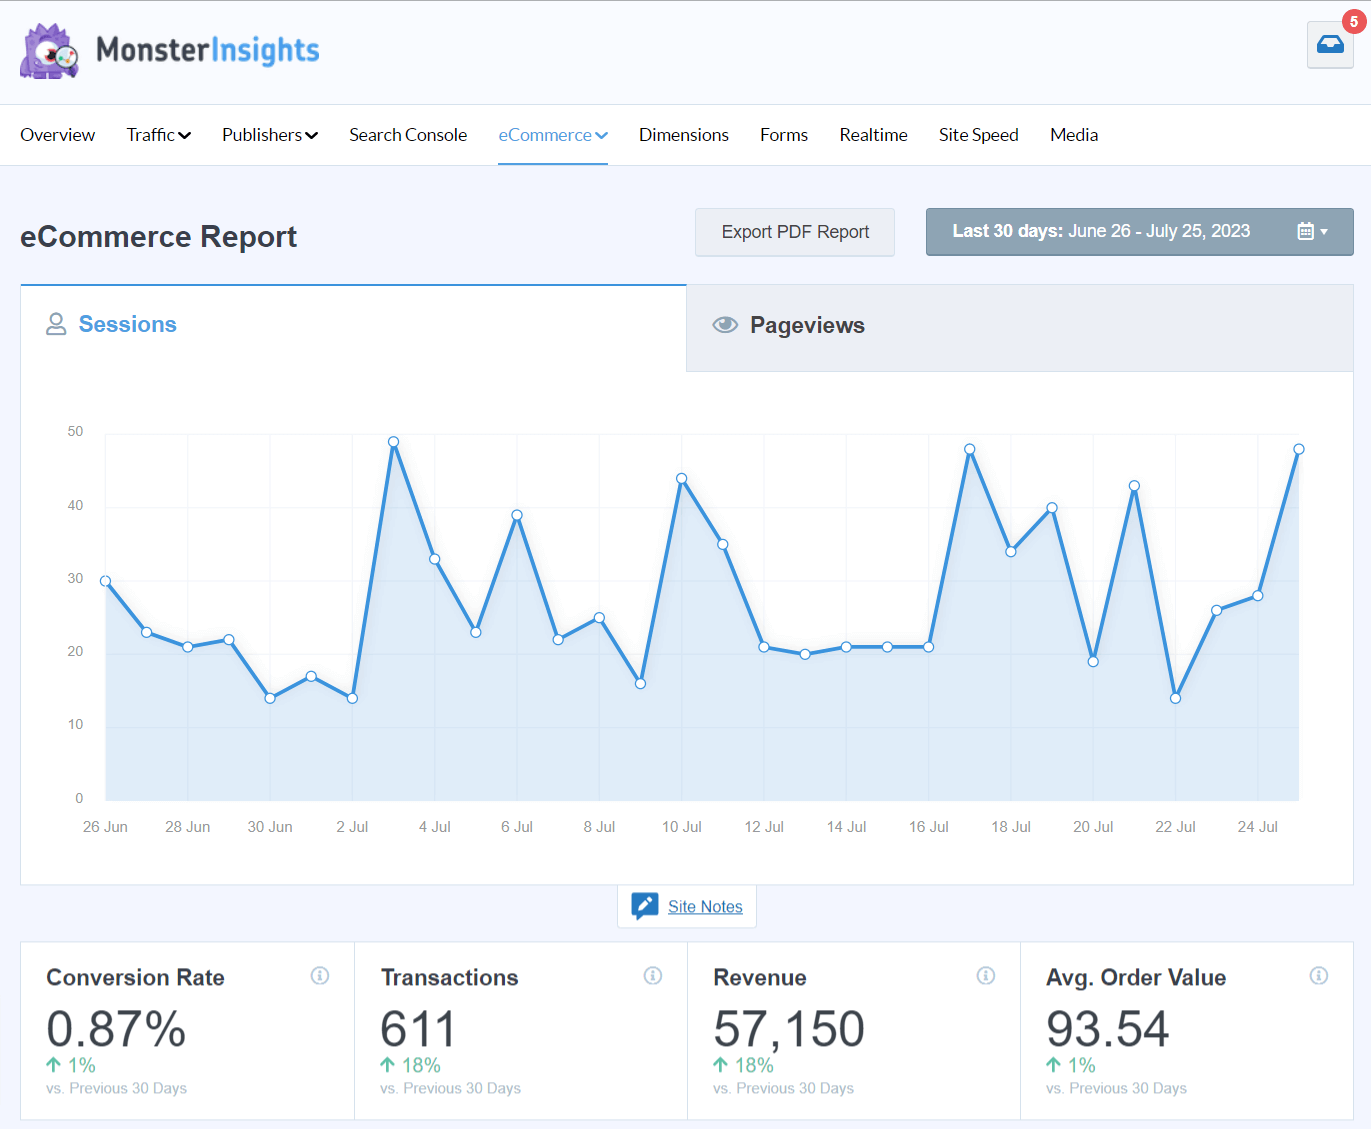
Before MonsterInsights, setting up something like eCommerce tracking in Google Analytics was complex, often requiring hiring developers or mastering Google Tag Manager.
MonsterInsights has streamlined these processes, removing the hassle for WordPress users.
This is why more than 3 million website owners choose MonsterInsights to link their WordPress sites with Google Analytics.
For a full tutorial on setting up MonsterInsights, you can check out How to Add Google Analytics to WordPress.
Frequently Asked Questions
Can anyone set up Google Analytics?
Yes, anyone with a basic understanding of websites can set up Google Analytics. It’s user-friendly and has straightforward instructions.
Is it free to set up Google Analytics?
Absolutely! Setting up Google Analytics is completely free. There are no charges for using the basic version.
Can you use Google Analytics on any website?
Google Analytics can be integrated with almost any website, regardless of the platform it’s built on.
Do I need Google Analytics?
If your website is more than a hobby and you want to understand your website’s traffic and user behavior better, Google Analytics is a highly recommended tool.
We hope this guide on how to set up Google Analytics on your website has been helpful.
Interested in learning more about MonsterInsights? Check out our article on MonsterInsights vs. Google Analytics.
If you liked this guide, why not follow us on YouTube? We’re always sharing useful tutorials, insightful reviews, and handy tips about Google Analytics and more.


Thanks so much for your comprehensive, clear directions!