Do you have videos that you want to upload to your WordPress site? Uploading videos to WordPress instead of using a video platform like YouTube or Vimeo is possible.
In this article, we’ll show you how WordPress video uploads work, how to add your videos to WordPress, and how to track those videos with Google Analytics.
WordPress Video Uploads Walkthrough
Can You Upload Videos to WordPress?
Yes, you can upload videos to your WordPress site. While it’s a good practice to upload your videos to YouTube or Vimeo to keep those files from slowing down your website, it’s not mandatory. If you want to host them right on your site, you certainly can!
How to Upload Videos to WordPress
To upload a video to WordPress from your computer, you’ll need to sign into your site and then:
- Navigate to Media » Add New

- Drag and drop your video file into the box, or click the Select Files button to choose your video file.
- That’s it! Your video is now uploaded and you can insert it into your page or post.
How to Embed Your HTML5 Video in WordPress
Ready to embed your video onto a post or page? You can do that easily with WordPress and HTML5.
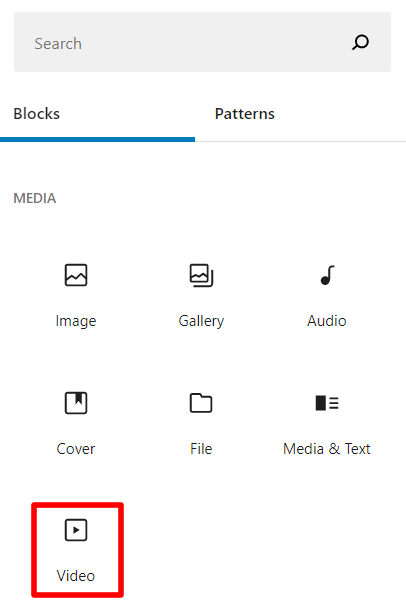
If you have the Gutenberg block editor, you can add a Video block to your content:
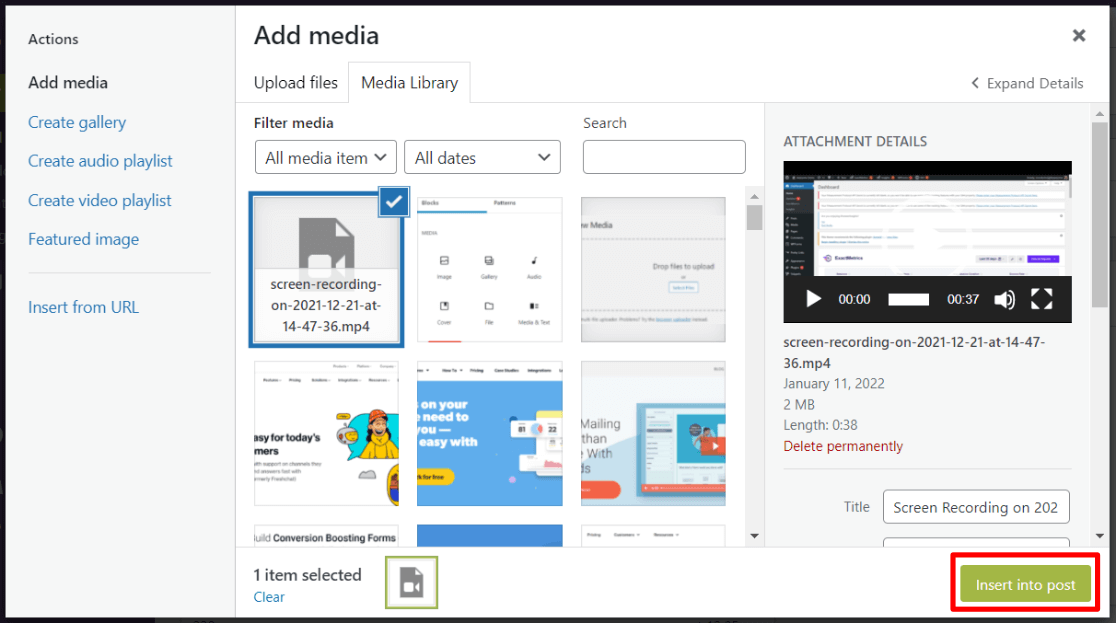
If you’re using the Classic editor, simply use the Add Media button, just like you do to add images, select your video, and click Insert into post:
How to Track WordPress Video Uploads with Google Analytics
Did you know that you can track how many people see your videos, how many press play, and how much of the videos they watch? It’s simple with MonsterInsights!
Just follow these simple steps to start tracking embedded HTML5 videos in Google Analytics:
- Install and Activate MonsterInsights
- Install the Media Addon
- Turn on video tracking
- Find your data in MonsterInsights
Already have MonsterInsights installed at the Plus license level or above? Skip to Step 2.
Step 1: Install and Activate MonsterInsights
First, you’ll need to install MonsterInsights on your WordPress website. MonsterInsights allows you to set up video tracking in WordPress with just a few clicks – no need to modify your Google Analytics code.
To get video analytics, grab MonsterInsights at the Plus level or above, then download the plugin from your Account page.
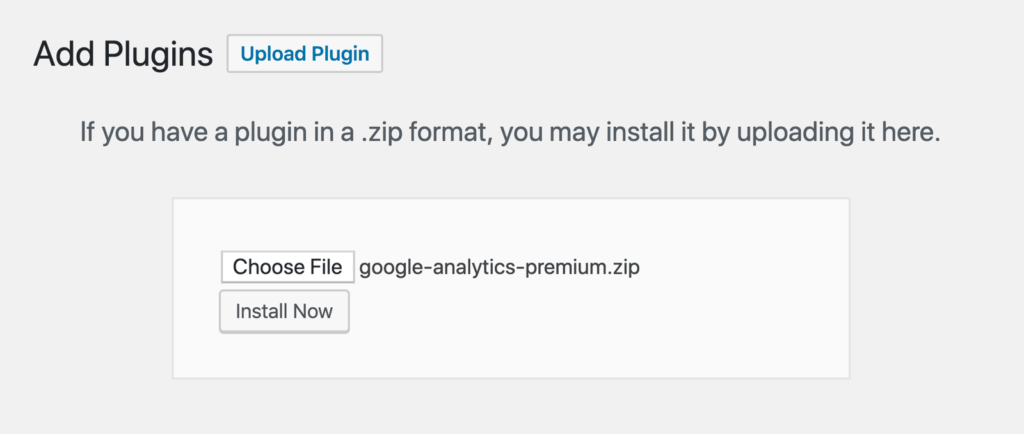
Next, upload the plugin on your WordPress website by going to Plugins » Add New » Upload Plugin and then click the Install Now button.
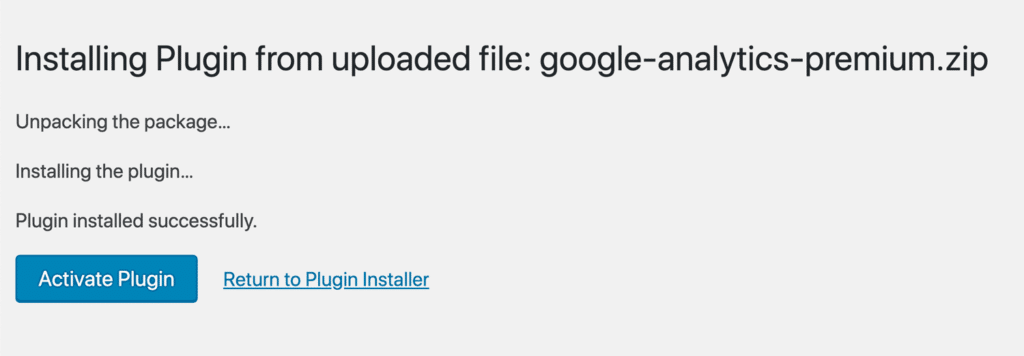
Now, activate MonsterInsights by clicking the Activate Plugin button.
After installing and activating the plugin, you’ll need to connect it with Google Analytics. The MonsterInsights setup wizard makes it super simple to add Google Analytics tracking code to your website.
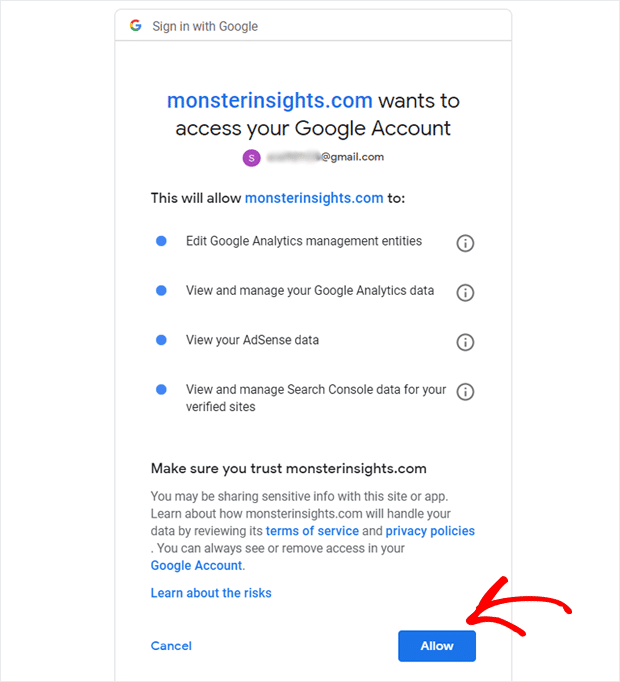
For more details on how to get set up, read our step-by-step guide on how to set up Google Analytics on your WordPress website properly.
Step 2: Install the Media Addon
To install the addon, visit the Insights » Addons page in your WordPress dashboard. Then, click Install under the Media addon.
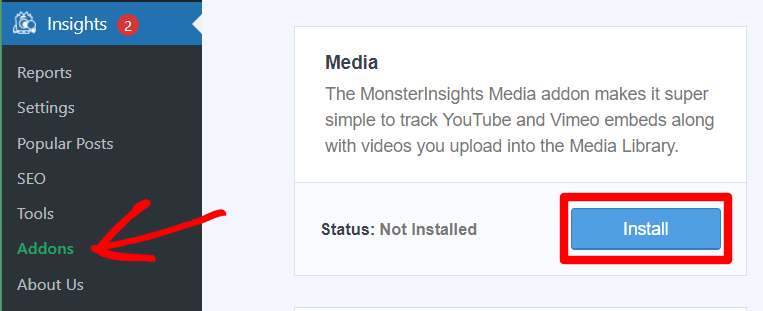
Step 3: Turn on Video Tracking
Now, it’s time to turn on video tracking for the type of videos you have on your site. To do that, navigate to Insights » Settings » Publisher. Scroll down to the Media Tracking box.
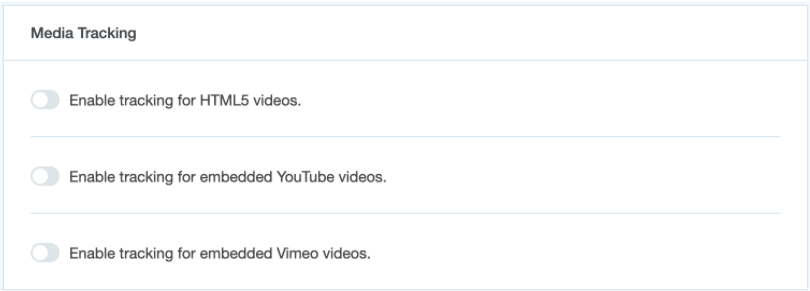
Now, click the button next to HTML5 videos, and any other type(s) of videos you want to track.
Step 4: Find Your Data in MonsterInsights
Now, you’ll have your video stats right inside your WordPress dashboard! First, navigate to Insights » Reports » Media:
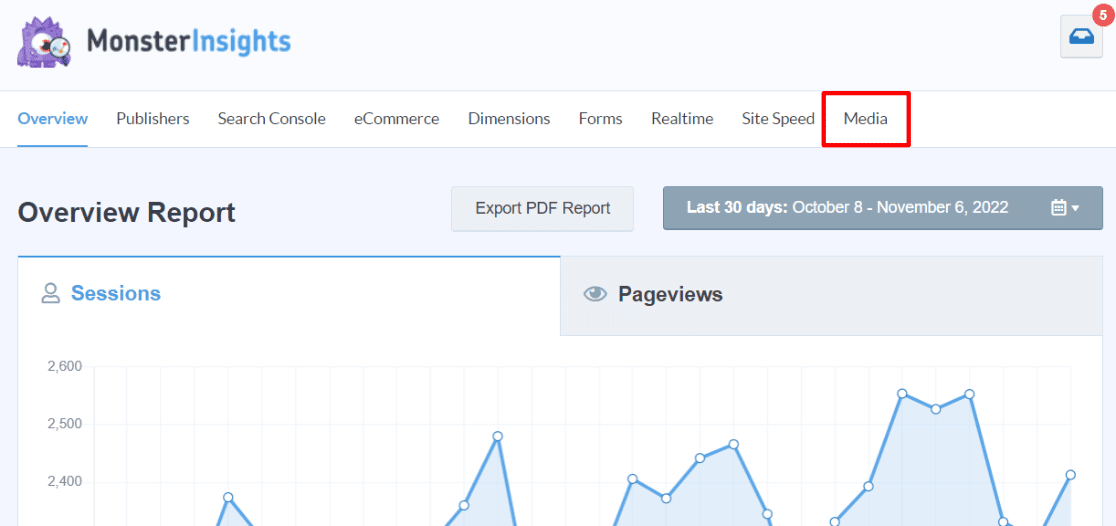
This will bring you to your Media report, where you can see total video plays per video, average watch time, average percentage watched, and completion rate.
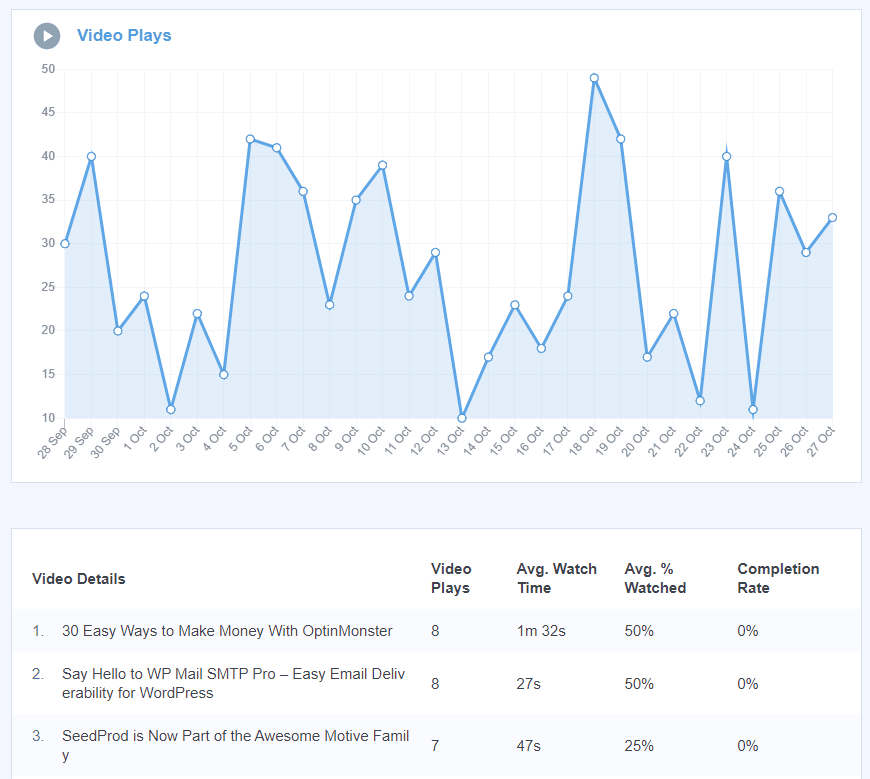
Your video data will also be sent to Google Analytics as events.
That’s it! We hope you love our Media Addon.
We think you’d also like learning How to Track Link Clicks in Google Analytics (Step by Step).
And don’t forget to follow us on Twitter, Facebook and YouTube for more helpful Google Analytics tips and tutorials.

