Setting up Google Analytics eCommerce and revenue tracking for your online store lets you gather vital data about customer behavior and sales performance. With proper eCommerce tracking in GA4, you’ll start collecting critical metrics like total purchases, revenue generated, product performance, and user engagement.
In this article, I’ll show you how to easily set up Google Analytics 4 eCommerce tracking in WordPress without using Google Tag Manager. I’ll also walk you through the eCommerce reports you need to monitor to grow your business faster.
In this article:
Start Tracking eCommerce Performance Today!
What is Google Analytics eCommerce tracking?
Google Analytics eCommerce tracking is an advanced tracking feature of Google Analytics that gives you access to a lot of data about what your visitors are doing in your online store. Google Analytics 4 can track many eCommerce metrics, such as overall revenue, number of purchases, average order value, add-to-cart events, and more.
Here are a few key benefits of tracking eCommerce events in Google Analytics:
- Track the pageviews and performance of your products.
- Track your sales and revenue.
- Optimize your conversion funnel to boost sales.
- Get important Key Performance Indicators (KPIs) that are vital to your business, such as average order value, eCommerce conversion rate, cart-to-view rate, and more.
- Make data-driven decisions to generate more sales and revenue from your eCommerce store’s website traffic.
Tutorial: Google Analytics eCommerce Tracking
In this tutorial, I’ll show you how to set up eCommerce tracking on WordPress without writing code or using Google Tag Manager. I’ll use MonsterInsights, which makes the process quick and simple.
MonsterInsights is the best Google Analytics plugin for WordPress. It allows you to easily connect your WordPress site with Google Analytics with a couple of simple clicks, so you can view all the data that matters most right in your WordPress dashboard.
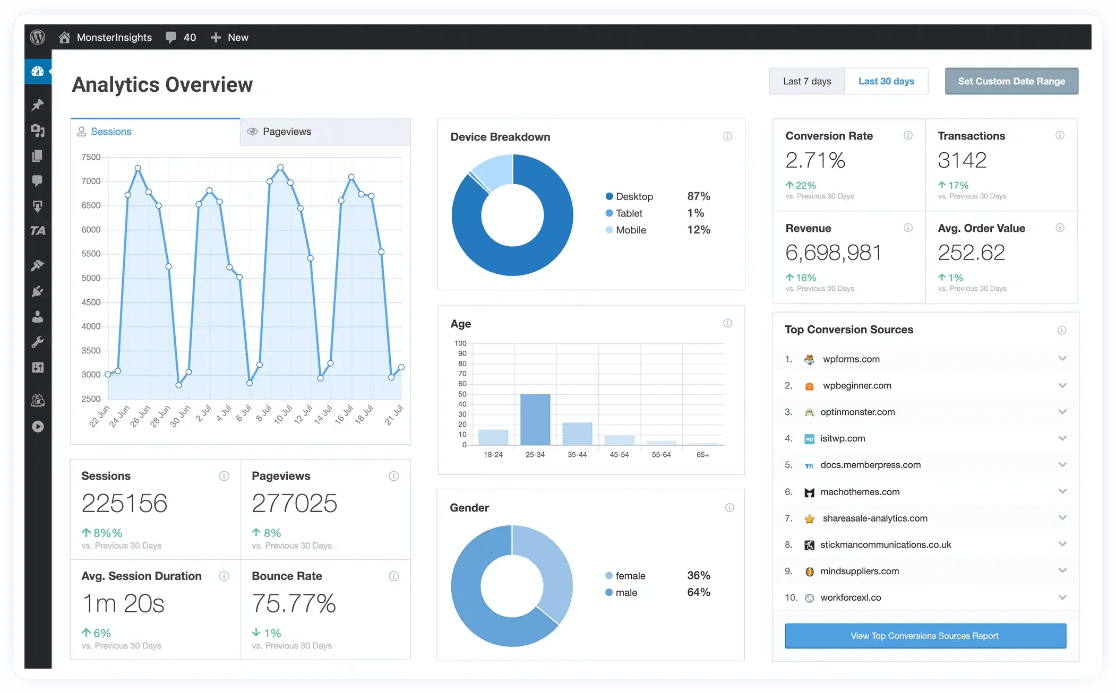
Plus, with the click of a button, you can set up sophisticated tracking features like event tracking, revenue tracking, form tracking, custom dimension tracking, outbound link tracking, real-time reports, and much more.
For eCommerce tracking, MonsterInsights integrates directly with:
- WooCommerce
- Easy Digital Downloads
- GiveWP
- Charitable
- MemberPress
- LifterLMS
- Restrict Content Pro
- MemberMouse
- WishlistMember
Without MonsterInsights, you’ll either need a developer or Google Tag Manager (or both) to set up eCommerce tracking in Google Analytics 4.
Here’s how to get started:
Step 1: Install MonsterInsights
If you haven’t installed MonsterInsights yet, you’ll need to grab a license at the Pro level or above, install it, and authenticate it with your Google Analytics account.
To start, download the ZIP files from your account area under the Downloads tab.
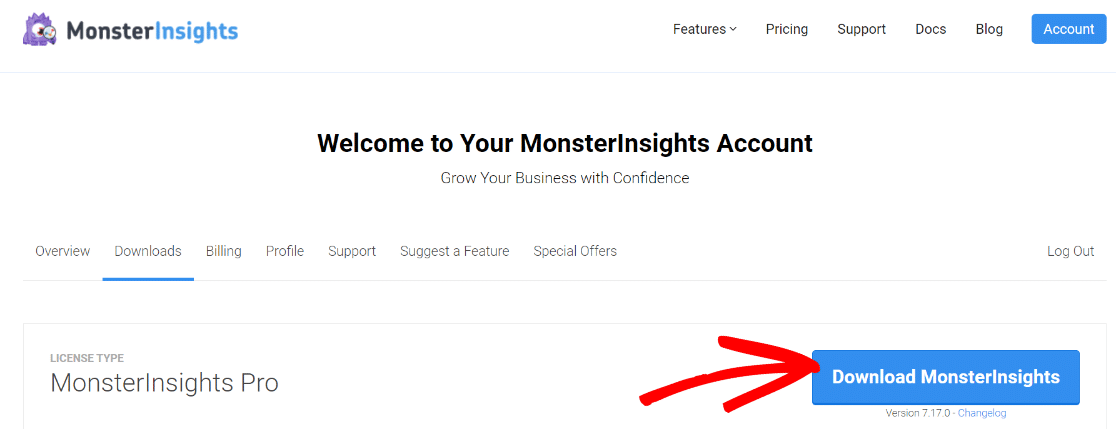
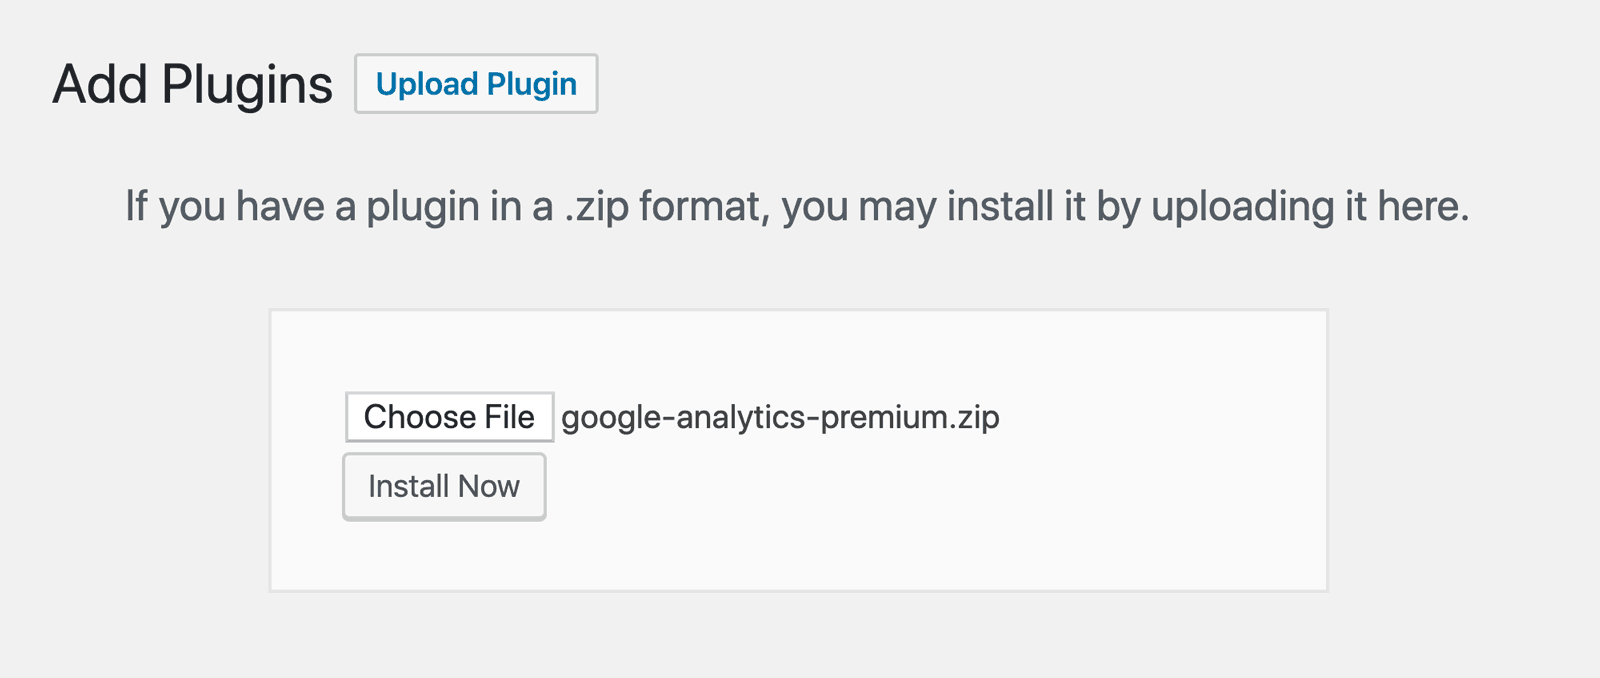
Next, upload the plugin to your WordPress website. You can do that by going to Plugins » Add New » Upload Plugins in your WordPress admin and clicking the Install Now button.
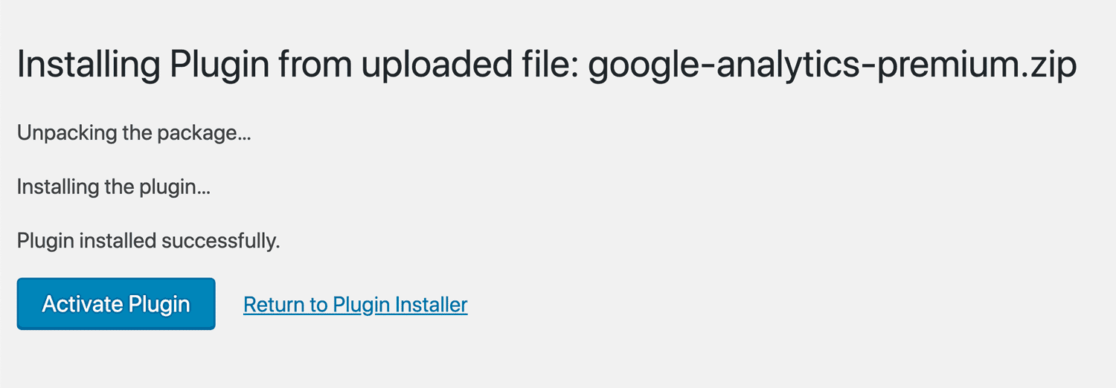
After that, click the Activate Plugin button.
Next, we’ll make sure you’re signed into the correct Google Analytics account.
Step 2: Sign In to Google
Now, you need to log in or sign up for a Google account.
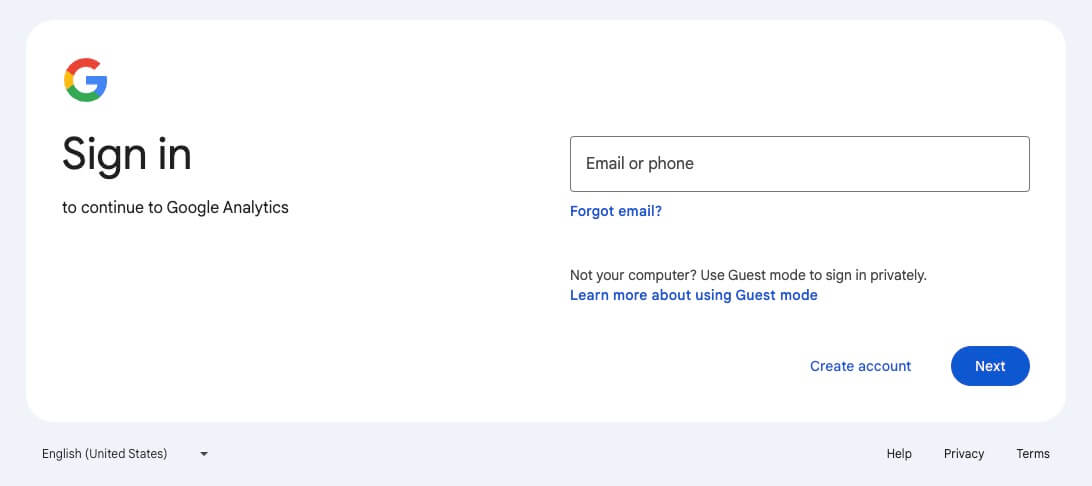
To get started, open the Google Analytics website and click the Sign in to Analytics link or the Start for free button in the top right corner of the page if you don’t have an account yet.

Next, you can log in to your existing Google account if you have one, or click the Create account link to create a new Google account.
Step 3: Create a Google Analytics Property
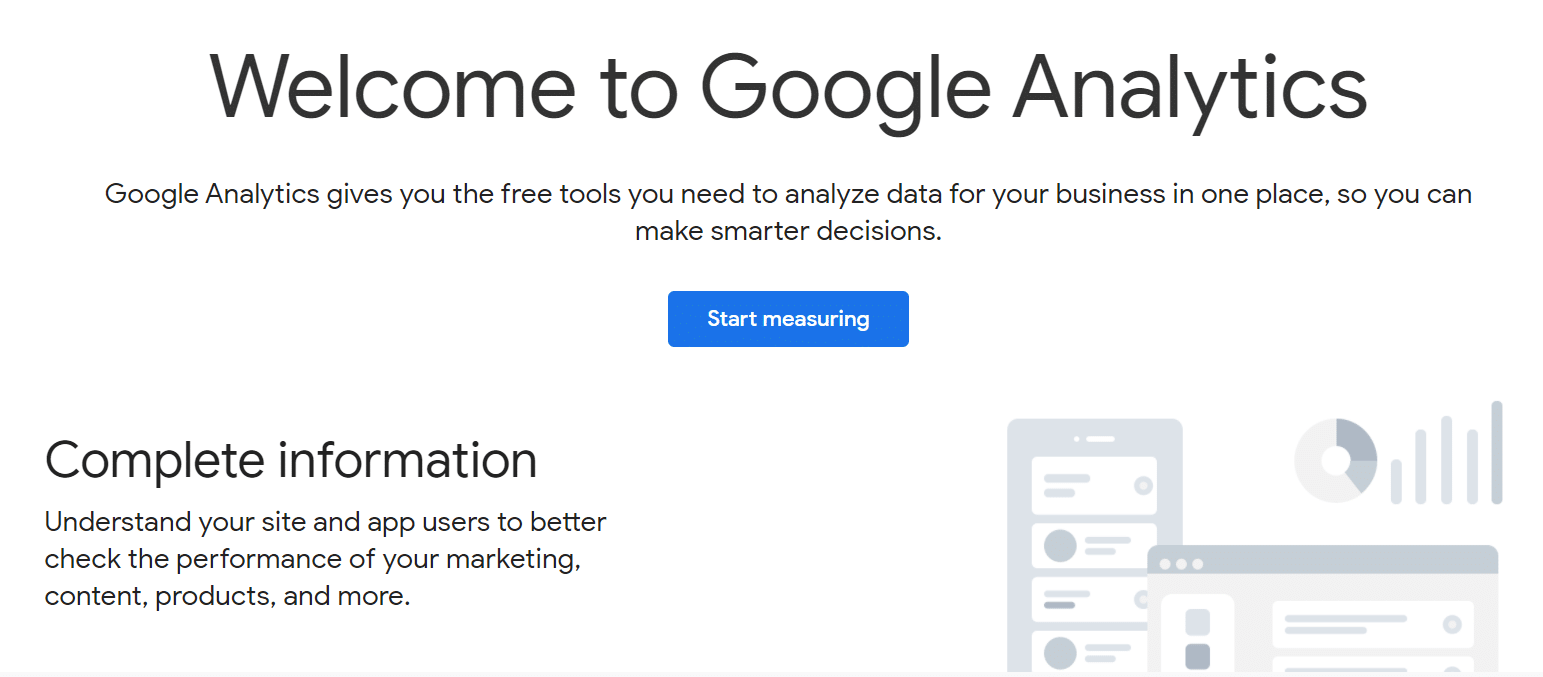
Now that you’ve signed in to your Google account, you’ll either see your Google Analytics account or you’ll be able to click the Start measuring button to get one set up.
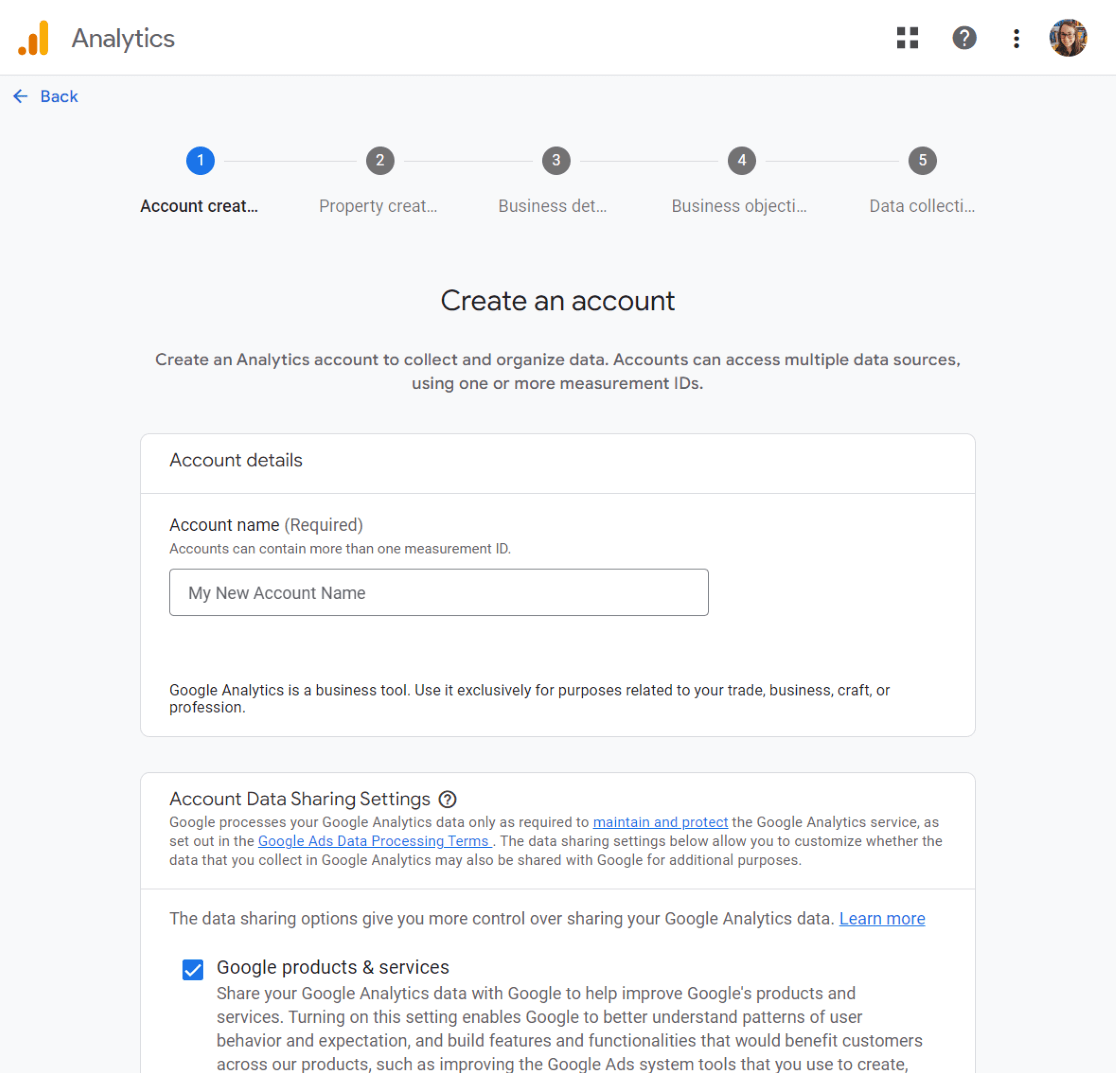
If you need to set up your account, enter the Account name for your Google Analytics account. You’ll also see different data-sharing settings — make sure you check all the boxes and then click Next.
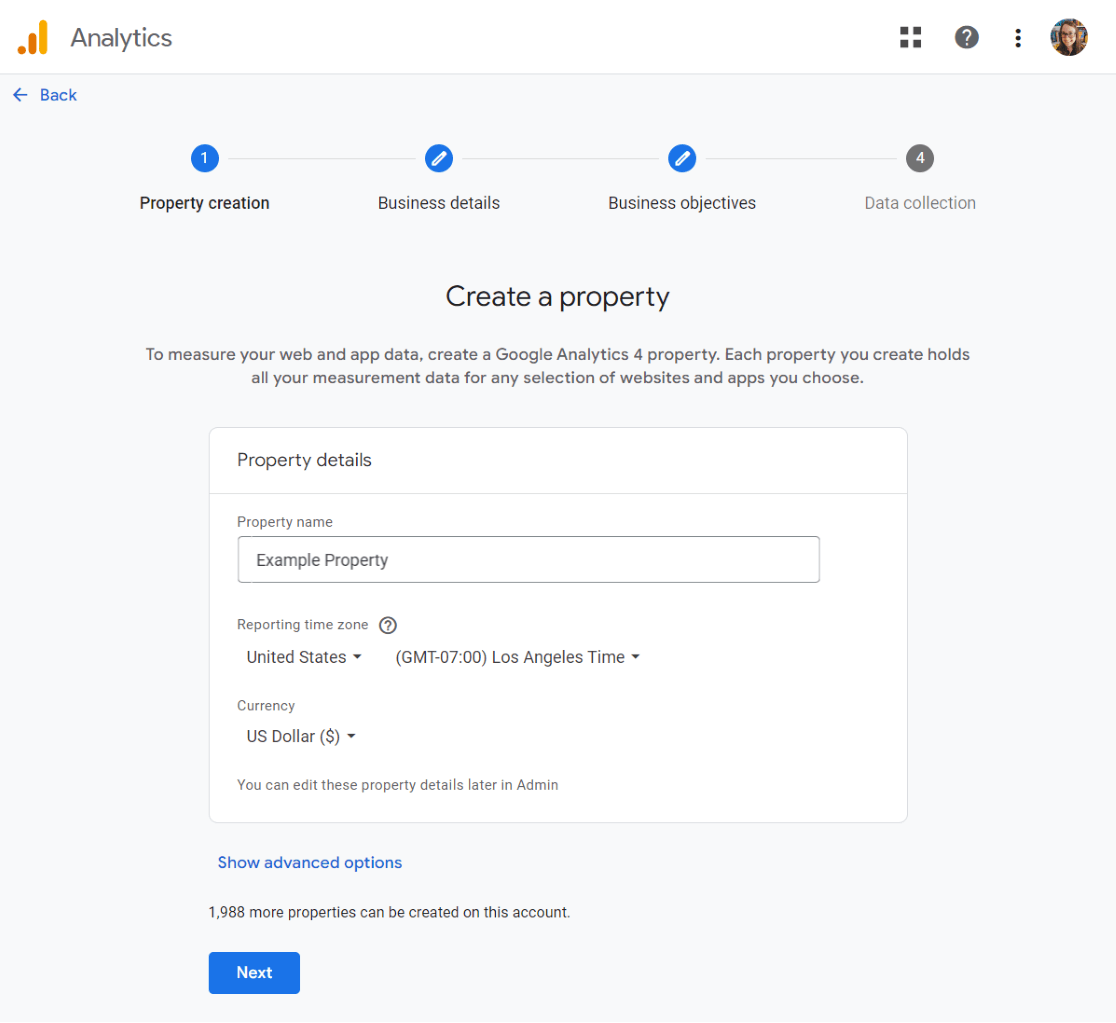
Now, enter the property details of your website. Start by entering a name and selecting a reporting time zone and currency. Click Next.
Choose your industry category and your business size, then click Next.
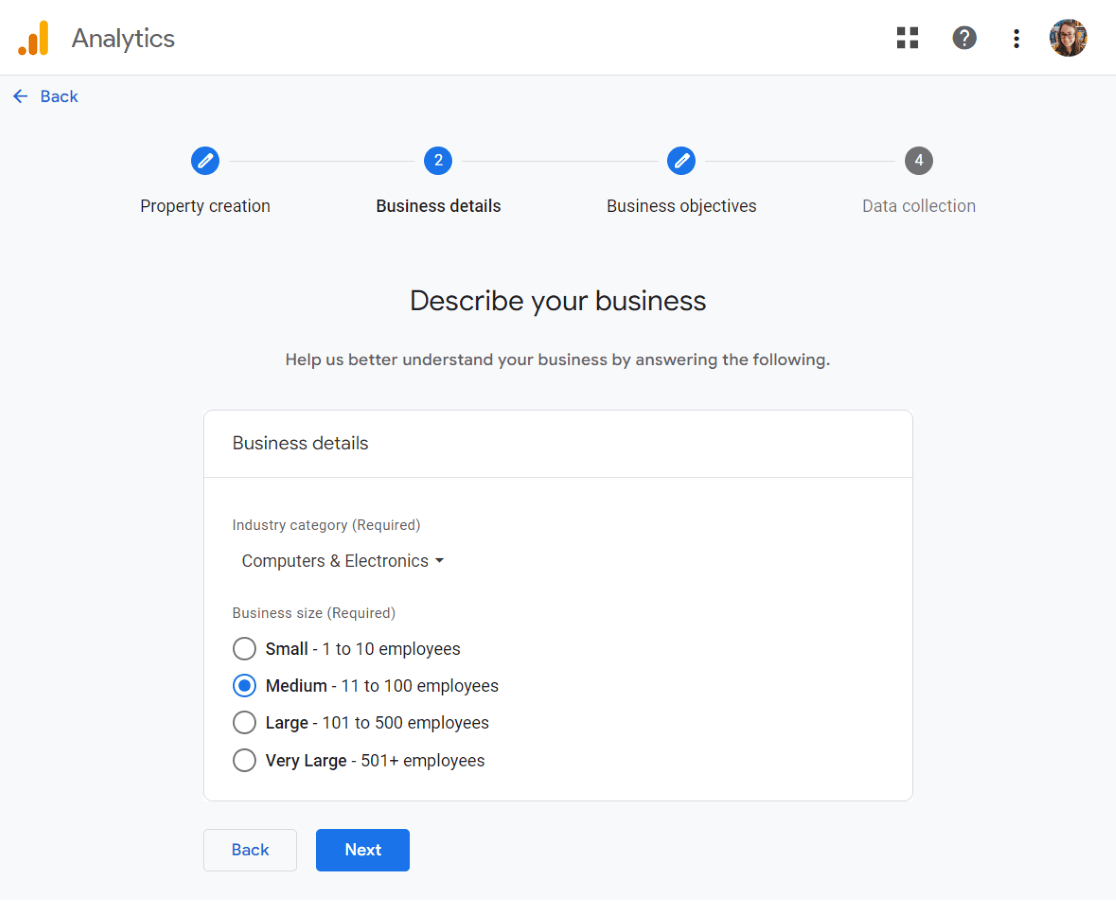
Finally, choose your business objectives. We suggest choosing “Get baseline reports” to populate your account with all of the Google Analytics reports.
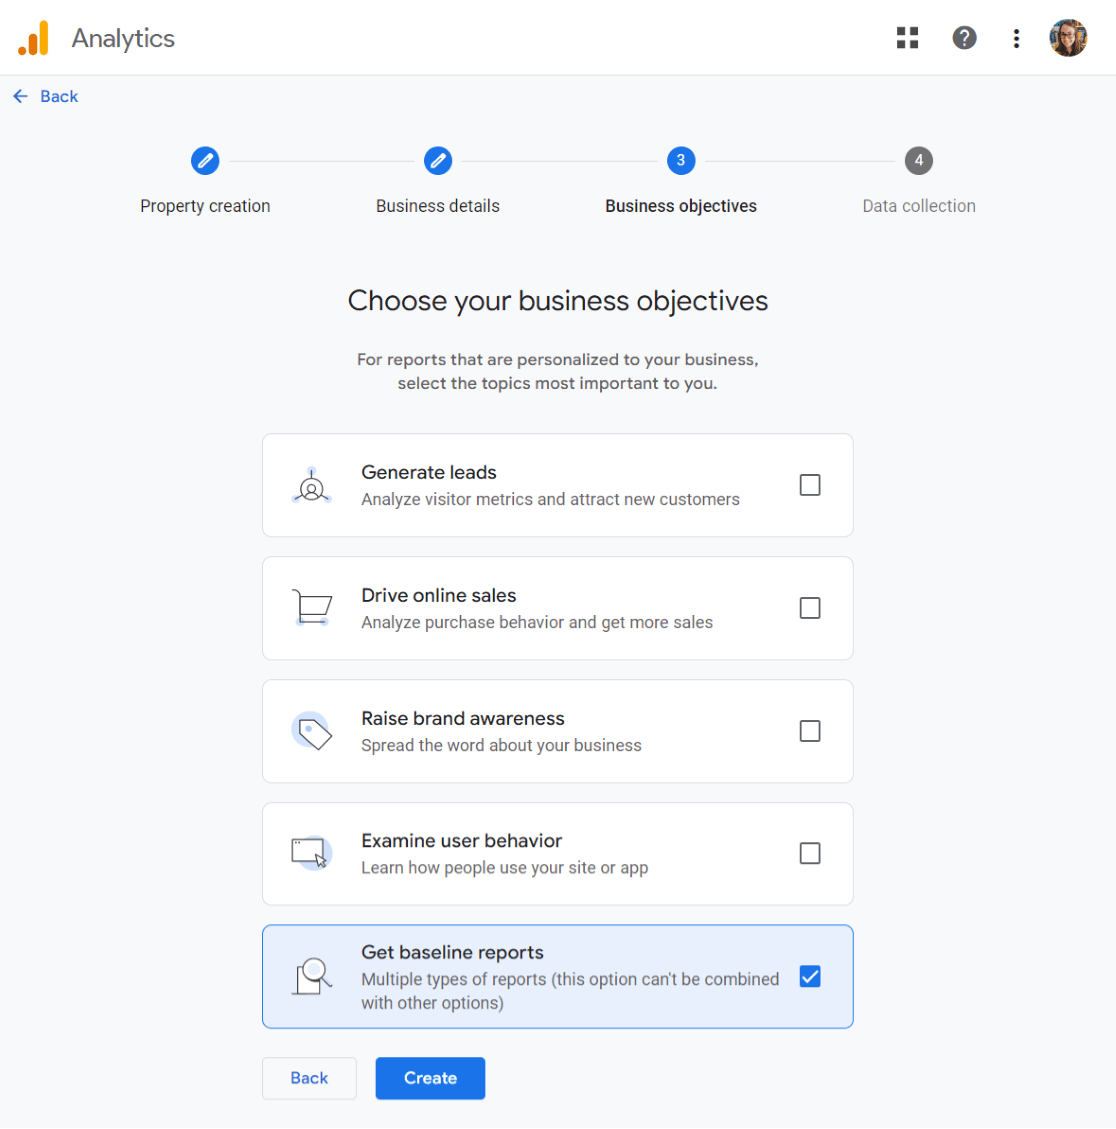
Click Create.
That’s it! You’re now signed up for Google Analytics, and you have a property ready to go. Next, we’ll head back to WordPress to connect to MonsterInsights.
Note: You do not need to proceed to the create stream step—MonsterInsights will do that for you!
Step 4: Set up MonsterInsights
Connecting MonsterInsights with Google Analytics is simple! Just head back to WordPress and follow the steps in the onboarding wizard:
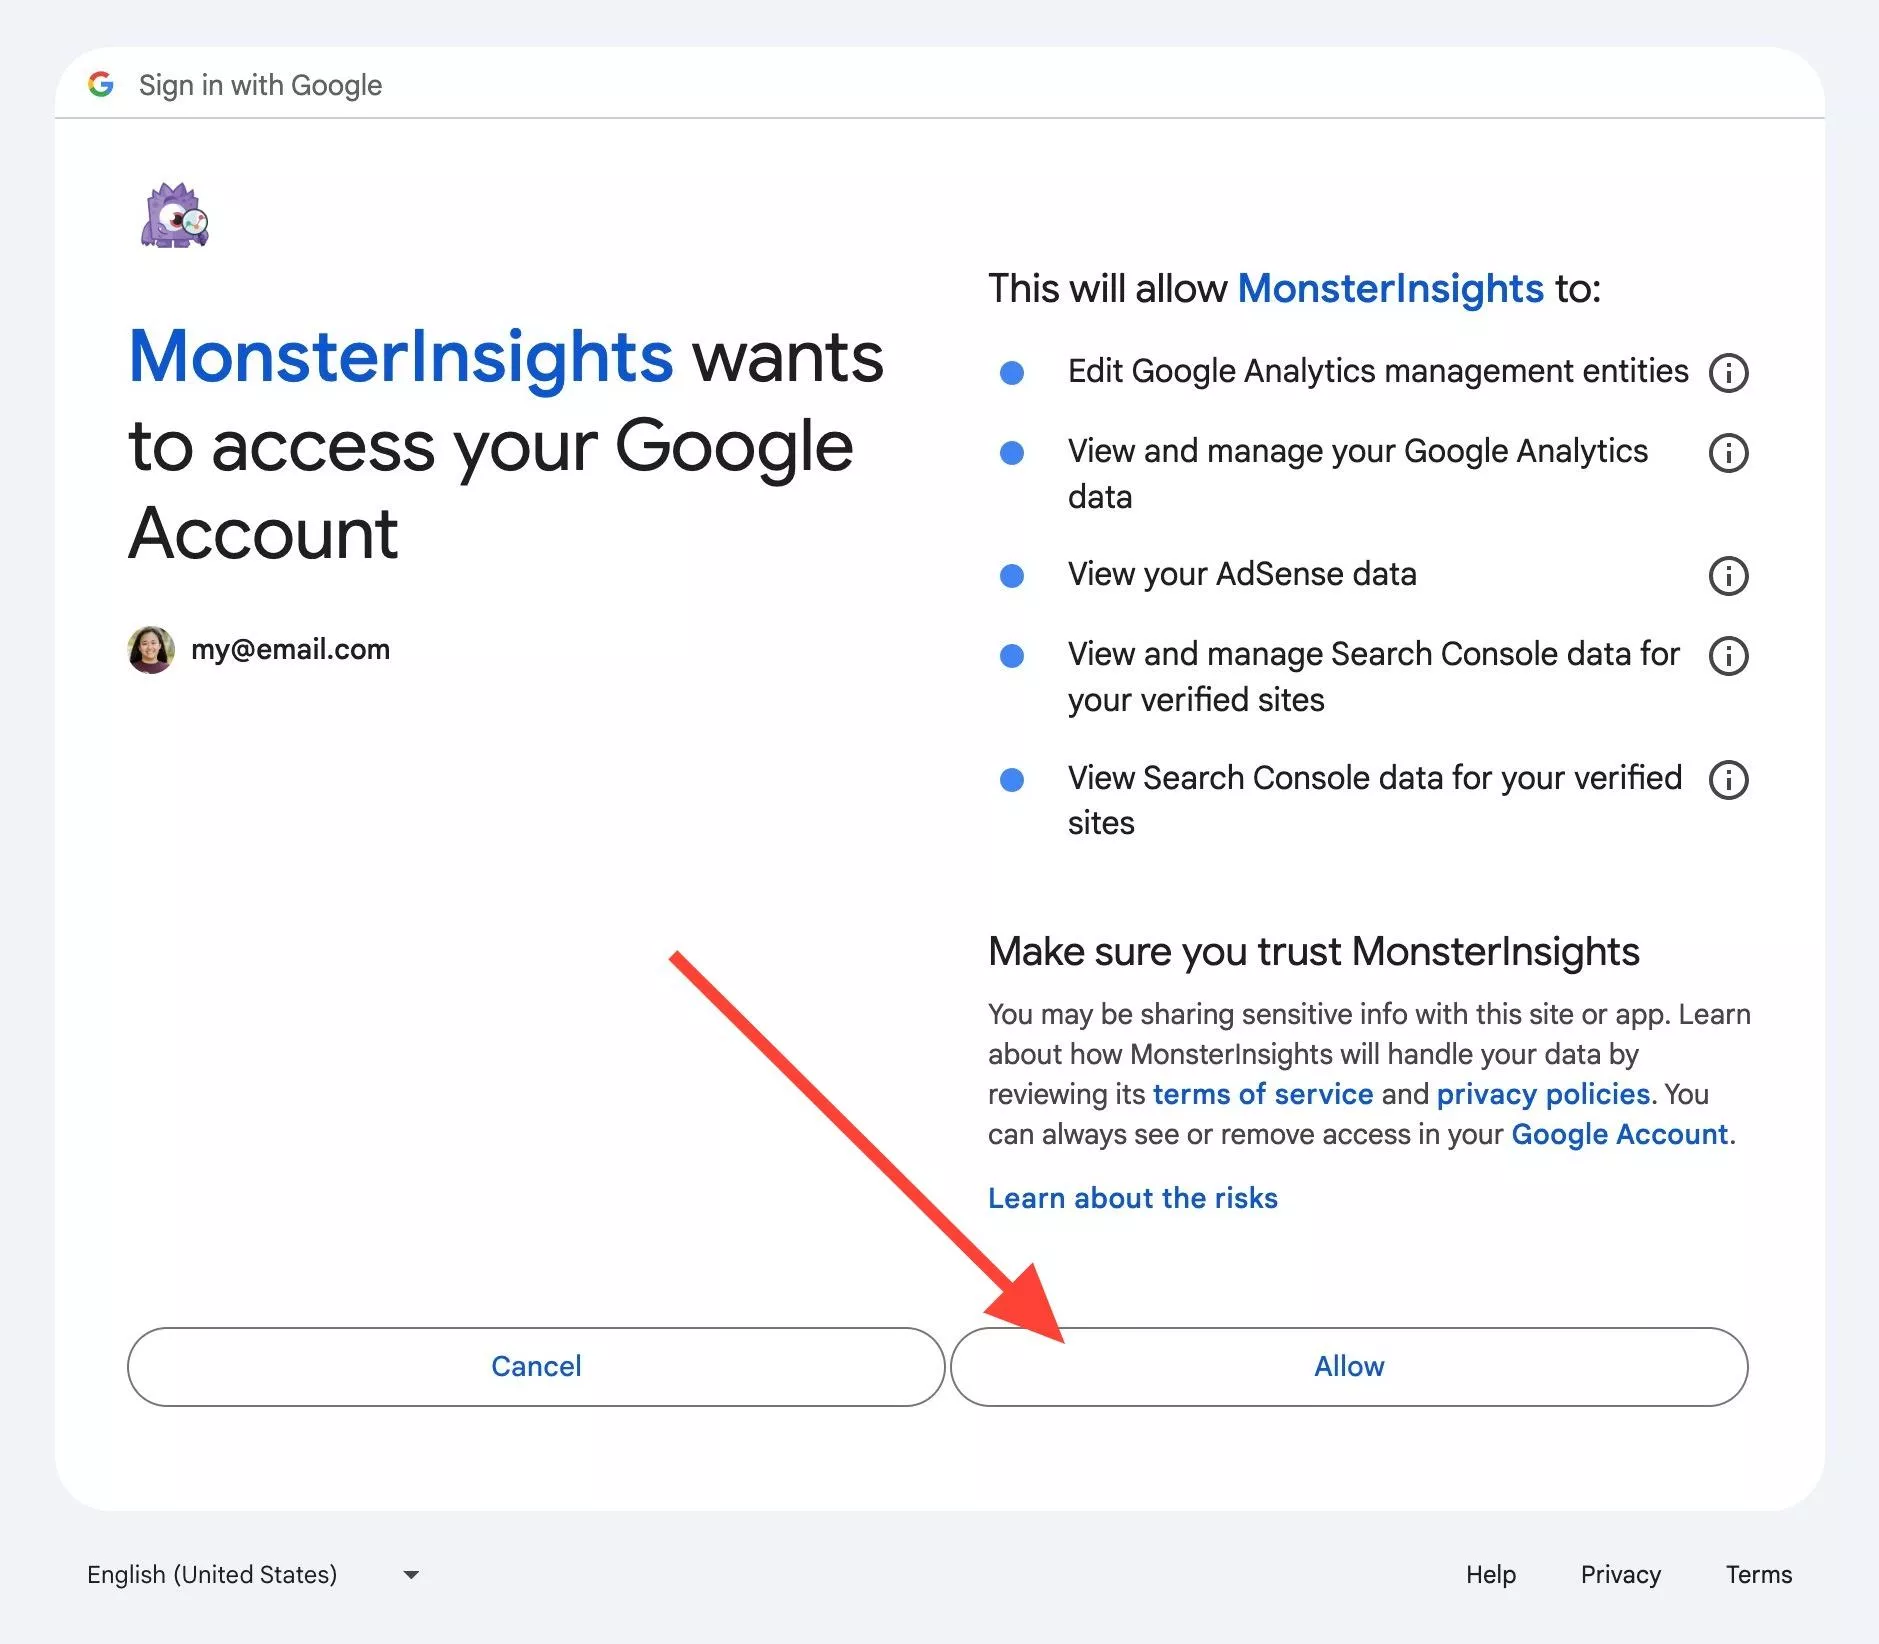
For a full tutorial on setting up MonsterInsights and connecting it with Google Analytics, check out our guide on how to properly set up Google Analytics and MonsterInsights.
Step 5: Install the eCommerce Addon
Finally, go to Insights » Addons and click Download & Activate in the eCommerce addon box.
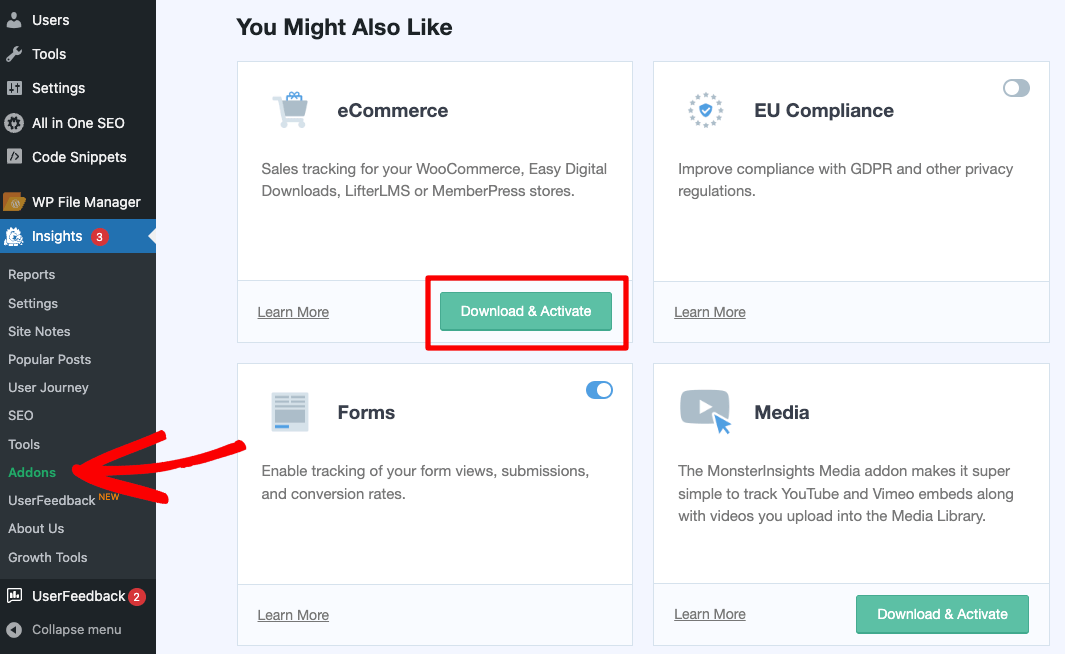
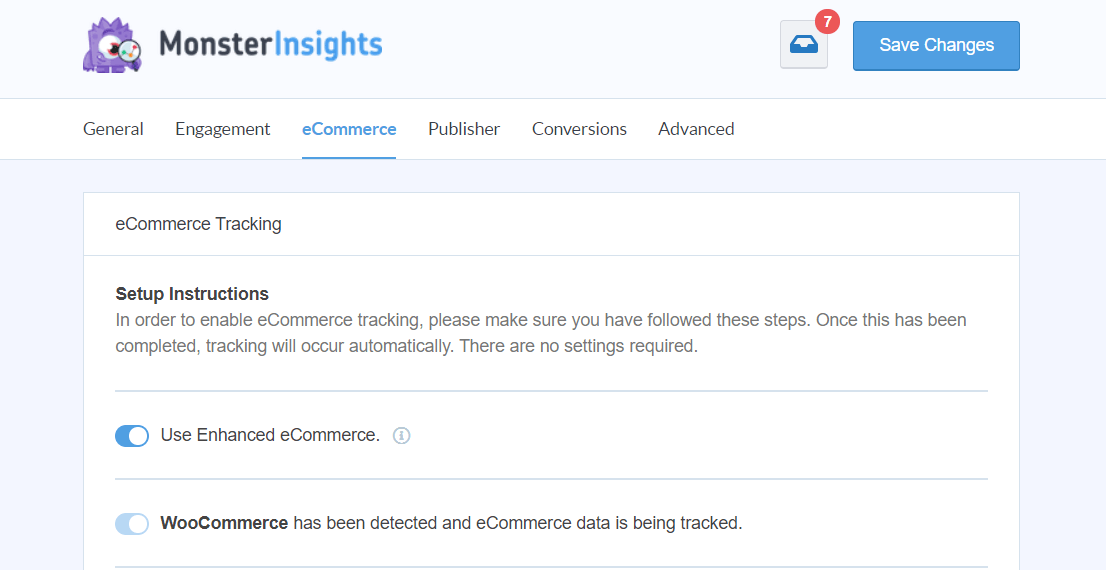
That’s it! You have eCommerce tracking all set up and ready to go. MonsterInsights will automatically detect the eCommerce platform you’re using, like WooCommerce, on the Settings » eComemerce page.
Step 6: Mark Purchases as Key Events
There’s a handful of reports inside the MonsterInsights dashboard that include a Conversion Rate metric. Your conversion rate is calculated based on how many of your visitors complete a conversion (key event). So, we need to tell Google Analytics that we want purchases to be considered a conversion (key event).
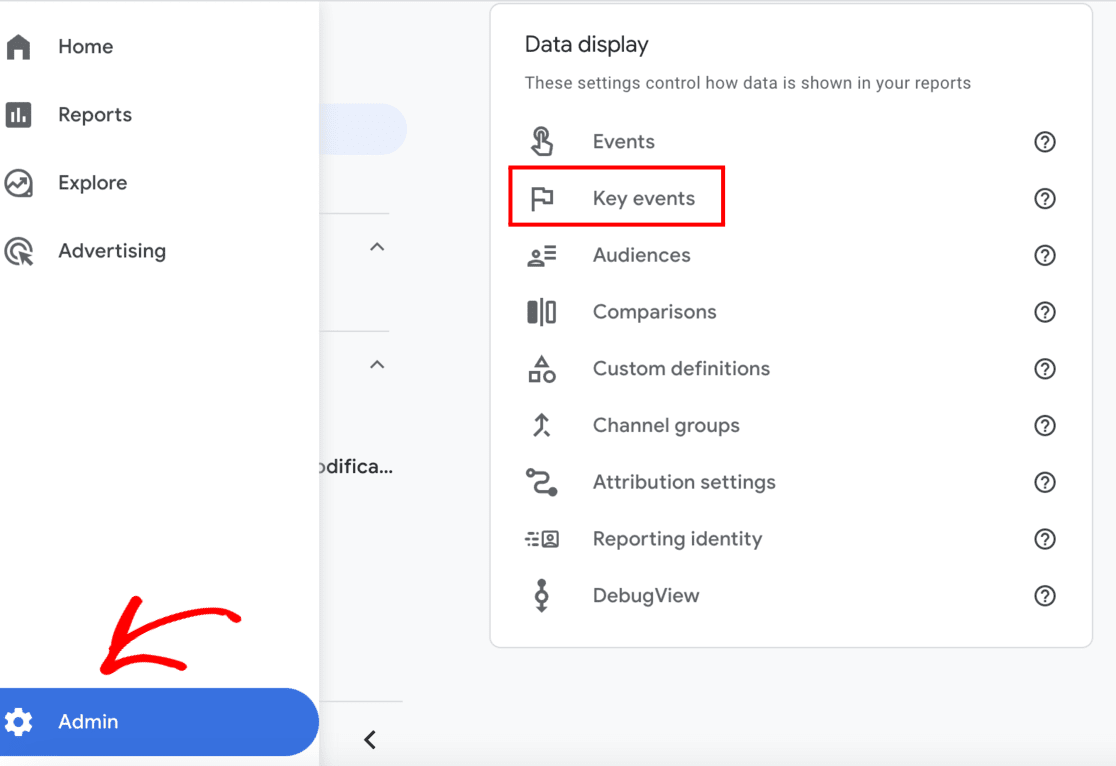
To do that, open Google Analytics and head the the Admin cog, then click on Key events in the Data display menu:
Next, find the key event called purchase and click the toggle to mark it as a key event:

That’s it! You’re all set up.
Where to Find Google Analytics eCommerce Reports
Once you’ve completed the setup, MonsterInsights will begin to gather data for your eCommerce site.
Best of all, it’ll bring your most important eCommerce metrics right inside your WordPress site dashboard.
To view your eCommerce stats, visit Insights » Reports from your dashboard and then click the eCommerce » Overview report.
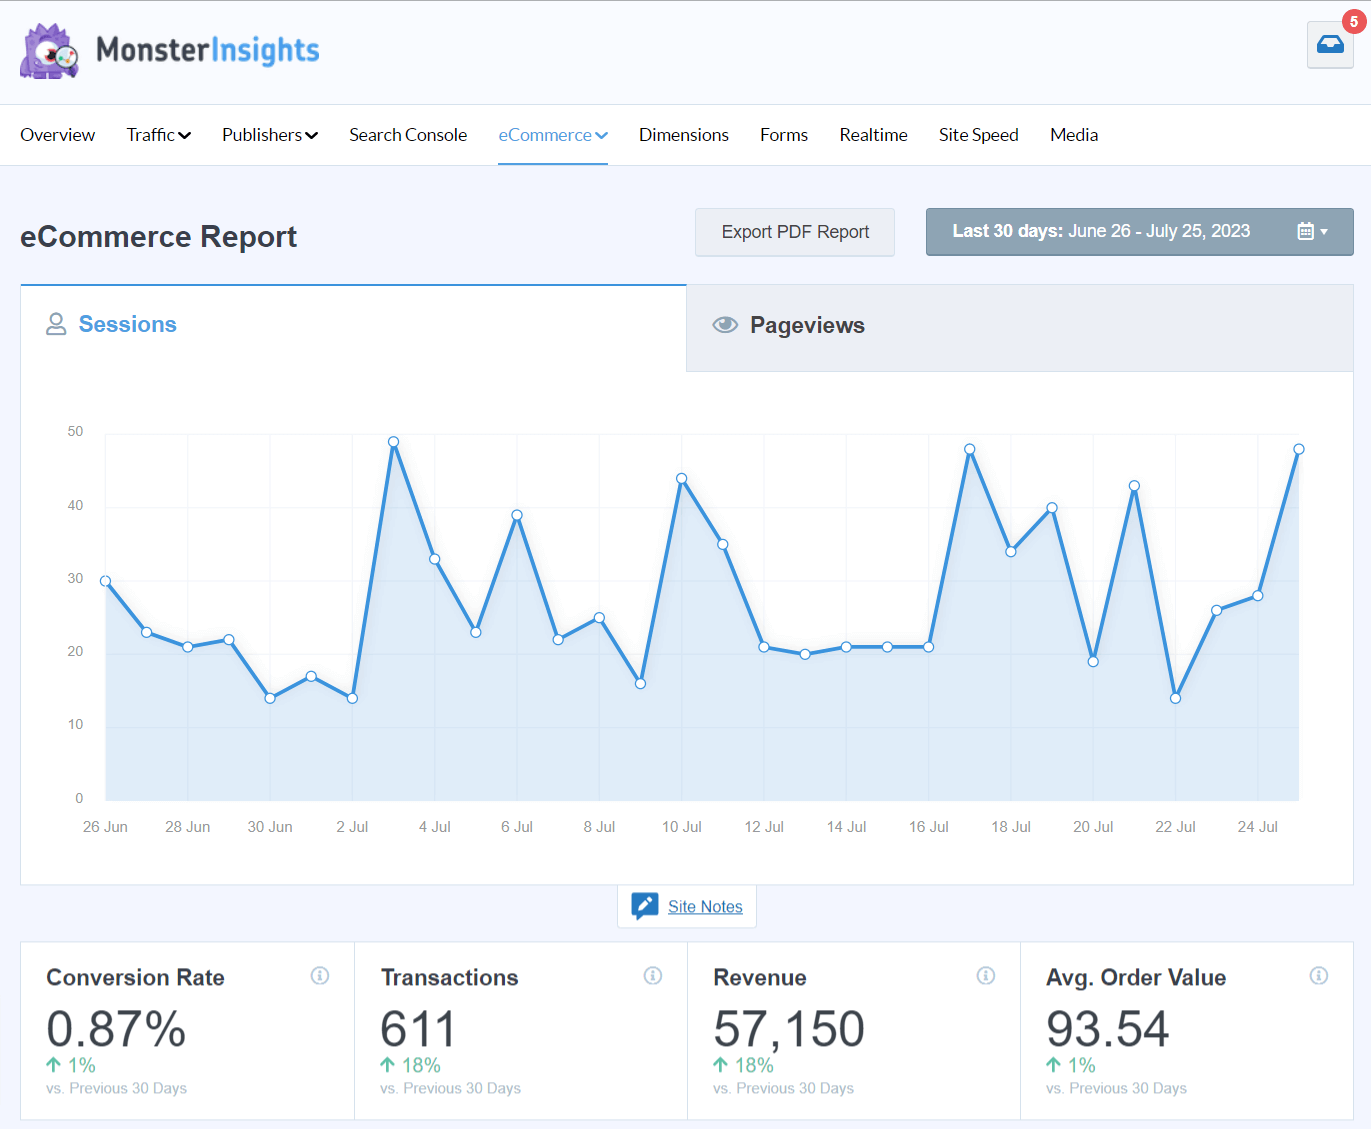
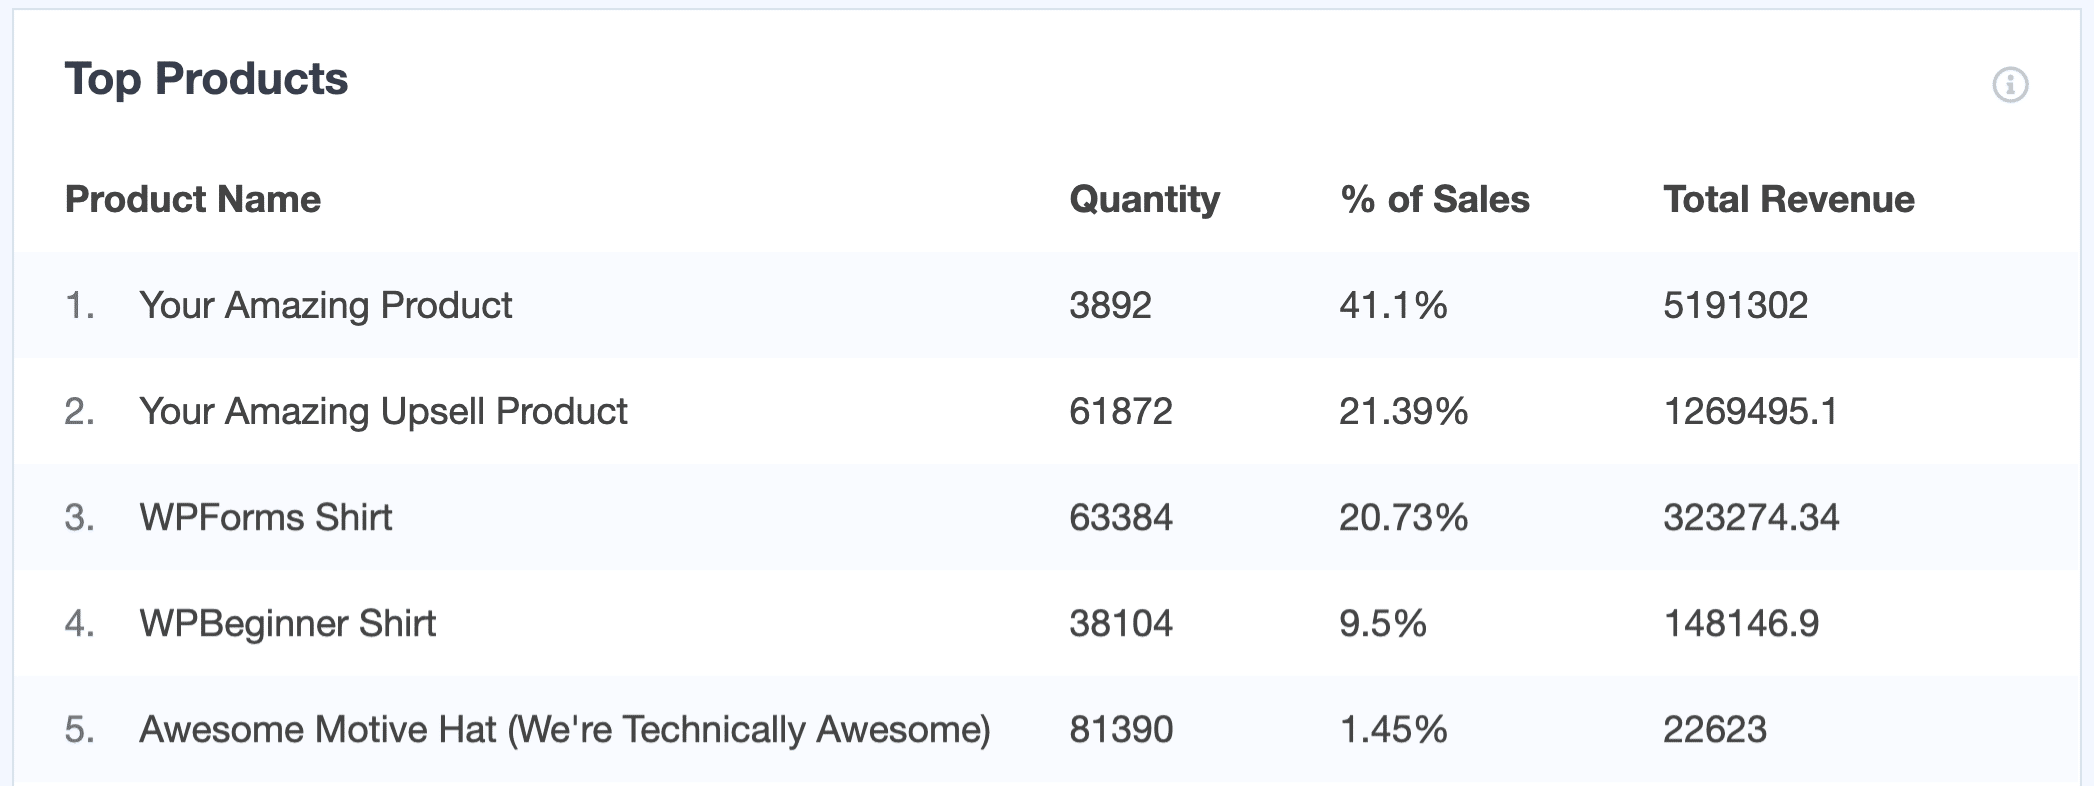
In this report, you can see your store’s total transactions, conversion rate, revenue, and average order value. You can also see your top-selling products.
As you scroll down the page, you’ll see your store’s top referral conversion sources. These are traffic sources that send customers to your website.

Finally, you’ll be able to see more transaction data, like total products added and removed from shopping carts, percentage of new customers, and percentage of abandoned checkouts.

If you want to see more detail, you can click the View Report button at the end of the products and conversion sources reports. Clicking on the button will take you to your Google Analytics 4 property, where you can explore your reports.
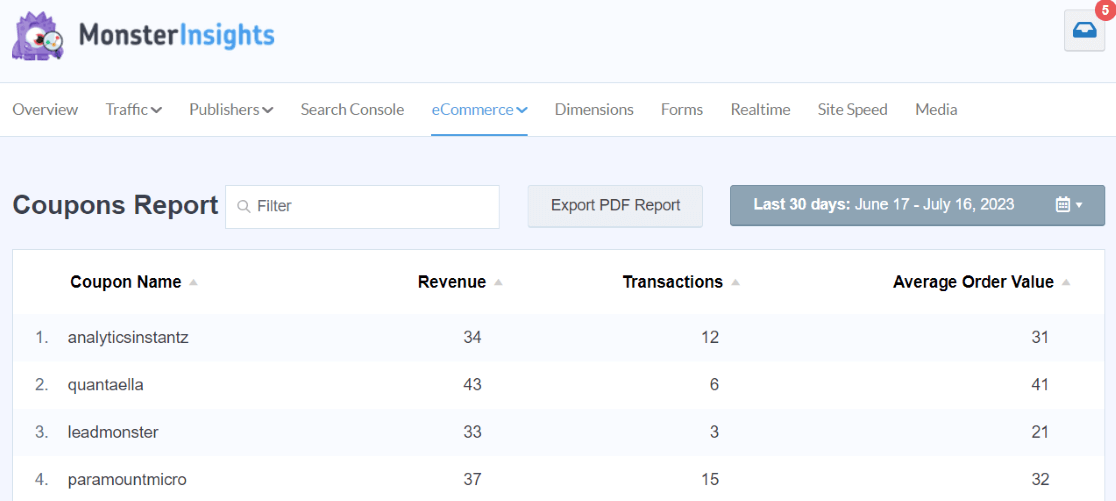
Next, open the eCommerce » Coupons report. If you use coupon codes in your store, you’ll find data on how those are used here.
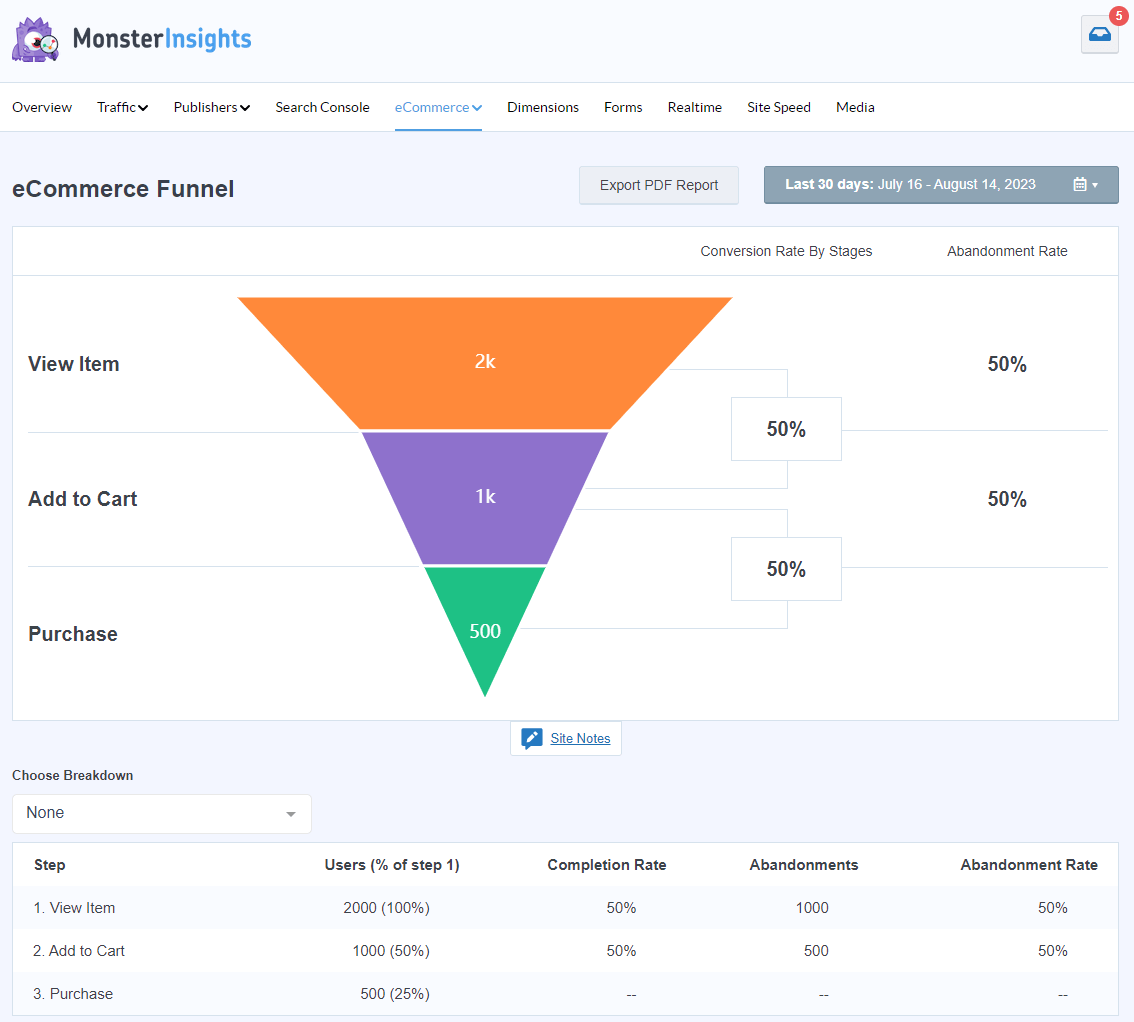
Finally, head to the eCommerce » Funnel report. This super helpful report will show you the steps of your purchase funnel and how your users navigate it. Where are they dropping out the most often? Use this data to help you create a better sales funnel.
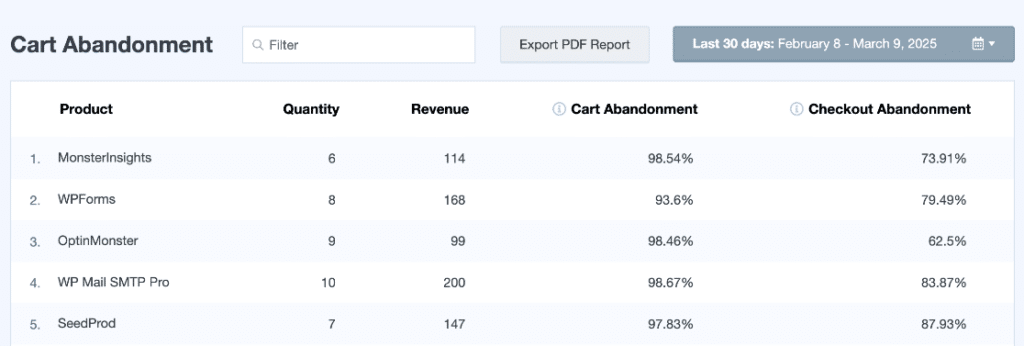
Want to know which products are getting left in shopping carts the most often? Use the Cart Abandonment report:
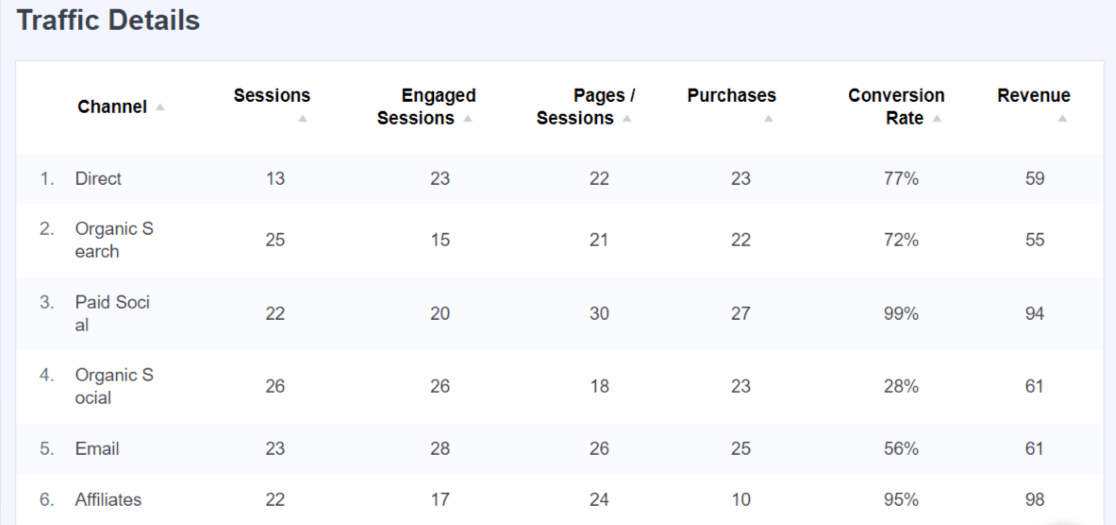
That’s not all! You’ll also find some truly valuable data in other MonsterInsights reports, like the Traffic overview:
More Google Analytics 4 eCommerce Reports
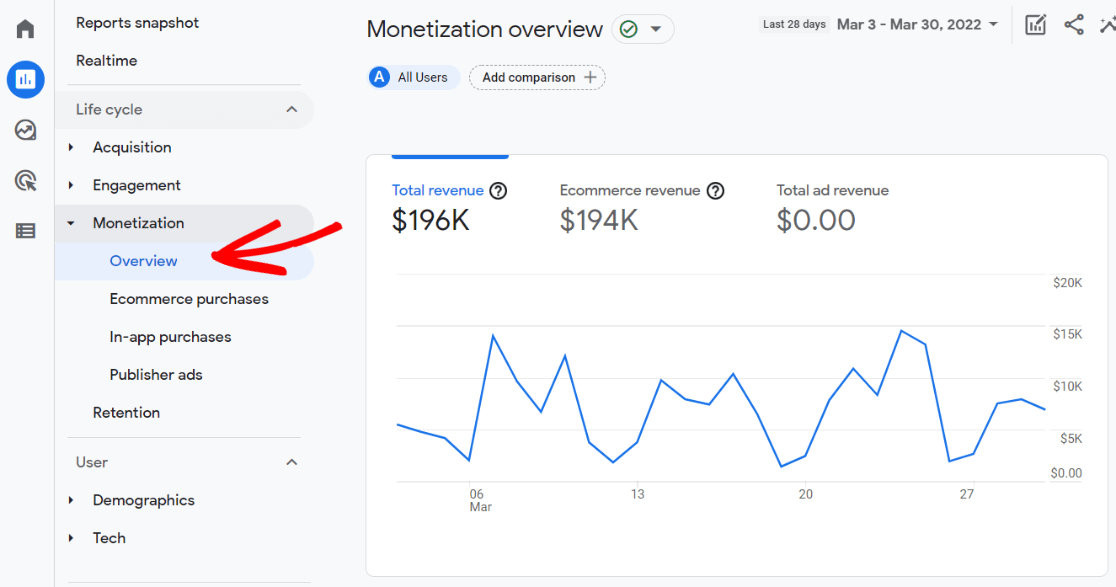
To view your eCommerce overview report in Google Analytics 4, navigate to Monetization » Overview. Here you can see your revenue trend by day, purchases by day, purchases by item name, purchases by item list, and more.
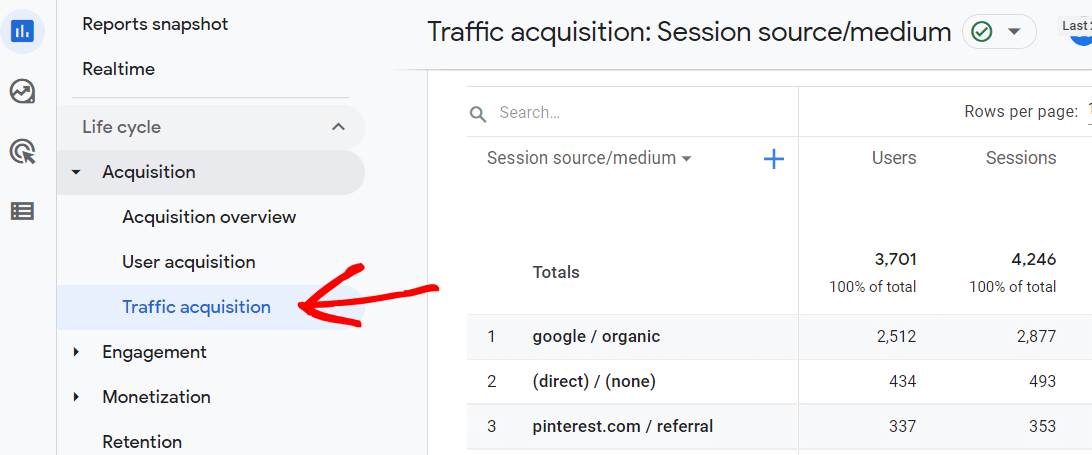
To view Google Analytics eCommerce sales (purchases) and revenue data organized by channel, navigate to Acquisition » Traffic acquisition:
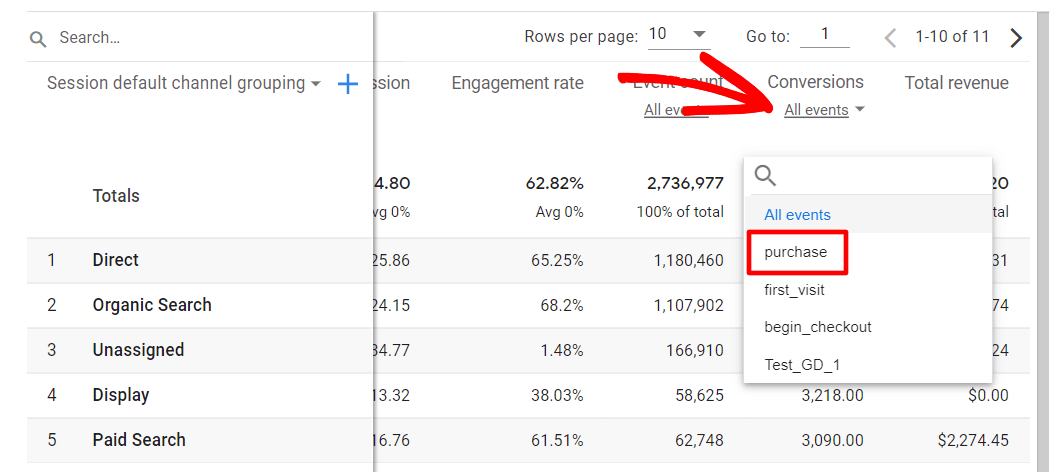
Then, scroll to the right in the table to find Conversions and Total Revenue. Click the All Events drop-down arrow under Conversions and select purchase:
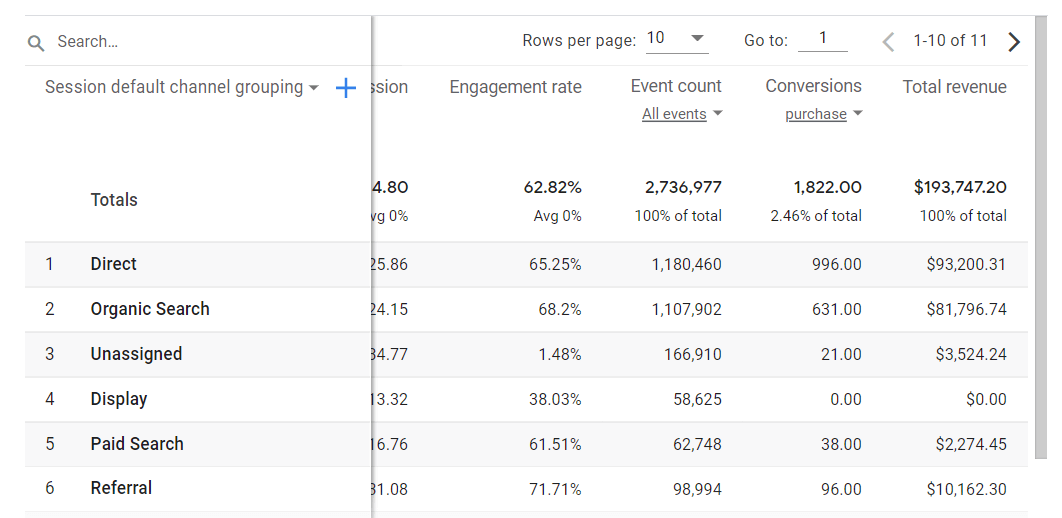
Now, the table shows total purchases and revenue by traffic channel.
That’s it!
Related: 9 Top eCommerce Metrics & KPIs to Track in Google Analytics 4
That’s it!
You now know how to set up eCommerce tracking in Google Analytics and can easily track the performance of your eCommerce business.
Start Tracking eCommerce Performance Today!
Thanks to MonsterInsights, you don’t need to perform any manual configuration, as you would need to in Google Tag Manager. The plugin takes care of everything and automatically tracks your eCommerce store’s sales and revenue.
We hope you liked our guide on how to set up Google Analytics eCommerce tracking in WordPress. We think you might also like to check out:
25 Crucial eCommerce Growth Strategies
eCommerce Customer Journey Analytics: WordPress Guide
11 WooCommerce SEO Tips to Increase Search Rankings Today
Finally, don’t forget to follow us on YouTube for more helpful reviews, Google Analytics tips, and tutorials.
Google Analytics Ecommerce Tracking FAQ
1. Why is revenue tracking important in Google Analytics 4?
Revenue tracking in GA4 is essential because it helps you understand your eCommerce business performance. With proper revenue tracking, you can identify your best-selling products, most profitable marketing channels, and opportunities to optimize your conversion funnel.
2. How do I find the total revenue report in Google Analytics 4?
To find your total revenue in Google Analytics 4, navigate to Monetization » Overview. This report shows your revenue trends, purchase frequency, and revenue by product. For a more detailed breakdown, go to Acquisition » Traffic acquisition, click the dropdown menu under Conversions, select “purchase,” and you’ll see revenue by marketing channel.
3. Does GA4 track eCommerce transactions automatically?
No, GA4 doesn’t track eCommerce transactions automatically. You need to set up eCommerce tracking by either implementing code manually, using Google Tag Manager, or using a solution like MonsterInsights that handles the implementation for you. With MonsterInsights, you can set up complete eCommerce tracking with just a few clicks.
4. How accurate is Google Analytics revenue tracking?
Google Analytics revenue tracking is generally accurate when properly implemented. However, discrepancies can occur due to factors like tracking blockers, tracking code placement issues, or multiple transactions counted twice. Using a solution like MonsterInsights ensures accurate tracking by properly implementing the necessary code and fixing common tracking issues automatically.
5. How do I fix missing eCommerce data in Google Analytics 4?
If you’re missing eCommerce data in GA4, check that: 1) eCommerce tracking is properly set up, 2) the purchase event is marked as a conversion, 3) your tracking code is placed correctly on all pages, and 4) there are no JavaScript errors interfering with tracking. Using MonsterInsights eliminates most of these issues by automatically implementing tracking correctly.

Thanks for this informative article; one question! Does WooCommerce Conversion Tracking and Google Analytics Enhanced eCommerce Tracking work for websites with multi-step checkout?
Hey Jitin – In general, yes! If you’re going from a cart page to a checkout page to a conversion page, Google Analytics can track that funnel.
Does MonsterInsights use dataLayer tracking or the Google Measurement Protocol to send in transactions.
Hi Edwin,
MonsterInsights uses the Measurement Protocol for sending transactions, as it’s more reliable.
Nice analytics reports
Does this work for Gravity Forms to track purchase amounts submitted with form?
Hey Tzvi! Unfortunately the eCommerce addon does not work with amounts submitted via a form at this time.