Do you use WishList Member? We love WishList Member for creating awesome membership sites, courses, and online communities. To make the plugin work even better for you, though, you’ll want to make sure to set up WishList Member Google Analytics tracking.
Growing your membership site is hard work. It takes a lot of time and research to figure out your audience’s wants and needs, where to find them, and how to market your site to them. Luckily, you can get started with Google Analytics tracking in just a couple of clicks, and find your most important metrics right inside your WordPress dashboard.
In this article, we’ll show you how to quickly and easily set up WishList Member Google Analytics tracking so that you can focus on what really matters: Growing your business.
Why Set Up WishList Member Google Analytics Tracking?
All membership sites are unique in terms of the content they offer and the interactions users have with them. That means that every membership website has a unique audience!
To figure out your unique audience (and do a whole lot more), you’ll need to set up Google Analytics. Here are the top benefits of adding Analytics tracking to your site:
- Understand User Behavior: Google Analytics provides valuable data on how users navigate your site, how they found it, the pages they visit, the time they spend on your site, and more. This information helps you get into the minds of your users so that you can better cater to their wants and needs.
- Measure Conversion Rates: Tracking conversions and key events allows you to determine how effective your site is at turning visitors into paying members. By monitoring conversion rates, you can make targeted improvements to increase sign-ups and grow your business.
- Analyze Marketing Campaigns: If you run marketing campaigns to promote your membership site, such as paid ads, social media posts, and emails, Google Analytics can help you track their performance. Easily see which campaigns are working and which ones need to be adjusted to better use your marketing budget.
Now that you understand the importance of Google Analytics tracking for your membership site a little bit more, let’s move on to the steps required to set it up for WishList Member websites.
How to Add Google Analytics to WishList Member
The easiest way to set up Google Analytics tracking and keep an eye on your stats is with MonsterInsights.
MonsterInsights is the best Google Analytics plugin for WordPress, and it makes setting up WishList Member tracking a breeze. Instead of spending time messing with your website’s code, figuring out what your most important data is, and puzzling out how to find it in Google Analytics, just install MonsterInsights and skip all of that.
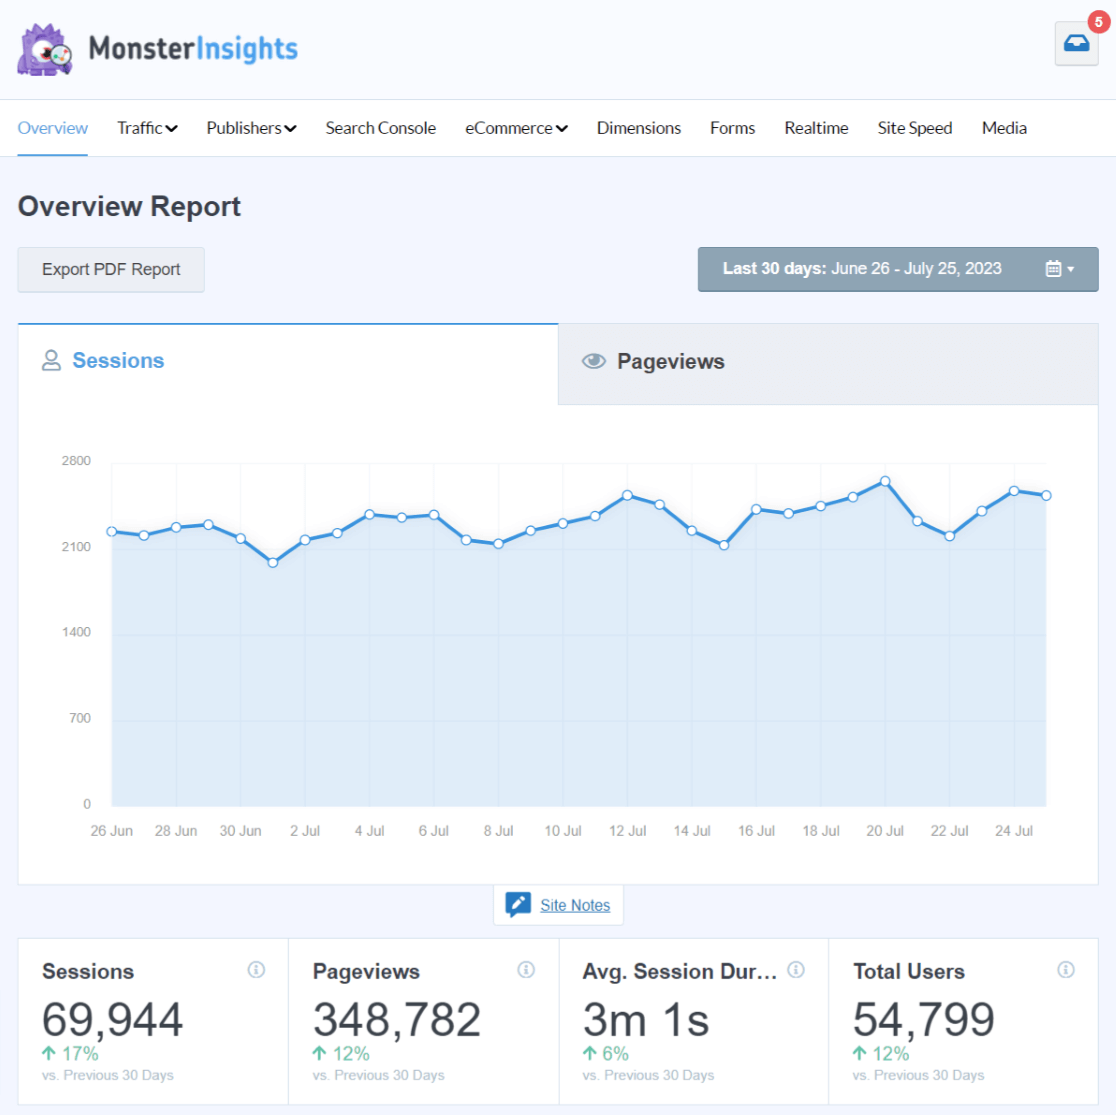
The plugin can connect your website with Google Analytics in just a couple of clicks and set up advanced Analytics tracking features instantly. That includes data you’ll need for your membership site, like eCommerce tracking, form submission tracking, logged-in vs. logged-out user tracking, and more.
Step 1: Install and Activate MonsterInsights
To set up tracking for your WishList Member site, download MonsterInsights at the Pro level or above.
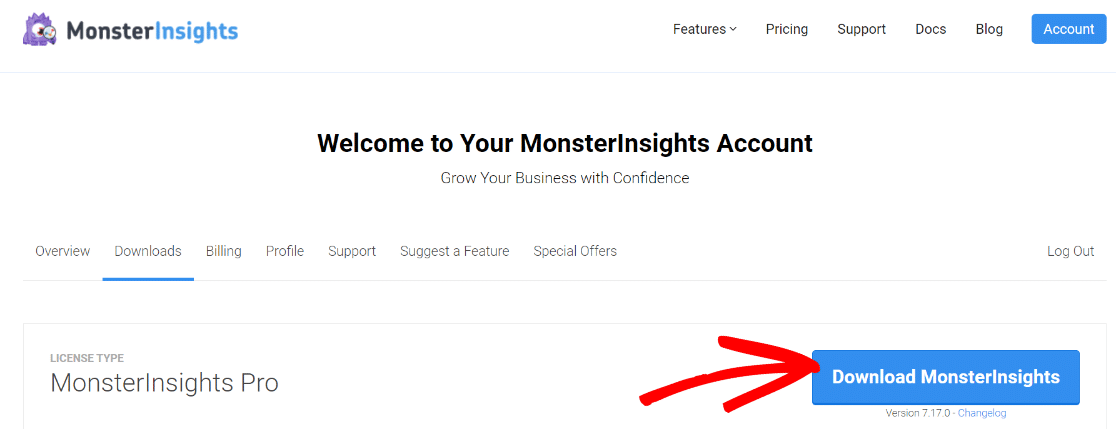
Once you’re set up with the Pro version of MonsterInsights, log in and go to your account area.
Then, navigate to the Downloads tab and click Download MonsterInsights.
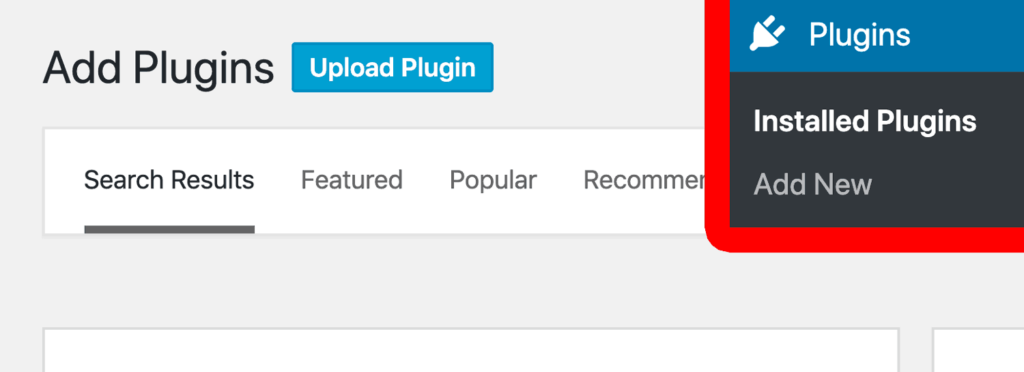
Now, go to your WordPress site’s admin and upload the plugin. You can do that by going to Plugins » Add New » Upload Plugin.
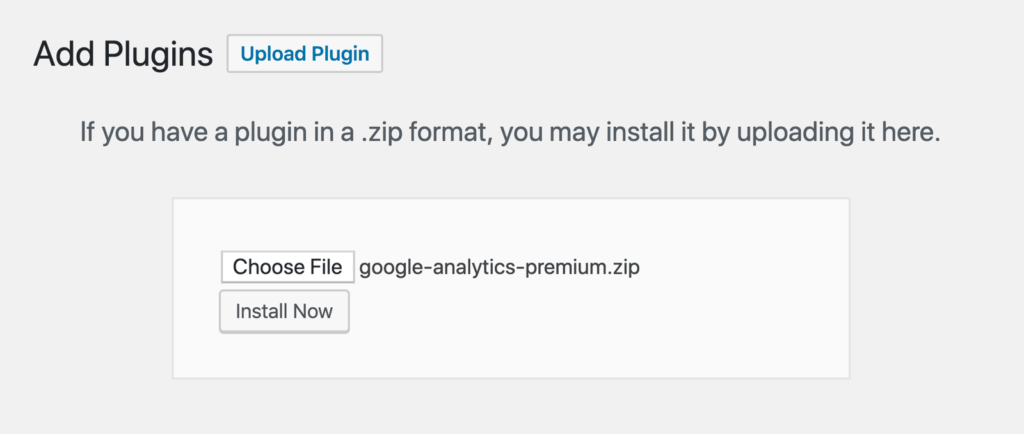
Next, click on Choose File and select the MonsterInsights ZIP file. Click Install Now.
Once the plugin installs, click Activate Plugin.
Step 2: Connect MonsterInsights to Google Analytics
After activating MonsterInsights, you must connect your site with your Google Analytics account.
MonsterInsights makes this process effortless. You don’t have to hire a developer or touch a single line of code. Using its setup wizard, you can add the tracking code to your website and complete your Google Analytics setup in no time.
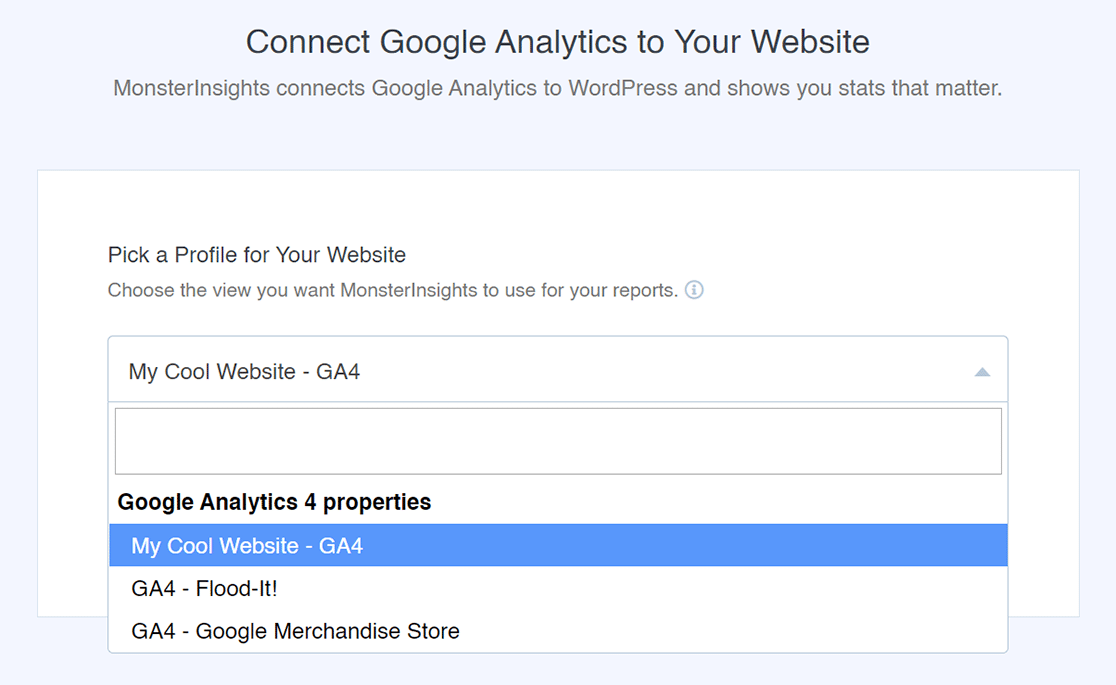
Simply follow each step in the setup wizard to get started.
For a full tutorial on setting up MonsterInsights, check out How to Add Google Analytics to WordPress the Right Way.
Step 3: Install the MonsterInsights eCommerce Addon
Now that MonsterInsights is ready to use on your website, the next thing to do is install and activate the eCommerce addon.
The addon automatically sets up tracking for your memberships or courses.
You can install the addon by going to Insights » Addons. In the eCommerce box, click Install.
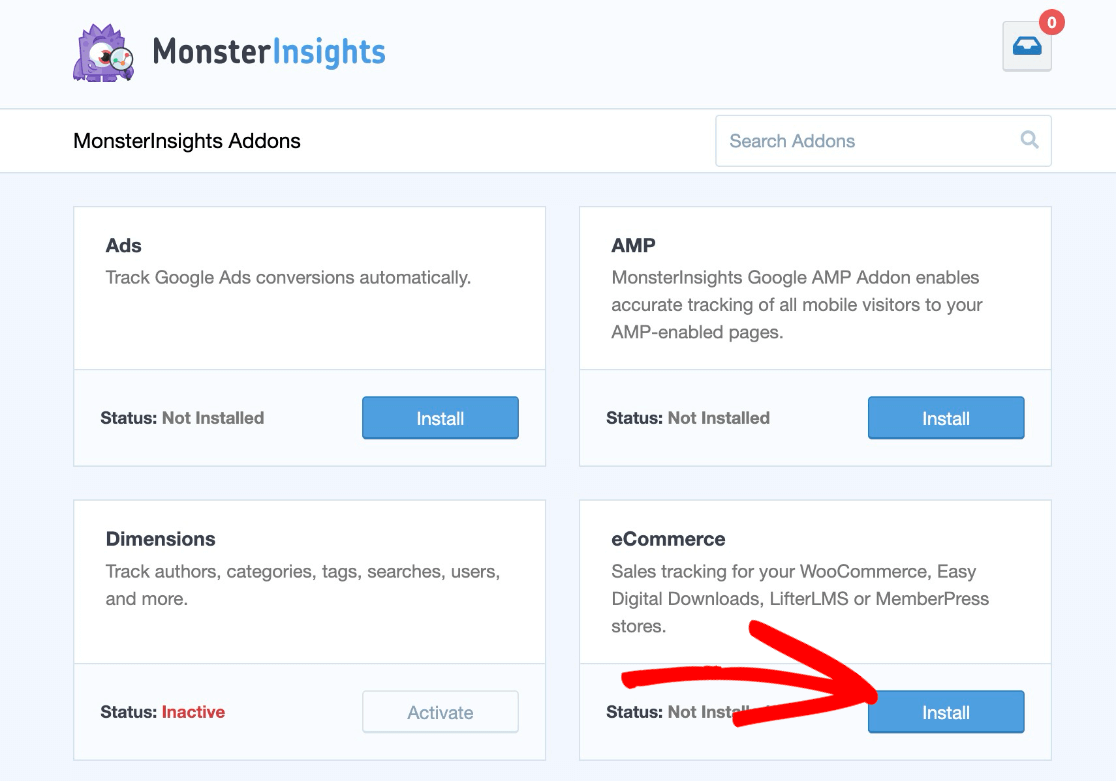
That’s it! Google Analytics is set up and ready.
The Best Google Analytics Reports for Membership Sites
Now that you have Analytics up and running on your site, you’ll be able to access the data you need to grow. Here are just a few of the reports that’ll help you identify what kinds of improvements you can make to your site:
The eCommerce Overview Report
If you’re selling memberships, courses, or other products on your site, you can use the eCommerce report to see how those items are performing. First, head to Insights » Reports » eCommerce » Overview:
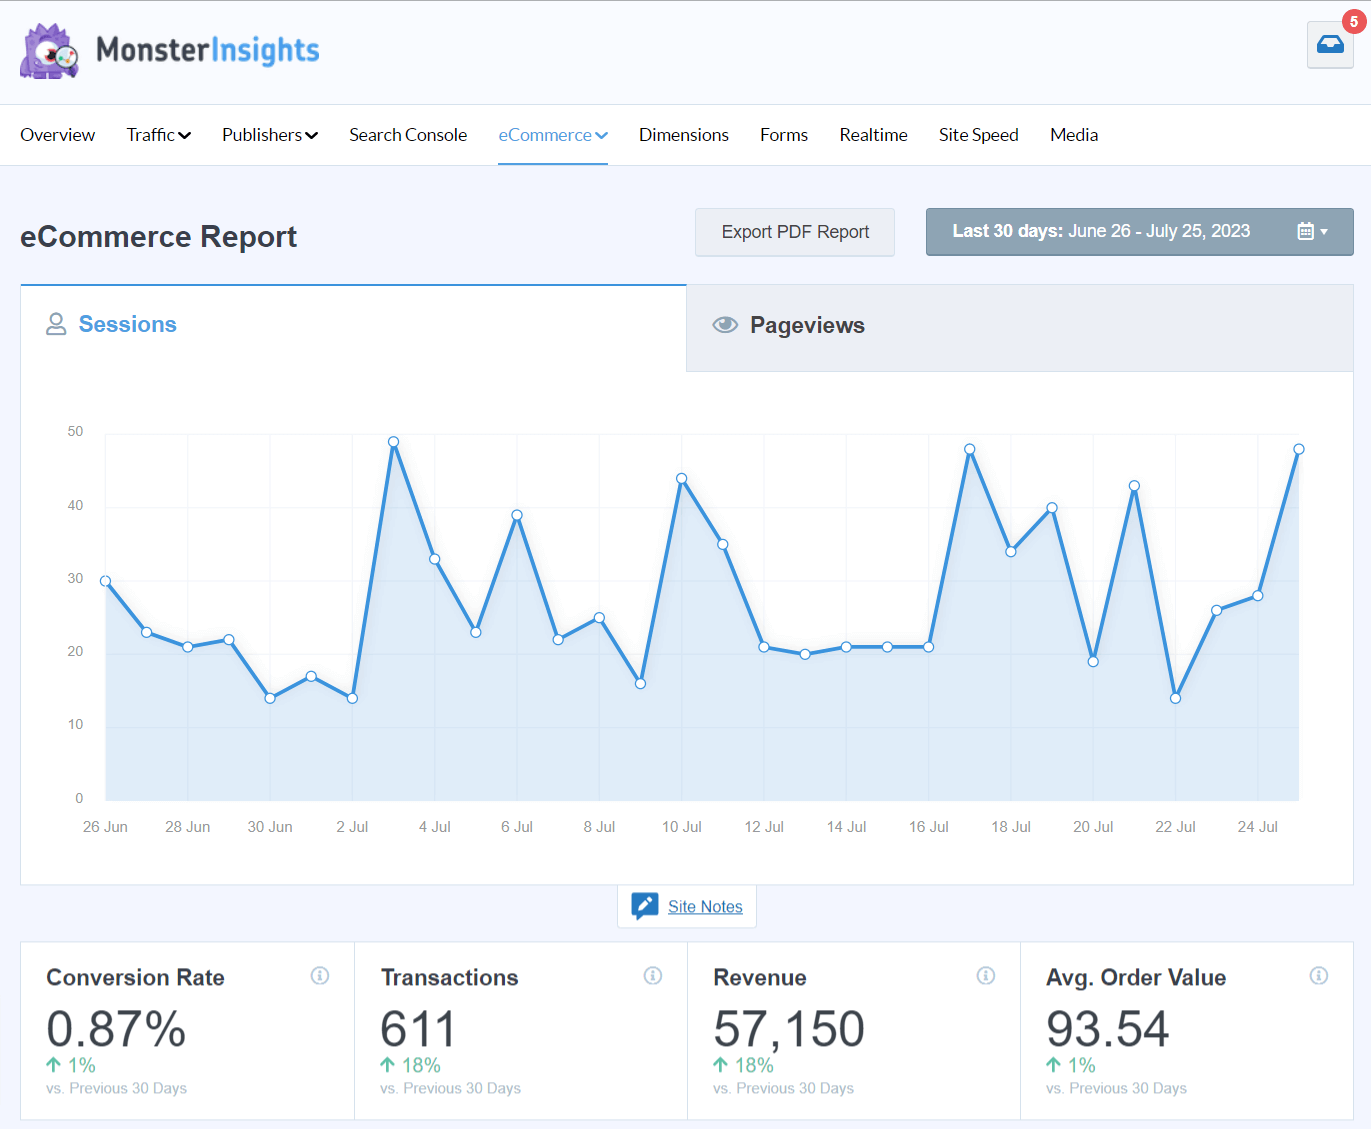
In this report, you’ll see basic eCommerce sales metrics, plus the revenue you made per product, which referral sites are sending the most converting traffic, and your overall cart abandonment rate.
Traffic Channels
Where is your traffic coming from? How are your visitors finding your site? Which channel are you getting the best, most-converting traffic from?
These are all questions you can answer with the Traffic report. Head to Insights » Reports » Traffic » Overview to figure out which channels you might want to invest more in and which channels you can focus on less:
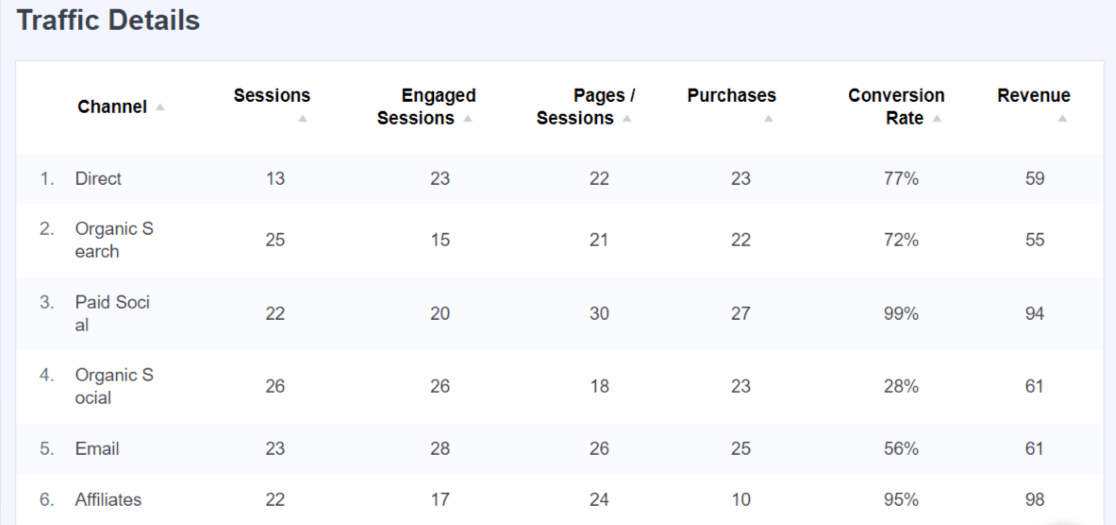
In the table, you’ll see how many purchases you’re getting from each channel, plus how engaged those users are with your site. This is awesome information to use in deciding where to use your time and marketing budget.
Campaigns
Do you tag URLs in your emails, social media posts, and more with UTM parameters? If so, you’ll definitely want to keep an eye on your Campaigns report. Find it at Insights » Reports » Traffic » Campaigns:
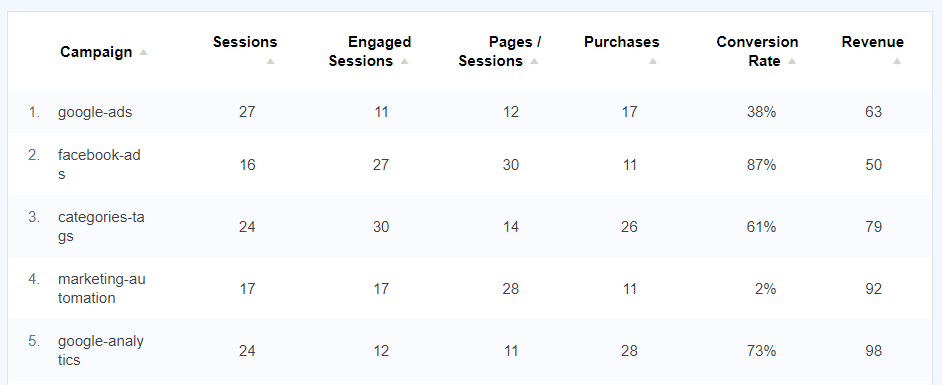
This report is especially helpful if you run campaigns across multiple platforms like email, social media, and ads. Quickly and easily see your campaign results so you know what to tweak.
Landing Page Details
How is your content performing? What’s your audience interested in learning more about? Use the Landing Page Details report to see what content is drawing in visitors, what content is leading to conversions, and what content could use some updates to make it work a little better for you.
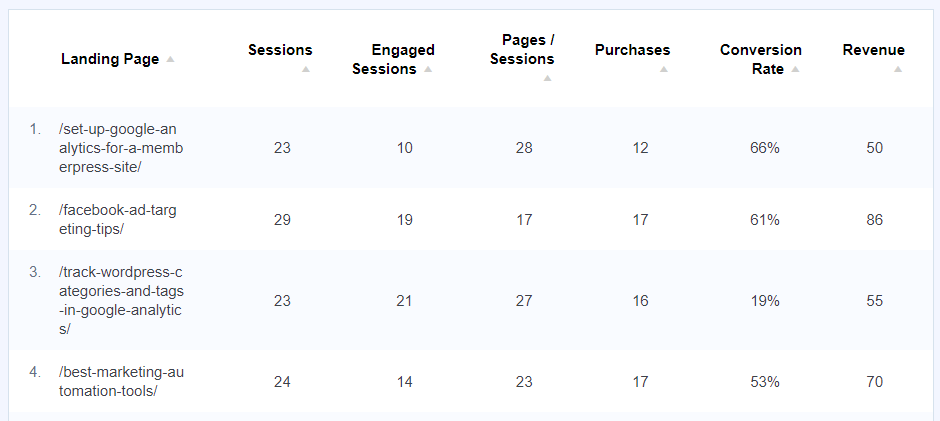
Other reports you’ll find super helpful are Forms, Social Media, Site Speed, Media (Videos), and more.
That’s it!
We hope you enjoyed our article on connecting your WishList Member website with Google Analytics. You might also want to check out:
9 Best ChatGPT WordPress Plugins
10+ Best No Code Tools for WordPress to Install Now
WordPress Widgets Beginner’s Guide
Finally, don’t forget to follow us on X, Facebook and YouTube for more helpful Google Analytics tips.
