Do you use Restrict Content Pro on your membership website?
Connecting your membership site with Google Analytics will give you the insightful data that you need in order to make decisions that’ll increase signups and grow your business.
To learn how to set up Google Analytics tracking for Restrict Content Pro, read on.
Restrict Content Pro & Google Analytics eCommerce
When you have new members sign up, do you know how they found your website? Did they visit a few times before signing up? What’s your signup conversion rate?
These are all questions that you can’t answer with the reports inside of Restrict Content Pro, but you can answer with Google Analytics eCommerce tracking.
Follow these steps to set up ecommerce tracking on your Restrict Content Pro website.
eCommerce Tracking Setup in 4 Easy Steps
To set up enhanced ecommerce tracking in WordPress for Restrict Content Pro the easy way, we’re going to use the MonsterInsights plugin.
MonsterInsights is the best Google Analytics plugin for WordPress, and it integrates directly with Restrict Content Pro.
With MonsterInsights, setting up eCommerce tracking is simple, requiring no code editing.
Get Started with MonsterInsights Today!
Now, let’s dive into the 4 steps to set up tracking!
Step 1: Install and Activate MonsterInsights
First, you’ll need to purchase MonsterInsights at the Pro level if you haven’t done so already.
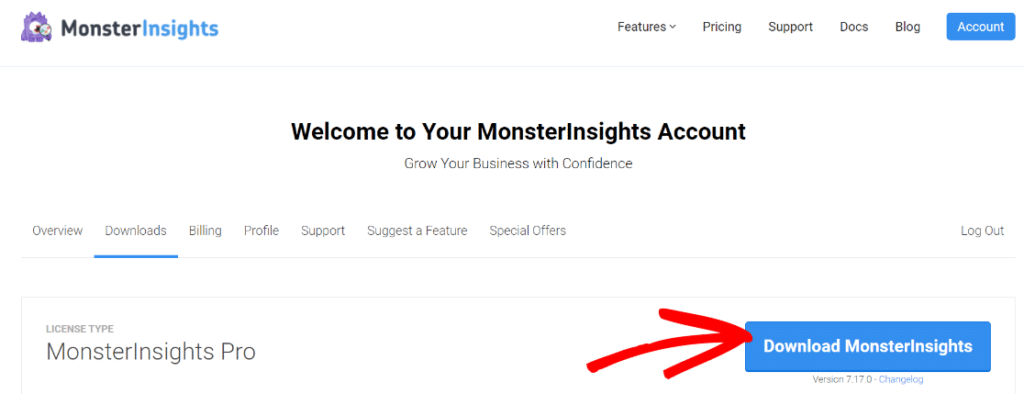
Then, download the ZIP files from your account area under the Downloads tab.
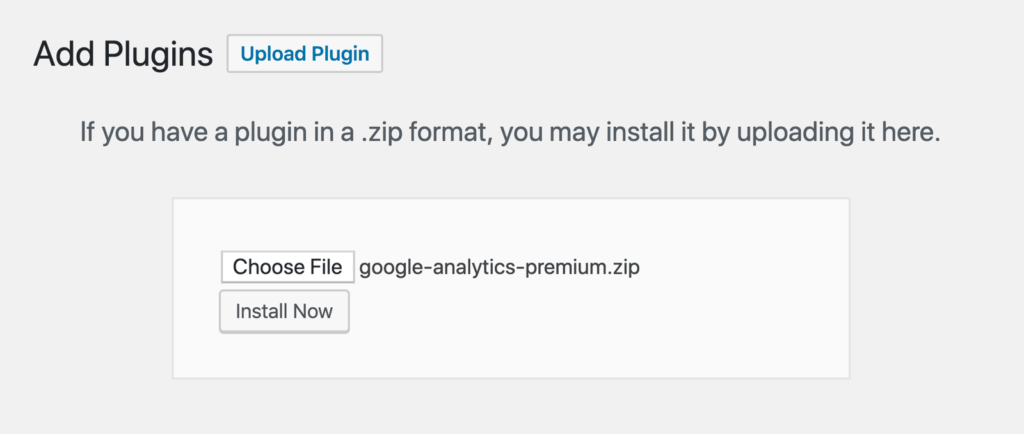
Next, upload the plugin to your WordPress website. You can do that by going to Plugins » Add New » Upload Plugins and clicking the Install Now button.
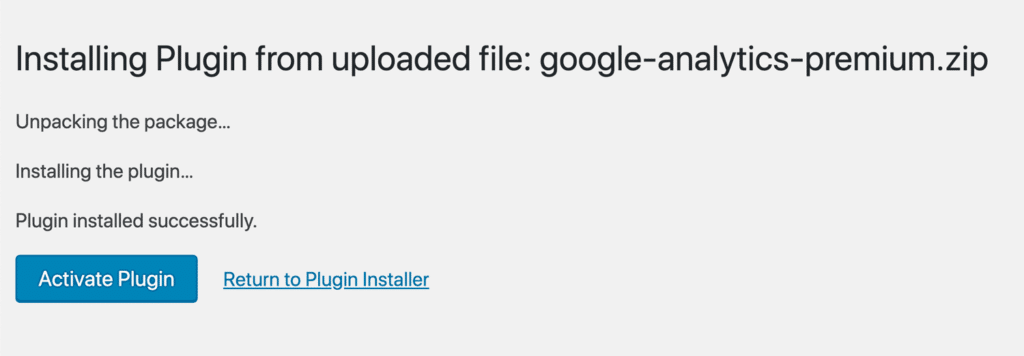
After that, click the Activate Plugin button.
Now, you’ll need to connect Google Analytics to your WordPress website. With MonsterInsights, there’s no code editing necessary! Just allow access to connect the two together.
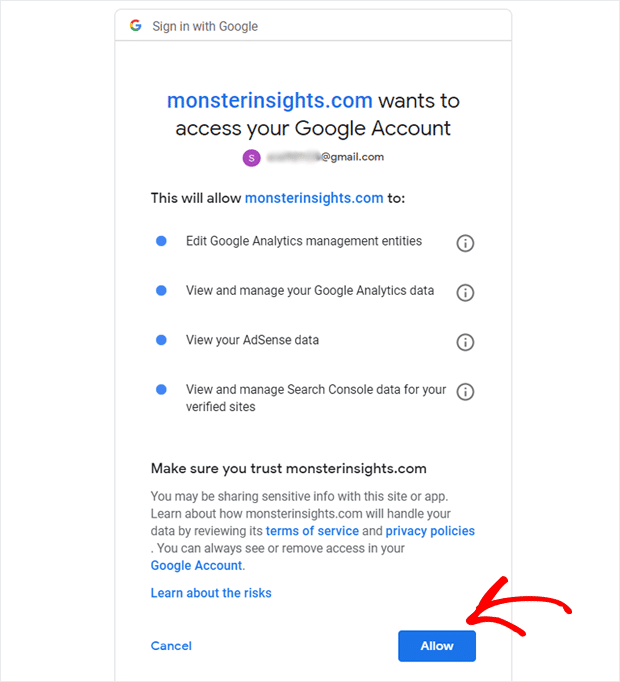
For help getting started, you can read our step-by-step guide on how to properly set up Google Analytics and MonsterInsights.
Step 2: Install the eCommerce Addon
Head to Insights » Addons and click Install under the MonsterInsights eCommerce addon.
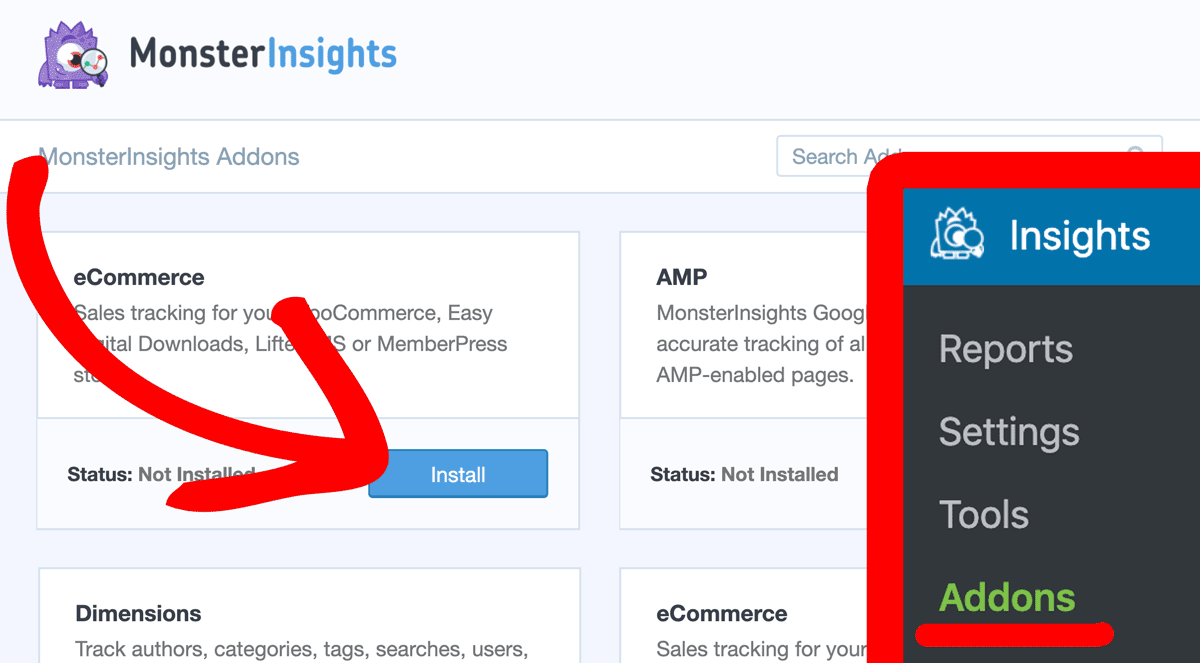
The addon will automatically activate once you’ve installed it.
MonsterInsights will find Restrict Content Pro and connect automatically. You’ll see that switch toggle into the on position in your eCommerce settings:
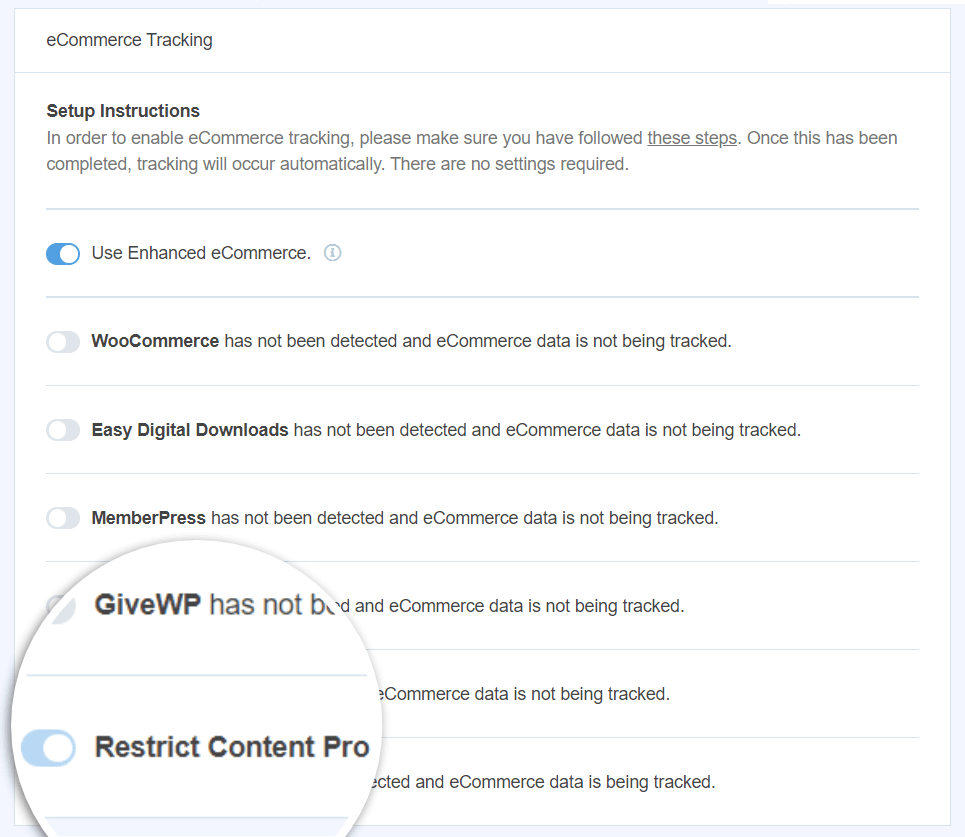
That’s it! You now have reports enabled and you’ll start seeing data from Google Analytics and Restrict Content Pro in your MonsterInsights reporting dashboard.
How to View Restrict Content Pro Reports in WordPress
Alright, so you have reporting set up. But how do you read those new reports?
Let’s take a quick look at how your MonsterInsights data will appear with Restrict Content Pro connected.
First, you’ll have the eCommerce overview:

- Conversion Rate = Visitors who signed up divided by total visitors
- Transactions = Paid Signups
- Revenue = Revenue from signups
- Avg. Order Value = Average paid per signup
Next, you’ll see a Top Products report:
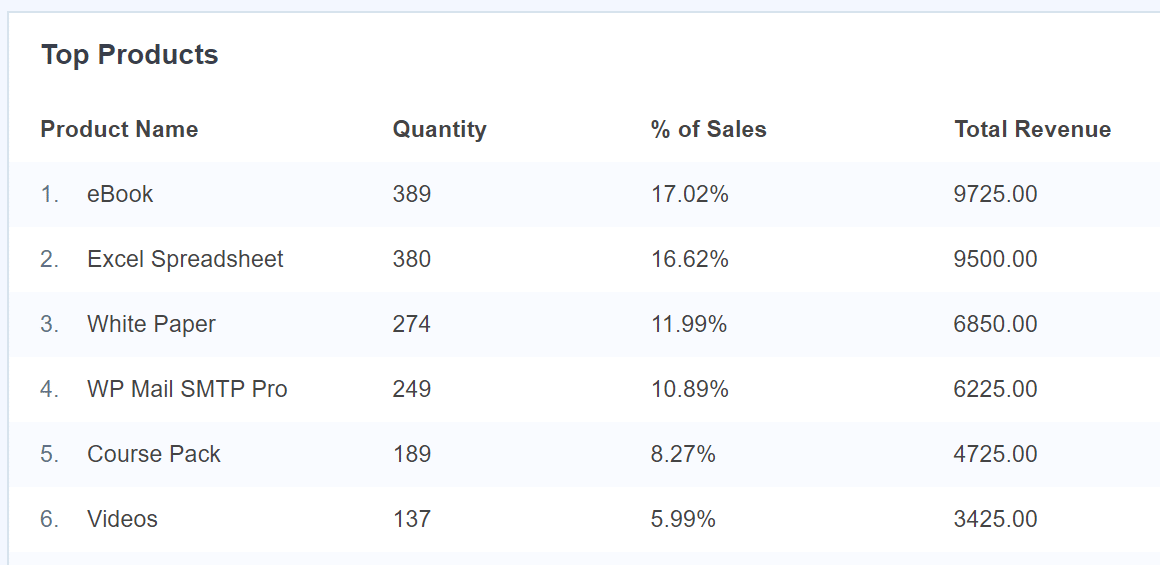
Each “product” for you is a membership page.
After that, you’ll see Top Conversion Sources:
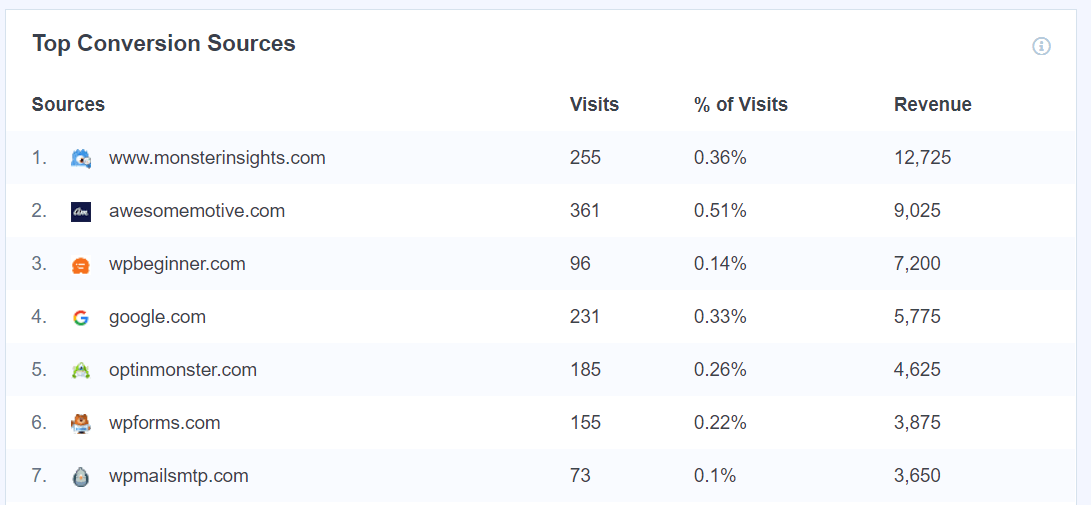
If visitors who purchased a membership were referred to your site by clicking through from another site, you’ll see those here.
Finally, you’ll be able to see total add and removed from cart events, percentage of new customers, and percentage of abandoned checkouts.

If you want to see more detail, you can click the View Report button at the end of the products and conversion sources reports.
That’s it for your ecommerce reports!
Restrict Content Pro User Journey Reports
In addition to eCommerce reports, the MonsterInsights User Journey addon will also add a user journey report to your Restrict Content Pro orders pages.
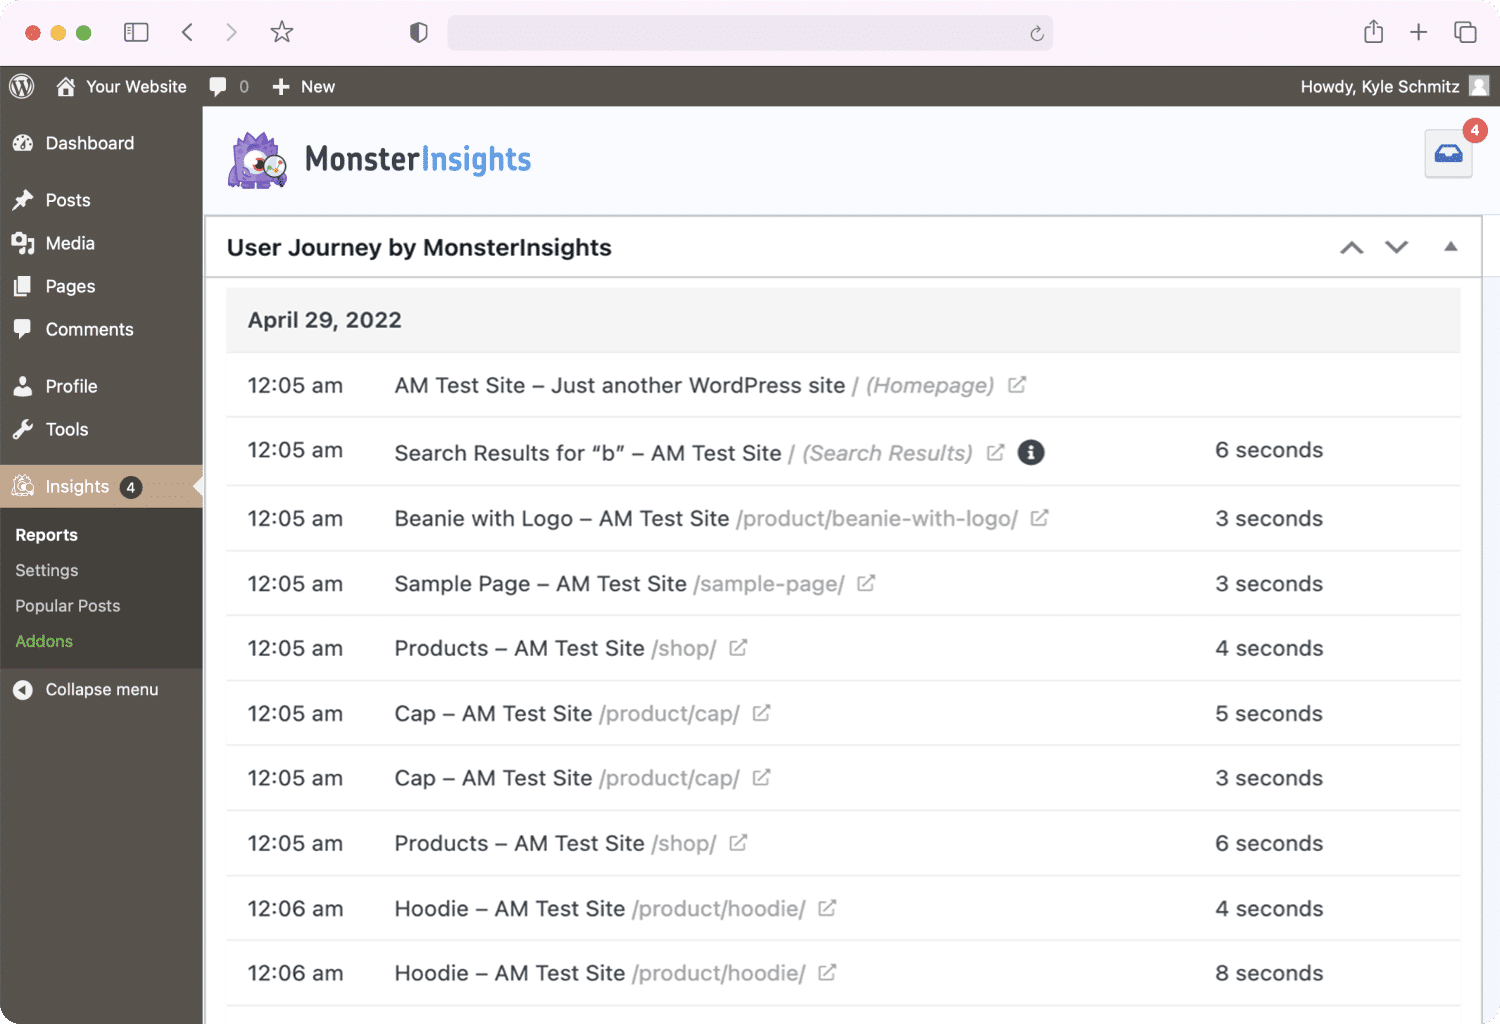
To learn more about the User Journey addon, check out eCommerce Customer Journey Analytics: WordPress Guide.
Get Started with MonsterInsights Now
For information about more of the reports you get with MonsterInsights, read Your Ultimate Guide to MonsterInsights Dashboard Reports.
And don’t forget to follow us on Twitter, Facebook and YouTube for more helpful reviews, tutorials, and Google Analytics tips.
