Want to understand the shopping behavior of your logged in customers with WooCommerce customer tracking?
Tracking individual WooCommerce customers by User ID can help you find out what each customer is doing on your site. See what pages they visit, what products they view, and how many purchases they make.
In this article, we’ll show you how to set up individual WooCommerce customer tracking.
Why Set Up Individual WooCommerce Customer Tracking?
If you require customers to log in to your WooCommerce site to purchase products, you need to enable customer tracking on your site.
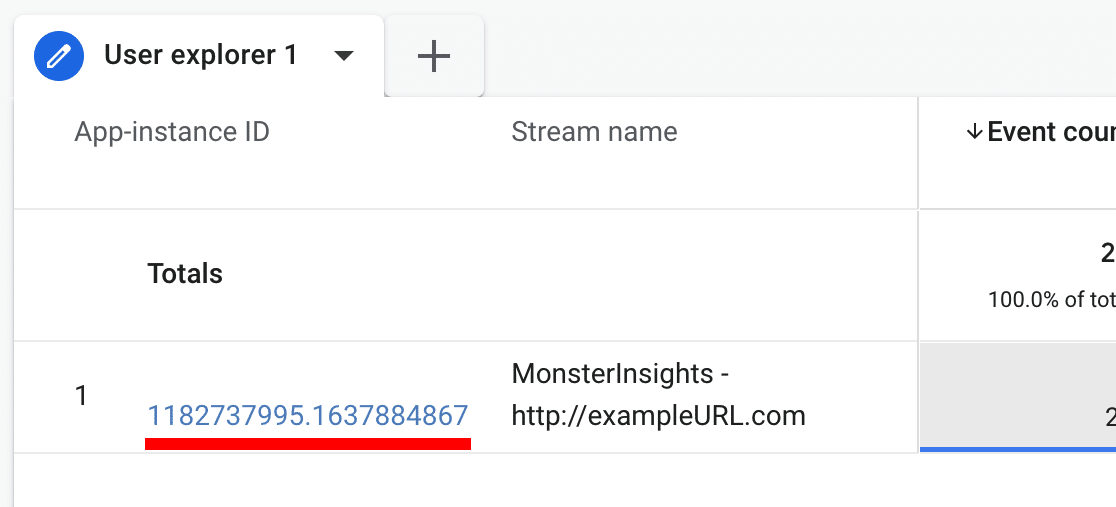
By default, Google Analytics identifies every customer of your WooCommerce store by assigning them a unique ID known as an app instance ID. The downside to this approach is that app instance ID doesn’t allow you to accurately track individual customers since it represents the unique device from which users shop on your site.
Some of the benefits of individual WooCommerce customer tracking are:
Get Better Conversion Tracking
With out-of-the-box Google Analytics, if a customer finds your website on their mobile device but comes back later on a laptop to purchase, they’ll be counted as 2 different people and you won’t be able to attribute the mobile visit to their conversion.
However, if they’re signed in and you have User ID tracking set up, you’ll be able to track that as one user across browsers, leading to much more accurate conversion tracking.
Provide Better Support
Have a customer that’s having problems with your website or the checkout process? Find them in your analytics to check out what pages they visited, what device they’re using, where they’re located, and more.
Tutorial: Enable WooCommerce Customer Tracking
Using MonsterInsights is the easiest way to enable individual customer tracking on your WooCommerce store.
MonsterInsights is the best Google Analytics plugin for WordPress. It allows you to easily connect your WordPress site with Google Analytics so you can view all the data that matters most right in your WordPress dashboard.
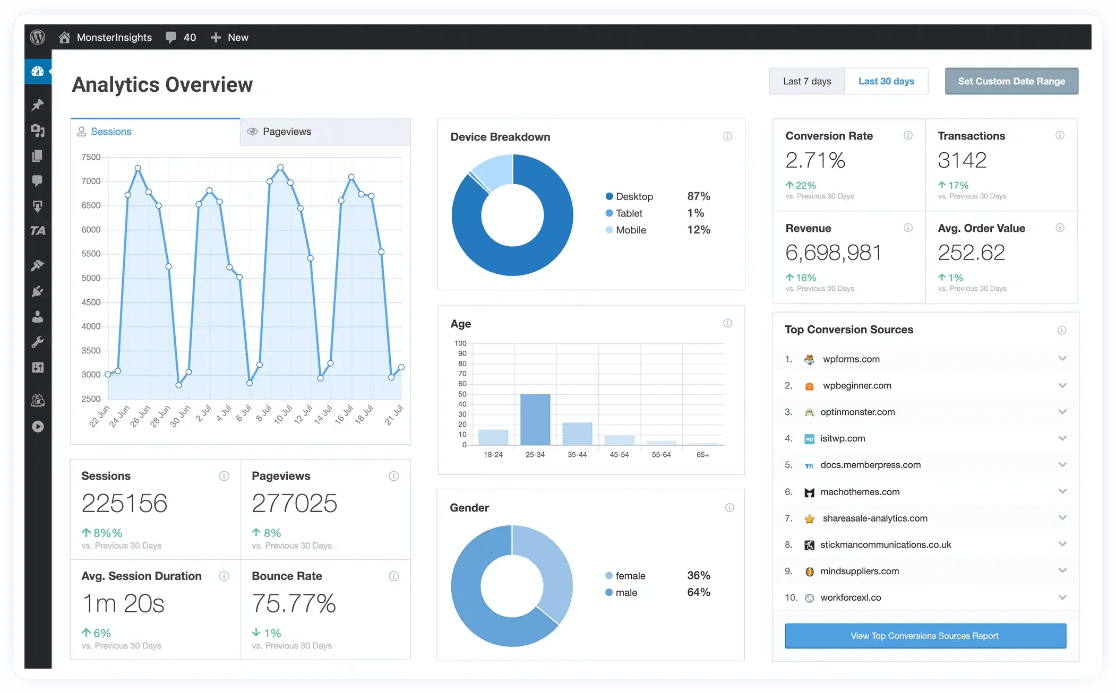
Plus, with the click of a button, you can set up sophisticated tracking features such as event tracking, form tracking, custom dimension tracking, video tracking, outbound link tracking, and more. With WooCommerce, you’ll even get user journey tracking!
For instance, if a shopper engages with your store using two different devices, it will be counted as two different users, not a single user.
To better track logged in users, MonsterInsights uses the unique WordPress user ID assigned to each individual user instead of Client ID.
Finding the WordPress User ID of Each Individual User
To find the WordPress user id of your users, just go to your WordPress dashboard and click on Users » All Users.
Then, hover your cursor over the user you want to find the ID for. You’ll see a URL appear at the bottom of your browser. In the middle of the URL, it will say “user_id=”. The number after that is the user’s ID number.
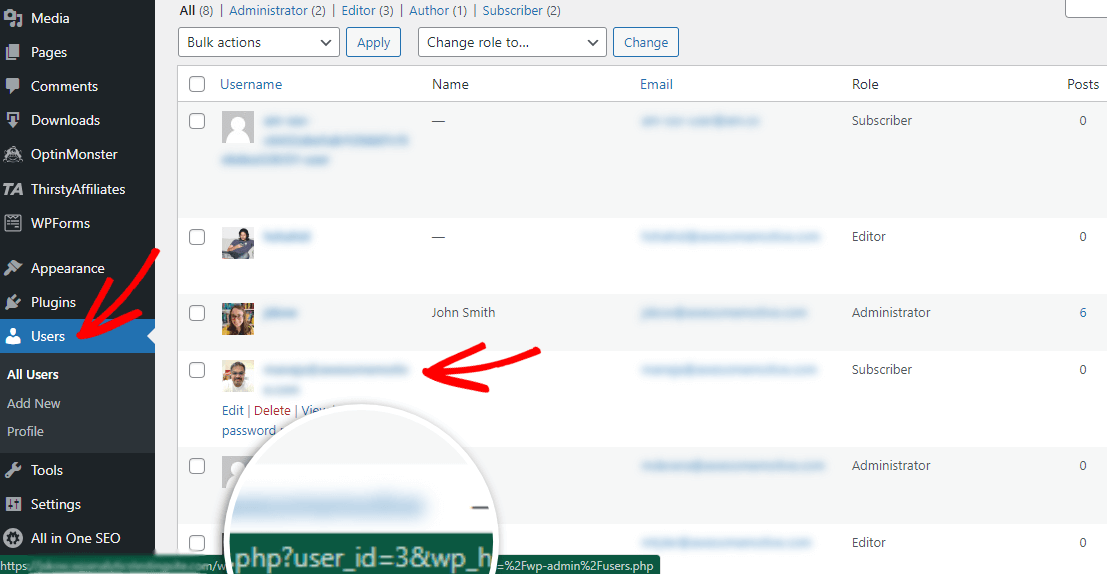
You can click the Edit link under the username to make sure. You’ll see the user ID in the web address on the edit page.

MonsterInsights replaces the anonymous app instance ID with this WordPress user id with just a few clicks.
Now, let’s jump into the tutorial.
Step 1: Install MonsterInsights
If you haven’t installed MonsterInsights Pro yet, you’ll need to install it and authenticate it with your Google Analytics account.
To start, purchase MonsterInsights at the Pro license level. Then, download the ZIP files from your account area under the Downloads tab.
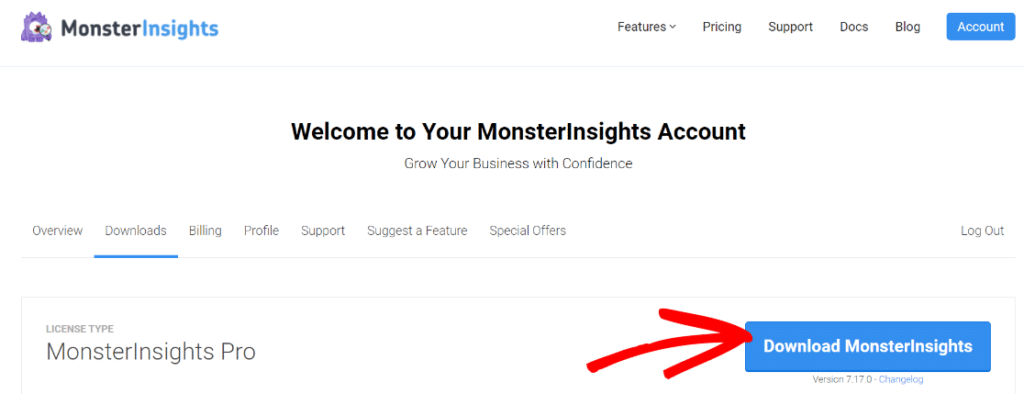
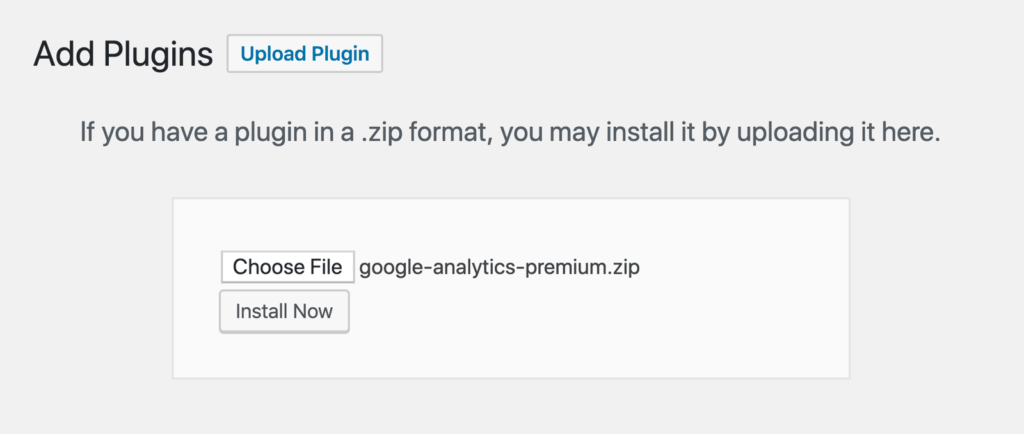
Next, upload the plugin to your WordPress website. You can do that by going to Plugins » Add New » Upload Plugins in your WordPress admin and clicking the Install Now button.
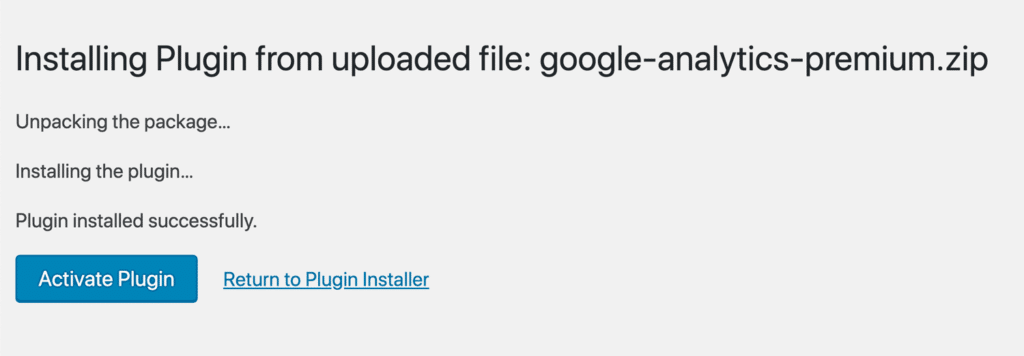
After that, click the Activate Plugin button.
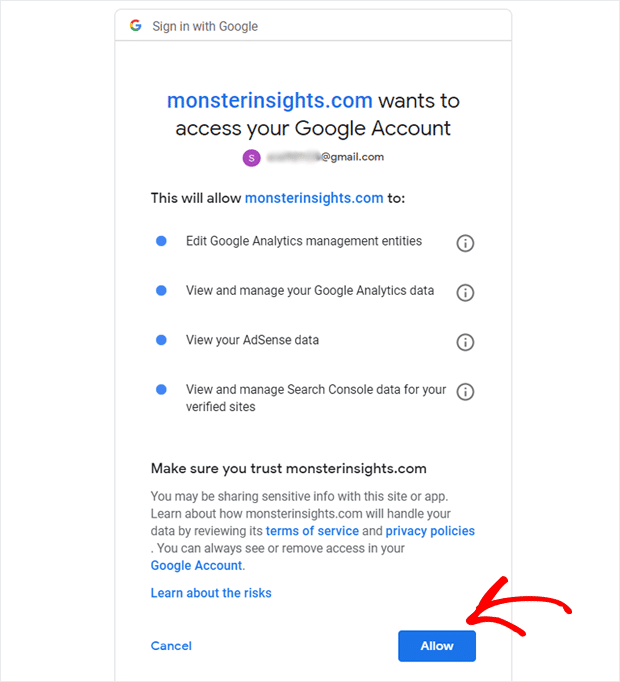
Now, you’ll need to connect Google Analytics to your WordPress website. Using MonsterInsights, it’s really easy! Just follow the steps in the setup wizard and the plugin will add Google Analytics to your site without the need to edit code.
For help getting started and a walkthrough of the onboarding wizard, check out our step-by-step guide on how to properly set up Google Analytics and MonsterInsights.
Step 2: Install the eCommerce Addon
To set up eCommerce tracking for your WooCommerce store, you’ll need the eCommerce addon. To add it, head to Insights » Addons and click Install in the eCommerce addon box.
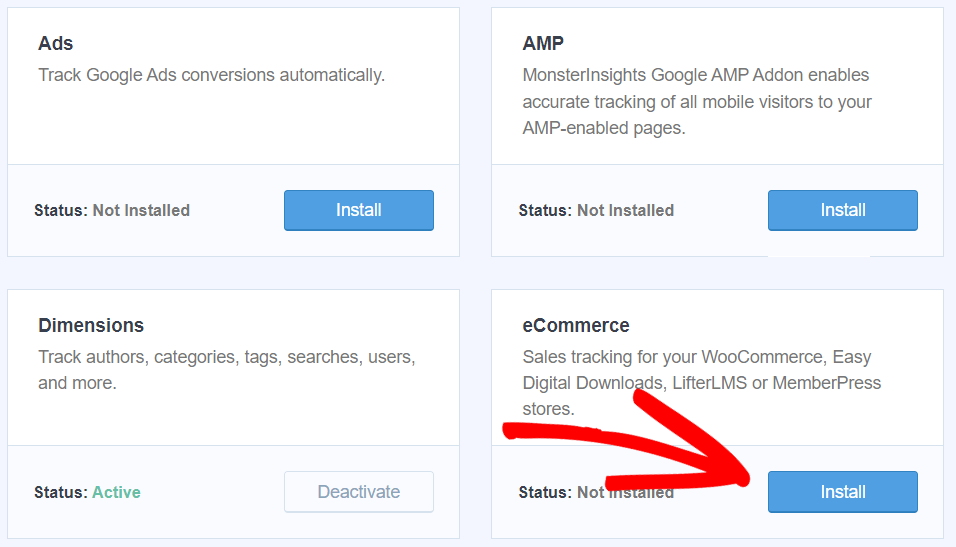
That’s all you have to do to set up eCommerce tracking!
Step 3: Enable User ID Tracking
Now, go to Insights » Settings in your WordPress dashboard. Click on the eCommerce tab at the top of the page and scroll down until you see the User ID Tracking box. Click the checkbox to enable WooCommerce customer tracking.
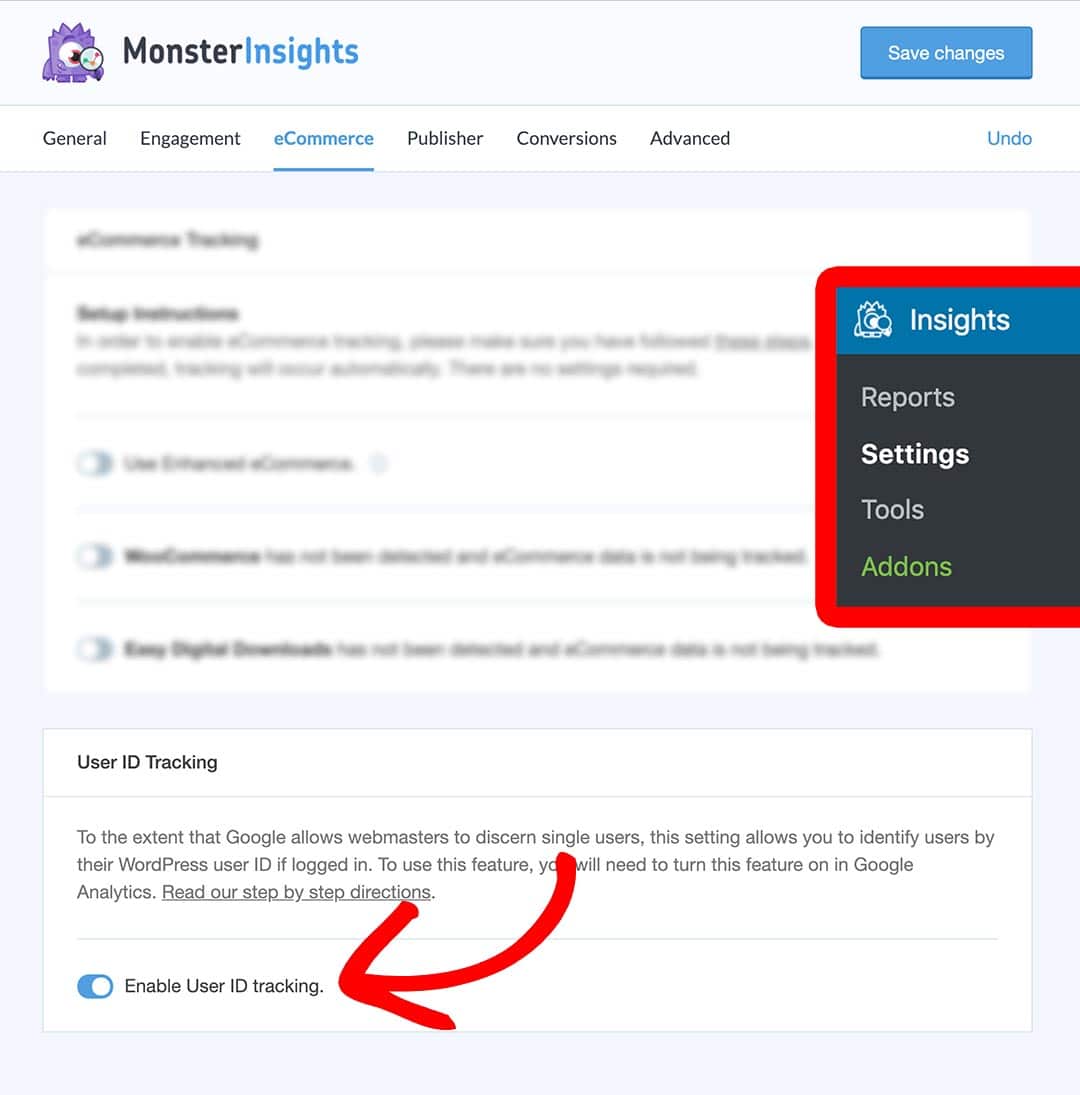
That’s it, user ID tracking is all set up!
How to Find the WooCommerce Customer Tracking Report in GA4
In Google Analytics 4, we’ll find the user ID report by creating a pretty easy custom report.
Just head to the Explore tab, then scroll over until you see the User explorer template. Click it.

Now, you’ll see your user explorer report!
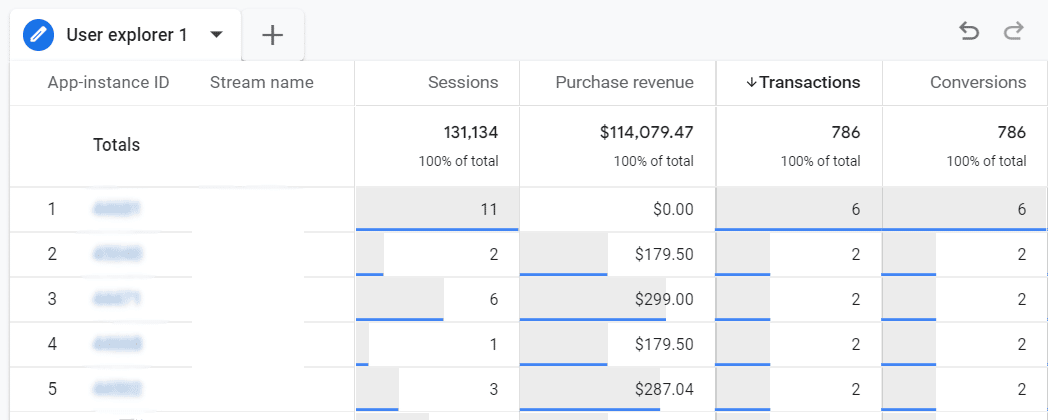
Click on a user in the App-instance ID column to see more information about that user:
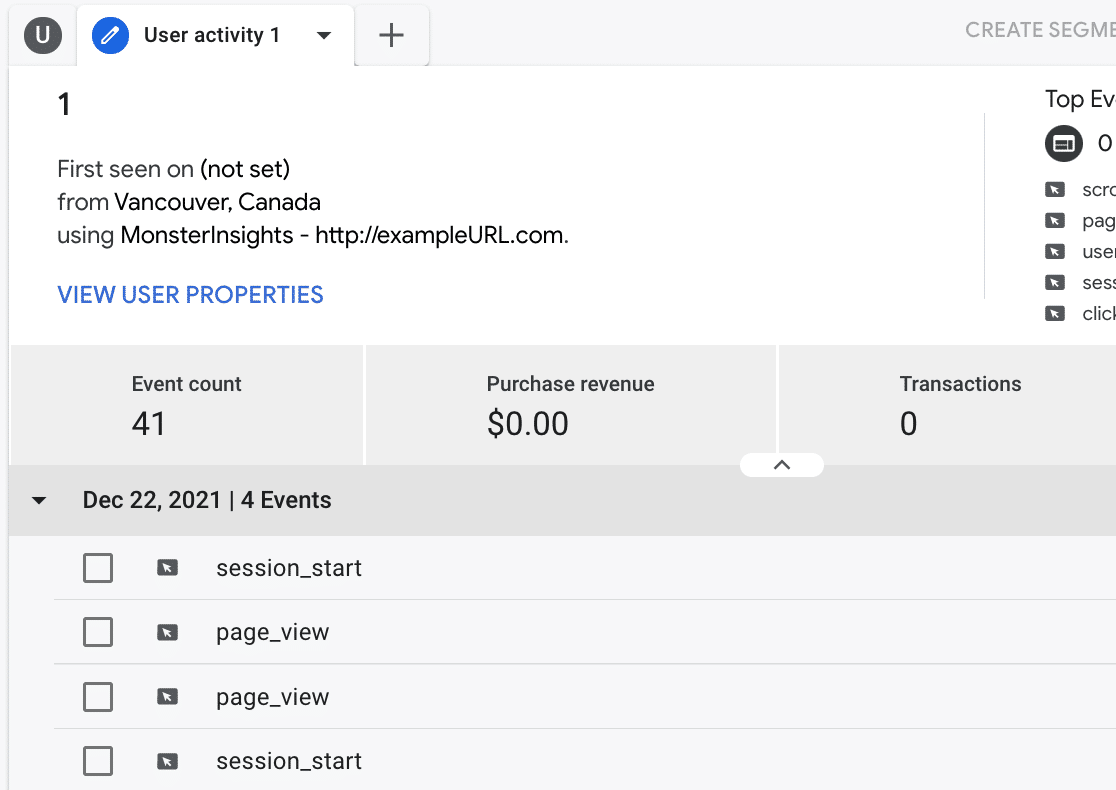
Here, you’ll see where your user is from geographically, their purchase revenue, events, and more. Click on each event to see more details about it.
Compare Your Logged in Users vs. Guest Users
WooCommerce allows you to offer guest checkout on your store that enables your customers who are in a hurry to purchase products without having to register an account with your site.
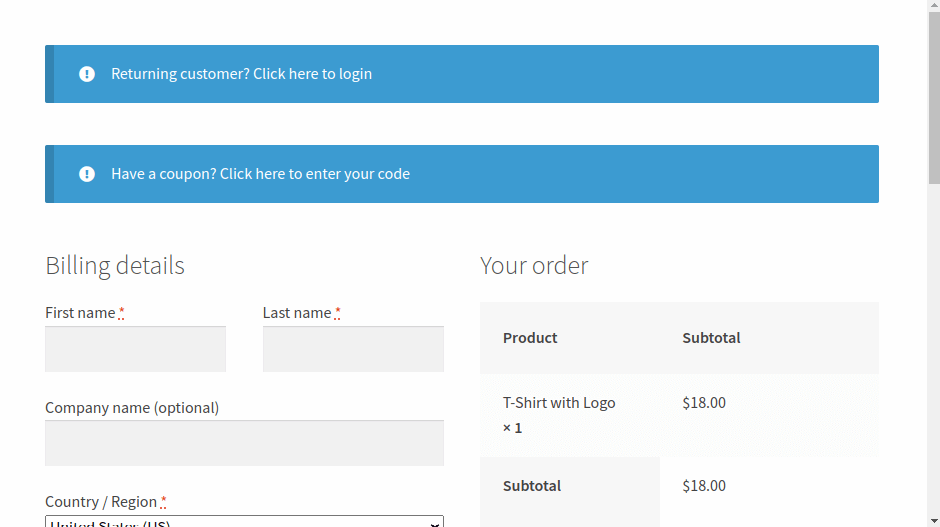
When you offer guest checkout on your store, you might want to compare the performance of both your registered customers versus guest customers. Understanding the performance of your guest users allows you to optimize your site for the general audience based on what resonates best with them.
MonsterInsights allows you to do this pretty easily!. To compare between them, you need to enable Logged in custom dimensions tracking on your site.
Here’s how to set up logged in WooCommerce customer tracking.
Step 1: Install the MonsterInsights Custom Dimensions Addon
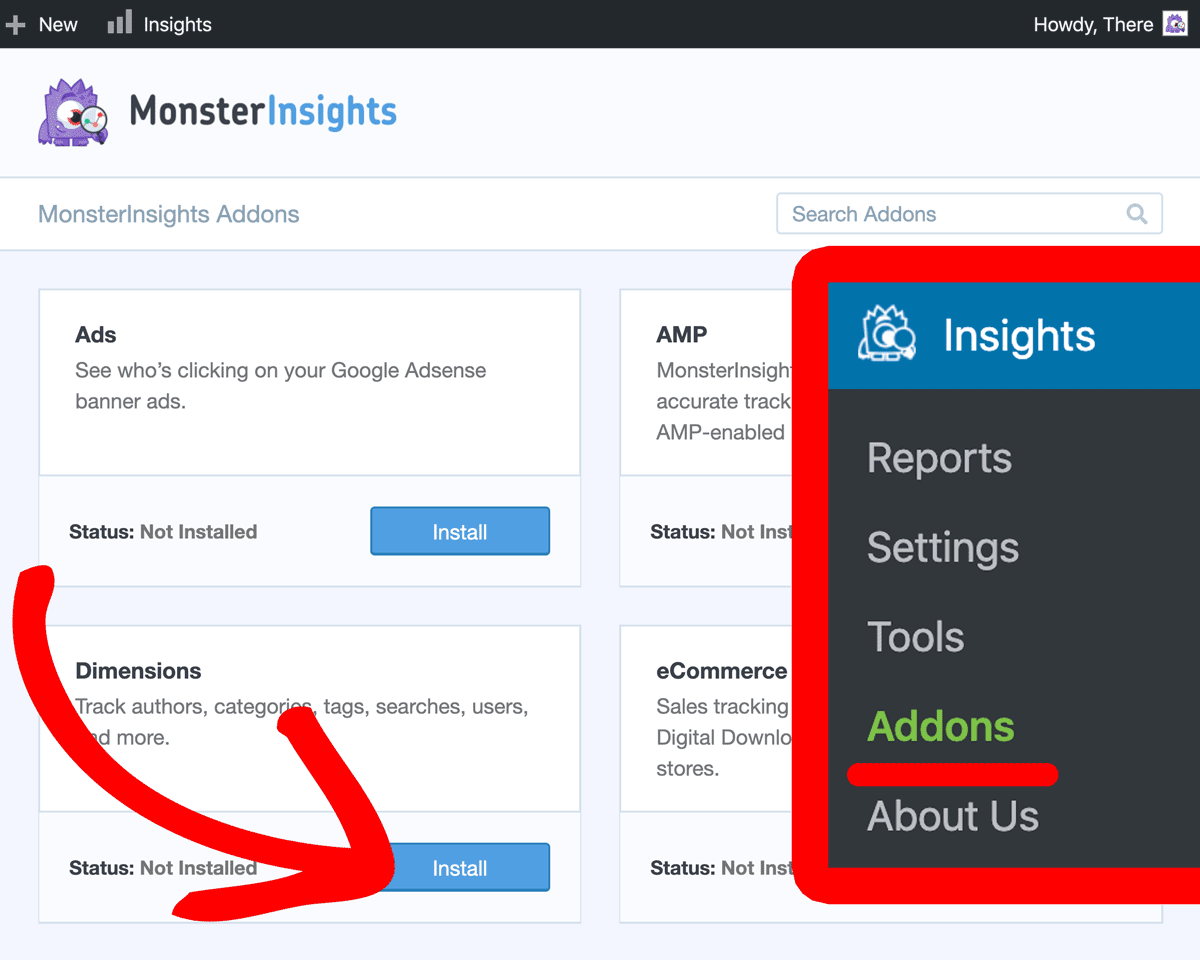
To install the addon, visit the Insights » Addons page in your WordPress dashboard. Then, click Install under the MonsterInsights Custom Dimensions addon.
Step 2: Add Custom Dimensions in MonsterInsights
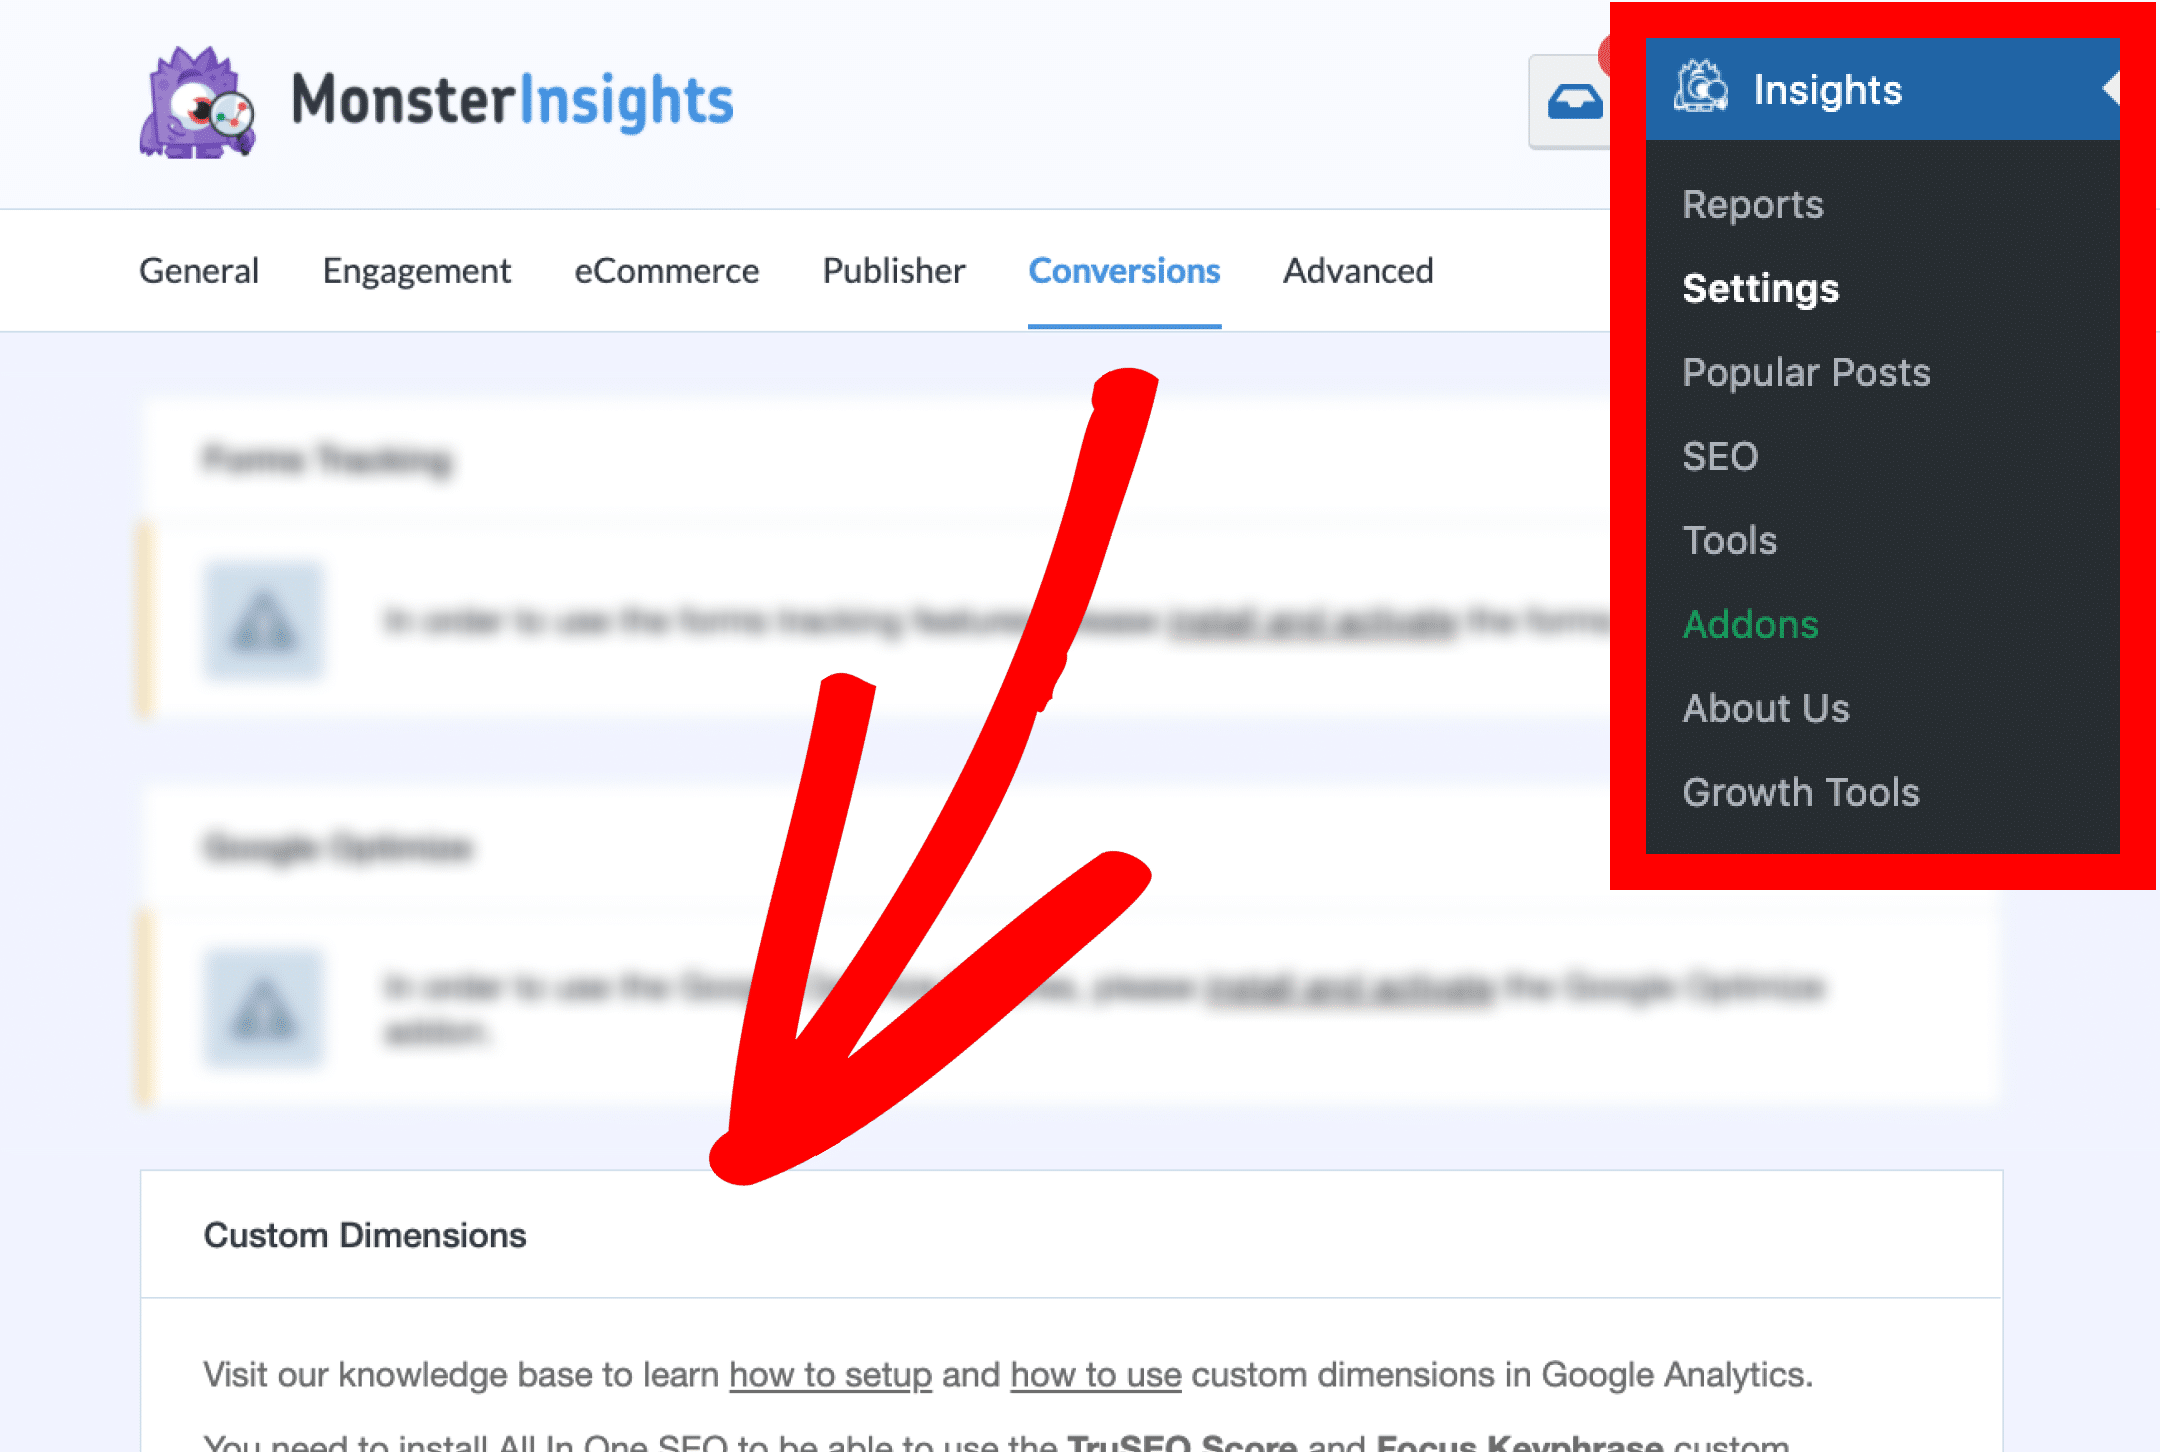
Navigate to Insights » Settings. Then, click on the Conversions tab and find the Custom Dimensions settings:
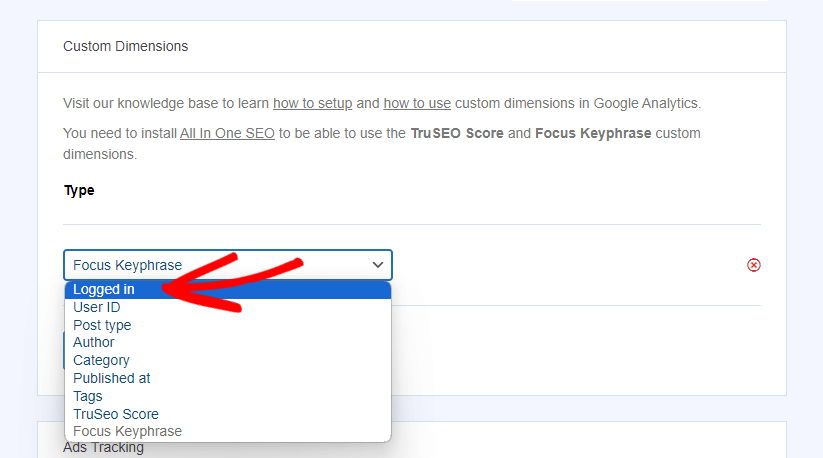
Now, click on Add new custom dimension and select Logged in from the dropdown menu.
Step 3: View the Logged in Sessions Report
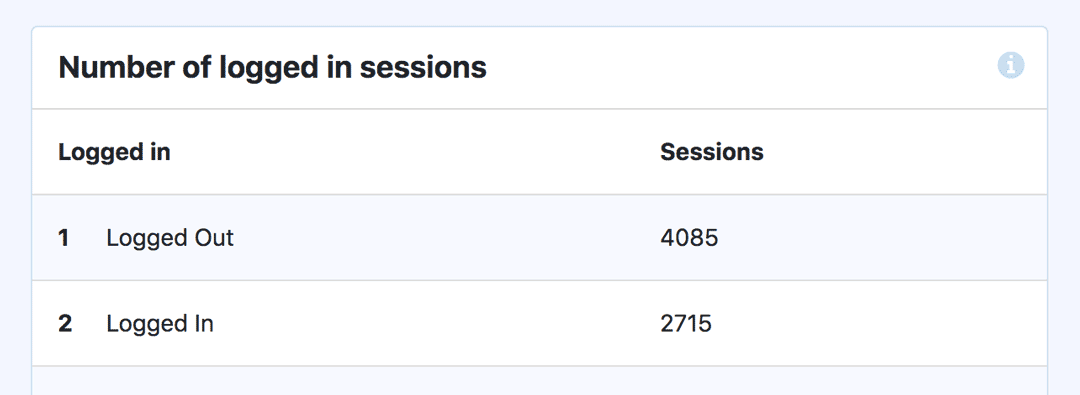
Now, you’ll be able to find a report of how many logged in users vs. guest users you had right in your WordPress dashboard. Just head to Reports » Conversions and find the Number of logged in sessions report:
How to Compare Logged in Users With Guest Users in Google Analytics
To get more information on logged in users vs guest users, you’ll need to create a custom report in your Google Analytics account.
You can add the Logged in dimension to virtually any custom report. Simply drag it to the Filters box and select exactly matches true to see logged in traffic, or false to see logged out traffic.
That’s it!
We hope this guide helped you to learn how to set up individual WooCommerce customer tracking.
For the long-term success of your WooCommerce shop, you might want to read 11 WooCommerce SEO Tips to Increase Search Rankings Today. And check out our list of the best WooCommerce plugins to grow your traffic and sales.
Not using MonsterInsights yet? What are you waiting for?
And don’t forget to follow us on Twitter, Facebook and YouTube for more helpful Google Analytics tips.
