Do you want to know how is your LifterLMS website performing or which courses convert the best?
By setting up tracking in Google Analytics, you can get insights about how people behave on your website and how much revenue you’re making.
In this article, we’ll guide on how to set up advanced LifterLMS reporting and analytics. Let’s kick things off…
What is LifterLMS?
If you’ve never heard of LifterLMS, then it’s the best learning management system plugin for WordPress. You can use it to create online courses on your website.
The plugin is very easy to use and you can create all types of courses using it’s drag and drop builder. It allows you to add videos, text, audio, quizzes, assignments, and much more without any hassle.
Besides that, you can track course progress, the number of enrolments, and award certificates to participants. It’s the best WordPress plugin to monetize your website.
So, why is it important to track LifterLMS in Google Analytics?
Benefits of Tracking LifterLMS in Analytics
By setting up LifterLMS tracking and getting reports, you can get insights to grow your website. Here are some benefits you might want to look at:
- Popular Courses – You can identify which courses people like and get the most conversions, so you can offer similar courses and make more money
- Conversion Sources – Tracking helps you identify where your participants are coming from and which channels they’re using to visit your site, so you can focus on promoting your courses more on those platforms
- Shopping Behavior – With LifterLMS reporting, you can get detailed insights about your user’s behavior, what pages they view, and which courses they sign up, so you can optimize your site’s conversion funnel
With that, let’s look at how to set up LifterLMS reporting in Google Analytics.
How to Set Up LifterLMS Tracking in WordPress
Although LifterLMS offers its own built-in reporting, it doesn’t give you insights about your site’s performance. It shows you stuff like how many students are enrolled, course progress, achievements, certificates, assignments completed, and more.
So, if you want to understand how your online courses are converting, you’ll need MonsterInsights. It’s the best WordPress Google Analytics plugin.
Using MonsterInsights eCommerce addon, you can automatically track your LifterLMS performance. And get detailed reports inside your WordPress dashboard.
Not only that, but you can easily set up advanced tracking with just a click of a button using MonsterInsights. For instance, you can track file downloads, set up custom dimensions, and make your site GDPR and CCPA compliant.
Now, before we start with the tutorial, make sure you’ve installed MonsterInsights plugin and connected Google Analytics with your WordPress website.
To get started, just follow these steps…
Step 1: Install MonsterInsights eCommerce Addon
The first step for setting up LifterLMS tracking is to install and activate MonsterInsights eCommerce addon.
You’ll need MonsterInsights Pro or higher plan to access the addon.
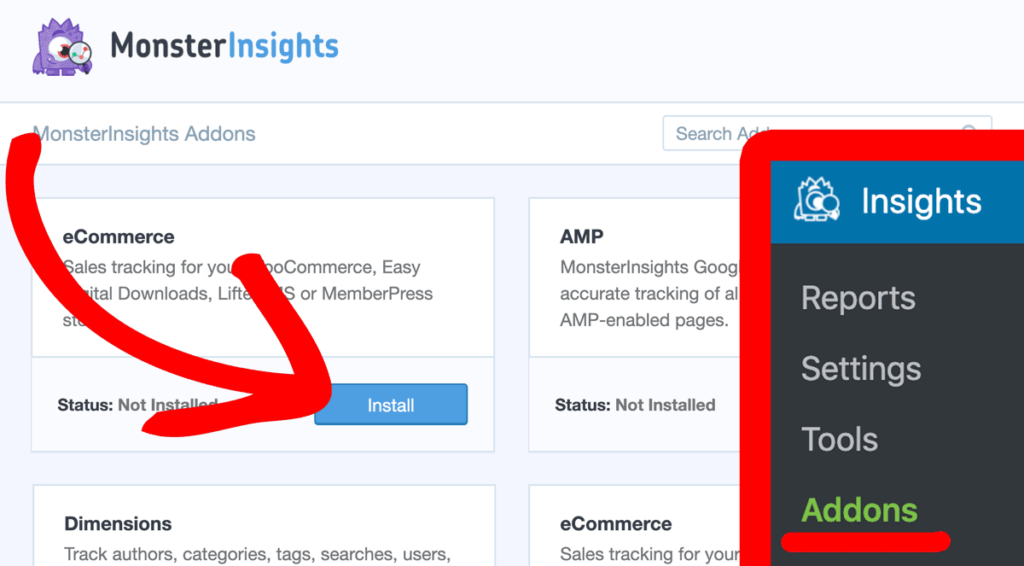
Then, go to your WordPress dashboard and then go to Insights » Addons and lookup eCommerce. Now, click Install.
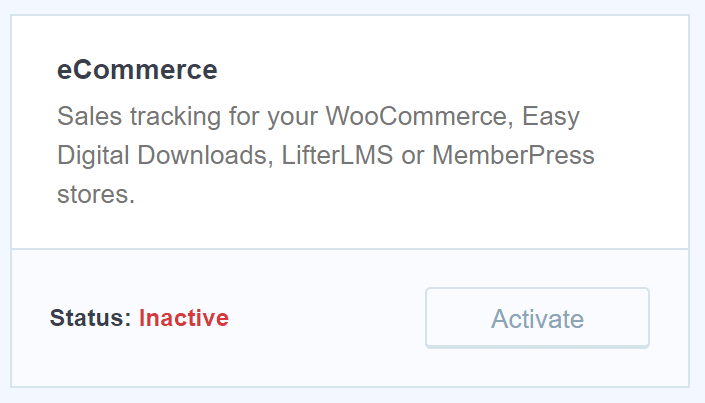
Wait for a few seconds and the addon will automatically Activate. You’ll see that the status of the addon changes from Inactive to Active.
And that’s it!
You’ve successfully set up Google Analytics eCommerce tracking for your LifterLMS store.
Now, how can you view its Analytics reports? Let’s find out…
How to View LifterLMS Reporting in WordPress
One of the advantages of using MonsterInsights is that you can view your LifterLMS performance without having to leave your website.
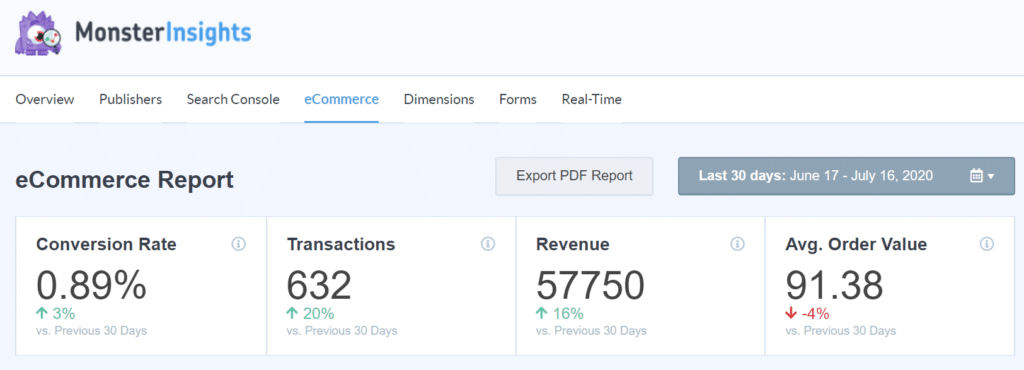
In your WordPress dashboard, simply go to Insights » Reports » eCommerce and view all the stats to make key business decisions. You can even download the report as a PDF file and share with it your team members or use it later.
Now, right off the bat, you can see an overview of your LMS site’s performance. You can see the conversion rate, number of transactions, total revenue, and average order value of your LifterLMS website.
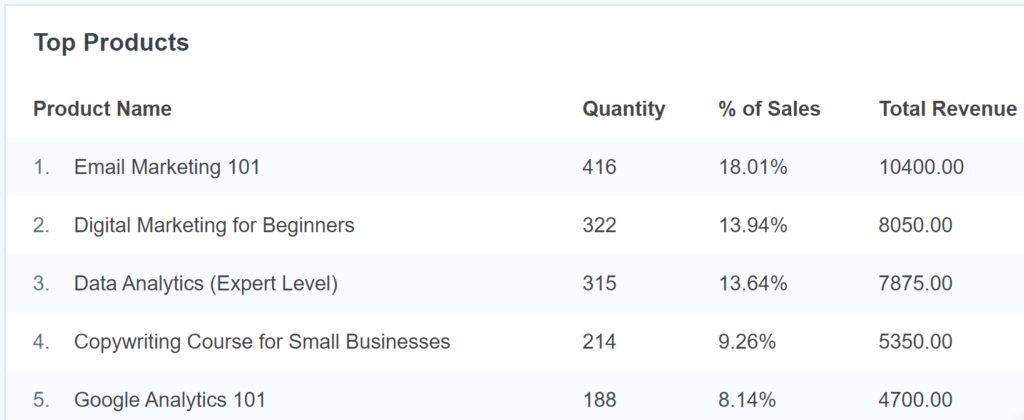
And if you scroll down, you can see which courses are converting best under the Top Products report.
For each course, you can see the quantity, which shows the number of signups or enrollments. Next, you can view their contribution to total sales and total revenue made from them.
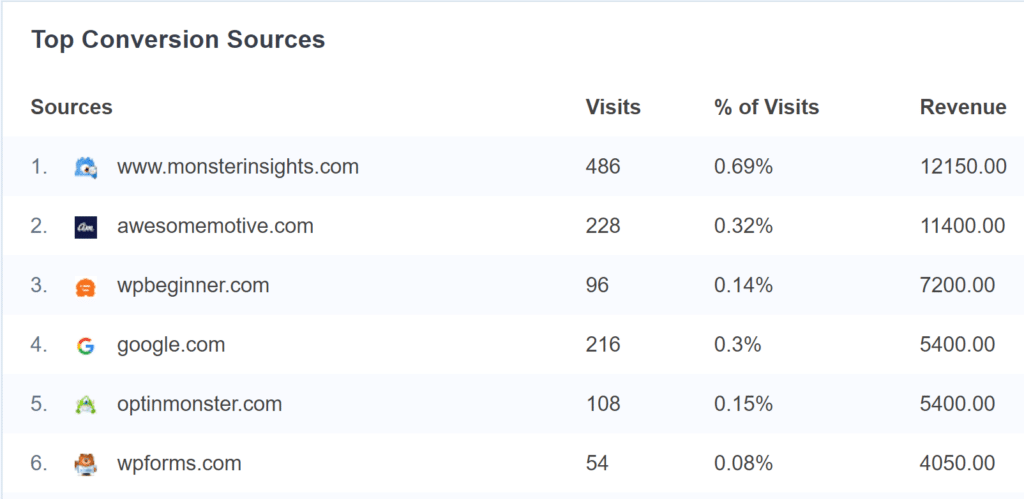
The next report you should view is the Top Conversion Sources. These are the website that is sending you highly converting traffic.
You can form partnerships with these sites and create personalized messages for visitors arriving from these sources to your website. For more tips and tricks, check out our post on how to drive traffic to your online store (15 proven ways).
With that, you’ve made it to the end of the tutorial!
You can now easily get insights about your LifterLMS website and see what’s working and what’s not. Then using the data, you can easily optimize your site and boost your revenue.
We hope you liked our post on how to set up advanced LifterLMS reporting and analytics. If you want, you can also go through our guide on WooCommerce conversion tracking.
And don’t forget to follow us on Twitter and Facebook for more Google Analytics tutorials.

