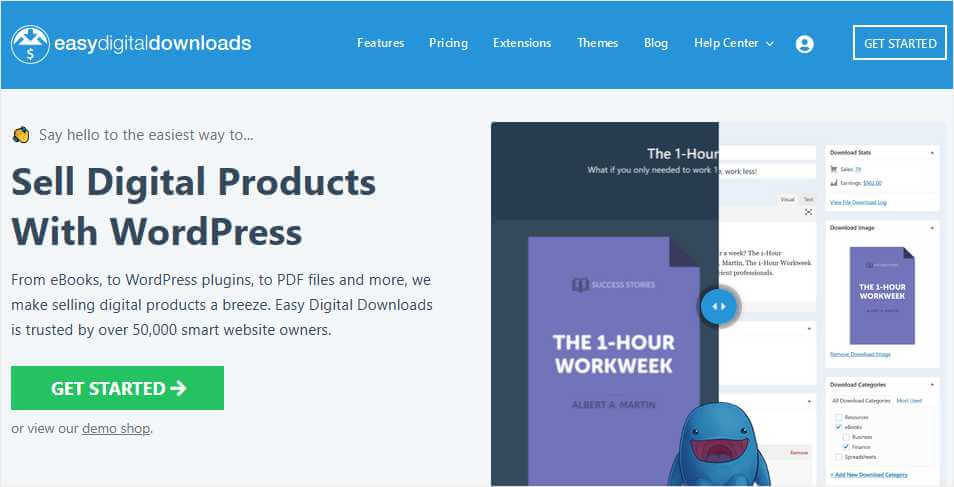
Are you interested in selling products that your customers can buy and download right away? Selling digital products is an extremely popular way to make money online. In this article, we’ll show you how to sell digital products online the easy way, with zero programming required.
What is a Digital Product?
A digital product is something you can purchase and download online. Digital products are virtual, not physical. For example, music, eBooks, and videos are frequently sold as digital products.
Selling digital products is a great way to earn money while minimizing expenses. When you create a virtual product like a book or software program, you can sell many copies of that product without much additional effort. You also avoid the costs and problems related to shipping, manufacturing, and managing inventory.
Here are some of the most profitable digital products you can sell online:
- eBooks
- Software and video games
- Music and audiobooks
- Digital art
- Videos and photographs
- Design templates
- WordPress themes
- Courses
The Best Way to Sell Digital Products Online
There are tons of website building tools and eCommerce platforms out there that claim to help you sell virtual products. However, the majority are truly designed for selling physical products. That adds a lot of extra stuff and expense that you don’t need.
You can also sell downloadable products on marketplace sites like Amazon or Envato, but you’ll pay them hefty fees for that privilege. And, you lose a lot of control over how your products are displayed and marketed.
So, how should you sell digital products? In most cases, the best way to sell digital downloads is on your own website. When you own your site, you’ll pay the lowest amount in commissions and fees, and you have complete control over how products are shown.
You can also focus your marketing efforts on driving traffic to your own site, instead of a marketplace where competitors are also selling their products.
Here’s an easy way to get started selling downloadable items on your own website.
Selling Digital Products Online in 4 Simple Steps
- Create a WordPress Website
- Install Easy Digital Downloads (EDD)
- Build your online store using EDD
- Start selling downloadable digital products
Let’s go through the process, one step at a time.
Step 1. Create a WordPress Website
First, we’re going to recommend that you build a website using WordPress. It’s the world’s most popular website builder and content management system.
Because of that popularity, the amount of tools and tutorials available for WordPress is unmatched. No matter what your future plans are for your business or personal website, WordPress has the flexibility to accommodate them.
Before you make a site with WordPress, you’ll need to take care of a couple other items first:
- Choose a web hosting company
- Pick a domain name for your site
Why Do I Need a Web Host?
A web hosting company owns and maintains the computers where your website files are stored. You want a web host that provides a high level of support, security, and regular maintenance in order to keep your site running 24 hours a day with no downtime.
Our favorite web host for hosting WordPress websites is Bluehost. They offer a number of hosting packages specifically tailored for WordPress. They make setting up WordPress sites almost effortless with a one-click installation process.
To sign up for a new hosting account, visit Bluehost’s sign-up page and click Get Started Now.

You’ll find a number of hosting plans for sale, all of which include instant WordPress installation.
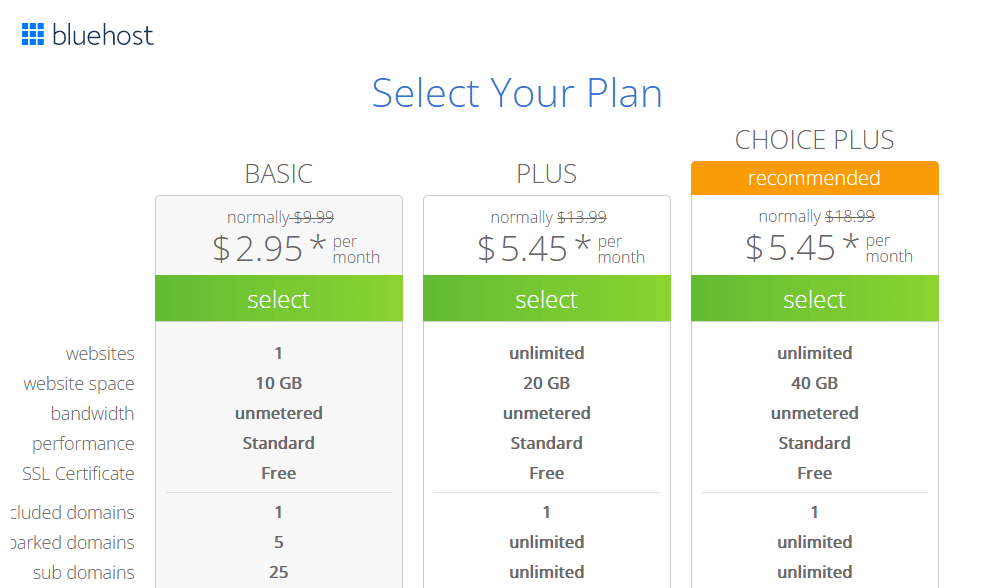
The Basic hosting package allows you to have one website. If you need to host more than a single site, select one of the upgraded plans.
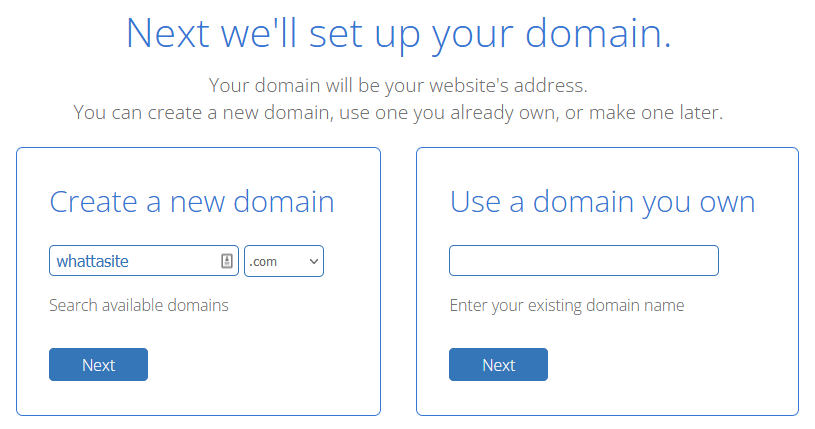
After you choose a hosting plan, Bluehost will offer you the opportunity to register a free domain name, if you don’t have one already.
How Do I Pick a Domain Name?
When you sign up with Bluehost or any other hosting company, one thing they ask for is your website’s domain name. Also called a website’s address or URL, it’s usually the name of your home page, like MonsterInsights.com.
Most businesses use their business name as their domain, if available. You can also choose some other word or phrase related to your business. If you need more help, check out this guide to choosing a domain name.
While .com is still the most common extension for businesses, there are many others. If it fits your website’s purpose, you can choose an address that ends in .org, .net, .co, .biz, or one of a dozen other options.
Enter a domain name that you’d like to use in Bluehost’s Create a new domain search box, then click Next to see if it’s already registered to someone else. If not, you’ll see this checkout page:
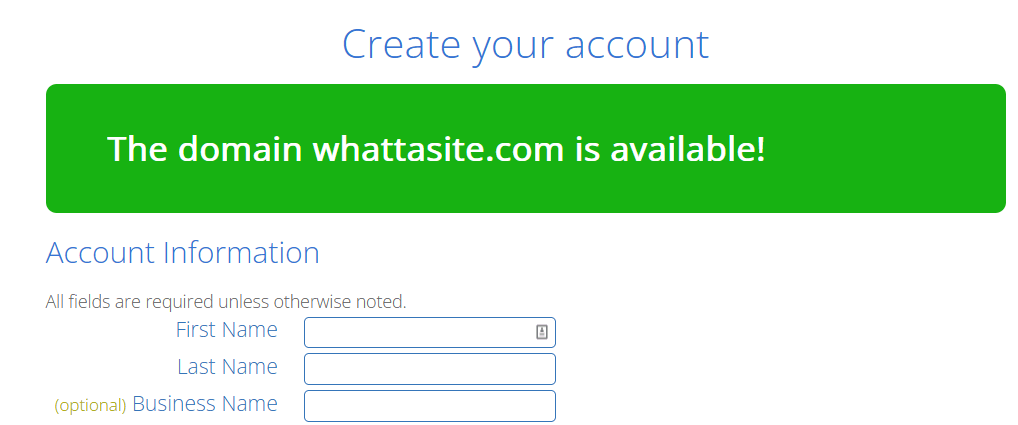
At this point, enter your contact and payment information and review your plan details. Submit your info and Bluehost immediately sets up your account. You’ll receive a confirmation email with login information that you’ll use in the next step.
Install WordPress on Your New Domain
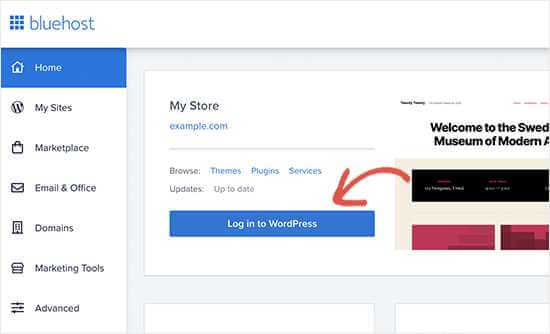
After you receive your Bluehost account details by email, log in to set up WordPress. From the Bluehost Home screen, click Log in to WordPress.
You’ll see the WordPress Dashboard, which looks something like this:
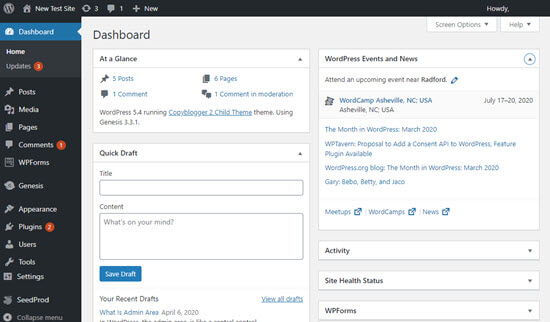
The left sidebar is where you’ll find most of WordPress’s menus for site settings, content editing, and plugin management. You don’t have to worry about too much of it for now.
Select a New Theme
When Bluehost installed WordPress on your site, it may have applied a default theme. WordPress has thousands of free and premium themes to choose from to change the look and feel of your website.
Now’s a good time to pick a theme that suits you and your business. You can always change themes later, if you need to. If you’re looking for an example of a good theme for selling digital products, here’s a list of great themes for selling eBooks.
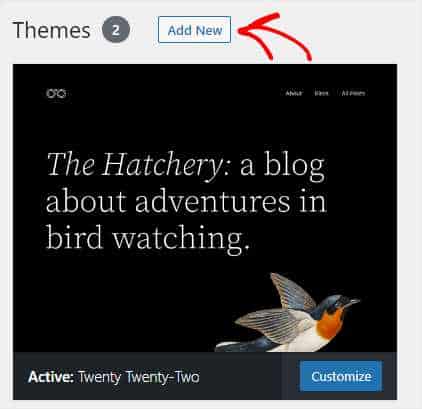
In the left sidebar of the WordPress dashboard, click on Appearance » Themes. The next screen shows you the currently active theme. To replace that theme, click on the Add New button.
Now, you can select a new theme from over 5,000 free options available within WordPress. To narrow down your choices, use the Feature Filter to find theme templates with the features you need.
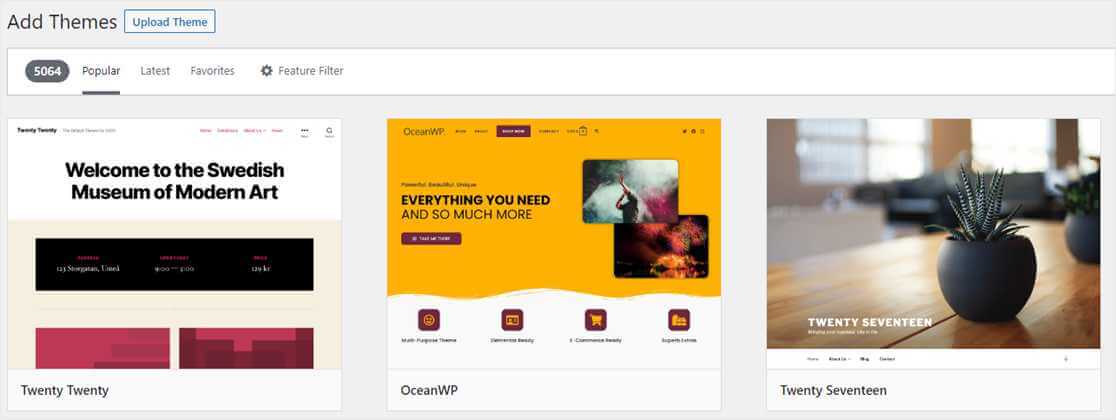
Once you find the theme you like, just click the Install button, then the Activate button.
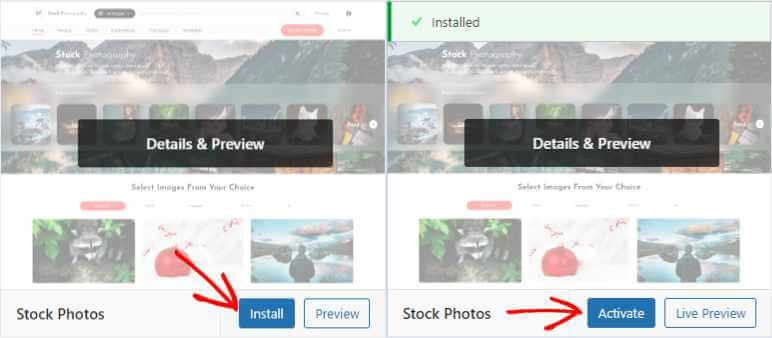
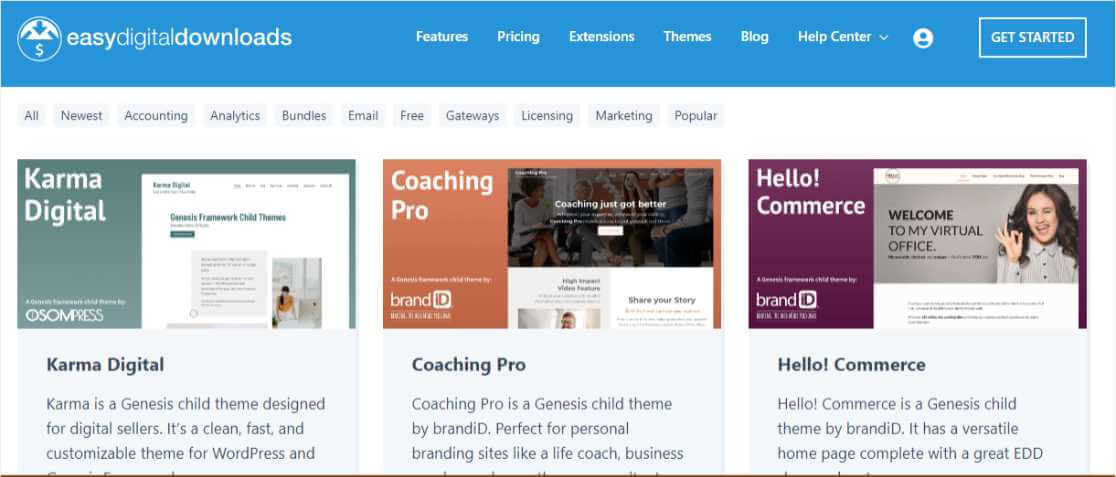
Another alternative for choosing a new theme is to install one that’s been tested to work with the Easy Digital Downloads plugin (which we’re installing in the next step). Easy Digital Downloads has curated these themes, both free and premium, to save you time and make sure you get off to a great start!
After you’ve installed your chosen WordPress theme, you’ll want to modify it to add your brand colors, logo, and other personalization. Here’s a quick tutorial on customizing your WordPress theme to get you started.
Step 2. Install Easy Digital Downloads (EDD)
Now, with a WordPress site up and running, you’re very close to being able to sell your digital media products.
One of the best features of the WordPress platform is the huge number of plugins they offer. Plugins give non-programmers the ability to add just about any feature they might want to their sites.
The best WordPress plugin for selling digital content online is Easy Digital Downloads, or EDD. It allows you to quickly build a powerful eCommerce site that accepts online payments while securely managing file downloads.
Download the EDD Plugin
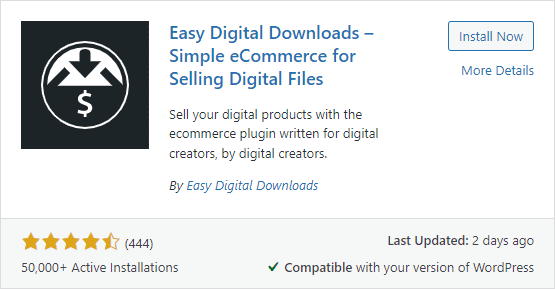
To install EDD, log in to your WordPress site and click the Plugins » Add New menu item. Type “Easy Digital Downloads” into the Search box.

Click the Install Now button, which after a few seconds turns into an Activate button. Hit that and EDD will be installed and activated on your site.
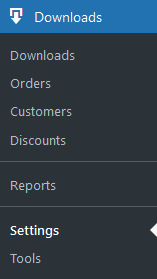
At this point, you should see a new menu in the WordPress dashboard called Downloads. That’s where you’ll manage all your digital products for sale, along with other eCommerce settings and options.
Step 3. Set Up Your Online Store Using EDD
Now that Easy Digital Downloads is installed on your new WordPress site, there are a few things you’ll need to do to get it set up. Then you can start adding items for customers to download.
Navigate to Downloads » Settings in WordPress and the EDD Settings screen will display.
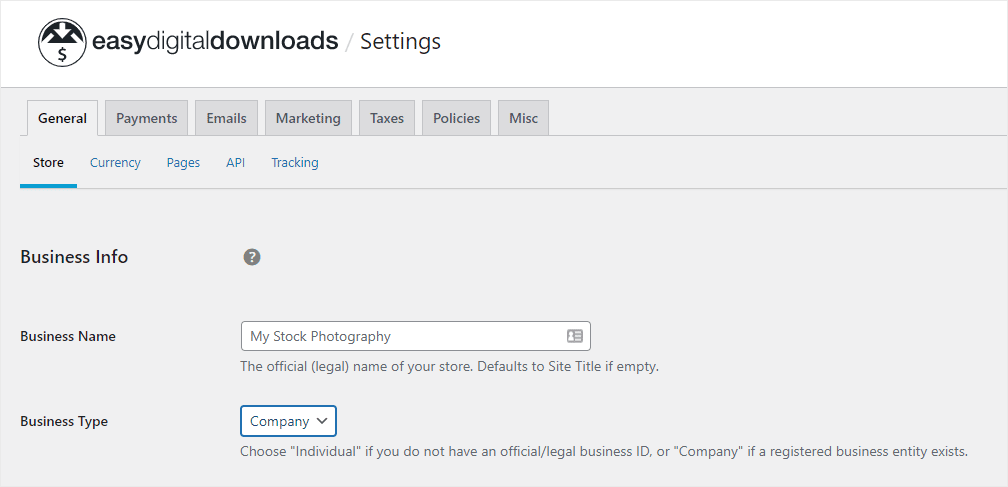
You’ll need to enter some basic information about your business and checkout options here. These are settings that apply to your entire store, like payment types accepted, taxes, refund policy, and similar items.
Before you sell any downloads, review and complete the following areas:
Business Info
Enter your business name, address, and other details here in the General » Store tab.
Currency
The default setting for currency is USD. Please change this option if you use a different form of currency.
Payments
The Payments » General tab includes important settings that allow you to accept various forms of payment. Stripe is our recommended payment processing gateway that allows you to accept credit cards, Google Pay, and Apple Pay.
Be sure and complete this section and click the Save Changes button before you continue. You can connect your Stripe and PayPal accounts here, as well.
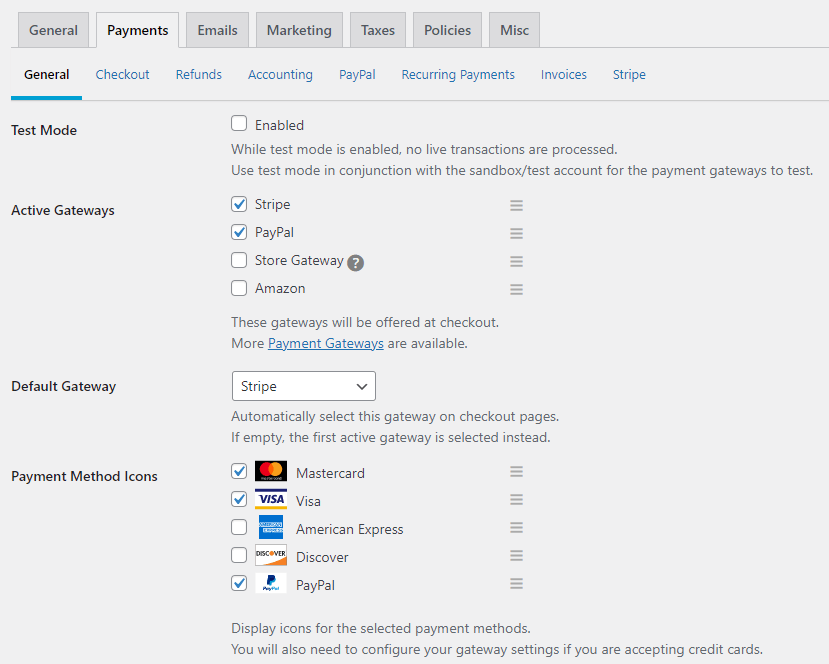
The Payments tab is also where you set global refund terms, manage the checkout process, set up recurring payments, and create custom invoices. Check the Test Mode box to test downloads without processing real payments. Just remember to uncheck it before launching your store.
Emails
Check out the Emails tab to adjust settings related to confirmation emails and purchase receipts. Easy Digital Downloads can send emails to both the purchaser and seller to confirm when a transaction occurs.
Taxes
If you are required to collect taxes on your digital products, this is where you enable tax collection and modify rates based on the buyer’s location.
You may want to glance through the remainder of the Settings screen so you know what’s there. However, if you’ve addressed the items above you should have a functional store.
Great job, let’s go on to the next step!
Step 4. Start Selling Downloadable Digital Products
Okay, Easy Digital Downloads is installed and set up on your WordPress site. Let’s add a product and start selling.
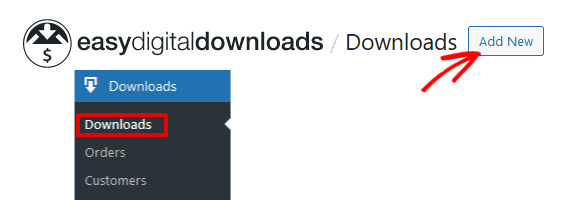
Click the Downloads » Downloads link in the EDD menu, then Add New.
At this point, you’ll see the Download editor screen, which is similar to the WordPress page editor. That means you can add blocks for text, images, and other elements to design your download product listing.
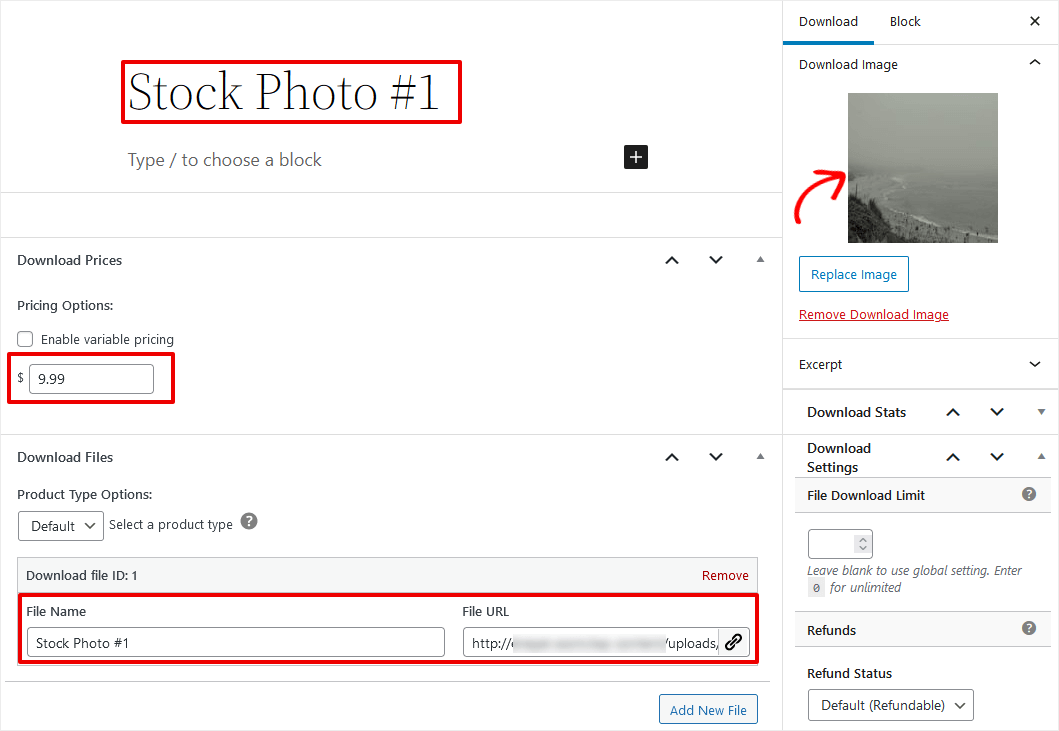
Creating a new downloadable product only requires you to add a product name (Stock Photo #1 in our example) and a File URL (where the file is stored). You enter a file URL, revise the file name, and set pricing in the bottom half of the screen.
You may want to add a block of text under your download title that describes the product.
In the right sidebar you’ll see more settings that apply to your download. Add an image for your product in the Download Image box by clicking the placeholder image. The image might be your eBook cover, a thumbnail image of your artwork, or a product logo.
When you enter a file URL, you have the option to use the WordPress Media Library or some other file storage location like Dropbox. If you want to store your digital downloads in the media library, click the link icon next to the field and it will open.

That’s all you need to do to sell digital products using Easy Digital Downloads. Change any other download settings in the editor according to your needs. Then click Preview » Preview in new tab to see what your product listing would look like as a full web page.
If you like what you see, go ahead and click Publish.
How to Sell Digital Products on Your WordPress Site
To show your digital media products on your website, simply add the following shortcode to any post or page in WordPress.
[downloads]
The default display looks something like this, when the shortcode is added to a page titled Landscape Photos:
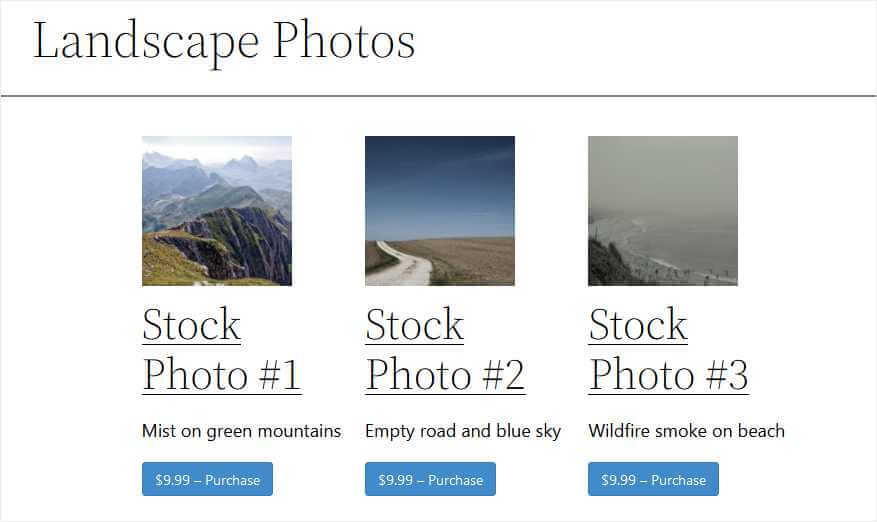
This allows you to style your sales pages however you like, and place product listings wherever you want.
When a buyer clicks the Purchase button under a download, it adds that item to the cart. Easy Digital Downloads automatically creates a shopping cart and checkout page for you.
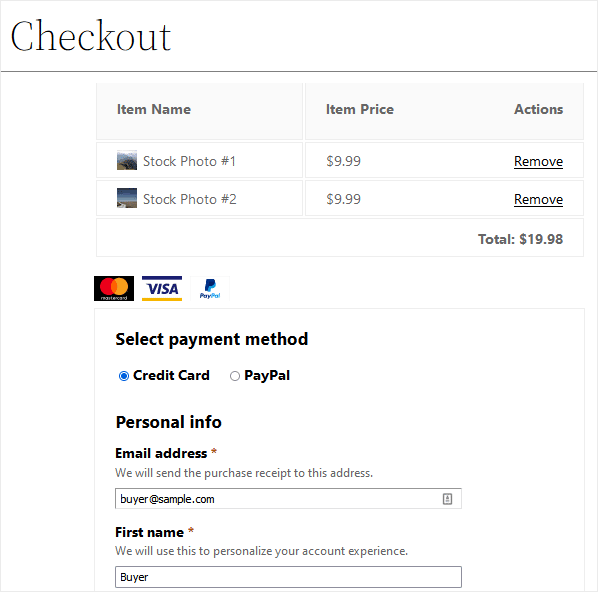
As soon as the buyer completes this form and clicks the purchase button, they’ll get a receipt with a link to download their items. They’ll also receive an email with the same information.
And we just made our first digital product sale! We hope you liked this quick step-by-step tutorial on selling downloadable digital media.
For additional details and tips on adding new digital products to your store, see this short guide to creating new products in Easy Digital Downloads.
Now that you know how to sell digital products online the easy way, you should learn how to track your customers and what they’re buying.
How to Track Digital Downloads Using MonsterInsights
Once you get your downloadable products online, you’ll want to start tracking how potential customers are using your website. This allows you to optimize site navigation and the purchase process, and maximize the number of visitors who convert into buyers.
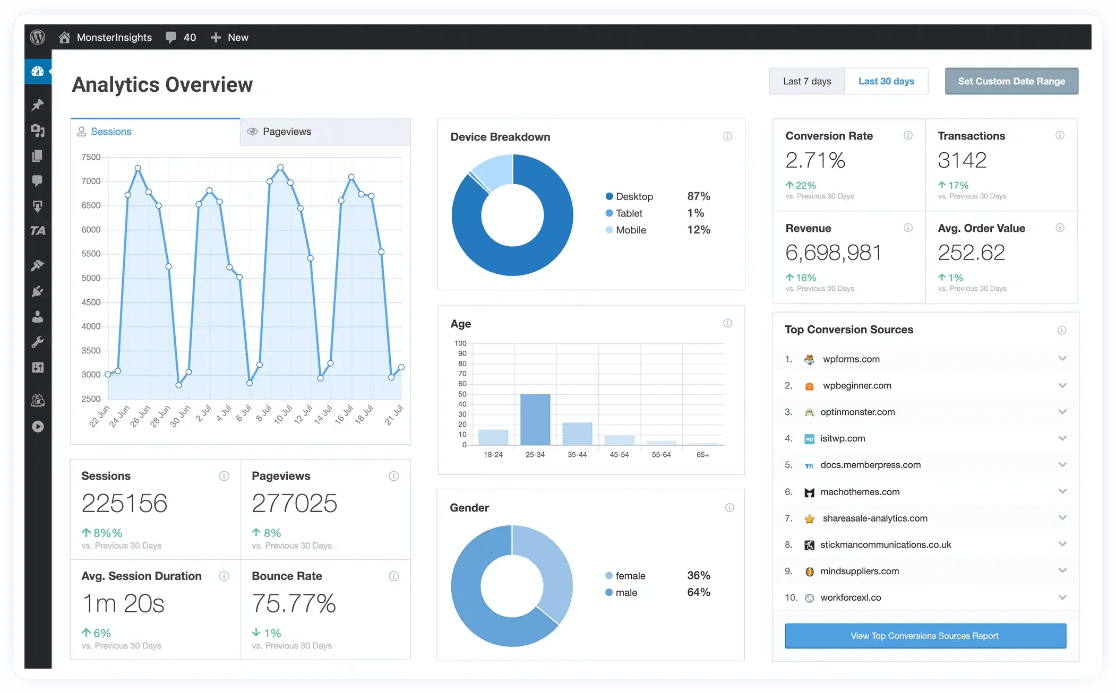
The easiest way to track user behavior on your site is with MonsterInsights, the best Google Analytics WordPress plugin.
MonsterInsights tracks all your site traffic with standard metrics like page views, users, and sessions. It also has eCommerce tracking and User Journeys to show you exactly how customers are navigating your site, from one click to the next.
For more on MonsterInsights eCommerce tracking, check out How to Set Up Google Analytics 4 eCommerce Tracking on WordPress.
Not using MonsterInsights yet? What are you waiting for?
And don’t forget to follow us on Twitter, Facebook and YouTube for more helpful tutorials, reviews, and Google Analytics tips.
