Are you planning to migrate a WordPress site to a new hosting server?
We understand that moving your site can feel like a daunting task. However, rest assured that with careful planning and proper guidance, you can navigate this transition smoothly.
In this article, we’ll address common concerns such as data loss and potential downtime, giving you the confidence to migrate your WordPress site hassle-free and successfully.
- The Benefits of Good Web Hosting
- How to Migrate Your WordPress Site
- Why Use a Plugin to Migrate Your WordPress Site?
- Frequently Asked Questions
The Benefits of Good Web Hosting
You might be migrating your website to a different web host in search of better hosting services or perhaps a more affordable option. Whatever your reason, it’s crucial to understand why good web hosting is important.
Choosing the right web hosting for your WordPress site is more than just finding a place to park your website. It can significantly impact your site’s performance and success in the digital world.
Let’s look at how good web hosting benefits your site:
- Faster site speed: Good hosting offers better hardware, optimized resources, and advanced technologies. This results in faster loading times for your website, which is a ranking factor for SEO.
- Increased uptime: Quality web hosting ensures that your site is up and running most of the time. High uptime rates mean your site is always available to visitors and search engines, which is crucial for maintaining your SEO rankings.
- Better security: A good web host functions as a shield that protects your site from malware and hackers. When your site is secure, search engines and visitors trust it more.
- Regular backups: Reliable hosting services include regular backups of your site. This way, you can fix your site quickly, reducing downtime and the negative impact on SEO in case there’s a problem.
- Effective support: You get access to better customer support with quality hosting. This means any technical issues are resolved quickly, and you have the help you need.
Remember, your web host plays a crucial role in your site’s performance and its ability to rank well in search engines. Choosing the right host can significantly impact your site’s success!
How to Migrate Your WordPress Site
Migrating your WordPress site is relatively straightforward, and we’re here to guide you through every step. While it’s a simple process, it’s essential to be careful and follow each step accurately to avoid any problems.
In this guide, we will be using the Duplicator plugin. It’s one of the best tools for migrating websites since it is designed explicitly for the job, making the process much easier. It takes care of many tasks you would have to do manually otherwise.
Now let’s get into it.
- Step 1: Get Ready for Migration
- Step 2: Install the Duplicator Plugin
- Step 3: Build Your Duplicator Package
- Step 4: Update Host Files to Avoid Downtime
- Step 5: Create a Database With Your New Web Host
- Step 6: Import Your Website to the New Web Server
- Step 7: Point Your Domain to Your New Web Host
- Step 8: Check That Your Website Works
Step 1: Get Ready for Migration
Getting ready to move your WordPress site starts with some essential preparations.
First, you need to pick a good hosting account. We suggest Bluehost for this. WordPress.org recommends them, and they are a great web host.
It’s essential to choose carefully to avoid the need to move again soon.
After you’ve secured your new hosting with Bluehost, hold off on installing WordPress there. Duplicator does that automatically later in the process.
For now, your new hosting account should be like an empty room with no files or folders in the main directory.
This preparation sets the stage for a smooth migration.
Step 2: Install the Duplicator Plugin
The next step is installing the Duplicator plugin on the website you’re planning to move.
If you need help with this, read this guide on installing a WordPress plugin for step-by-step instructions.
Duplicator is the top choice for migrating WordPress sites because it has features that make the process easier and more secure.
These include automated scheduled backups, cloud storage support, one-click restore options, and intelligent migrations.
All these features combine to ensure your site’s move is as smooth as possible.
Note: Duplicator also offers a free version. However, while Duplicator Lite can handle the migration of your site, it comes with limited features. The Pro version offers more advanced options and tools for a comprehensive and efficient migration experience.
In this guide, we will be using Duplicator Pro.
Step 3: Build Your Duplicator Package
After installing and activating Duplicator, your next step is creating a package. This package will contain everything needed to move your website.
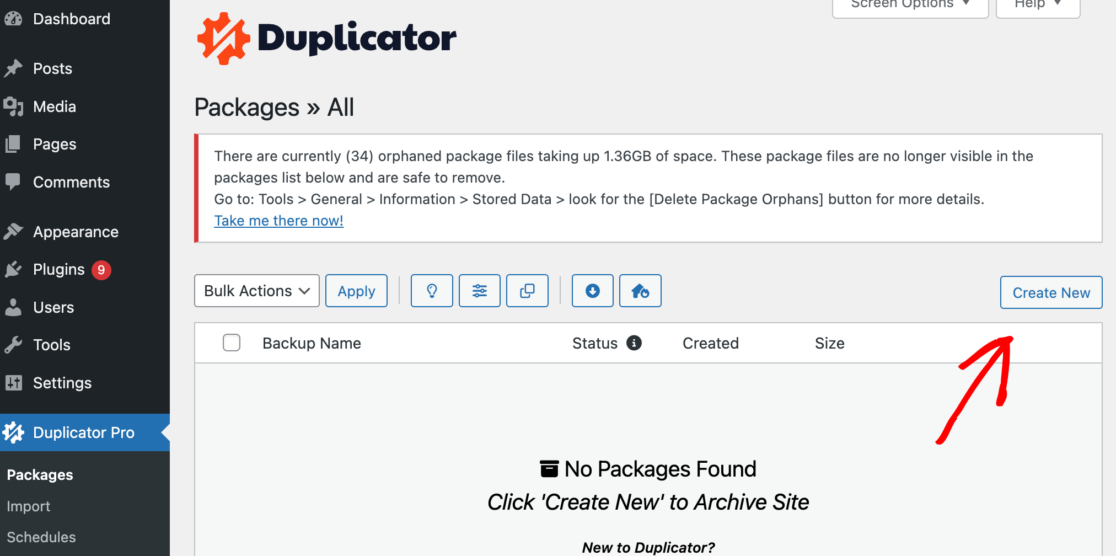
First, go to Duplicator » Packages in your WordPress admin area.
Click the Create New button in the top right corner. This will start Duplicator’s backup wizard.
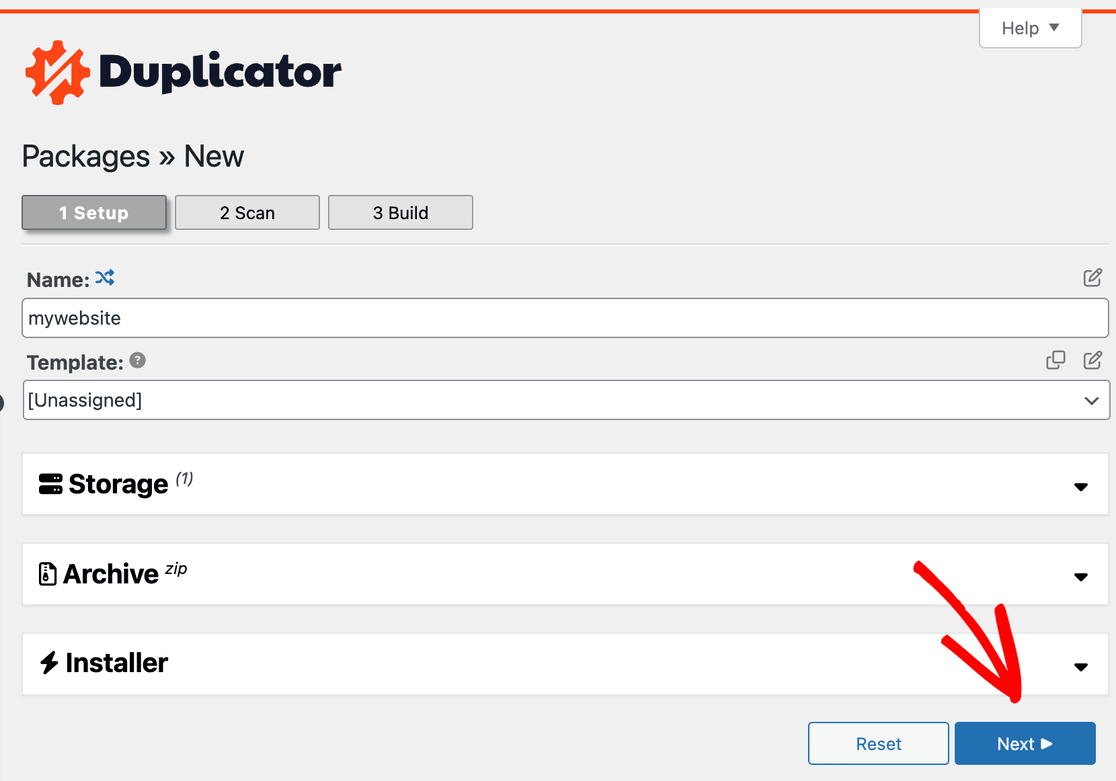
You can give your backup a name on the next screen or just click Next to continue.
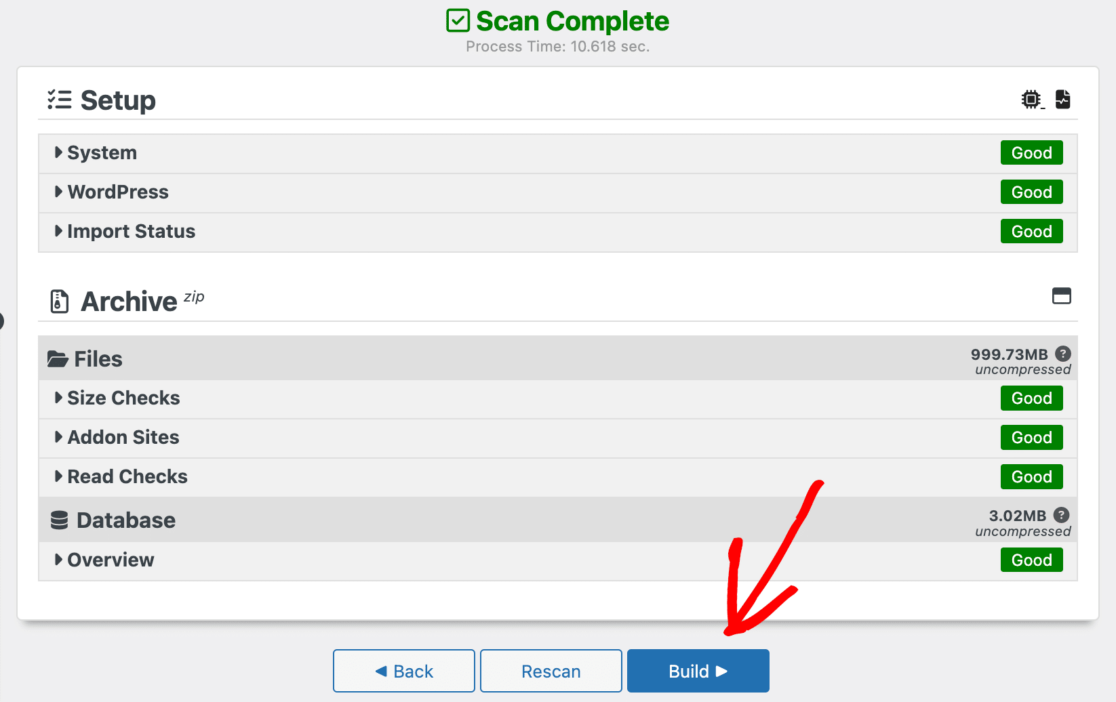
Now, Duplicator will check your system to ensure it’s ready to create the package.
Wait for the scan to complete and ensure all the results say ‘Good’ before you continue. This indicates that everything is set up correctly for the package creation.
Click the Build button to start building your package. This might take a few minutes, so be patient and keep the tab open while Duplicator works.
Once the building process is finished, you’ll see options to download the Installer and the Archive package.
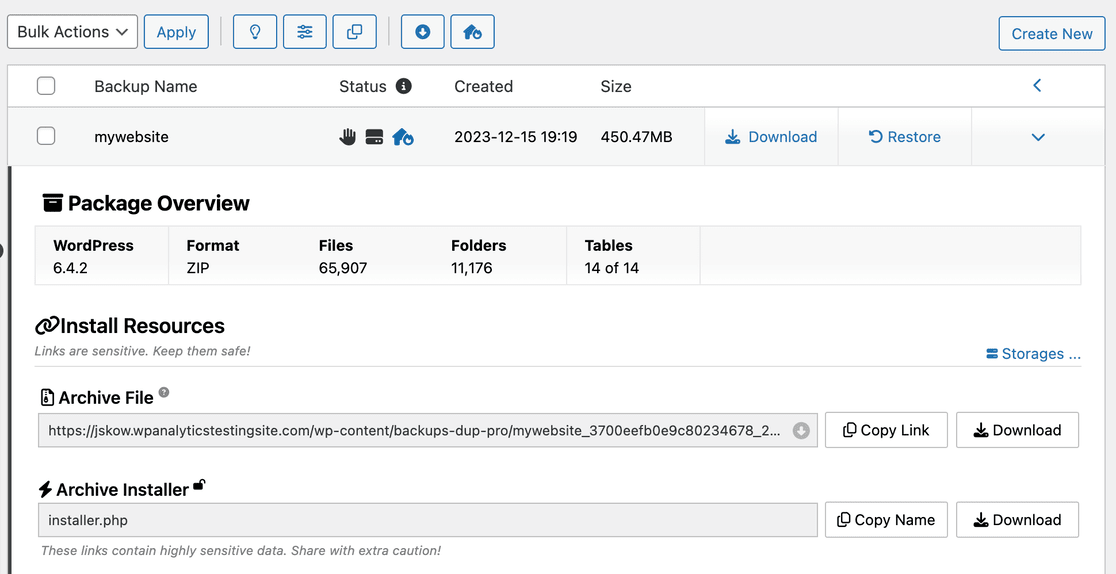
Click on Download for both files.
- The Archive file is a complete copy of your website.
- The Installer file automates the installation process on the new host.
Now you have a complete backup file of your website and a comprehensive package ready for migrating your WordPress site with Duplicator.
Step 4: Update Host Files to Avoid Downtime
You might think moving to a new host means your website will be down for a while. But there’s a way to set up your new site without any downtime.
This is an optional but recommended step when migrating your WordPress site, as it helps prevent downtime during the move.
It involves making a small change to the hosts file on your computer. This file links website addresses to specific IP addresses.
By modifying this file, your computer will act like your site has already shifted to the new location. This allows you to work with the files on your new host while your visitors continue to access the site on your old host.
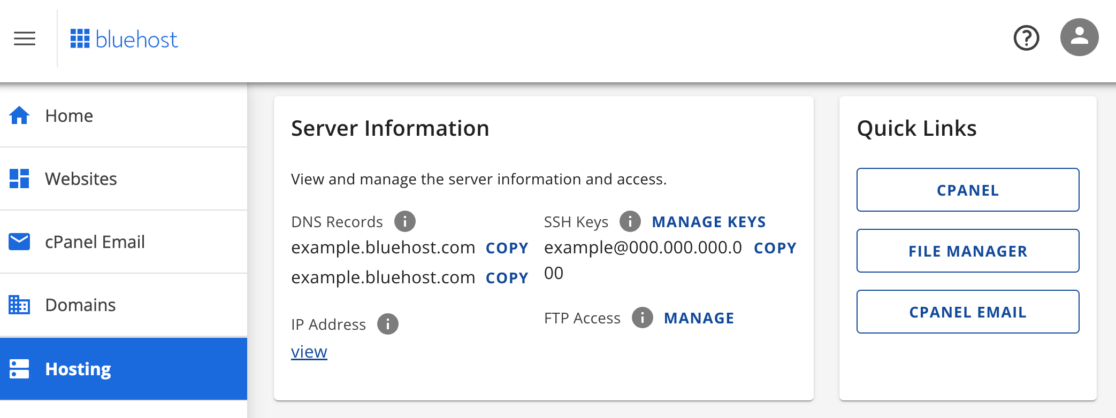
First, find the IP address of your new host, which you can usually find in your hosting control panel.
For example, Bluehost shows this under the Hosting and Server Information section:
Next, access the hosts file on your computer.
If you’re using a Mac, open the Terminal app and type:
sudo nano /private/etc/hosts.
Windows users should open Notepad as an administrator, go to File » Open, and navigate to:
C:\Windows\System32\drivers\etc
Once you open the hosts file, add your new host’s IP address and domain name at the bottom. Then save your changes.
This update makes your computer access your new hosts files using your domain name while everyone else still sees your site on the old host.
Remember, after you’ve completed your site’s migration, you should undo this change in your hosts file.
Step 5: Create a Database With Your New Web Host
Before you can move your website, setting up a new WordPress database on your new hosting server is essential. You can move on to the next step if you already have a database on your new host.
Here’s how you do it for those who need to create one.
First, log into your new hosting account and go to the cPanel dashboard.
From there, find and click on the MySQL Databases option.
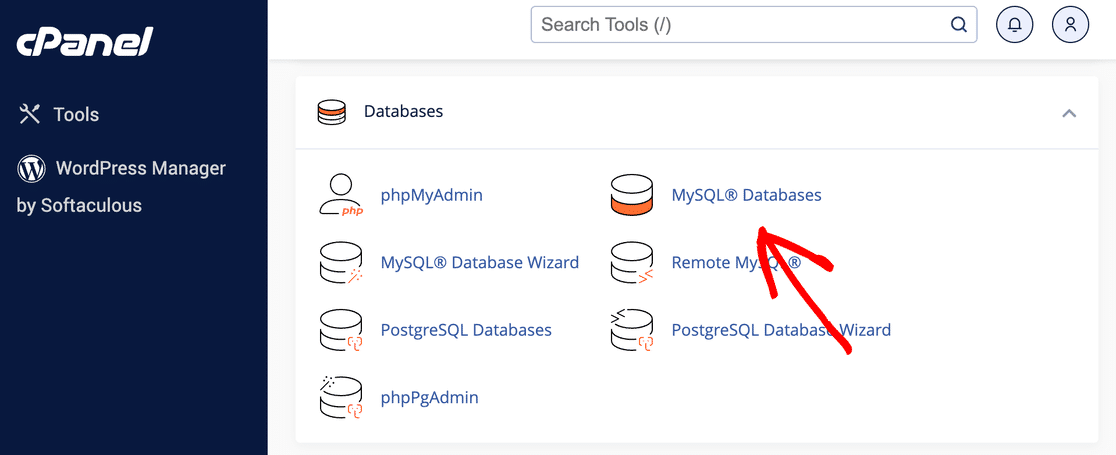
You’ll see a section at the top of the page to create a new database. Enter your chosen name for the database and click Create Database.

The next step involves setting up a new user for this database. Look for the ‘MySQL Users’ section on the same page.
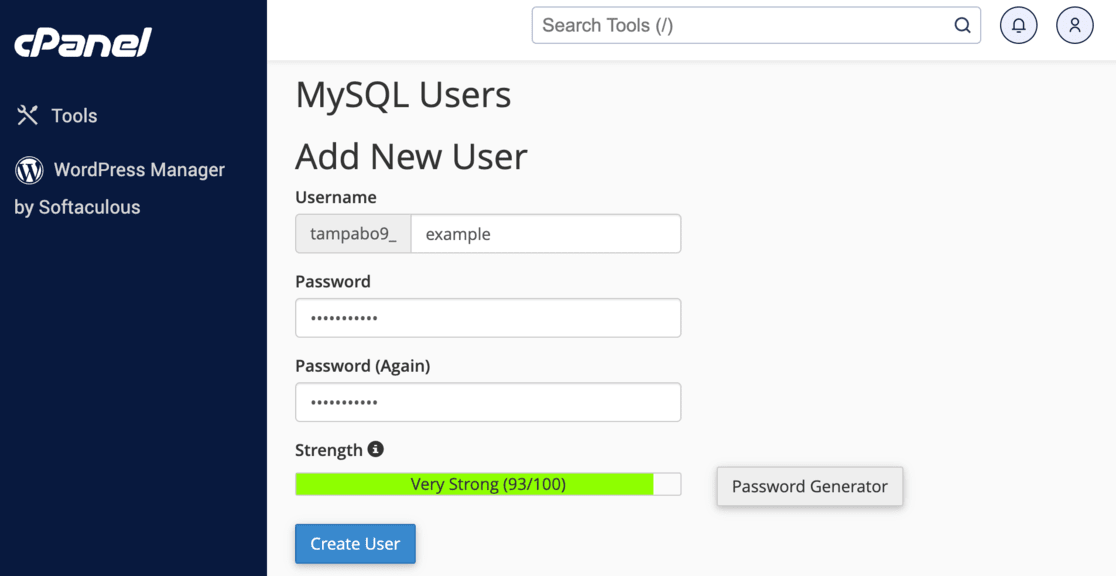
You can create a new user by entering a username and password here. After you are done, click Create User.
After you’ve created the new user, you need to connect this user to the database you just made. Do this by scrolling down to the ‘Add User Database’ section.
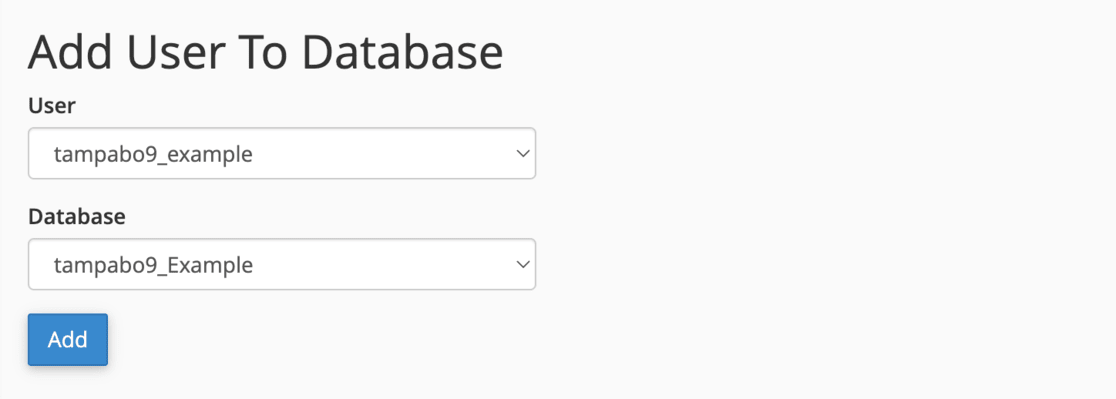
Click Add and then assign all privileges to this user, ensuring they have full access to the database.
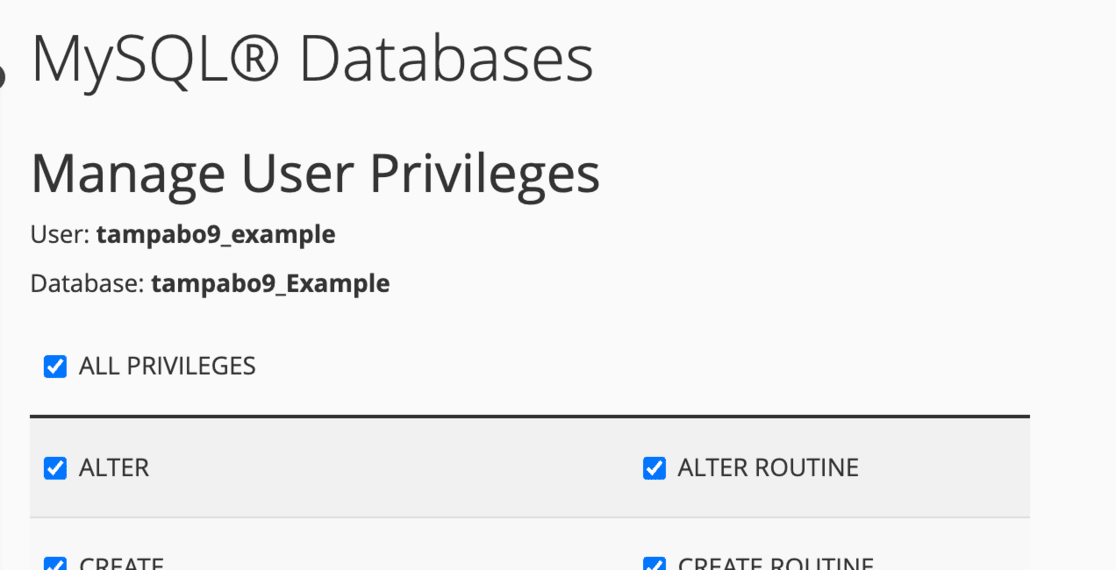
With these steps, your new database is ready to import your original WordPress website to your new host.
Step 6: Import Your Website to the New Web Server
With your database in place, it’s time to upload your Duplicator package to the new web server.
There’s no need to install WordPress first on your new host, as Duplicator takes care of that.
First, use your cPanel to upload the site backup and installer files to the root directory of your new hosting account.
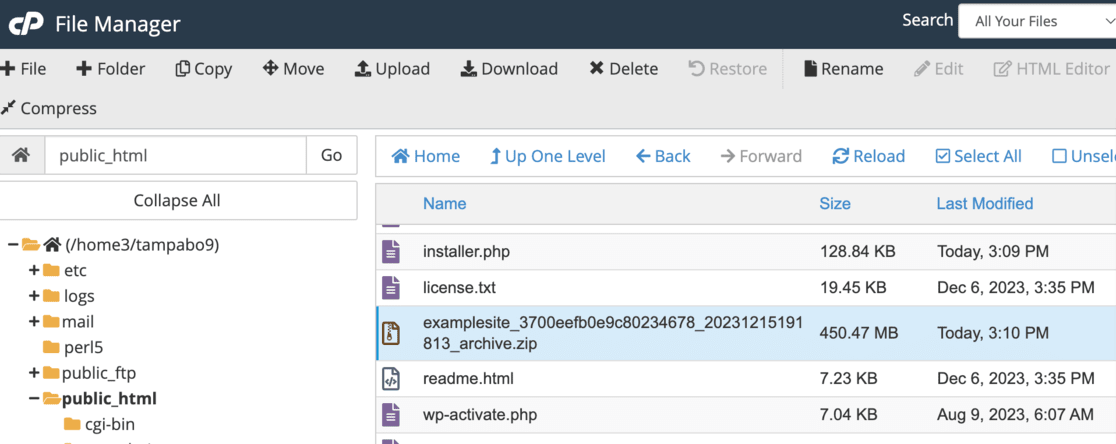
Once uploaded, go to your web browser and type in yourdomain.com/installer.php, replacing ‘yourdomain.com’ with your domain name.
This action will launch the Duplicator installation wizard.
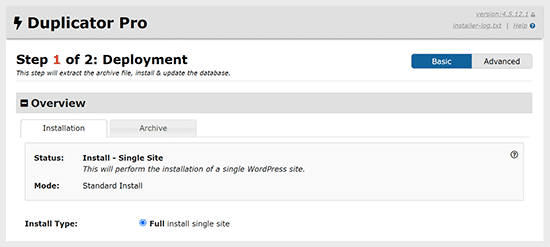
During the installation, you’ll be asked to enter the details of your newly created database, including its name, username, and password.
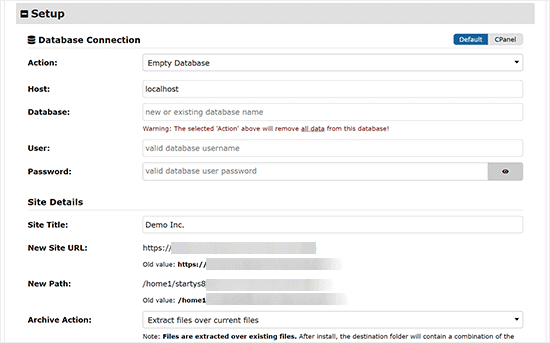
The host field is typically set to ‘localhost’ by default, which is fine.
After entering these details, click Validate to ensure everything is correctly set up.

A successful connection test will show a confirmation message.
Then, proceed with Next.
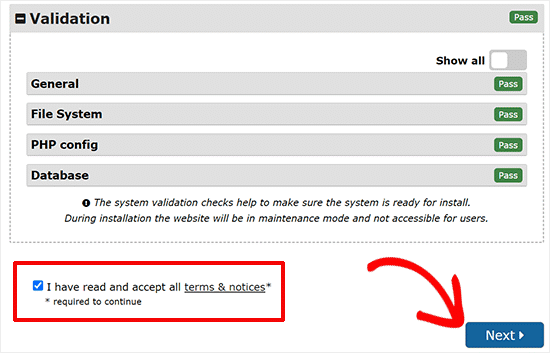
This will display a screen showing your old and new URLs – they should match if you are keeping your old domain, and you should update it if you are creating a new domain.
After confirming the details, click Run Update.
The final page may offer some testing suggestions. It’s a good idea to follow these to check that everything works.
These steps ensure your Duplicator package is correctly uploaded and installed on your new web server.
Step 7: Point Your Domain to Your New Web Host
The last step in moving your WordPress site is to inform search engines that your site has a new home.
This is done by redirecting your domain to your new web host and might take a few days, depending on your website’s size.
Once you have moved your site’s files and database to the new host, the next task is to update your Domain Name System (DNS) nameservers.
Start by logging into your old web hosting account or the domain registrar where your domain is managed.
Look for the section where you can access your DNS settings:
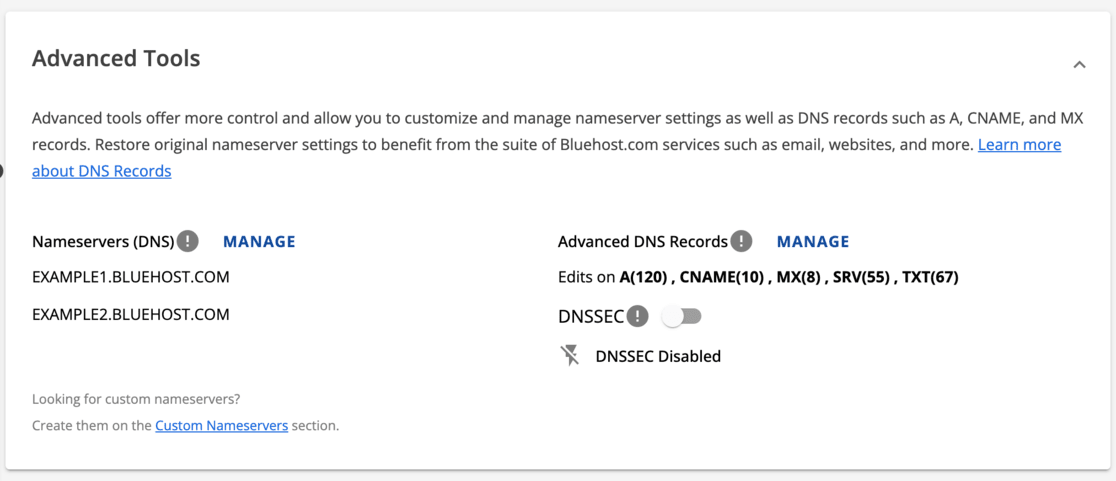
Here, you should find an option to modify your nameservers. Choose the Custom option to change your nameservers.
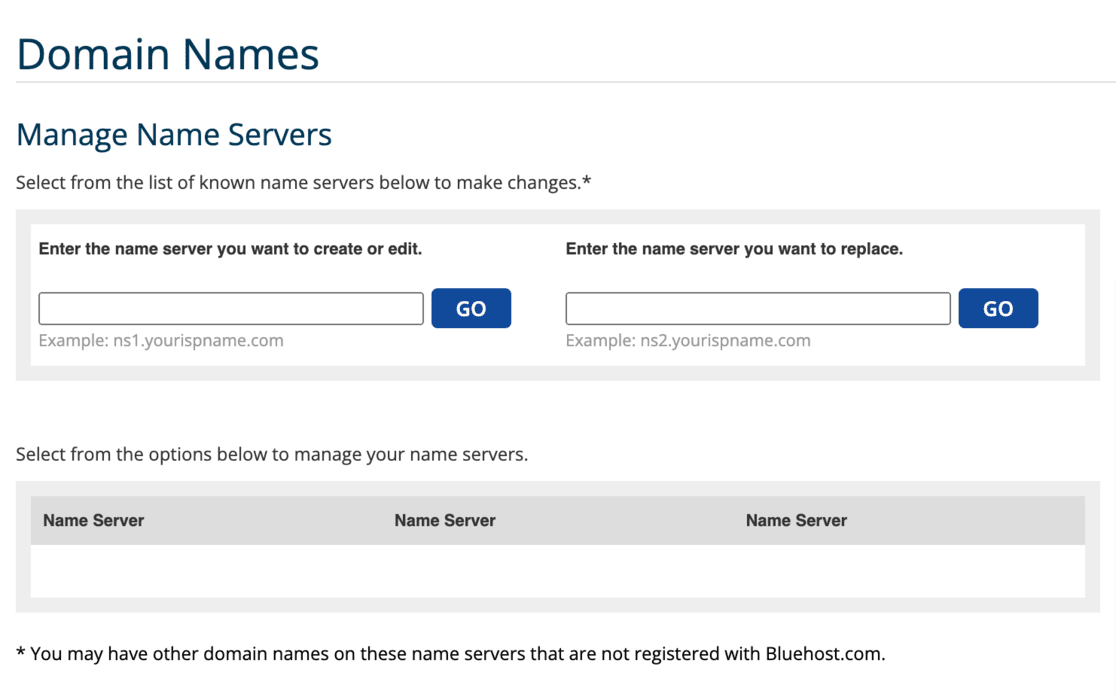
Then, input the nameservers provided by your new hosting provider. These details are often included in your new host’s welcome information or support documentation.
Contact your new web host’s customer support if you can’t find them.
After entering the new nameservers, make sure to save your changes. This action starts the process of pointing your domain to the new host.
The change might not be immediate, and it can take up to 48 hours for the new DNS settings to be fully published across the internet.
With this step, you complete the migration of your website, successfully pointing your domain to its new location on the web. This makes sure your website functions properly and is found correctly by search engines.
Step 8: Check That Your Website Works
After migrating your WordPress site to the new host, you should ensure everything works.
Start by reviewing your website to see if everything looks as it should. In WordPress, you can also verify your new hosting details in the dashboard.
Allow a few days for the migration process to settle fully.
If you encounter any issues or have questions during this period, don’t hesitate to contact your new host’s customer service for assistance.
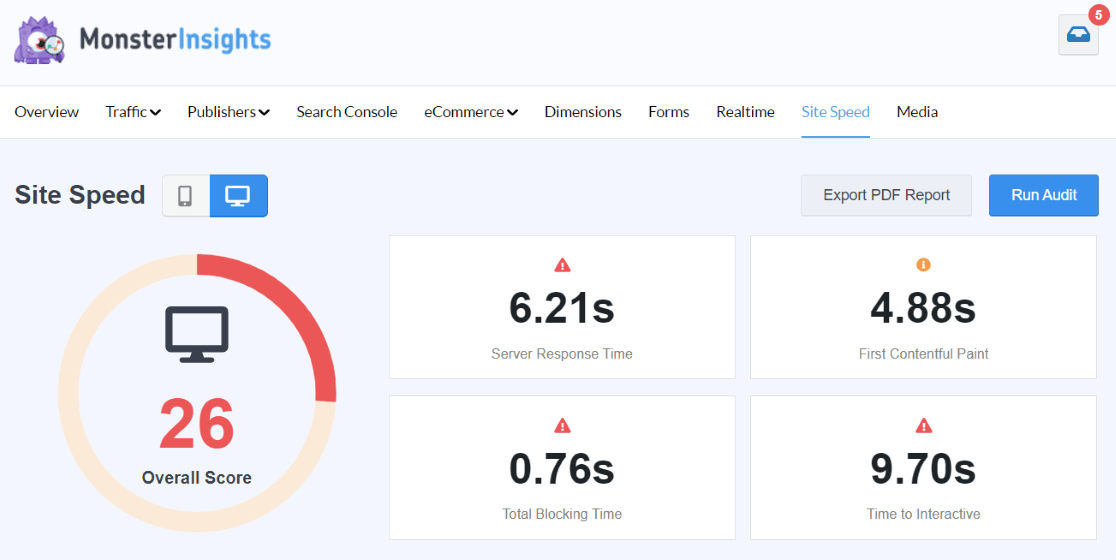
A quick check of your website’s performance is also a good idea. Tools like MonsterInsights are great for checking your site speed.
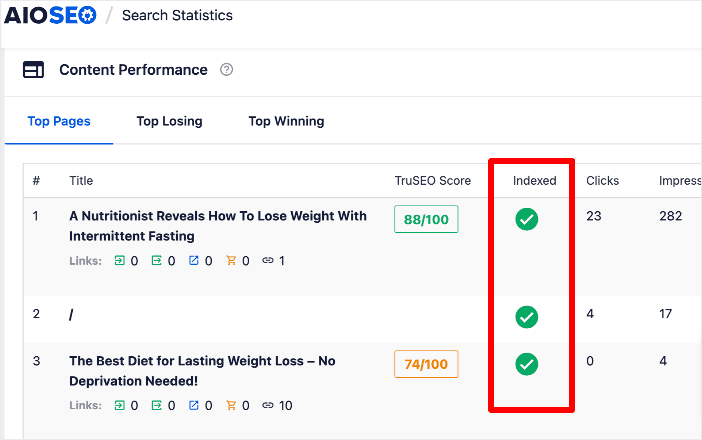
Additionally, consider using a comprehensive tool like AIOSEO to run a full SEO audit and ensure that search engines index your pages correctly.
Once you’re confident that everything is running smoothly and your site is fully operational on your new host, you can contact your old web host to discuss closing your previous account.
This final step ensures you’re not leaving any loose ends and that your site’s migration is fully complete.
And that’s it! You have now successfully migrated your WordPress site to your new host!
Why Use a Plugin to Migrate Your WordPress Site?
Migrating a WordPress site might seem tricky, especially if you’re considering doing it manually.
While manual migration is an option, it typically suits those with more advanced skills and knowledge of WordPress.
A migration plugin like Duplicator is a much better choice for beginners or those who want a smooth process.
If you try to move your site manually, you have to work with your site’s files and database yourself. This can be complex and risky if you’re not used to it.
Always back up your website before starting. This way, you can fix things if something goes wrong.
Duplicator is a handy tool here. It makes moving your site easier and backs up your site. It puts all your files and database in one package you can save on your computer.
This way, you have a backup if needed and don’t have to deal with the files or database of your original WordPress site.
Another big plus of using Duplicator is automatically setting up WordPress on your new server.
This saves a lot of time and makes the move less complicated. In a manual migration, you’d also have to do this part yourself, which is more work.
In short, while you can move your site manually, using a plugin like Duplicator is safer, faster, and easier. It takes away much of the hard work and worry, making it the preferred way to move your WordPress site.
Frequently Asked Questions
What does it mean to migrate a WordPress site?
Migrating a WordPress site means moving it from one hosting server to another. This involves transferring all your site’s files, content, and database to a new host.
How do I migrate my entire WordPress site?
To migrate your entire WordPress site, use a plugin like Duplicator. It packages your site’s content and database, which you then upload to the new hosting server.
How much does it cost to migrate a WordPress site?
The cost of migrating a WordPress site varies. It can be free using plugins like Duplicator Lite, or there may be a fee if you opt for a hosting provider’s migration service.
How long does it take to migrate a WordPress site?
The time to migrate a WordPress site depends on the size and complexity of the website. It can take a few hours to a couple of days for the entire process to be complete.
We hope this guide on how to migrate a WordPress site has been helpful. Should you encounter any hiccups during your WordPress migration, read this guide on common WordPress errors and how to fix them.
If you liked this article, maybe you’d like to read:
5 Best WordPress Multisite Hosting Providers (Expert Pick)
45+ Best WordPress Plugins to Download Now (Many FREE)
10+ Best No Code Tools for WordPress to Install Now
Haven’t you tried MonsterInsights yet? Today is the day to start!
Don’t forget to follow us on Twitter, Facebook and YouTube for more helpful reviews, tutorials, and Google Analytics tips!
