Need to increase the maximum file upload size in WordPress?
If you tried to upload a file to your media library and get the error “file exceeds the maximum upload size for this website,” then you need to increase the file upload size for your website.
Luckily, it’s actually pretty easy to do!
In this article, we’ll show you how to increase the maximum file upload size in WordPress quickly and easily.
What Is the Maximum File Upload Size in WordPress?
The maximum file upload size on your WordPress website varies depending on your hosting company. The max file upload size is set by them.
For instance, the limit for shared hosting at Siteground is 256 MB. At Bluehost, it’s 50 MB. At Hostinger, it’s 128 MB.
With most hosts, you’ll be able to increase your maximum file upload size, until you hit their server’s preset max (this also varies by host).
What’s My Website’s Maximum File Upload Size?
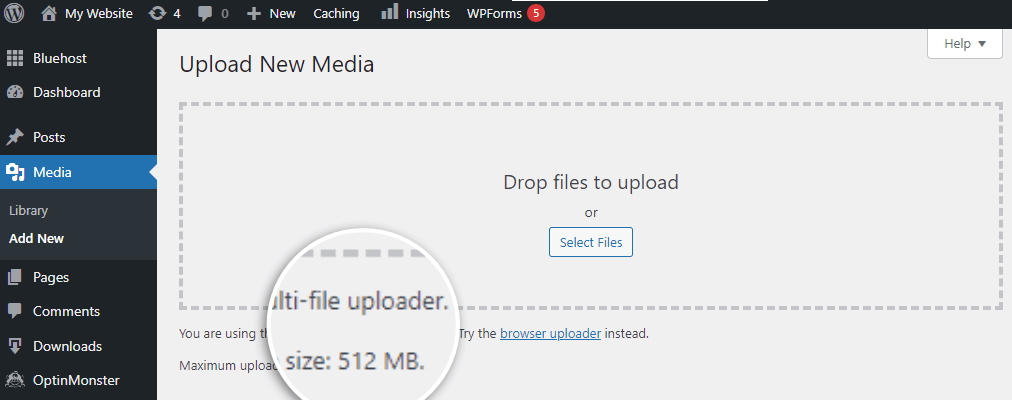
To find out what your current maximum file upload size is set to, open your WordPress dashboard and head to Media » Add New. Your maximum file size will be listed underneath the upload box.
In this example, the maximum upload size is 512 MB.
Tutorial: Increase WordPress File Upload Size
To make this super easy, we’re going to use the best code snippets plugin for WordPress: WPCode.
Using WPCode, we can quickly and easily insert the code we need (that we’ll provide you with) into our website, right where it needs to go. And the best part? We don’t have to touch any of our actual website code.
Let’s get started.
Step 1: Download and Install WPCode

For this tutorial, we’ll be using the free version of WPCode. Make sure to check out all the features though to see if a licensed version would help you out!
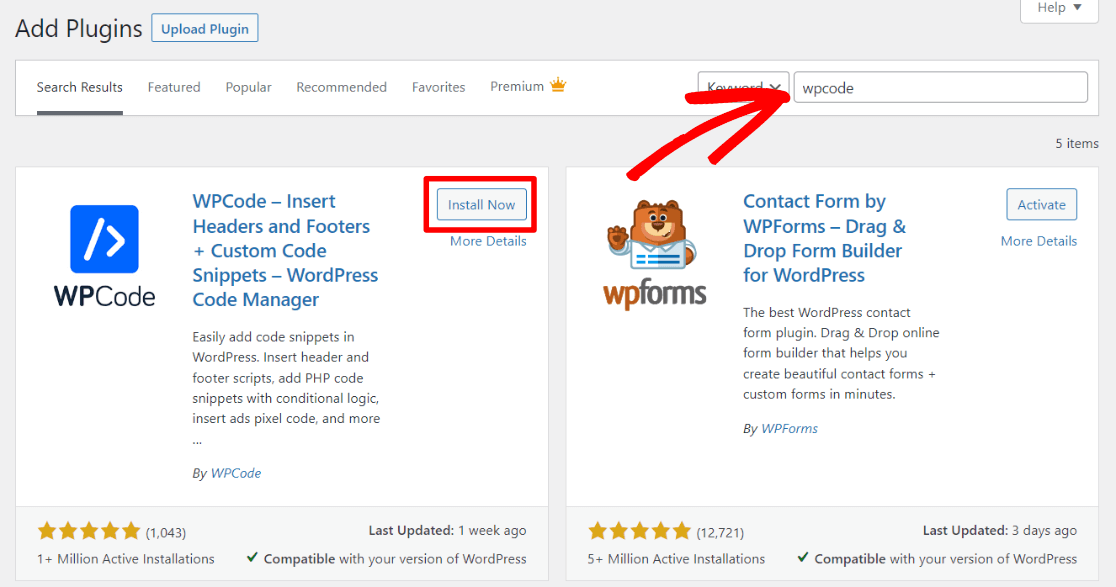
To grab the free version, open your WordPress dashboard and head to Plugins » Add new. Run a search for WPCode and click Install Now:
Then, click Activate:
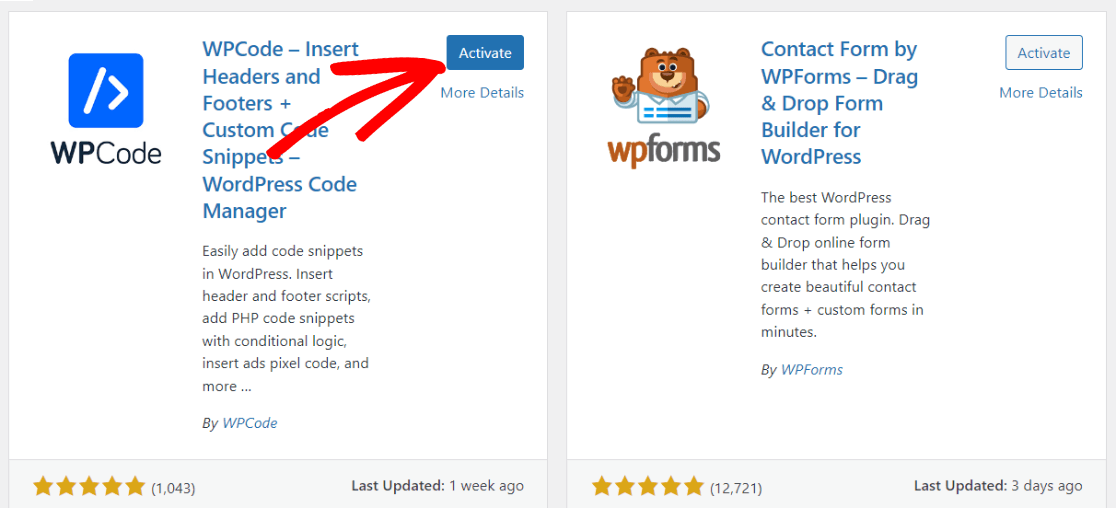
You’ve got WPCode installed and ready to go!
Step 2: Create a Code Snippet
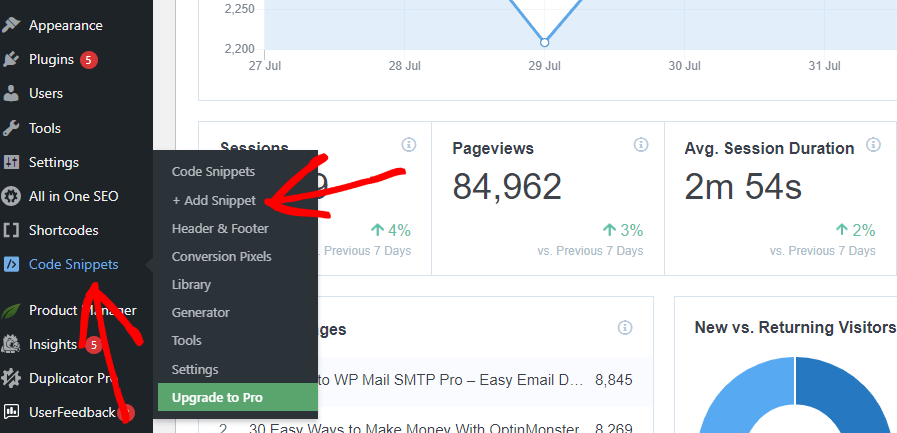
In your WordPress sidebar, head to Code Snippets » + Add snippet:
Now, we’ll create a snippet using our own custom code:
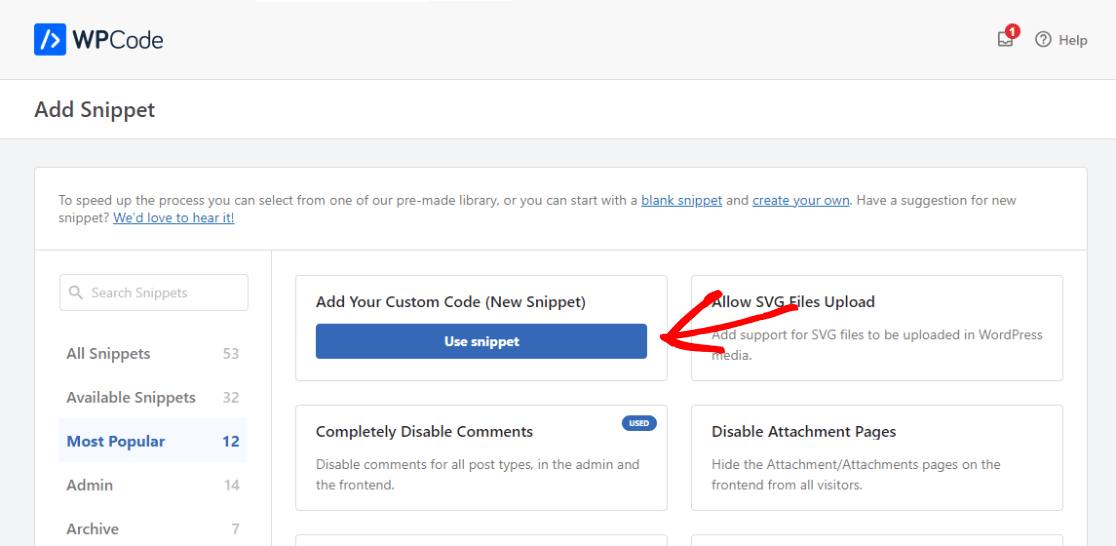
Step 3: Paste Your Code Snippet
Next, click on the Code Type dropdown and choose PHP Snippet:
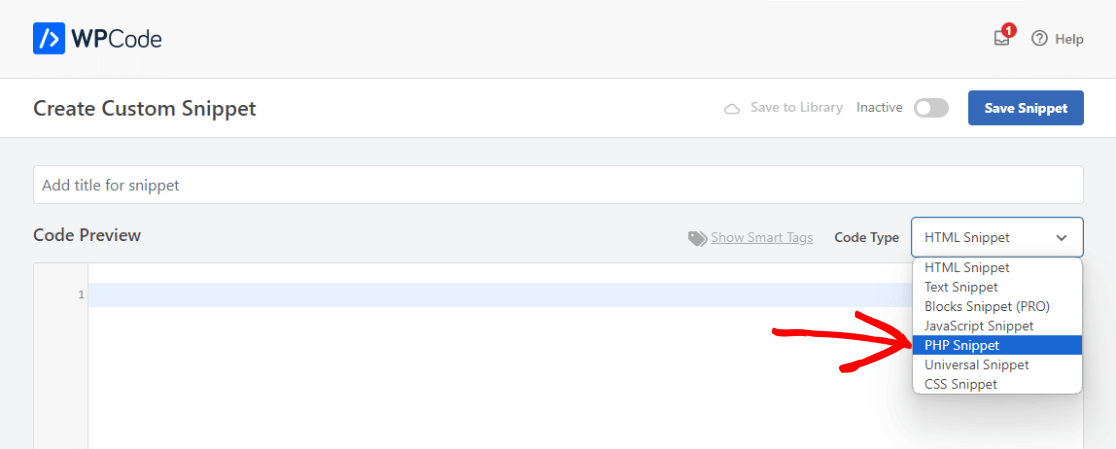
Then, give your snippet a title like “Increase Maximum File Upload Size” and copy paste the following code into the box:
@ini_set( 'upload_max_size' , '256M' );

@ini_set( 'post_max_size', '256M');

@ini_set( 'max_execution_time', '300' );
The first line (where it says 256M) is your maximum file upload size. You can change that number to whatever you need it to be!
The second line defines how big each of your posts can be. This is important if you’re adding those large files to your posts. The post needs to be big enough to hold the file!
Once you’ve pasted the code with your preferred max upload size, you might notice that there are more options down below the text box. You’ll find great options there for inserting your code snippets, but we’re going to leave everything at the default settings, since we want the code to publish right away and run everywhere:
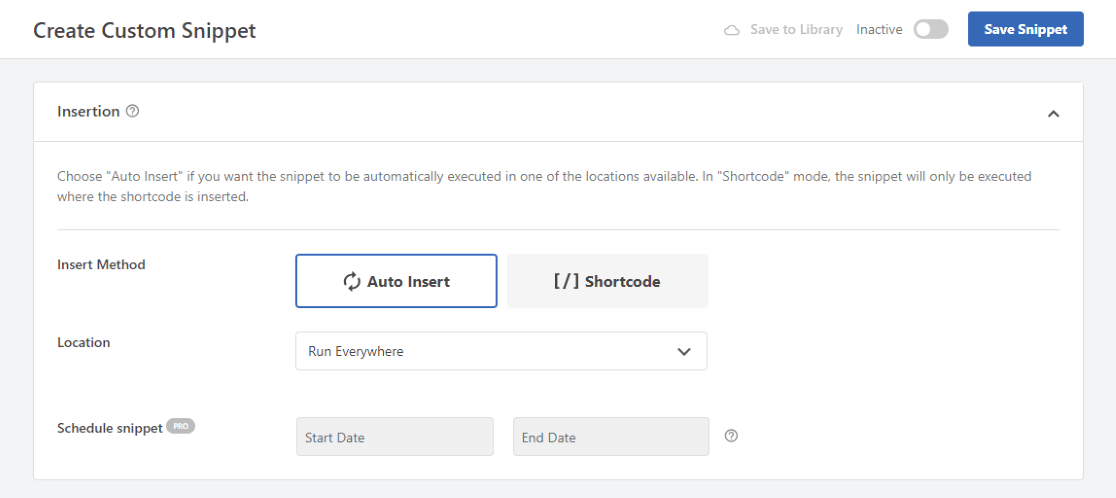
Now, go ahead and toggle the switch to Active and click Save Snippet:
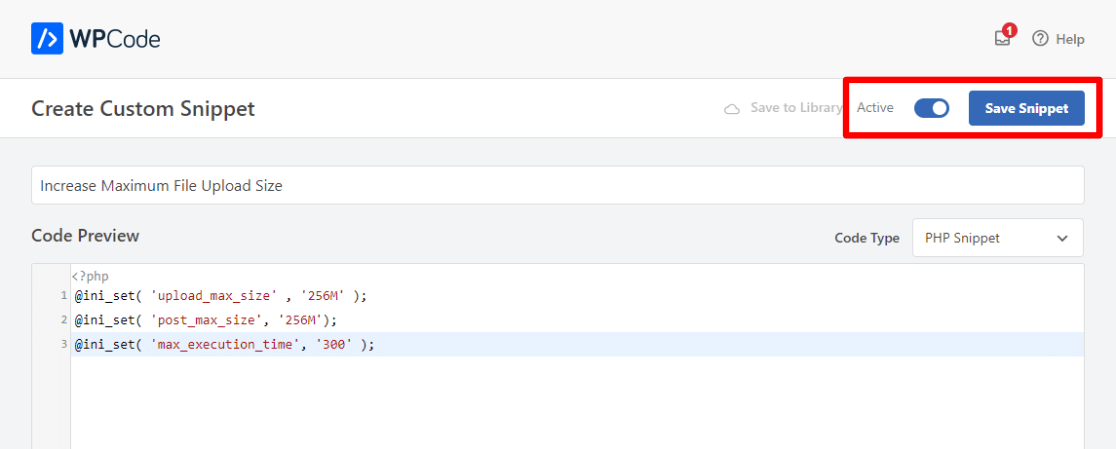
That’s it! You’ve updated your maximum file upload size in WordPress.
Now, do you want to know the correct way to insert Google Analytics code into your site? Check out How to Add Google Analytics to WordPress the Right Way.
Not using MonsterInsights yet? What are you waiting for?
And don’t forget to follow us on Twitter, Facebook and YouTube for more helpful Google Analytics tips.
