Are you looking for a simple way to include a WordPress Facebook feed on your site?
Adding a WordPress Facebook feed allows you to share updates from your Facebook page directly on your website. This keeps your site lively and fresh and helps increase your Facebook page’s followers.
In this article, we’ll guide you through the steps to seamlessly integrate a custom Facebook feed into your WordPress website, all without needing any technical skills.
Whether you’re a blog owner, a small business, or just looking to enhance your online presence, follow along to learn how easy it can be!
Why You Should Embed a Custom WordPress Facebook Feed
Embedding a custom Facebook feed on your WordPress site can be very beneficial. Here’s why:
- Reach more people: Facebook is the largest social media platform with billions of active users. You can connect with more of these users by displaying your Facebook content on your website.
- Keep your website fresh: Automatically update your site with new content from Facebook. This keeps your site dynamic and interesting for visitors.
- Boost engagement: When visitors see exciting posts, videos, or images from your Facebook, they are more likely to interact and engage with your site.
- Promote your social media: Showcasing your Facebook feed on your website can encourage more likes and follows for your page or group.
- Increase visibility: More visibility on Facebook means more engagement, helping you to grow your online presence effectively.
Integrating a WordPress Facebook feed into your site creates a lively, engaging hub that bridges your social media and website content. It strengthens your online presence, increases engagement, and allows you to connect more strongly with your audience.
How to Add a Facebook Feed to WordPress
Integrating a Facebook feed into your WordPress site can be achieved by using Facebook’s tools for manual embedding or, more effectively, through a dedicated WordPress plugin.
Choosing the Smash Balloon Facebook Feed Pro plugin is the best option for those seeking a user-friendly and feature-rich solution.
Smash Balloon simplifies the embedding of a custom Facebook feed, eliminating the need to navigate complex code snippets and multiple web pages, which is common with manual methods.
As the best social media plugin, it offers extensive customization options that don’t require any coding skills, allowing you to tailor the look and functionality of your feed to match your website’s design.
For people just starting out or with a limited budget, you can get started with Smash Balloon for free.
However, the pro version of Smash Balloon is particularly robust, enabling you to display videos and photos and combine posts from different Facebook pages or groups.
It also allows you to filter feeds based on post types to target better the content displayed.
Additionally, you can easily embed Facebook reviews and community posts, enhancing social proof and visitor engagement on your site.
Let’s explore how to embed a Facebook feed in WordPress using Smash Balloon in the next steps:
- Step 1: Install Facebook Feed Pro by Smash Balloon
- Step 2: Connect Your Facebook to WordPress
- Step 3: Create a Custom WordPress Facebook Feed
- Step 4: Customize Your WordPress Facebook Feed
- Step 5: Embed Your Facebook Feed in WordPress
Step 1: Install Facebook Feed Pro by Smash Balloon
Installing and activating the plugin is the first step to start using the Facebook Feed Pro on your WordPress site.
If you’re unsure how to install a WordPress plugin, you can refer to this beginner’s guide for detailed instructions.
Once the plugin is installed and activated, you’ll need to configure it to connect with your Facebook account:
- Navigate to Facebook Feed » Settings in your WordPress dashboard.
- You must enter your license key in the License Key field. This key can be found in your account on the Smash Balloon website.
- After entering your license key, click on the Activate button to enable all the features of your Smash Balloon plugin.
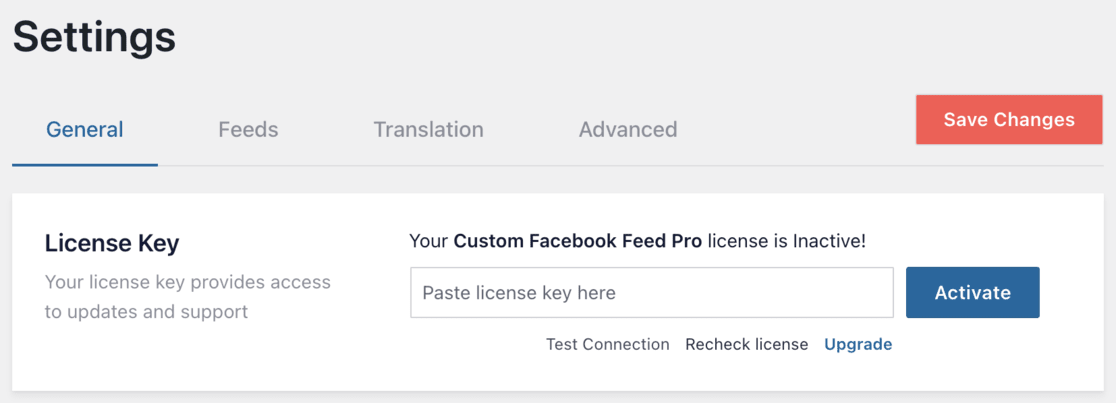
By following these steps, you’ll be ready to customize and display your Facebook feed on your WordPress website.
Step 2: Connect Your Facebook to WordPress
After activating the Facebook Feed Pro plugin, you can integrate your Facebook content into your WordPress site.
Smash Balloon enables you to pull content from various Facebook pages and groups and even merge feeds for a comprehensive display.
To set up your first feed, navigate to Facebook Feed » All Feeds in your WordPress dashboard and select Add New.
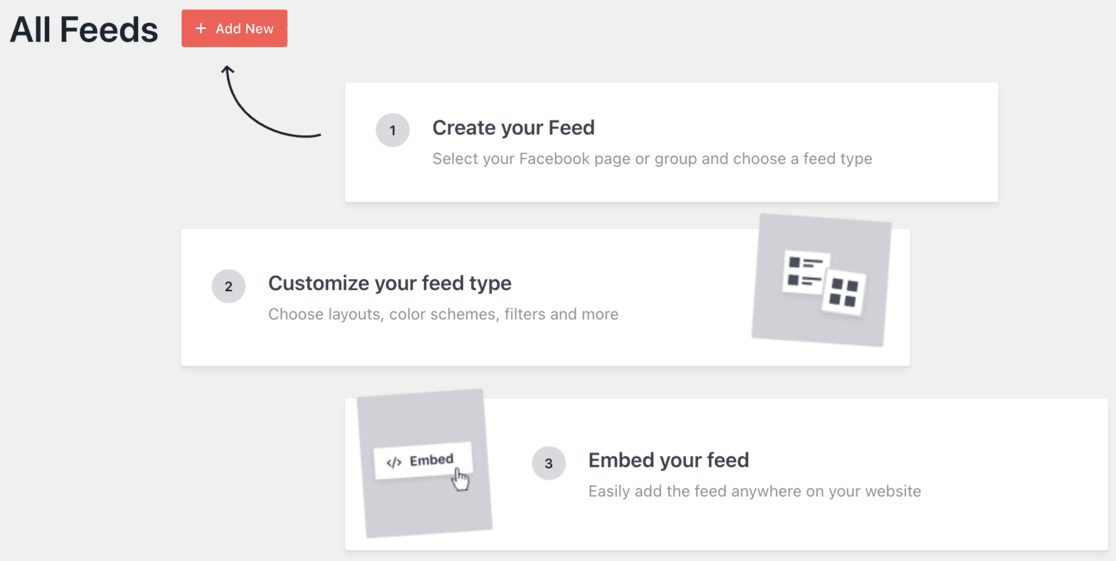
For this guide, we’ll focus on creating a ‘Timeline’ feed, though you can choose from other types of feeds such as albums, videos, or events.
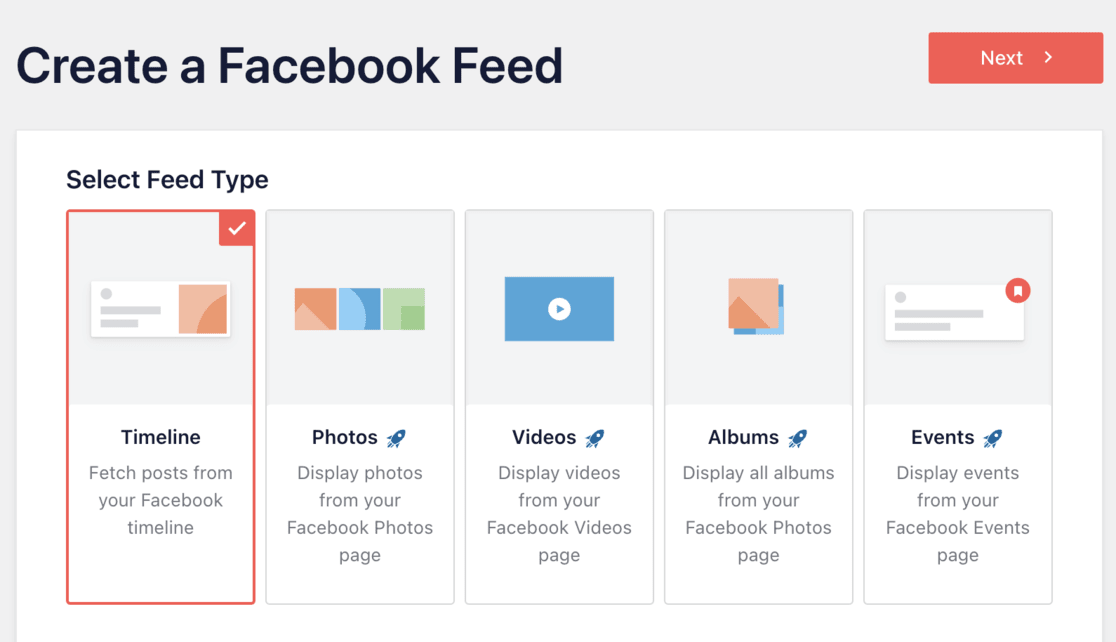
Once you’ve selected the type of feed, proceed by clicking the Next button.
You’ll then be prompted to specify the source of your feed. Click on Add New to start this process.

On the following screen, decide whether you want to connect a Facebook page or group feed to your WordPress site.
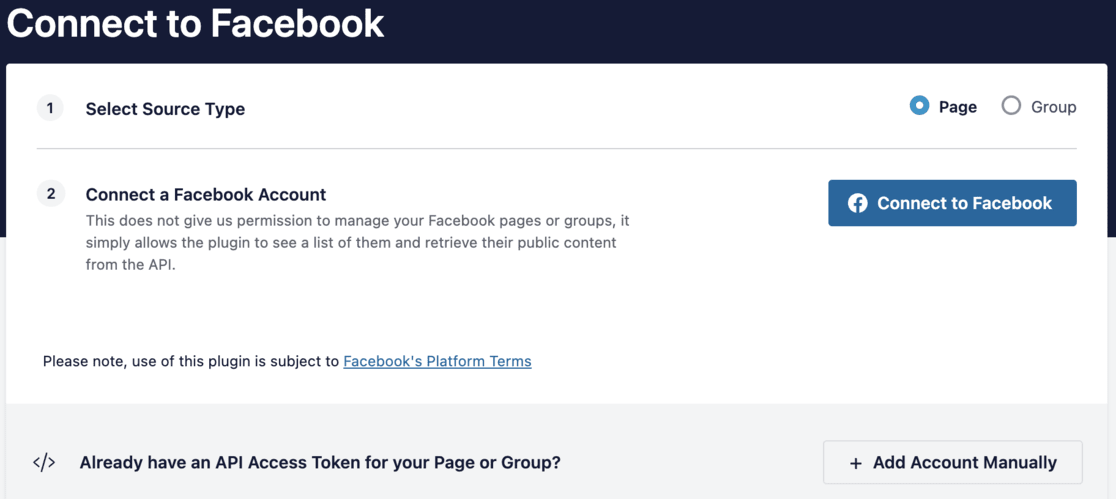
After making your choice, click on Connect to Facebook.
A popup will appear asking you to log into your Facebook account. Once logged in, select the pages or groups you wish to include in your feed.
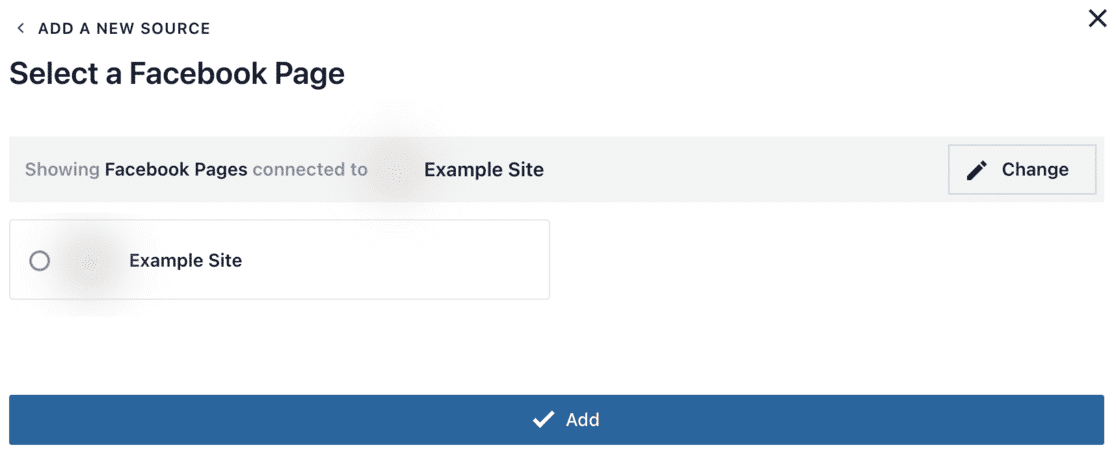
After selecting, click the Add button to continue.
With these steps completed, Smash Balloon will automatically return you to the WordPress dashboard and the Facebook Feed » All Feeds page.
Now it’s time to create your WordPress Facebook feed.
Step 3: Create a Custom WordPress Facebook Feed
If you are not already there, navigate to the Facebook Feed » All Feeds page.
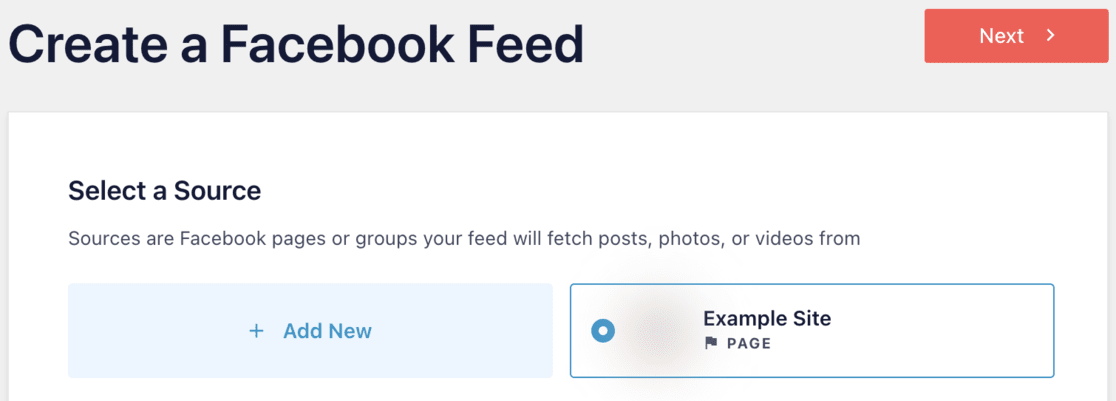
To create a custom Facebook feed, use the Facebook source you connected to in the previous step and click on Next.
You’ll then be presented with a selection of templates that serve as the starting point for your feed.
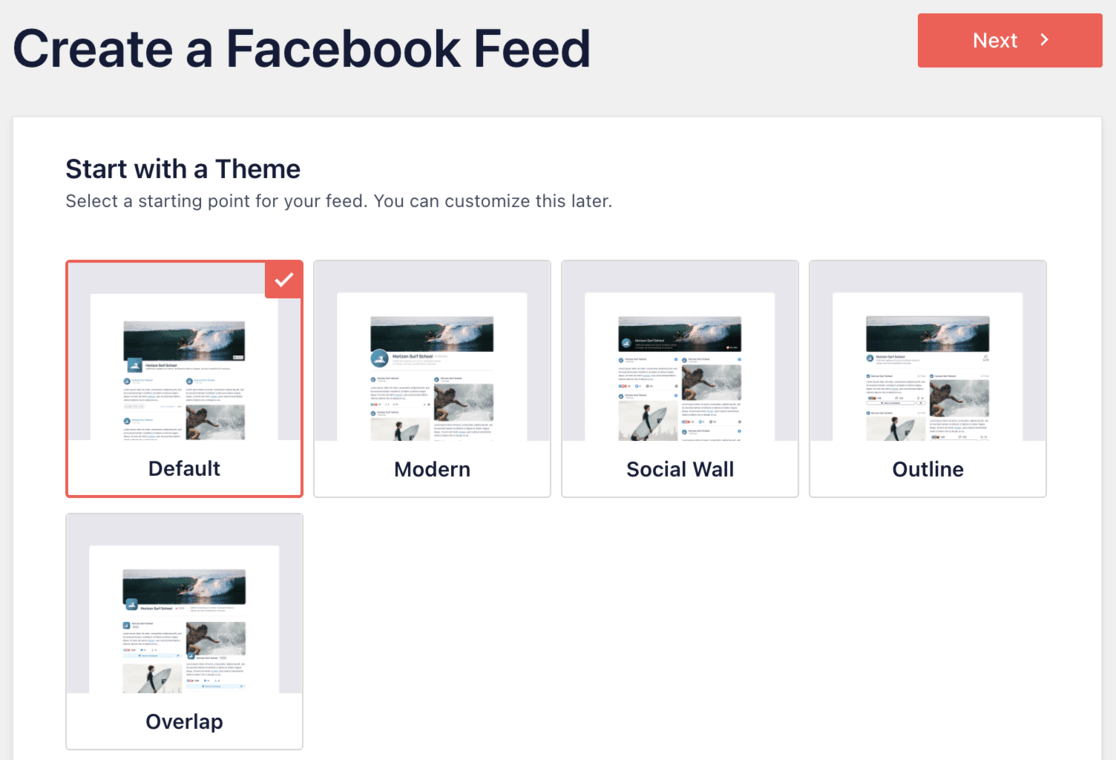
Each template is fully customizable, allowing you to adjust it to align perfectly with the look and feel of your WordPress site.
For this guide, we’ll use the ‘Default’ template, but feel free to explore and select any template that suits your needs.
After selecting a template, click on the Next button.
Smash Balloon will then generate a Facebook feed based on your chosen source and template.
This initial setup provides a solid foundation, but you’ll likely want to tweak the appearance and settings of your feed to fit your site’s design and functionality.
Step 4: Customize Your WordPress Facebook Feed
Facebook Feed Pro plugin offers numerous ways to customize your WordPress Facebook feed.
Once you are on the Facebook Feed » All Feeds screen, locate the feed you’ve just created and click on the Edit button, represented by a small pencil icon.

This action opens the feed editor, showing a preview of your custom Facebook feed as it will appear on your site, including embedded Facebook videos, status updates, and other content.
In the feed editor, various settings on the left-hand side allow for extensive feed customization.
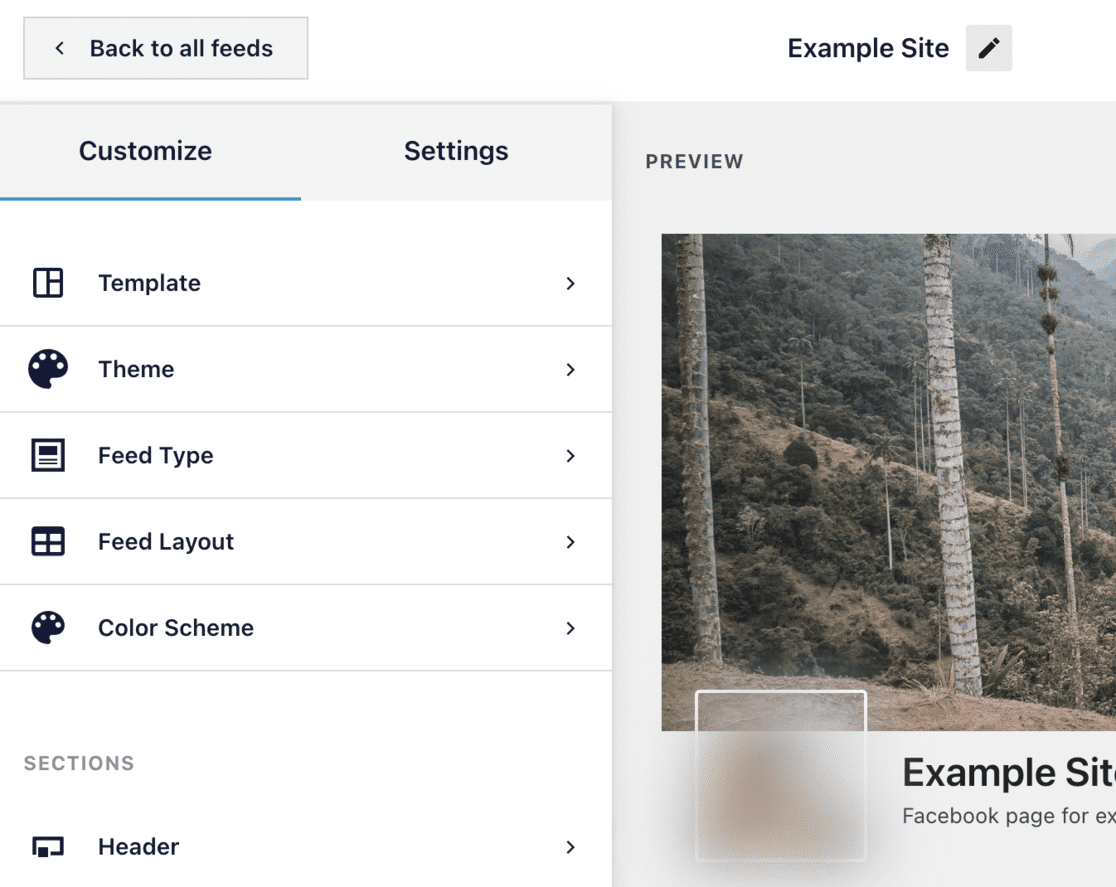
Starting with Feed Layout, you can experiment with different layouts and adjust the feed height.
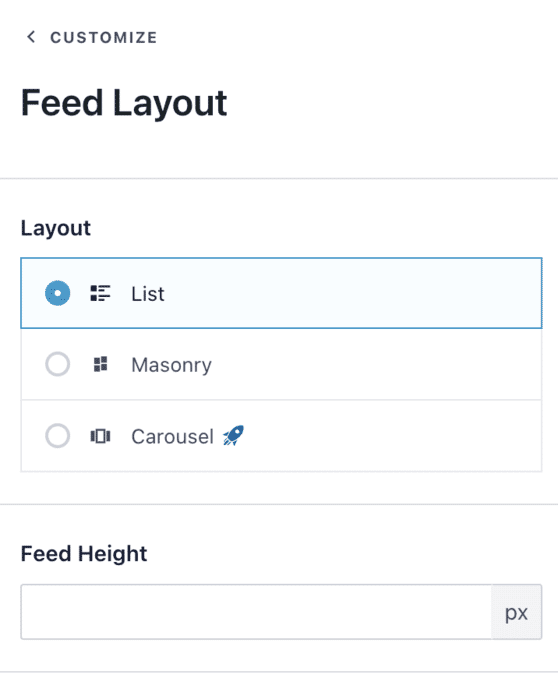
For a dynamic display, consider choosing the ‘Carousel’ layout, which turns the feed into a responsive slider.
As you tweak these settings, the preview updates in real time, allowing you to see the impact of each change instantly.
It’s also important to consider the display on mobile devices, which often have less screen space and processing power than desktop computers.
Adjust the number of posts displayed on mobile devices by entering a new number in the ‘Mobile’ field under ‘Number of Posts.’
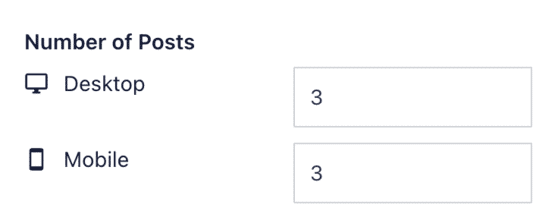
Use the preview buttons to view your feed on desktops, tablets, and smartphones, and ensure it looks great across all devices.
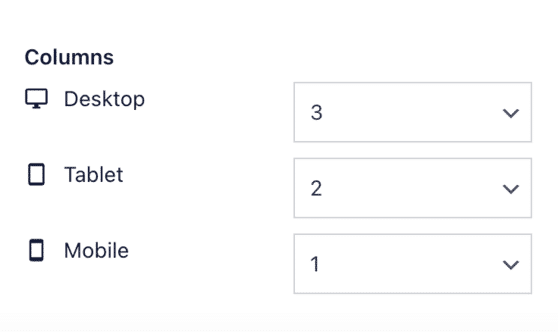
Adjustments can also be made to the number of columns displayed in the feed on different devices to ensure the content fits comfortably on smaller screens.
If the default column layout looks wrong on mobile devices, you can modify the numbers in the ‘Columns’ section.
Once you are satisfied with the layout, explore the ‘Color Scheme’ options.
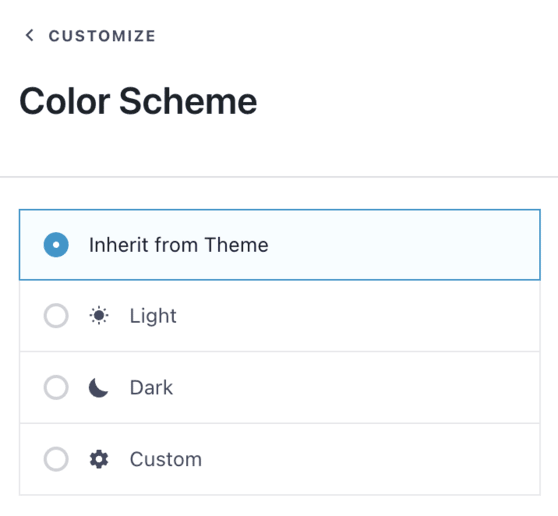
While Smash Balloon initially uses a color scheme that matches your WordPress theme, you can select ‘Light’ or ‘Dark’ themes or even create a custom color scheme that complements your site’s aesthetics.
Further personalize your feed by configuring the ‘Header’ section, where you can adjust the size and visibility of your Facebook profile picture and the name of your page or group.
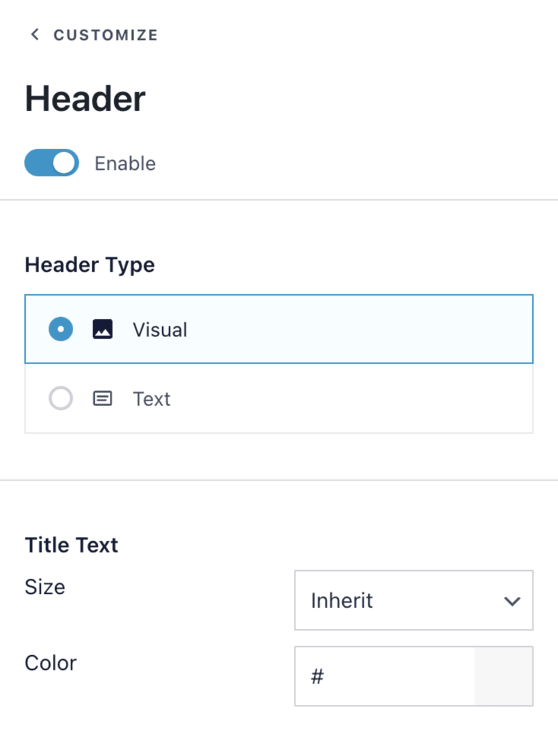
If preferred, the header can be completely disabled by toggling the switch.
In the ‘Posts’ section, customize the appearance of individual posts within your feed.
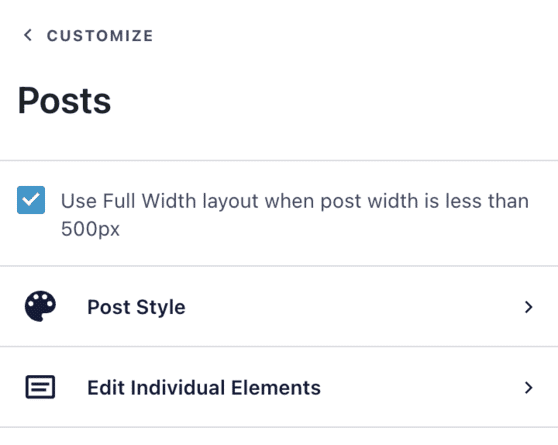
Options include switching between regular and boxed post styles, changing background colors, and adding box shadows to enhance visual depth.
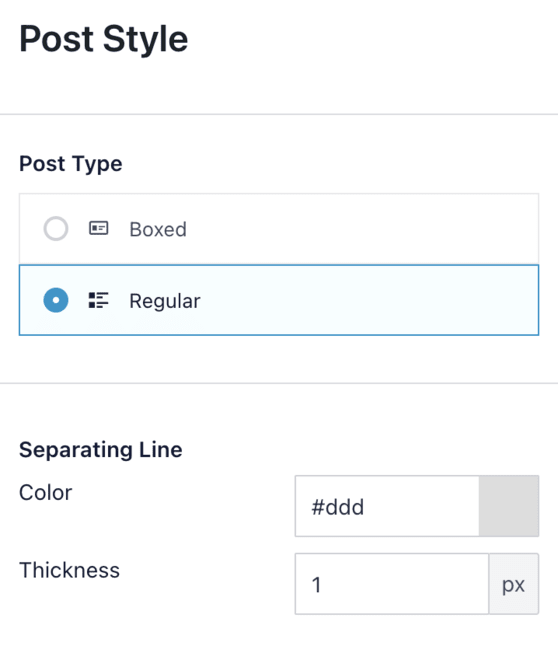
If you want to encourage visitor interaction, consider adding a Facebook ‘Like’ button by navigating to the ‘Like Box’ section and enabling it.
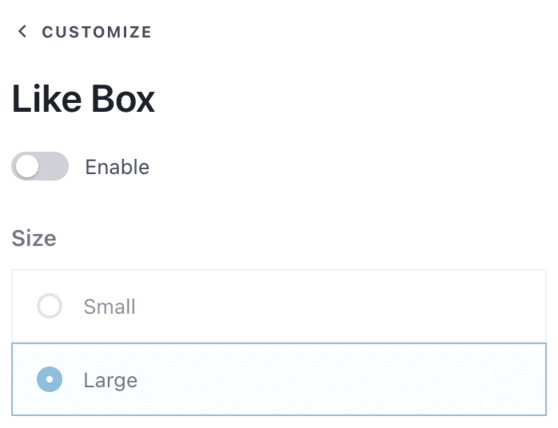
This button can be styled and positioned as desired, either at the top or bottom of the feed.
Lastly, customize the ‘Load More’ button, which can be styled to be more conspicuous or disabled entirely, depending on the nature of your feed.
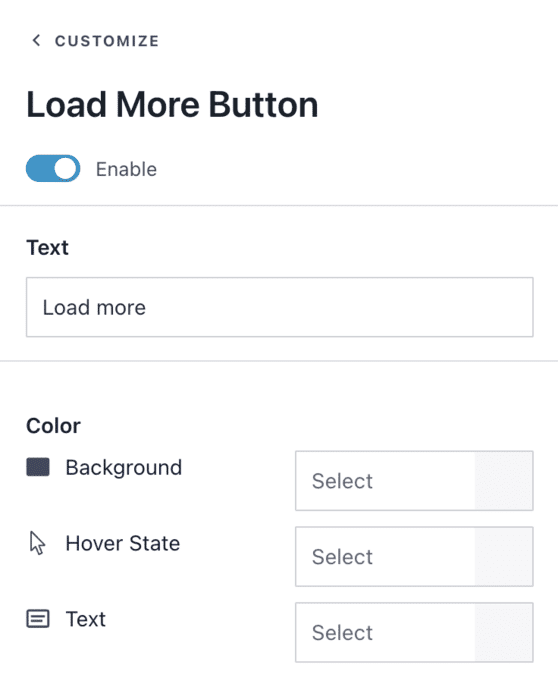
Removing the ‘Load More’ button might be practical for time-sensitive content, such as event announcements.
After finalizing all customizations, ensure to click Save to apply your settings.
Your custom Facebook feed is now ready to be embedded on your WordPress website, making it more engaging and connected to your social media presence.
Step 5: Embed Your Facebook Feed in WordPress
To embed your Facebook feed into your WordPress site, click the Embed button next to the Save button in the plugin interface.

This action introduces two options for embedding your feed: a shortcode or a block.
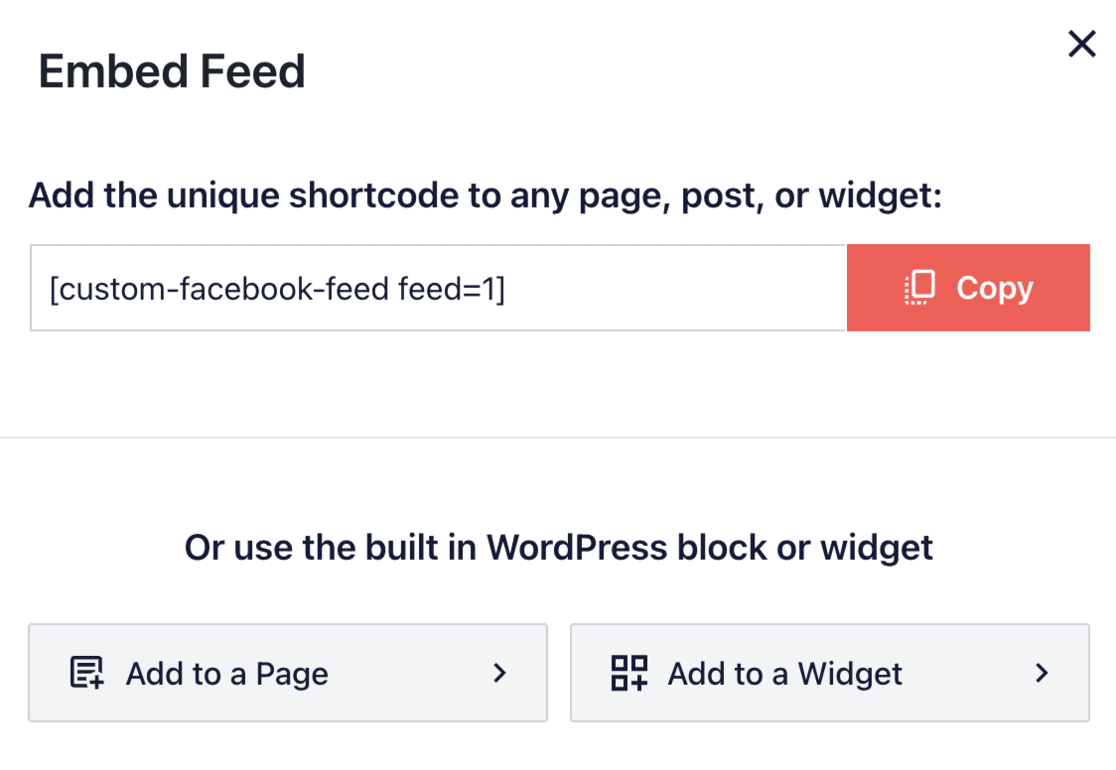
For a straightforward integration, using a block is generally easier.
Within the Embed Feed popup, you can click ‘Add to a Page’ or ‘Add to a Widget,’ depending on whether your theme supports widget-ready areas.
For the purposes of this guide, we’ll proceed by selecting ‘Add to a Page.’
After clicking Add to a Page, you must choose which page you’d like to insert the Facebook feed into.
Select your desired page and click Add.
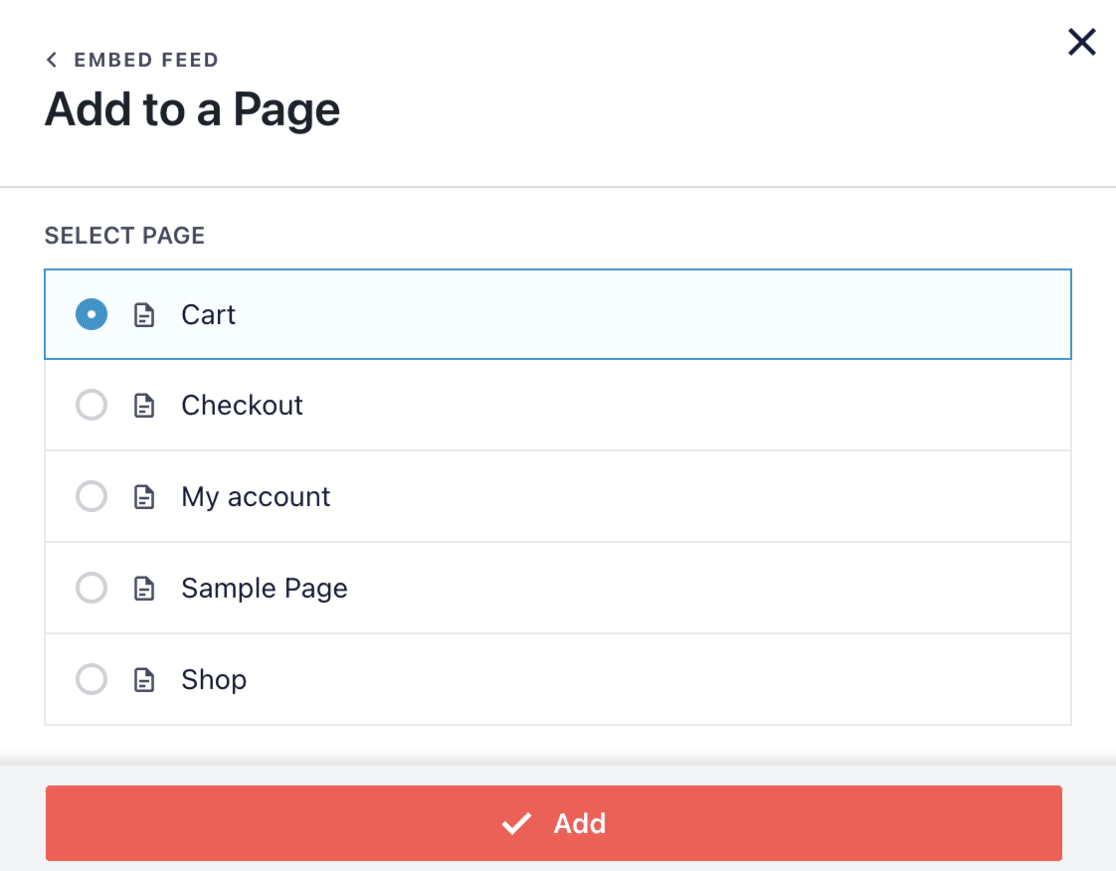
This will redirect you to the block editor of the chosen page.
In the block editor, click the + button and search for the Facebook Feed block.
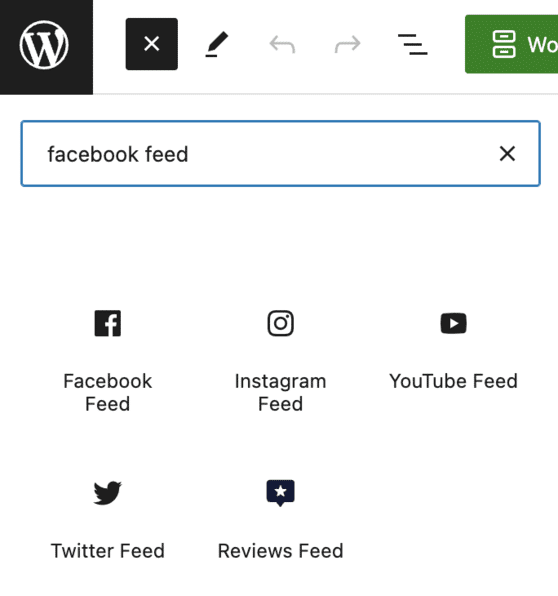
You can then drag and drop this block into the desired location on your page.
At this point, select the specific Facebook feed source you want to display from the drop-down.

Once the feed appears in the editor, make sure to click Update to apply the changes and make them visible on your website.
If you prefer to use the shortcode method, copy the shortcode provided in the Embed Feed popup.

Paste this shortcode into a shortcode block within the content editor of any page, post, or widget where you want the feed to appear.
After placing the shortcode, don’t forget to click Update to finalize the embedding process.
Now that you’ve successfully integrated a Facebook feed into your WordPress site, use MonsterInsights to monitor the traffic and conversions generated by your new feed page!
Frequently Asked Questions
How do I add a live Facebook feed to WordPress?
Install the Facebook Feed Pro plugin by Smash Balloon, connect it to your Facebook account, configure your feed preferences, and embed the feed using the provided block or shortcode.
What is the best social feed for WordPress?
Smash Balloon is highly regarded for its ease of use and extensive customization options, making it one of the best choices for integrating social feeds into WordPress.
How do I embed a Facebook post in WordPress without a plugin?
Navigate to the desired Facebook post, click the three dots for more options, select ‘Embed,’ copy the provided code, and paste it into the HTML section of your WordPress post or page.
Does WordPress have social media integration?
Yes, WordPress supports social media integration through various plugins and widgets that allow for embedding social feeds, sharing buttons, and linking to your social media profiles.
That wraps up a tutorial on embedding a custom WordPress Facebook feed to your website.
If you liked this article, make sure also to check out:
- 8 Best Social Media Metrics to Track Now (+ Growth Tips)
- 8 Proven Ways to Increase User Engagement on Your Website
- How to Create a WordPress Instagram Feed (Easily)
- How to Create a WordPress Gallery: Step-by-Step
Not using MonsterInsights yet? Get started now!
Don’t forget to follow us on X, Facebook, and YouTube for the best WordPress tutorials and Google Analytics updates.
