Are you looking for ways to attract users to our most popular posts and products in WordPress?
Showing your best content helps people easily find new blog posts, increases user engagement, and improves the visibility of your posts. It also boosts SEO by allowing you to create internal links to your pages.
In this article, we’ll show you how to display your most popular posts in WordPress.
Let’s begin.
Why Display Popular Posts in WordPress?
Sometimes, visitors have a hard time finding your best content. Even when highly optimized, popular content could get lost if you have thousands of blog posts.
And, sometimes, it won’t even appear on search engines.
That’s why showing popular posts allows you to display your top articles anywhere on your entire website. You don’t have to worry about your content being buried out of sight.
Since popular posts are the most successful content pieces, they can help boost user engagement and keep people on your site. And with more people reading your blog posts, there’s a higher chance they’ll convert.
That said, are you ready to learn how to display popular posts in WordPress?
How to Set Up Popular Posts in WordPress
There are many popular WordPress post plugins that you can use to display your best content. But the easiest way is through MonsterInsights.
It’s the best Google Analytics plugin for WordPress, and using its Popular Post feature, showing your most successful articles is a breeze.
The plugin offers pre-built templates and many customization options, so you can make sure the popular posts match the layout and design of your website.
Just follow these steps to get started.
Step 1 – Install the MonsterInsights WordPress Plugin
The first step you’ll need to perform is to install and activate the MonsterInsights plugin on your WordPress website. Using the plugin, you can set up Google Analytics without coding and get all the data that matters right within your WordPress dashboard.
Note that you’ll need MonsterInsights Plus or a higher license to use its Popular Posts feature.
MonsterInsights also allows you to set up advanced tracking easily. In just a few clicks, the plugin helps track your visitors’ behavior on the website.
For instance, you can find out which content they like, where they’re from, which links they click, and a lot more.
And if you’re looking to get to know your audience even better, then MonsterInsights offers powerful addons.
These help track your online store’s performance, show how your WordPress forms convert, and allow you to set up custom dimensions.
Step 2 – Add Google Analytics to Your Site
Once the plugin is activated, you must connect Google Analytics with your website.
Usually, you’d have to enter a tracking code in your website’s header manually. This means going through the website code.
But with the MonsterInsights setup wizard, you only have to follow the steps, and the plugin will take care of the rest. No need to edit code or hire a professional.
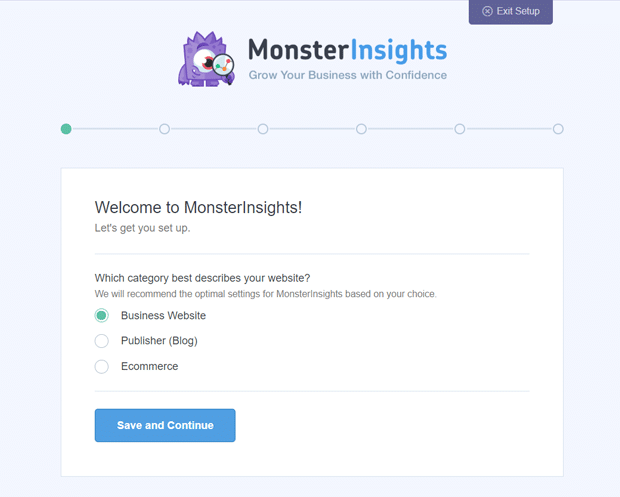
For more details, follow our guide on how to add Google Analytics to WordPress.
Step 3 – Select Popular Posts Type
After you’ve added Google Analytics to your site, the next step is to select your popular post type.
MonsterInsights offers 3 ways you can display the best content on your site. These include:
- Inline Popular Posts – Automatically display posts within the text of your post or page.
- Popular Post Widget – Show up to 10 blog posts anywhere on your site in a widget, like a sidebar, the end of an article, or the footer.
- Popular Products – Display 10 of your top-selling products on your eCommerce store.
You can choose from any of these 3 ways to show your top blog posts by going to Insights » Popular Posts.
Step 4 – Choose a Theme
Next, you can select a theme for your popular posts. MonsterInsights provides pre-built themes, so you don’t have to worry about the design and style of your popular posts.
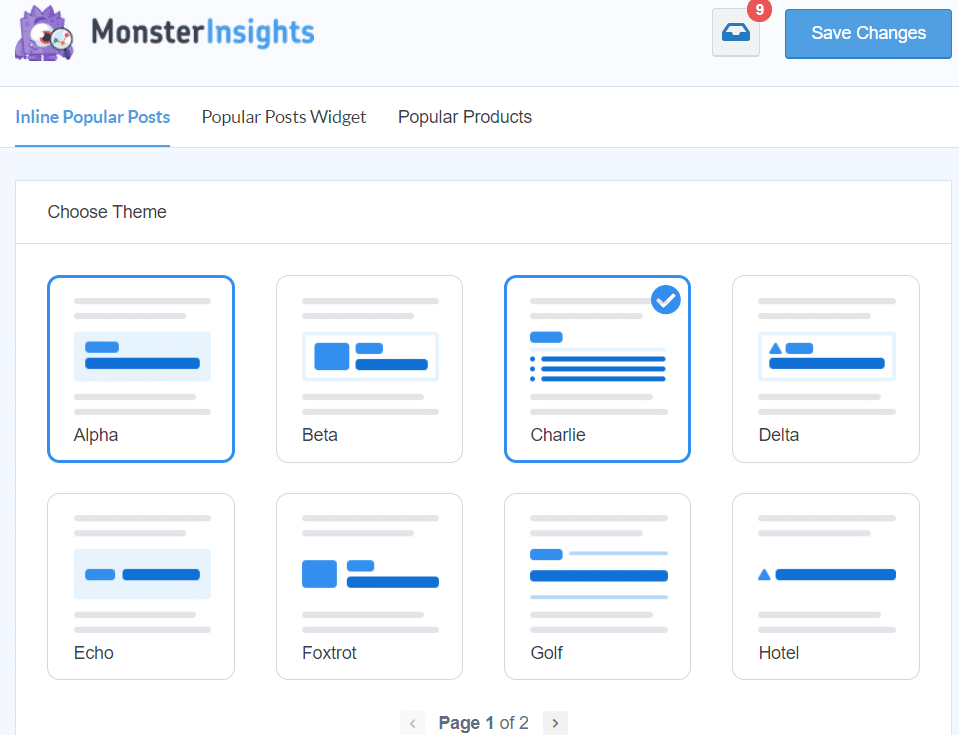
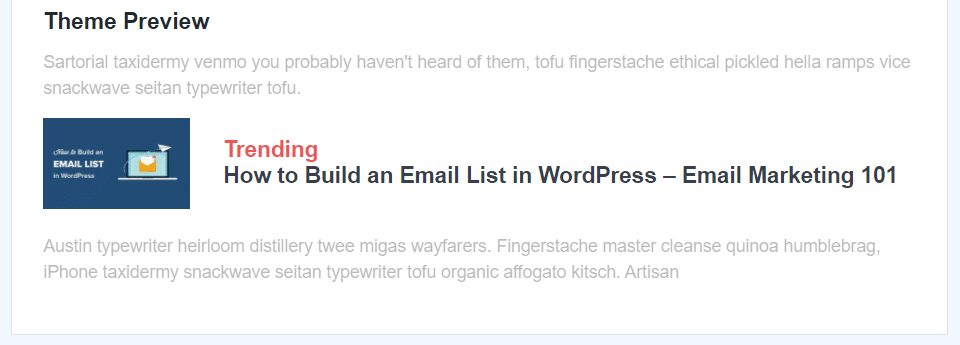
And the best part is that the plugin shows a preview of each theme. This way, you can see a theme’s appearance before selecting one for your website.
Step 5 – Customize the Design
Once you’ve selected a theme, MonsterInsights offers more options for customizing its design. For instance, you can change the title, label, icon, and background color and size.
And if you want, you can also use your own styling.
Select the No Styles option under Widget Styling, and you can use your own CSS.
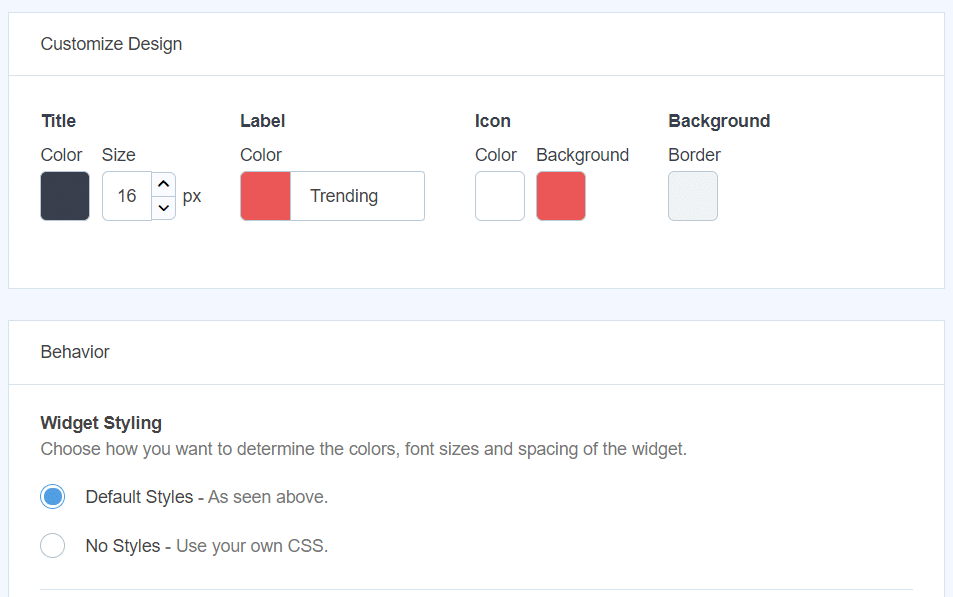
Note that the customized design options may vary depending on your selected theme.
Step 6 – Sort Your Popular Posts
Next, you can select different options to sort your popular posts. Let’s go over each one.
How to Display Most Commented on Posts
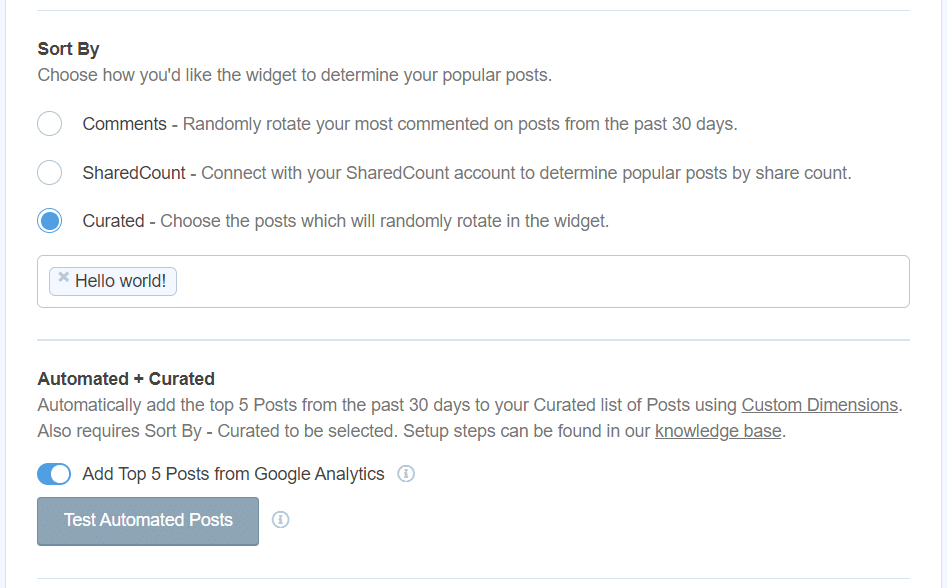
When you choose the ‘Comments’ option, MonsterInsights will randomly rotate the most commented on posts from the last 30 days.
What’s great about this option is that it’s always showing your most recently popular content. If you’re a publisher that gets comments on a daily basis, this is an awesome option.
Depending on what people are commenting on, it can show a mixture of older and newer posts.
How to Display Most Shared Content
Hey, Pinterest users! This is a very cool option for you, although it also works for all social media shares on other networks.
Using SharedCount, you can display your posts based on share count. For example, if you’re a food blogger, you could share your top-most shared recipes.
How to Display Curated Content as Top Posts
Want to choose your own top posts? You can do that, too! Just start typing post titles to choose which ones you’d like to display (like in the screenshot below).
How to Display Top Posts by Views
There’s also an option to automatically curate the list of blog posts to show in the popular post widget.
By setting up the Post Type custom dimension in Google Analytics, MonsterInsights will display the top 5 articles from the past 30 days as popular posts.
You can also make sure the curated list is working properly by clicking the Test Automated Posts button.
If you don’t have a post type dimension setup on your site, then follow our beginner’s guide to custom dimensions in Google Analytics.
It’s very easy to set up custom dimensions using MonsterInsights. The plugin offers a Dimensions addon, which helps you add custom dimensions in just a few clicks, and you won’t have to edit the tracking code on your site.
Step 7 – Place Your Popular Post Widget
The next step is to place your popular posts anywhere on your website.
MonsterInsights offers 2 ways to place the widget. You can either select automatic placement or manual placement.
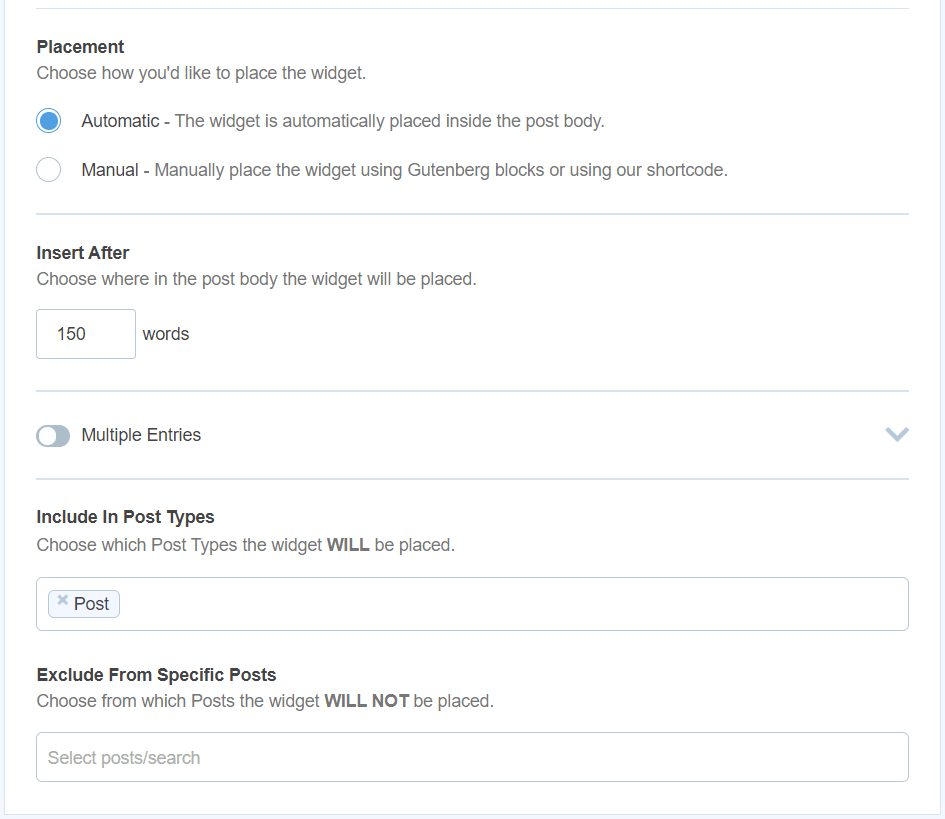
If you choose Automatic, the plugin will add the widget within the post body. It provides options to insert the widget after a certain number of words. And you can include and exclude post types to show the popular post widget.
Now, if you select the Manual option, MonsterInsights lets you add the popular post widget using a Gutenberg block or a shortcode.
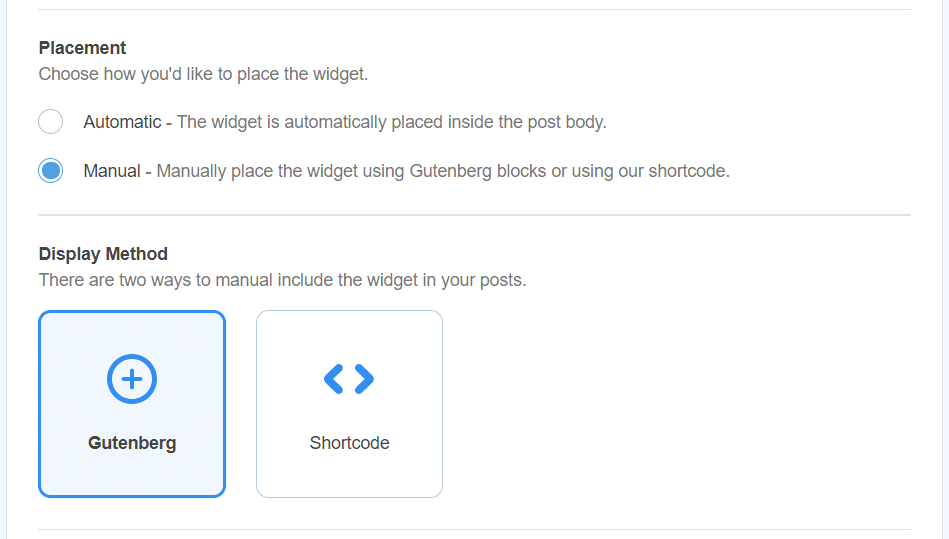
Let’s see how to add your most successful article to your website manually.
Step 8 – Add Popular Posts to Your Website
After selecting the placement option, you can now add popular posts to your content.
First, go to any page or post and open the editor. Next, click the plus sign at the top left corner and select the Popular Posts or Shortcode blocks.
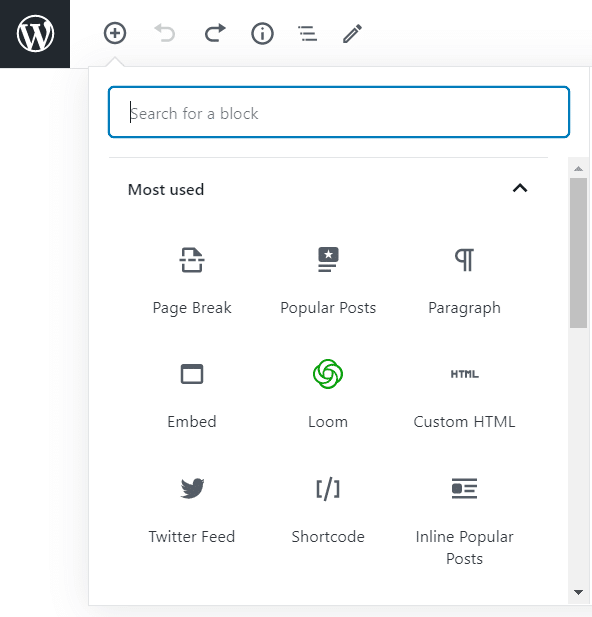
The Popular Posts block will automatically add your top content to the page. And if you select the shortcode, enter the code from MonsterInsights.
Once that’s done, preview your page and hit publish.
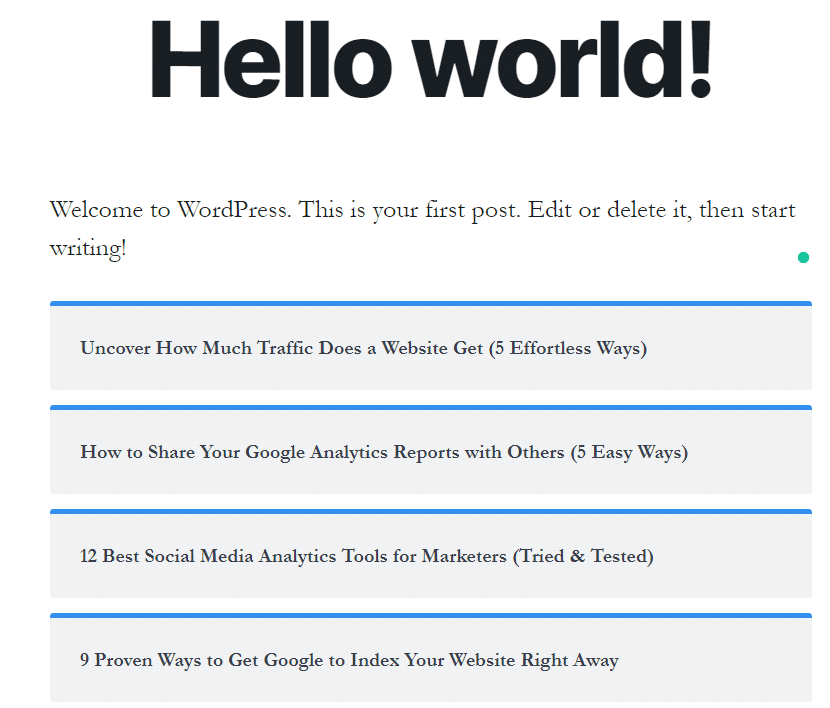
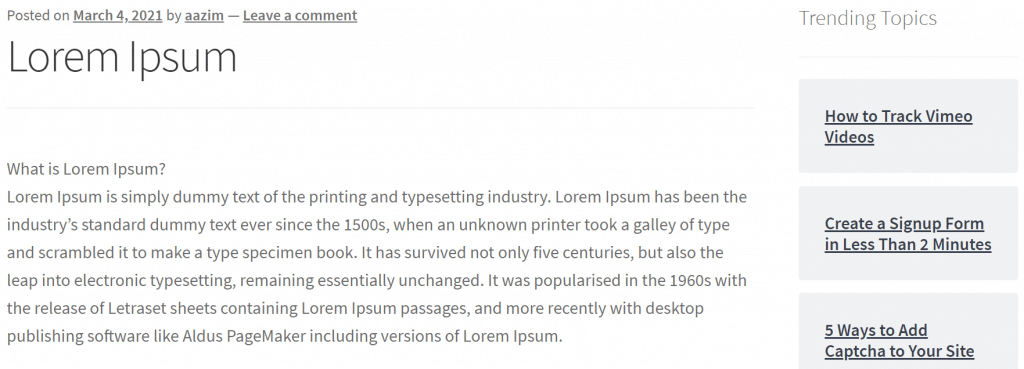
If you want to display the popular posts widget in the sidebar or in the footer of your website, go to your WordPress admin area and navigate to Appearance » Widgets.
Next, drag and drop the Popular Posts – MonsterInsights widget under the Default Sidebar menu (or footer).
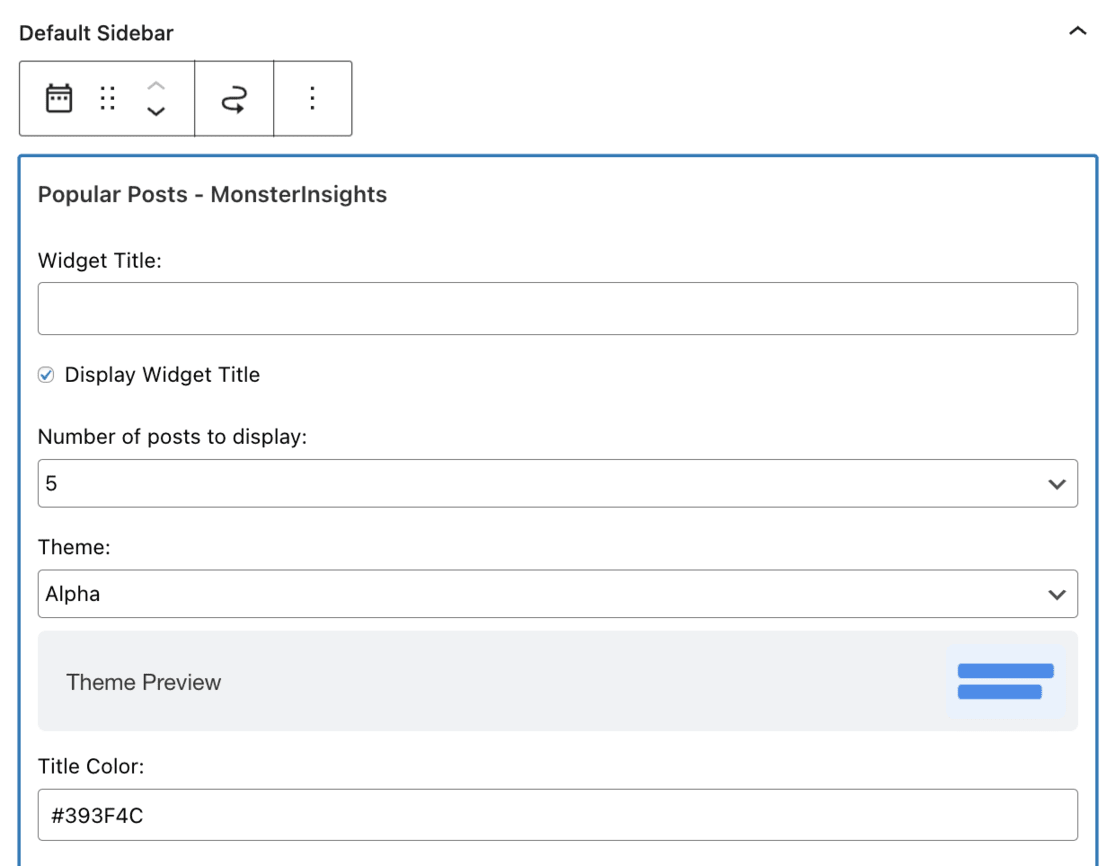
You can enter a widget title, select a theme, edit the title color and font size, change the background color, and select categories to show posts.
Frequently Asked Questions
What is a popular post in WordPress?
A popular post in WordPress is a post that has been viewed, read, or interacted with more than other posts on your website. WordPress keeps track of how many times each post is viewed, and you can use this information to show off your most popular posts.
How do I display my most popular posts in WordPress?
To display your most popular posts in WordPress, you can use a plugin or widget that shows the most viewed posts. Many plugins are available, like WPBeginner or MonsterInsights. After installing the plugin, you can add it to your site’s sidebar or widget area. The plugin will automatically show the most viewed posts based on the number of views.
Can I customize how my popular posts are displayed?
Yes, you can customize how your popular posts are displayed. Most popular post plugins allow you to choose how many posts to show, whether to show the post title, the number of views, and even the post thumbnail.
What if I want to display my most popular posts on a specific page?
If you want to display your most popular posts on a specific page, you can create a new page in WordPress and add a shortcode provided by the popular posts plugin. Once you’ve added the shortcode to your page, the most popular posts will be displayed on that page.
And that’s it!
The popular posts feature in MonsterInsights is the perfect way to enhance your visitor’s online experience, increase user engagement, and prevent your best content from getting buried.
We hope you liked our article on how to display your most popular posts in WordPress. Be sure to also read:
- 8 Proven Ways to Increase User Engagement on Your Website
- Top 5 User Engagement Metrics for Your Website Explained
- How to Set Up Google Analytics Link Click Tracking
And don’t forget to follow us on X, Facebook, and Youtube for more Google Analytics tutorials.

There is something inherently missing with this plugin (unless I am mistaken).
The ability to specifically place an exact post (popular content) in a specified article.
The more exact and highly targeted and closely related the displayed post is to content that is hosting it the more likely it is to be clicked and thus reduce bounce rate or get the desired action.
Trust me my bounce rate is around 2% (approximately 98% of my visitors view more than one page). I was able to achieve this by do exactly that being very specific and highly targeted with related content and internal links in my articles.
If a visitor has gone and clicked over to read article X and there are article mentioned that are very similar (not just same category, same sub category, highly similar) it is very likely they will be interested in reading that/those articles as well.
This is also how you get 4% to 5% email sign up rates – surgical precision with title/keywords mentioned in the incontent capture box and pop up.
This is high level CRO and I’d love to see this added to your widget thing.
Hi Derek,
Unfortunately, that’s not possible at this time, but it’s a great idea – I’ll pass it along to our developers. Thank you! You can subscribe to our weekly newsletter (using the form in the sidebar or at the bottom of this page) if you’d like to be alerted when new features are released.
So this is exciting. I’ve tried to implement inline posts, curated and I cannot seem to find that option. We recommend specific posts within our content. When I choose inline, it’s only showing me posts OFF our site and I cannot choose the article I want to highlight they read. Am I missing something?
Hi Rob, thanks for stopping by 🙂
Can please reach out to our support team with your issue? They’ll help you out!
Love this website keep up the good work!
want to show real time top 5 posts rather than past 30days. is it possible..?… if not please update.. it will give huge traffic benefit to users. please consider this
Hi Muthukumar – It’s not currently possible but we do have it on our list of requested features. We’ll add your vote!