Wondering how to create an opt-in form in WordPress to capture emails and grow your email list?
Growing your email list is one of the very best things you can do to amp up your marketing campaigns. Email marketing is one of the most profitable marketing channels, so it’s really a good strategy to grow your list.
The hard part, though, is gathering those emails! Thankfully, there are multiple ways to create opt-in forms in WordPress that are attention-grabbing, optimized, and effective.
In this article, we’ll go over how to create opt-in forms in WordPress in a couple different ways.
WordPress Opt-in Form Best Practices
Before we get into the steps for creating your opt-in form, let’s look at a couple best practices and tips.
- Use pop-up forms – Have you heard negative things about pop-up forms? Well, forget the bad things you’ve heard, because there are good, Google-approved ways you can use pop-up forms. And they’re super effective! We’ll talk more about pop-up forms in our tutorial.
- Keep it simple – The simpler and shorter your opt-in forms, the more likely people are to actually fill them out. A name and email address is all you need to start – or in some cases, just an email address will do!
- Put one on every page – You want visitors to be able to sign up for your list, no matter where they are on your site. Think about the sidebar, the footer, and/or the header, in addition to any special pop-ups you have.
- Make it worthwhile – What’s the benefit of signing up for your subscriber list? What will the visitor get out of filling out the form? Make it enticing. Offer a stellar piece of content, a coupon or discount, or tell them how many other subscribers they’ll be joining (if you have quite a few).
How to Create WordPress Opt-in Forms [2 Ways]
We have two different, amazing plugins you can use to create opt-in forms. Although you could use one or the other, we’d recommend using both of them at the same time for different types of forms.
We recommend:
- OptinMonster for pop-up forms, floating bar forms, countdown forms, and more
- WPForms for contact forms with opt-in checkboxes, sidebar forms, and more
Let’s take a look at OptinMonster opt-in forms first.
How to Use OptinMonster Opt-in Form Builder
OptinMonster is the most powerful conversion optimization toolkit for the web. Use it to quickly grow your email subscriber list, and get more leads, and increase your revenue.
For WordPress users, OptinMonster has a powerful, easy-to-use WordPress plugin to set up opt-in forms on your site. It’s used by over 1 million active users!
Step 1: Sign up for and Install OptinMonster
To start, sign up for an account at optinmonster.com. You can choose the plan that includes the features you need and the number of pageviews you get per month. We’ll use the Pro plan in our tutorial, but you can certainly get started with the Basic plan if it fits your needs.

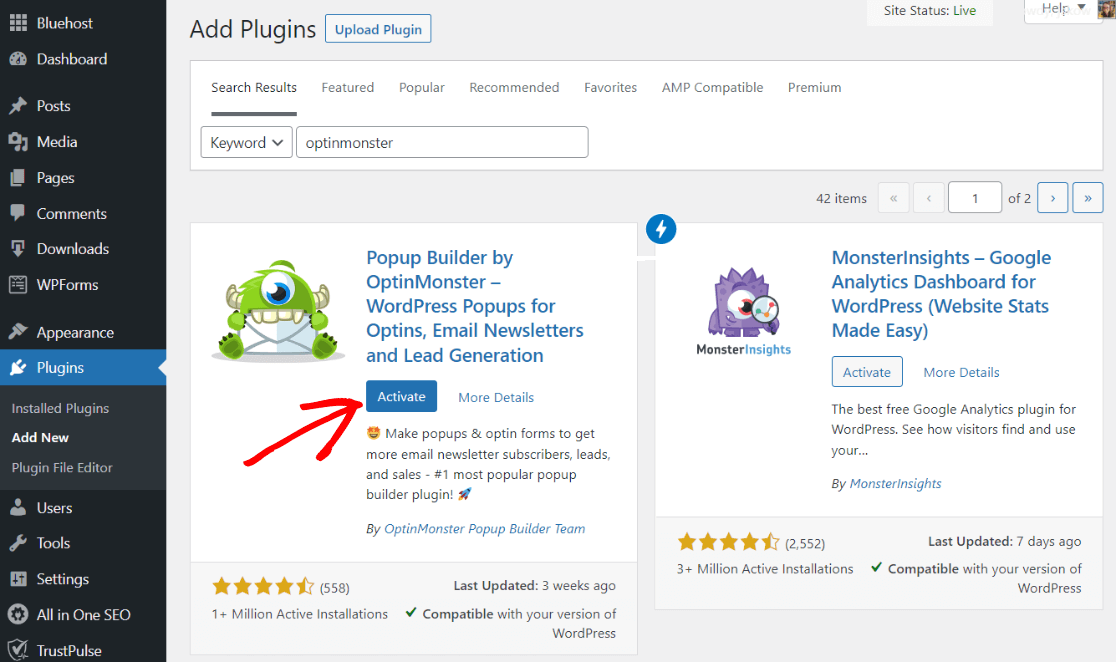
Next, open your WordPress site and go to Plugins » Add New and search for OptinMonster. Click Install Now:
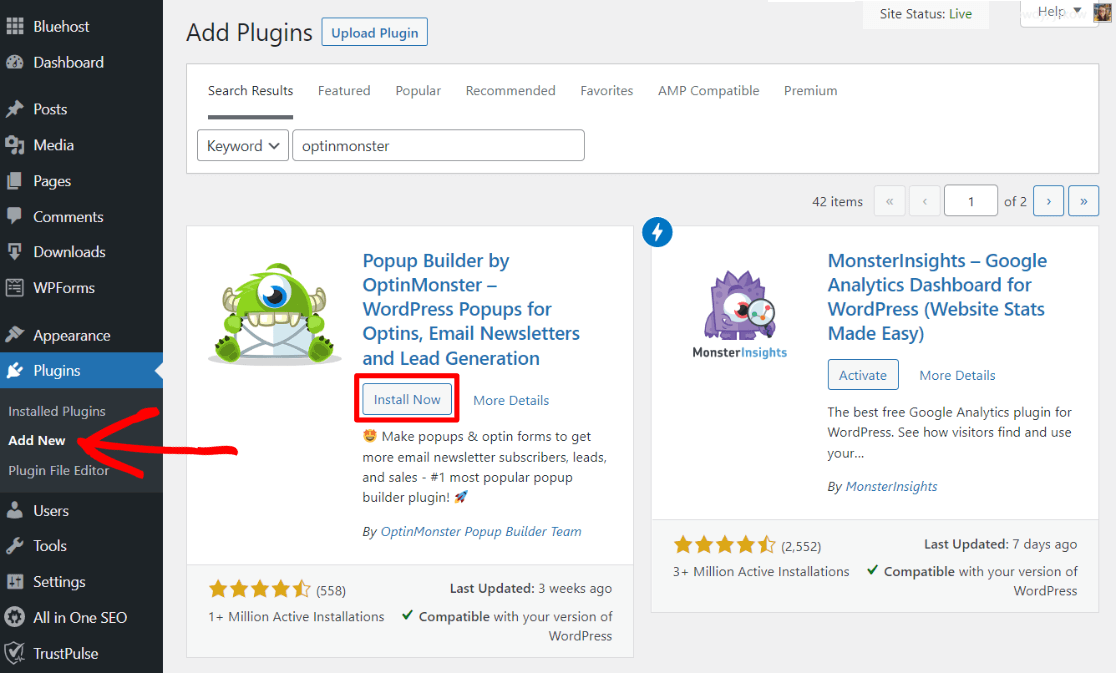
Once the plugin finishes installing, make sure to click the Activate button.
Step 2: Connect Your Account
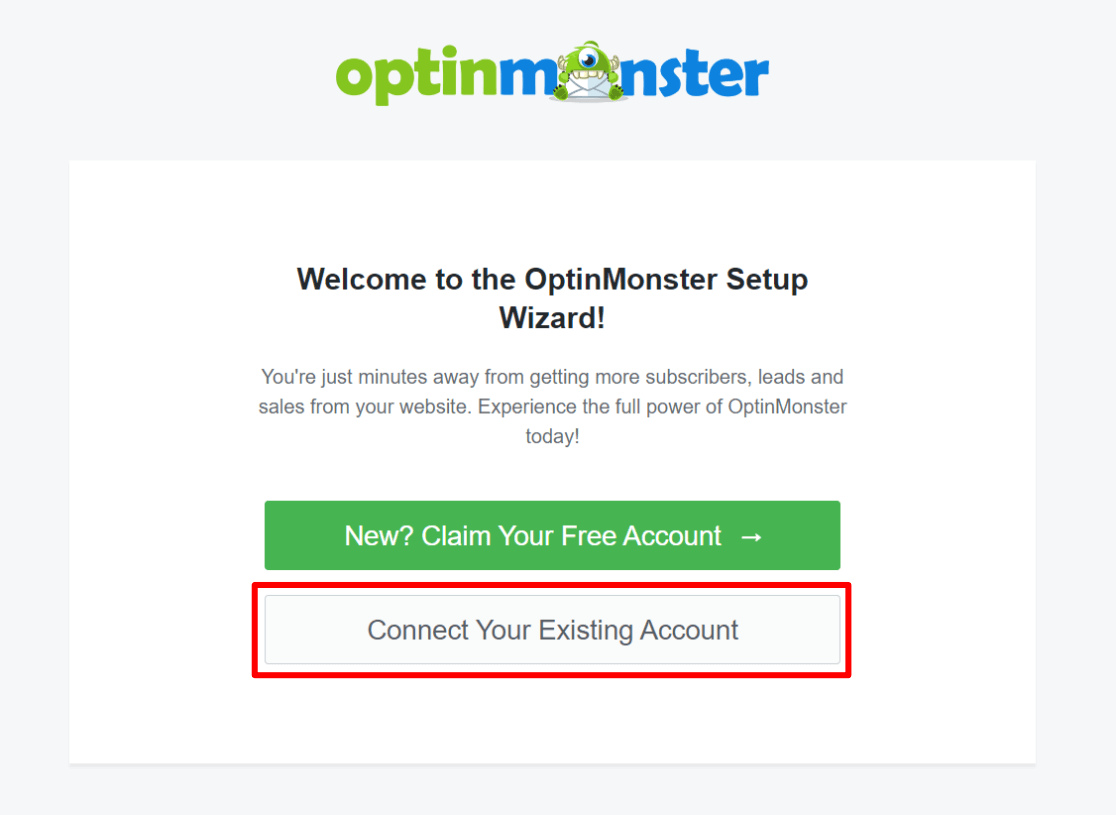
Now, the setup wizard will automatically come up. Go ahead and walk through all the steps, beginning with connecting to the account you just set up in step 1:
Step 3: Design Your First Opt-in Form Campaign
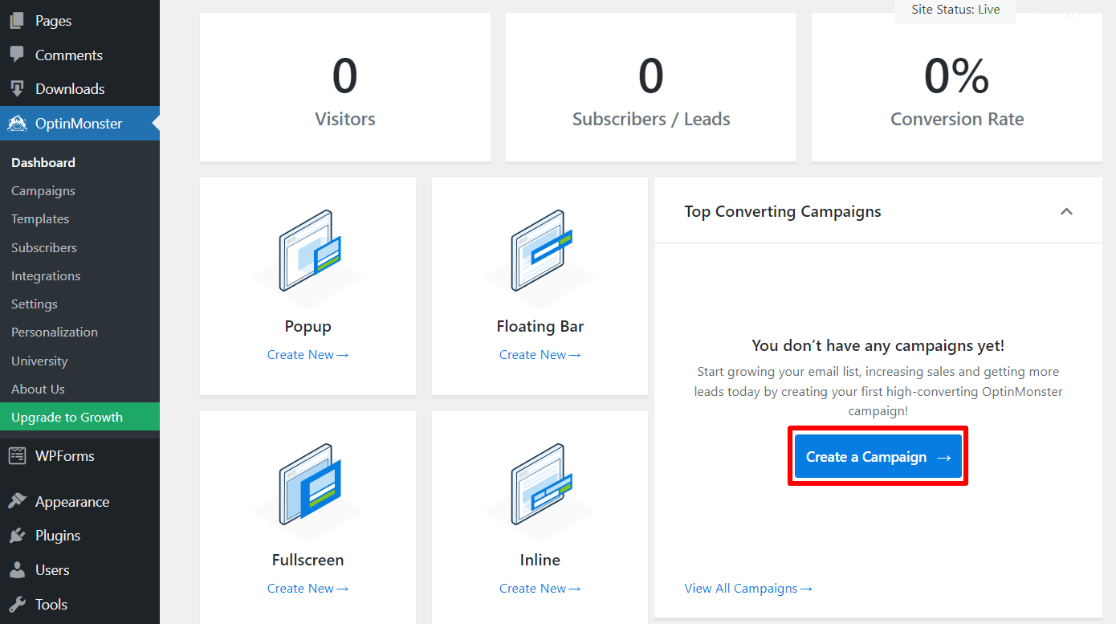
Now, you can create your first opt-in form. Go ahead and click the Create a Campaign button, or choose the type you’d like from the choices (popup, floating bar, etc.).
Once you choose the type of campaign you want, you’ll be able to choose a template to start with. We’re going to create a Popup campaign and use the Simple Dark template:
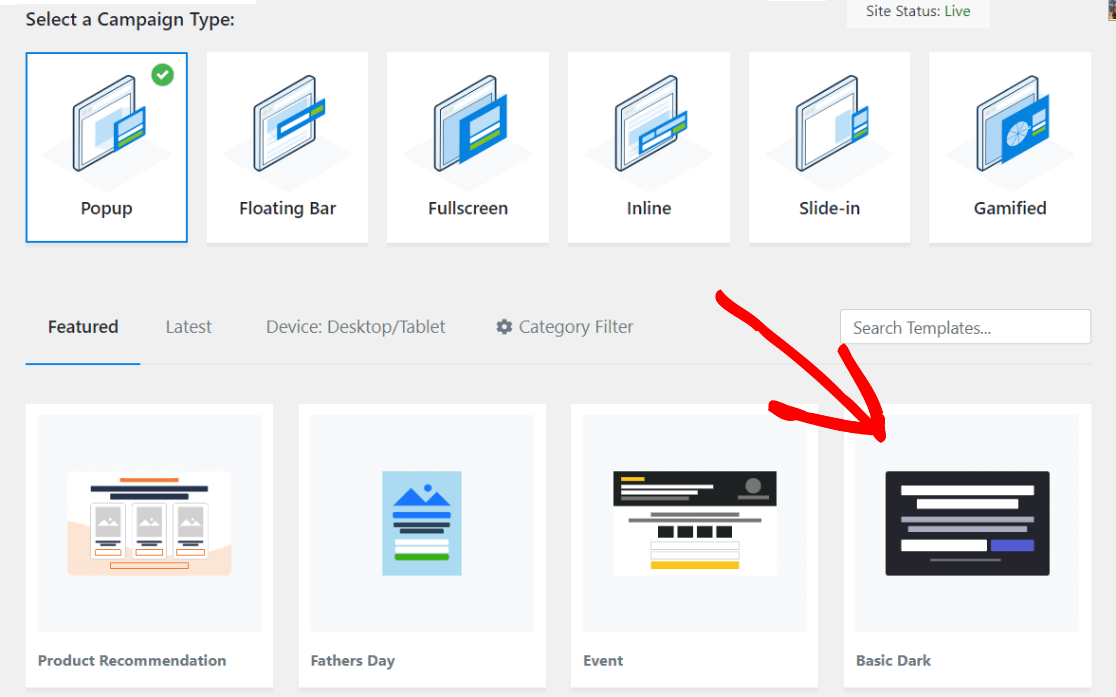
Go ahead and select your template, then give your campaign a name.
Once you name your campaign, you’ll be taken to the campaign builder:
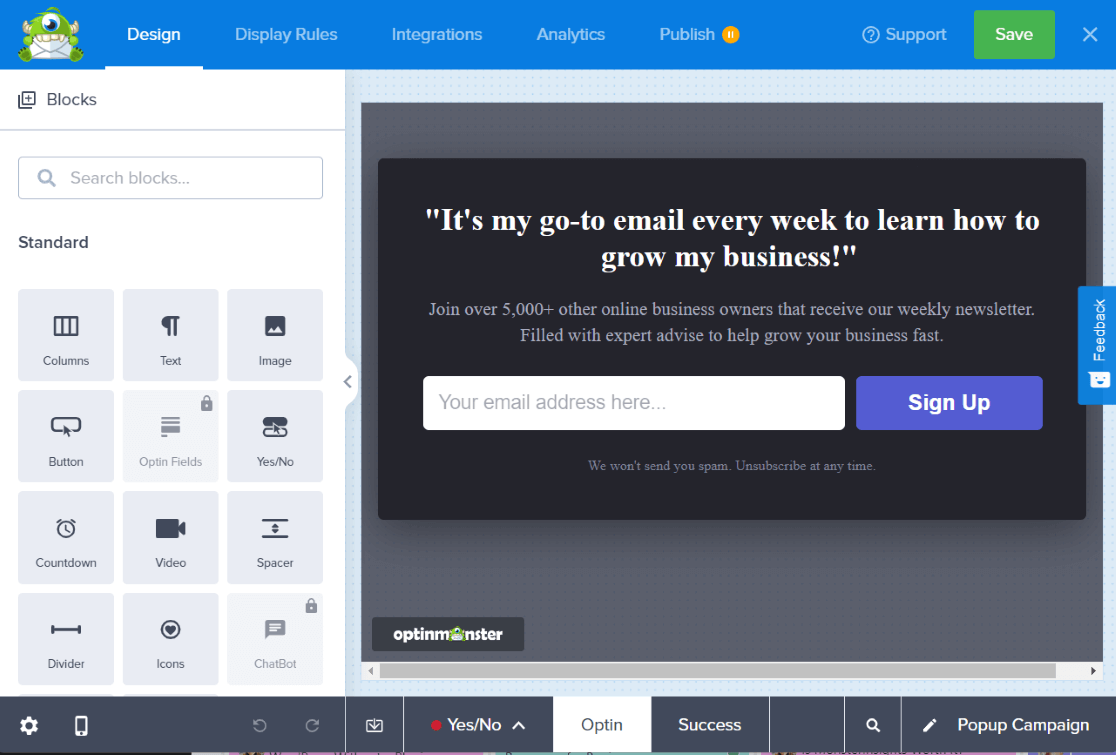
Here’s where you’ll create the design of your WordPress opt-in form. Go ahead and click and drag any elements you’d like into your form, including text, images, buttons, video, a countdown, and much more. Or, click on an existing element to change the text, size, color, and more.
Step 4: Select Display Rules
When the opt-in form looks just how you want it, head over to the Display Rules tab:
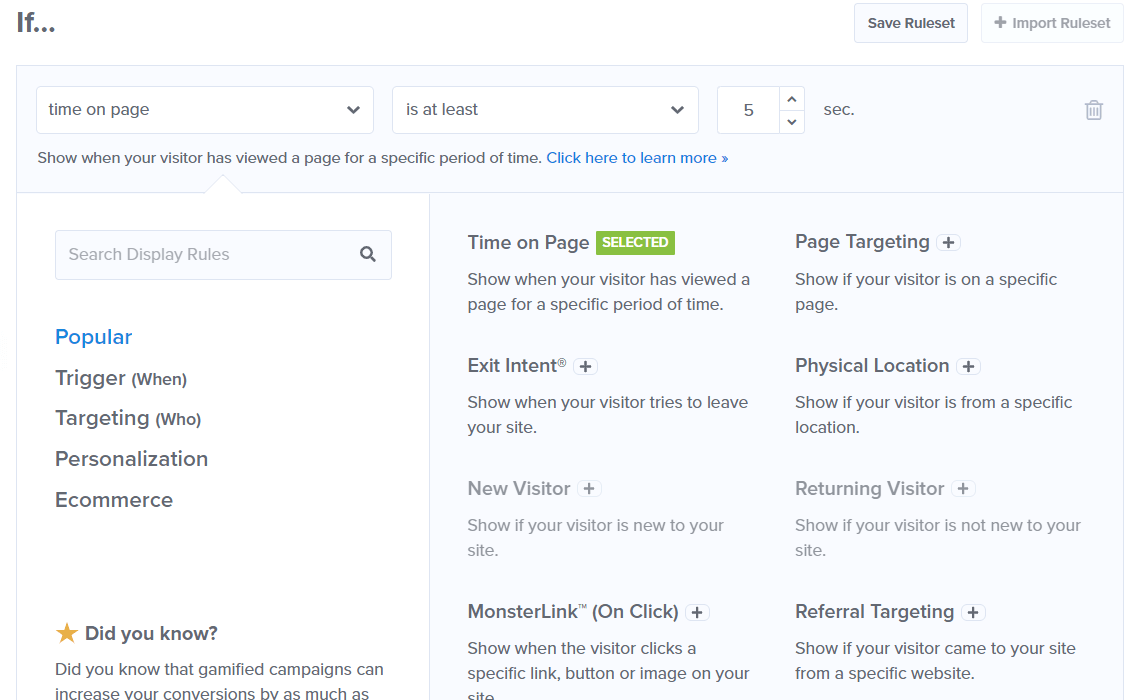
Here’s where you’ll choose when and where you want your popup opt-in form to show up. OptinMonster helps by showing you popular choices here, like when someone has been on any page on your site for more than 5 seconds.
Some other examples of when you might want to show your popup opt-in form are:
- Only on certain pages if your offer is page-specific (like offering a specific content download)
- When your visitor is about to leave (Exit Intent®)
- On a certain day of the week (like a weekend offer on the weekends)
- After someone has scrolled 25% down the page
Step 5: Set up Integrations & Analytics
After your display rules are set, you can add any integrations and analytics that you’d like to use. For instance, in the integrations tab, you can connect with an email marketing tool like Constant Contact so that anyone who fills out your opt-in form will automatically be added to Constant Contact.
If you use Google Analytics, you can connect your account in the Analytics tab.
Get more help with OptinMonster integrations.
Step 6: Publish
Once all your settings are configured, you can head to the Publish tab and change your Publish Status to Publish.

That’s it! Your OptinMonster opt-in campaign is live.
How to Use WPForms Opt-in Form Builder
Our other option for creating opt-in forms in WordPress is with WPForms.
WPForms is the best forms plugin for WordPress, and it allows you to create tons of different kinds of forms, including opt-in forms.
With WPForms, you can make an opt-in form for your sidebar, footer, page, or post. You can also use it to create contact forms that include an opt-in checkbox to sign up for your mailing list, or any other type of form that has an opt-in checkbox. There are so many possibilities!
In this quick tutorial, we’ll show you how to create a specific, stand-alone opt-in form that we’ll embed in a sidebar.
We’re going to use WPForms Pro. In order to integrate the plugin with your email marketing platform, you’ll want WPForms Plus or above.
Step 1: Download and Install WPForms
After you’ve purchased WPForms, head to the Downloads tab to download your plugin:
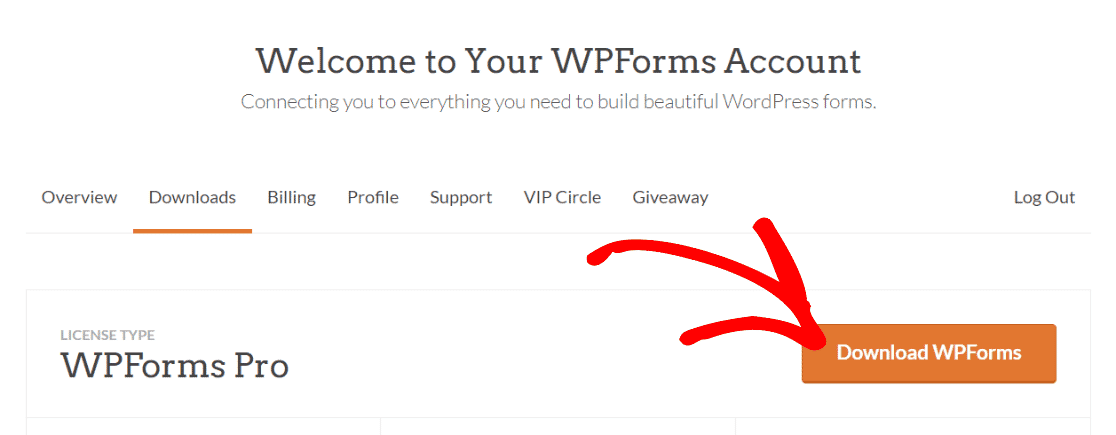
Once you have your zip file downloaded, open your WordPress dashboard and navigate to Plugins » Add New » Upload Plugin. Upload your zip file:

Now, activate WPForms by clicking the blue Activate Plugin button:
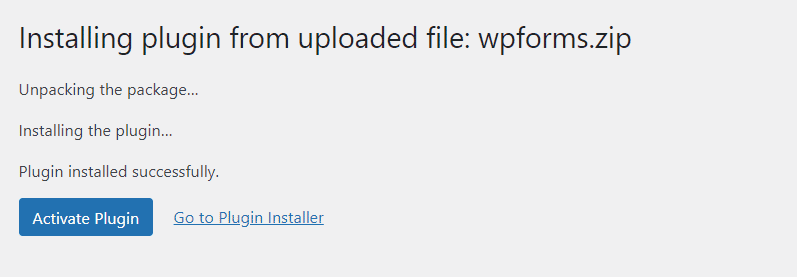
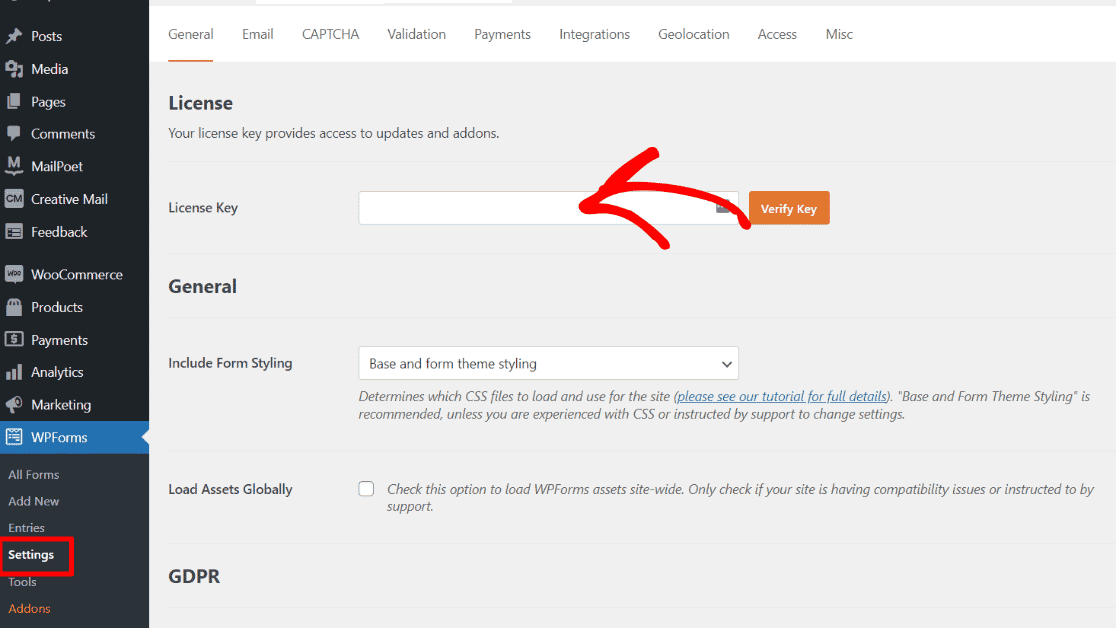
Finally, grab your license key from your WPForms account, then navigate to WPForms » Settings » General to paste it in:
Step 2: Design Your Opt-in Form
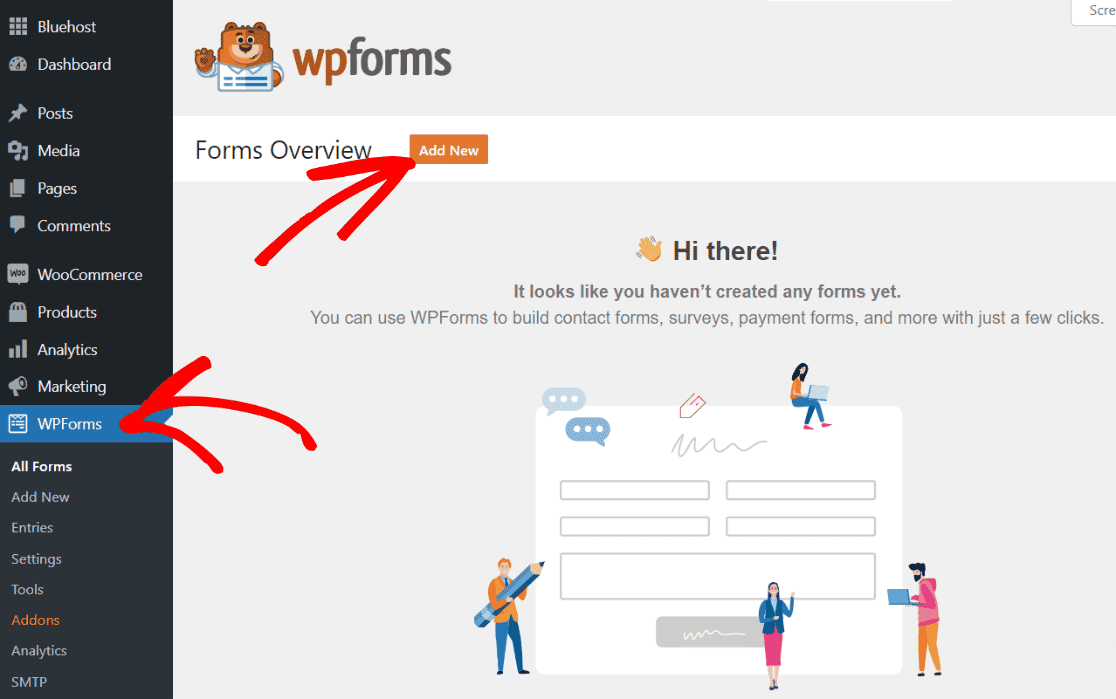
To create your first form, navigate to WPForms » Add New:
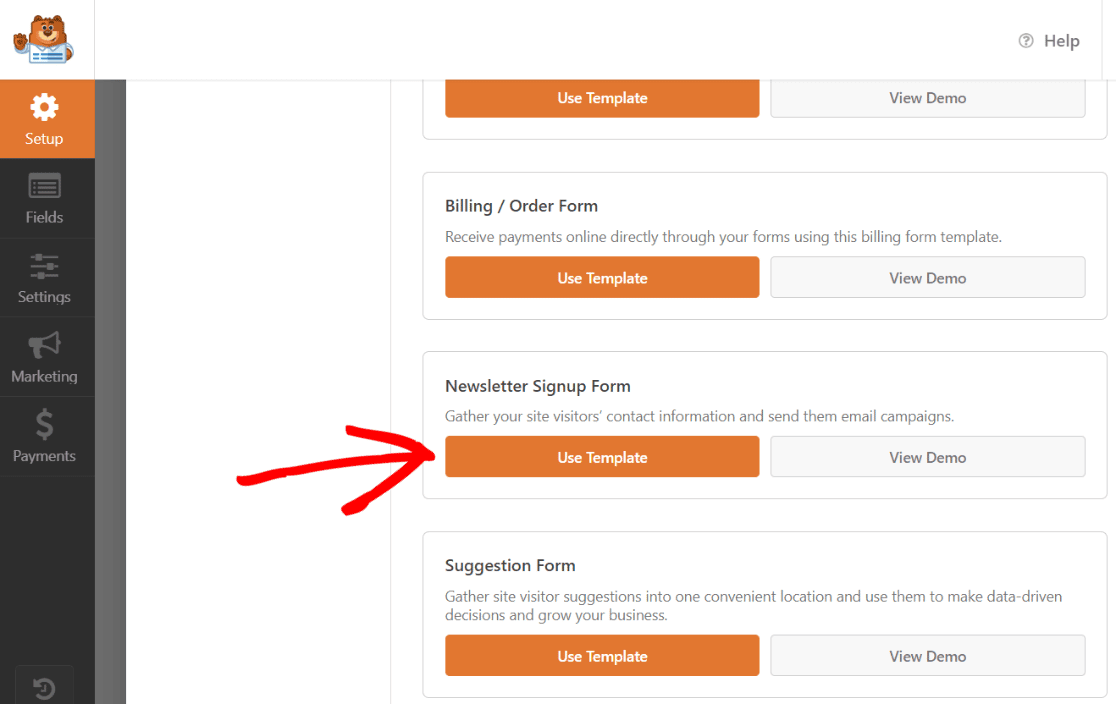
Then, scroll down until you find Newsletter Signup Form and choose Use Template.
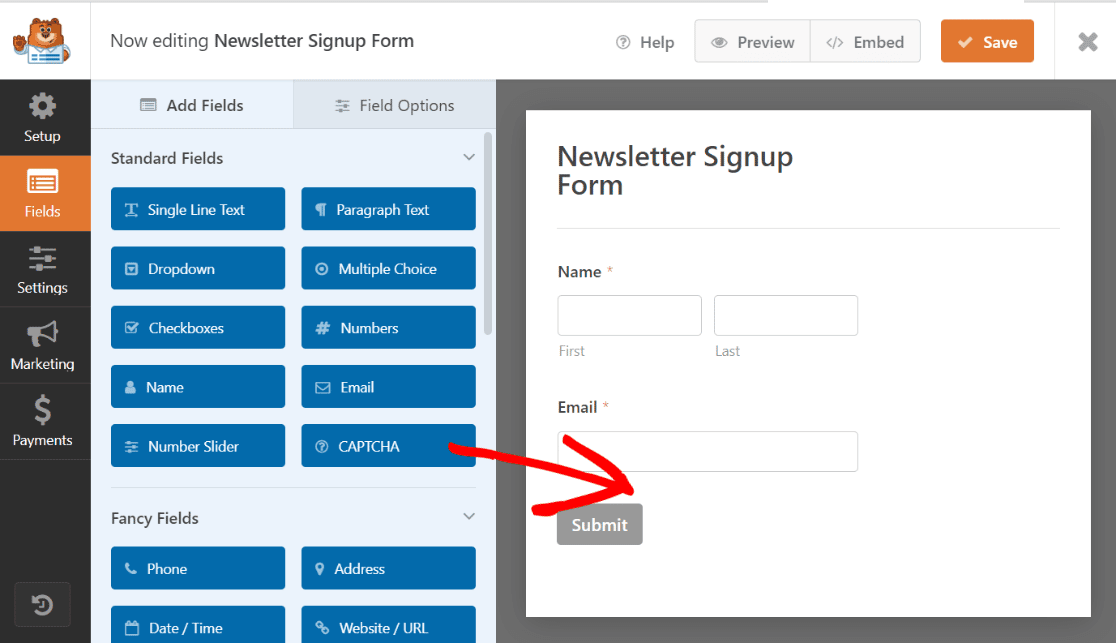
Now, you’ll have a form that already has name and email address fields. If you’d like to change any of the fields or add more, you can click and drag them from the left into your form.
Step 3: Update Opt-in Form Settings
There are several things you’ll want to update in the Settings tab.
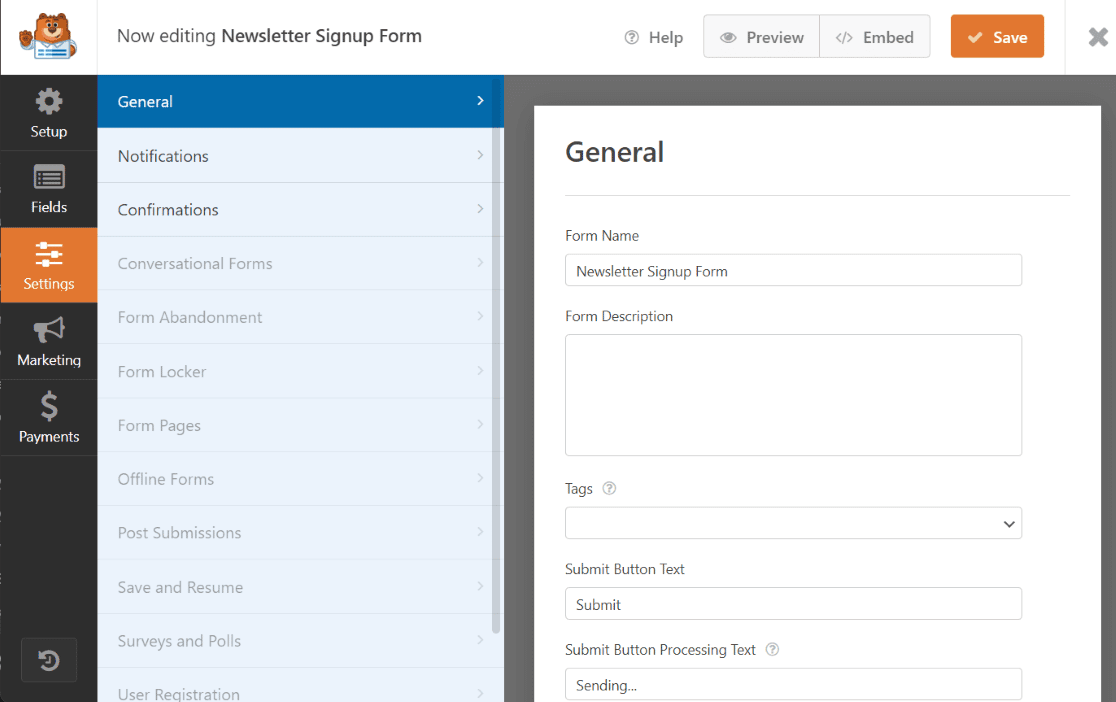
The Settings tab is where you’ll change things like:
- Form name
- Submit button text
- Email notifications – who is notified when a form is submitted
- What happens when a form is submitted (the user is redirected to a thank you page, an email is sent to them, etc.)
For help with WPForms settings, check out A Complete Guide to WPForms Settings.
Step 4: Connect Your Email Marketing Tool
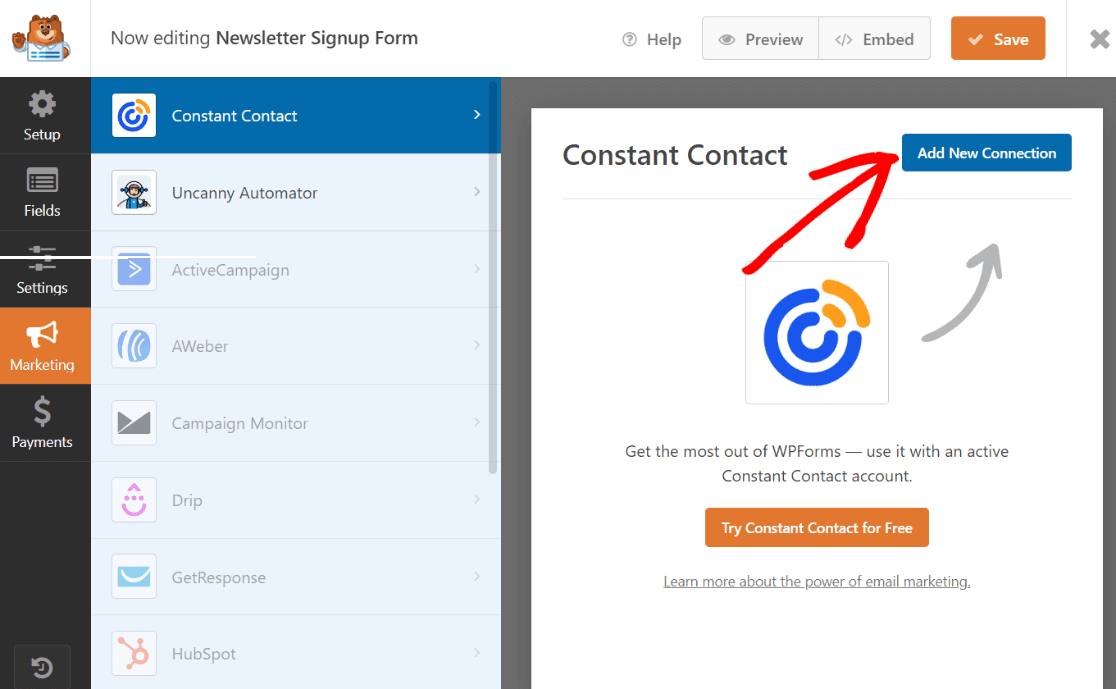
Next, open the Marketing tab to connect with your email marketing service. If yours is grayed out, just click on it to install the addon that’ll let you connect to it.
We’ll go ahead and connect with Constant Contact by clicking the Add New Connection button:
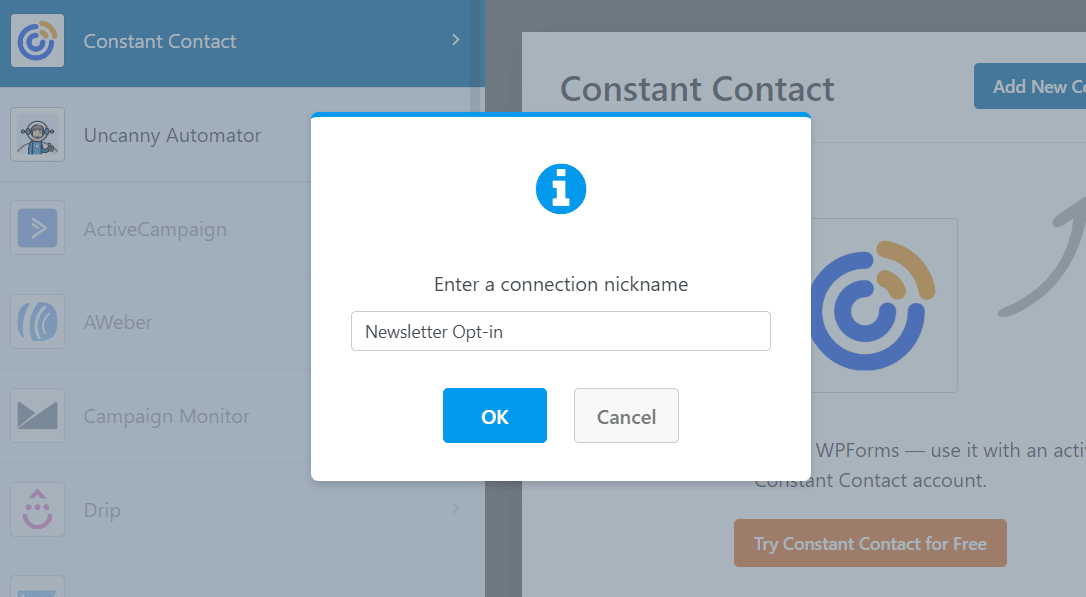
Now, add a nickname for your connection:
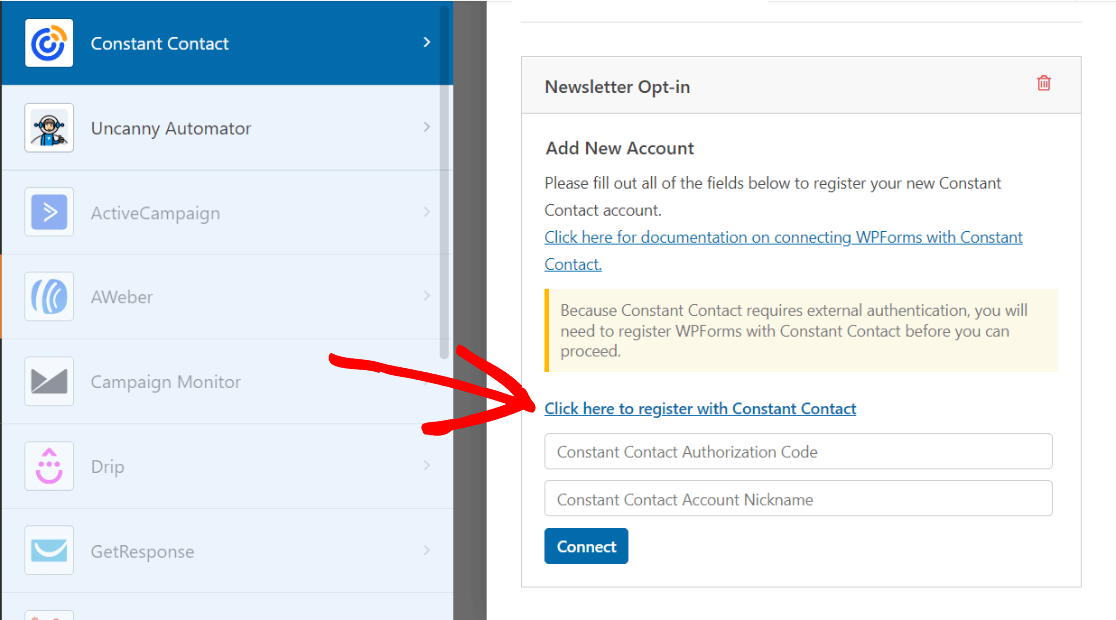
Next, we’ll click the link to register with Constant Contact:
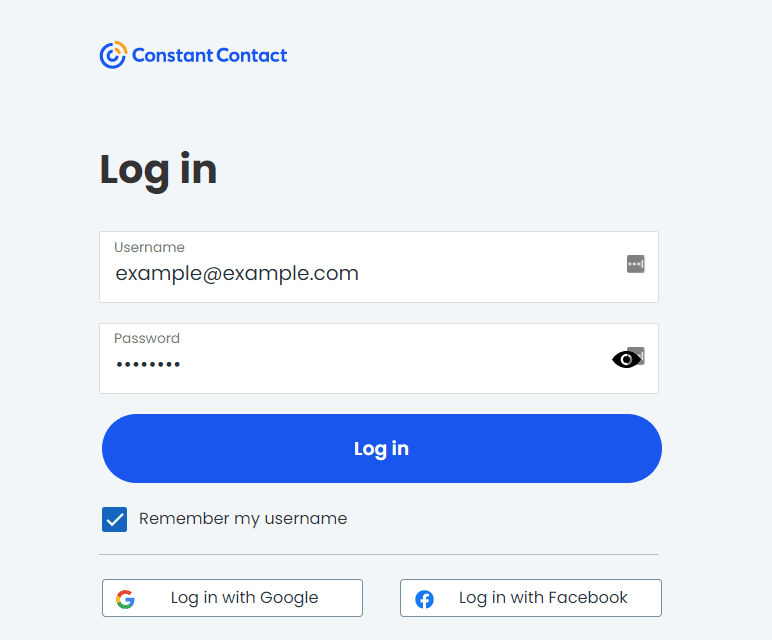
A window will pop up for you to log in:
After logging in, you’ll be given a code to copy paste into WPForms:
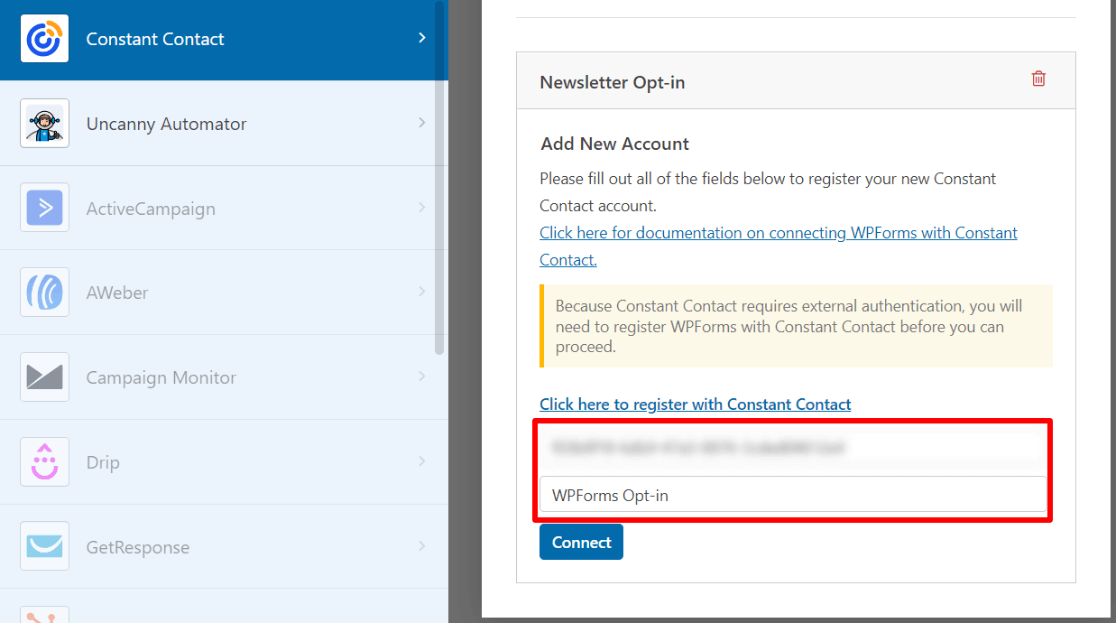
Go ahead and click Connect after you’ve filled out the Authorization code field and the nickname field.
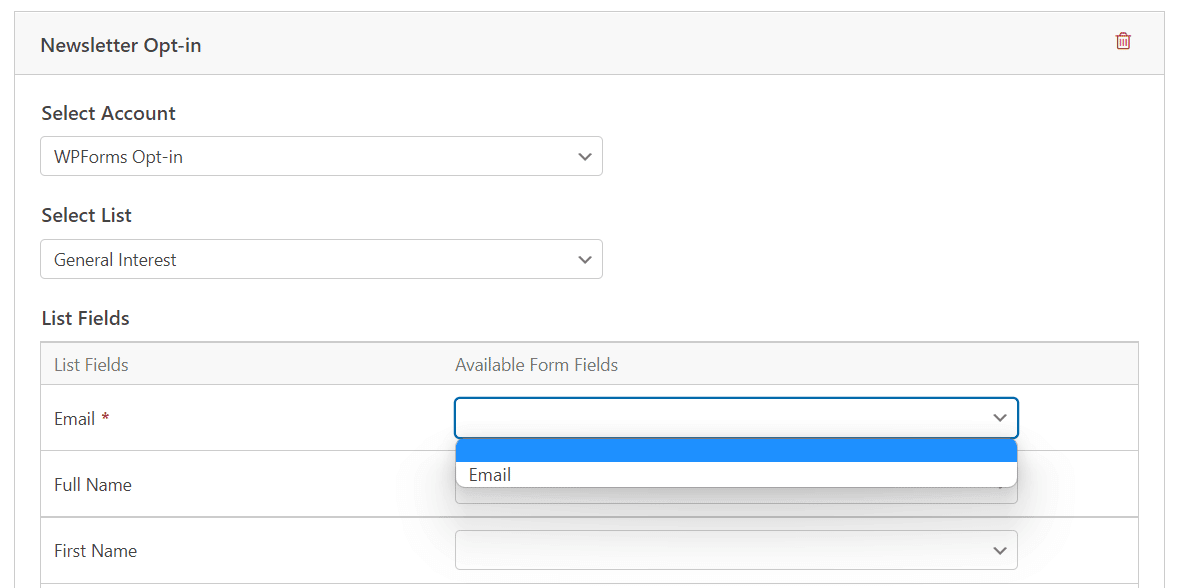
Then, make sure to map the fields in your form to the corresponding fields in your email service provider:
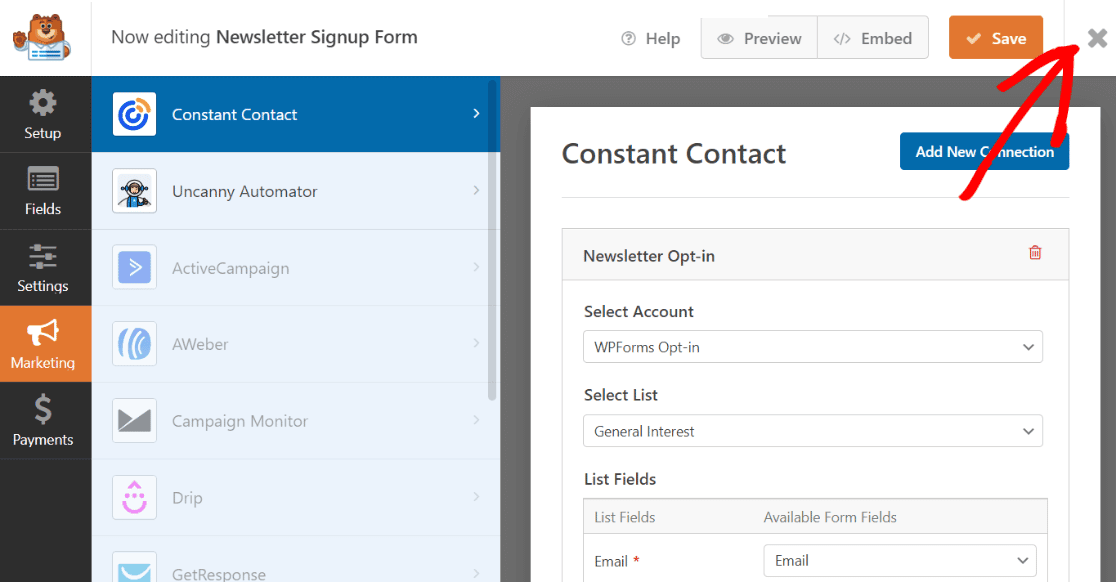
That’s it! Go ahead and click the orange Save button, then click the x (if you’re going to add your form in a sidebar widget):
Step 5: Embed Your Opt-in Form
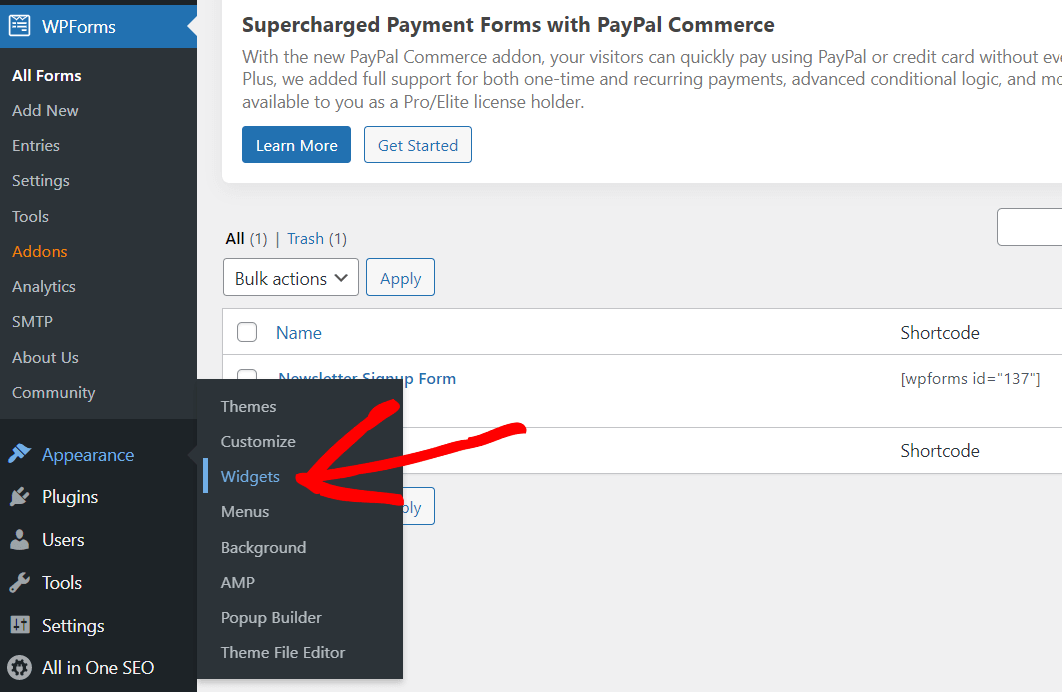
Now, we’ll embed our opt-in form in the sidebar. Go back to your WordPress admin and navigate to Appearance » Widgets:
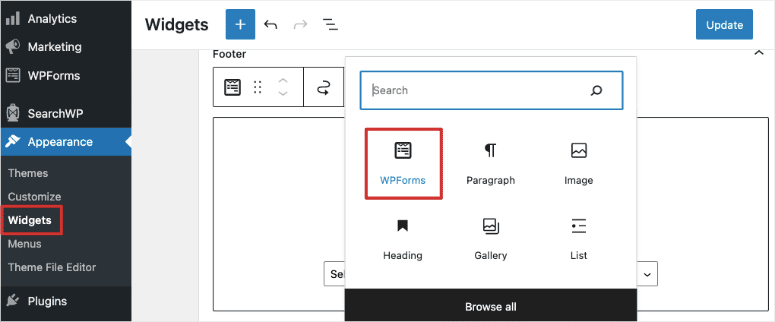
Next, hover where you want your form to go and click add block, then we’ll add the WPForms block:
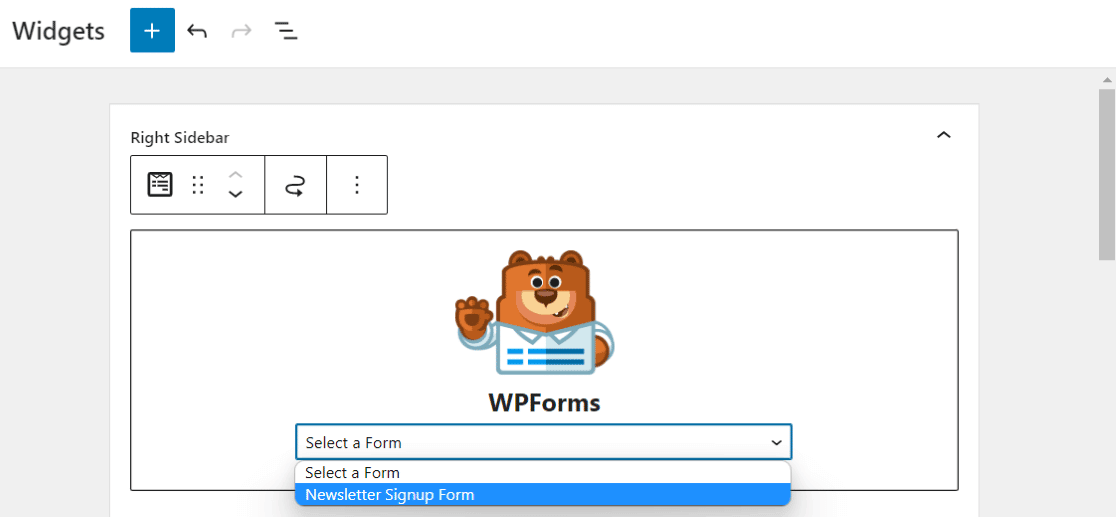
Now, click the dropdown to choose the form to embed in your sidebar:
Finally, choose whether or not you want the form’s title and description to show, then make sure you click the blue Update button.
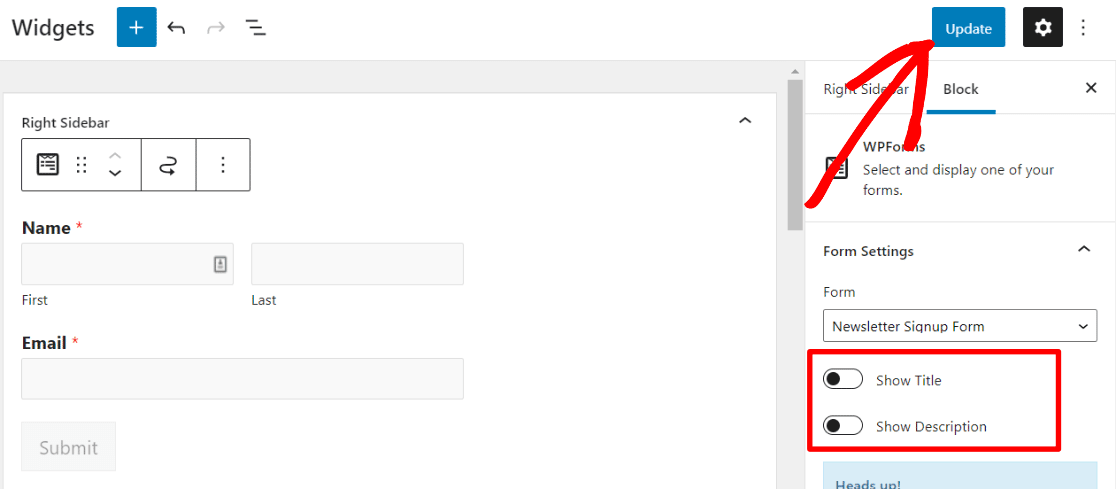
That’s it! You’ve just embedded an opt-in form in your sidebar.
There are so many things you can do with both OptinMonster and WPForms. We hope you take a look at these tools!
For more on powerful ways to increase your opt-in rate, check out How to Grow Your Email List: 16 Highly Effective and Easy Ways.
Want to track how your site is doing in Google Analytics? Read How to Add Google Analytics to WordPress the Right Way.
Not using MonsterInsights yet? What are you waiting for?
And don’t forget to follow us on Twitter, Facebook and YouTube for more reviews, tutorials, and helpful Google Analytics tips.
