Wondering how to create an IP address filter in Google Analytics?
There are a couple reasons why you might want to filter out traffic from a certain IP address, but the most common one is to filter out traffic from your own home or office. It makes sense that you don’t want your own visits to your site to count as traffic!
In this guide, we’ll show you how to use an IP address filter to exclude internal traffic from Google Analytics, but we’ll also guide you through a much easier alternative if you’re a WordPress user.
Video Walkthrough
Why Create an IP Address Filter in Google Analytics?
Google Analytics is a powerful tool that you can use to track how people interact with your website. However, Analytics will also track your internal traffic (traffic from yourself and others at your company) in its reports if you don’t exclude it.
This would mean that your Google Analytics reports will contain both internal and external visitors to your website. As a result, you won’t be able to remove internal traffic from your reports and it may skew the data about your real visitors.
You can stop Google Analytics from tracking your internal visits by setting up IP address filters in Google Analytics.
But there’s a catch!
Issues with IP Address Filters
IP address filtering is only applicable if you’re using a static IP address, or an address that doesn’t change. A static IP address is normally used if external devices need to know your IP address so they can whitelist yours for security purposes.
Since most regular users do not need to whitelist their own IP, they use dynamic IP addresses instead, which change over time. So, even if you exclude one IP address, your IP will eventually change without your knowledge, and Analytics will track you again.
Plus, your IP address doesn’t travel with you, so if you connect to your site using another wireless network (like at a coffee shop), a static IP address filter wouldn’t work. Your activity would still be tracked and counted by Google Analytics.
So, is there a simpler way of excluding your internal traffic? If you’re using WordPress, there definitely is!
Not using WordPress and still want to filter your IP? Jump down to our Google Analytics IP filtering instructions.
A Better Way to Filter IP Addresses in WordPress
An easier way to filter out your own visits from tracking is with MonsterInsights, the best Google Analytics plugin for WordPress.
The plugin makes it super easy to set up and use Google Analytics. You can add Google Analytics to your site using the plugin without editing code or hiring a developer.
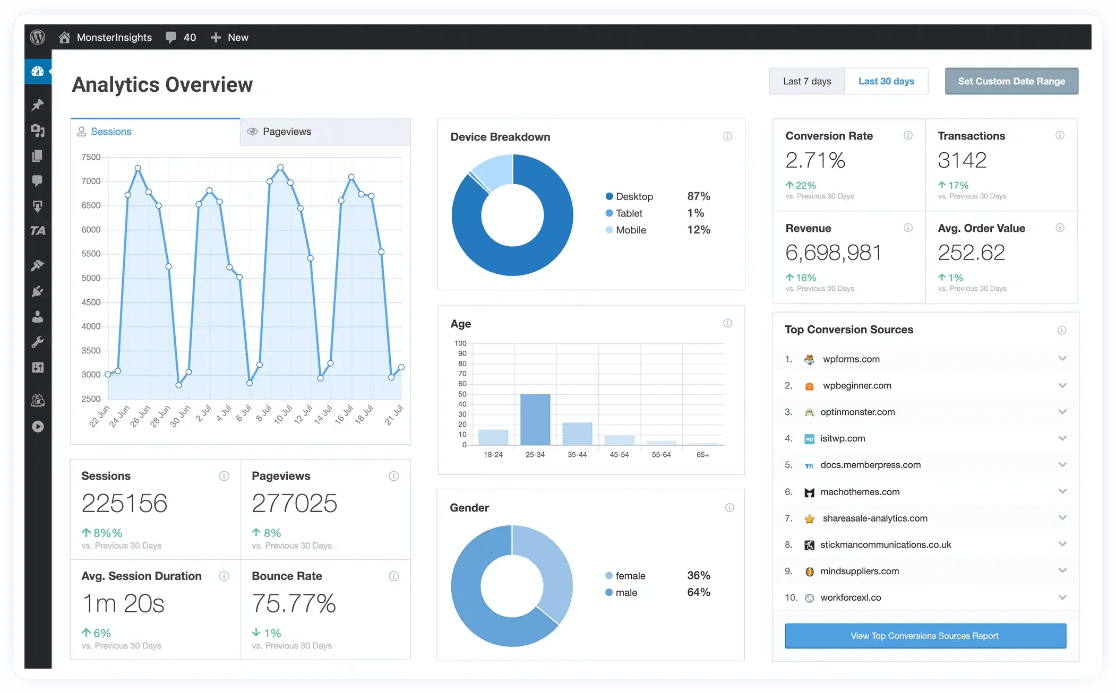
Plus, with the click of a button, you can set up sophisticated tracking features such as event tracking, eCommerce tracking, form tracking, custom dimension tracking, outbound link tracking, and more.
With MonsterInsights, you can easily filter out your own visits from tracking when you’re logged into your site. All you need to do is to specify the user roles you’d like to stop Google Analytics from tracking. Then, whenever you or anyone else that’s logged into your WordPress site visits, you’ll be excluded from Google Analytics.
This method is far more reliable as it doesn’t rely on your IP address. So, even if your IP address changes for some reason or you’re connected to another network, you won’t have to worry about tracking your own visits in Analytics.
To filter out user roles from tracking, you’ll first need to download and install MonsterInsights.
To access tons of awesome features, make sure to grab MonsterInsights Pro. Or, to get started with tracking your most important metrics and excluding user roles from tracking for free, check out how you can get a forever free trial.
After you’ve got MonsterInsights installed and connected to Google Analytics, go to your WordPress admin area, and then navigate to Insights » Settings. Now click on the Advanced tab on the top and scroll down to Permissions.
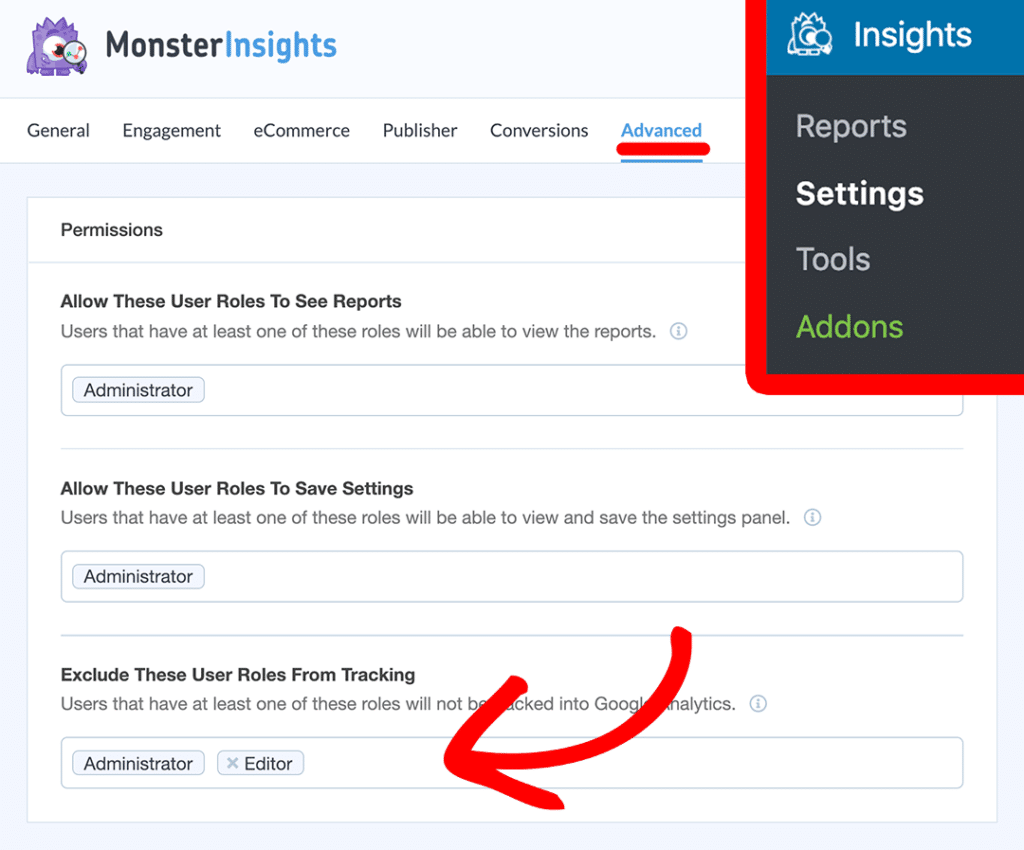
Next, specify user roles you’d like to stop tracking under the Exclude These User Roles From Tracking and click Save Changes.
If you’d still like to create a static IP address filter, you can continue reading below.
How to Create an IP Address Filter in Google Analytics
To create an IP address filter, you’ll need to know the public IP address you’re using. The easy way to find your IP address is by searching what is my IP address in Google.
Once you found it, you can create a filter for your website in Google Analytics.
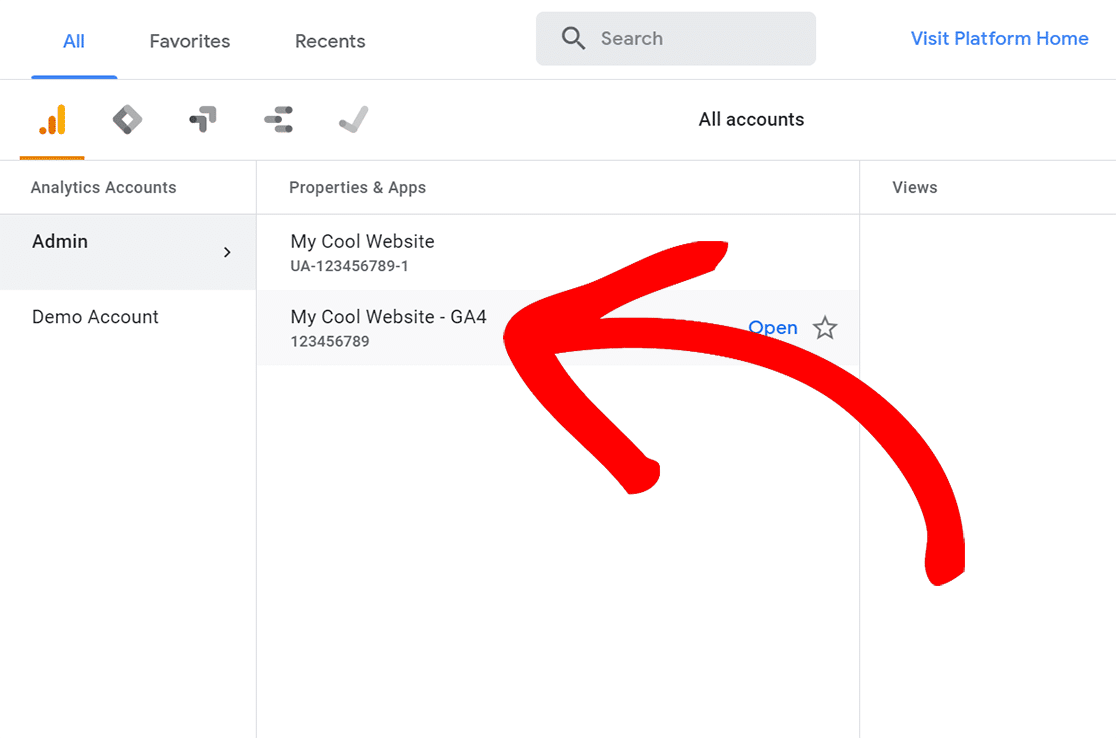
First, log in to your Google Analytics account, and select the website you’d like to create a filter for.
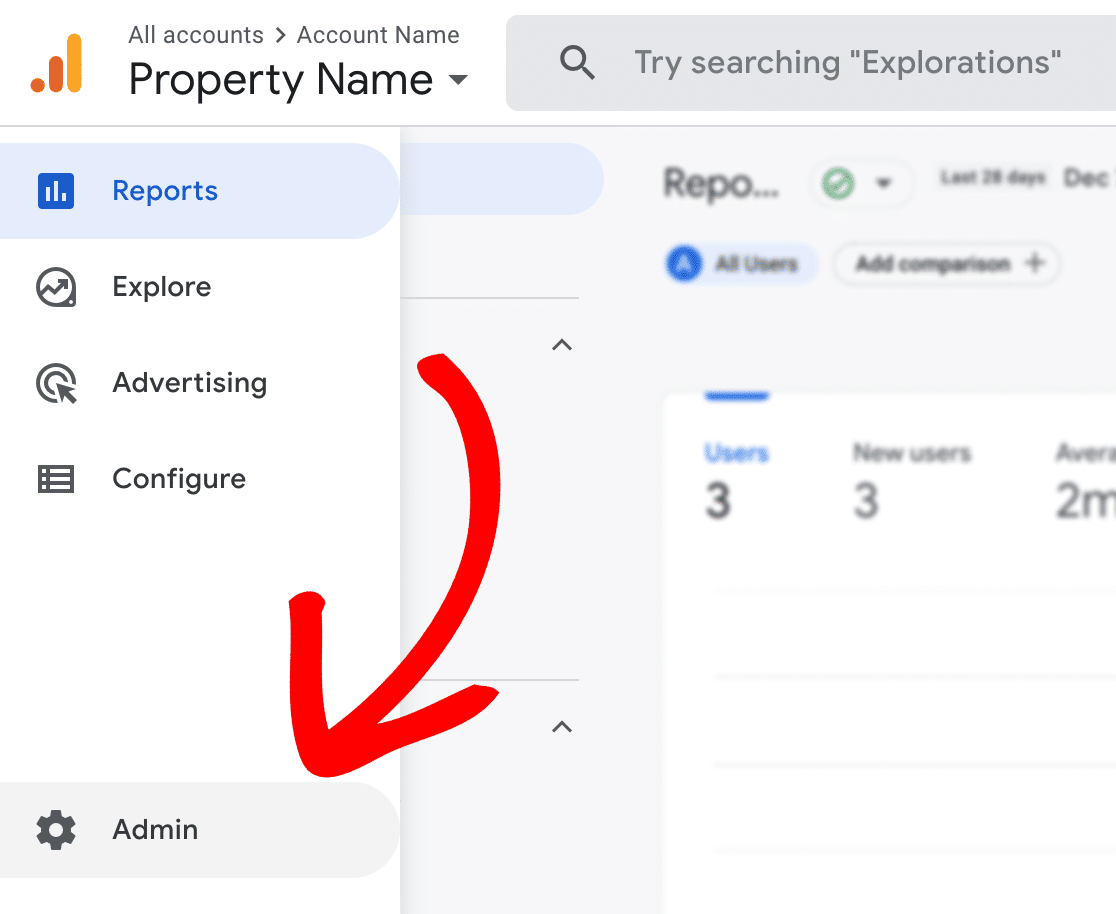
Then, click Admin in the left taskbar.
In the Property column, click Data Streams. Then, click into the data stream that your website is tracking with.
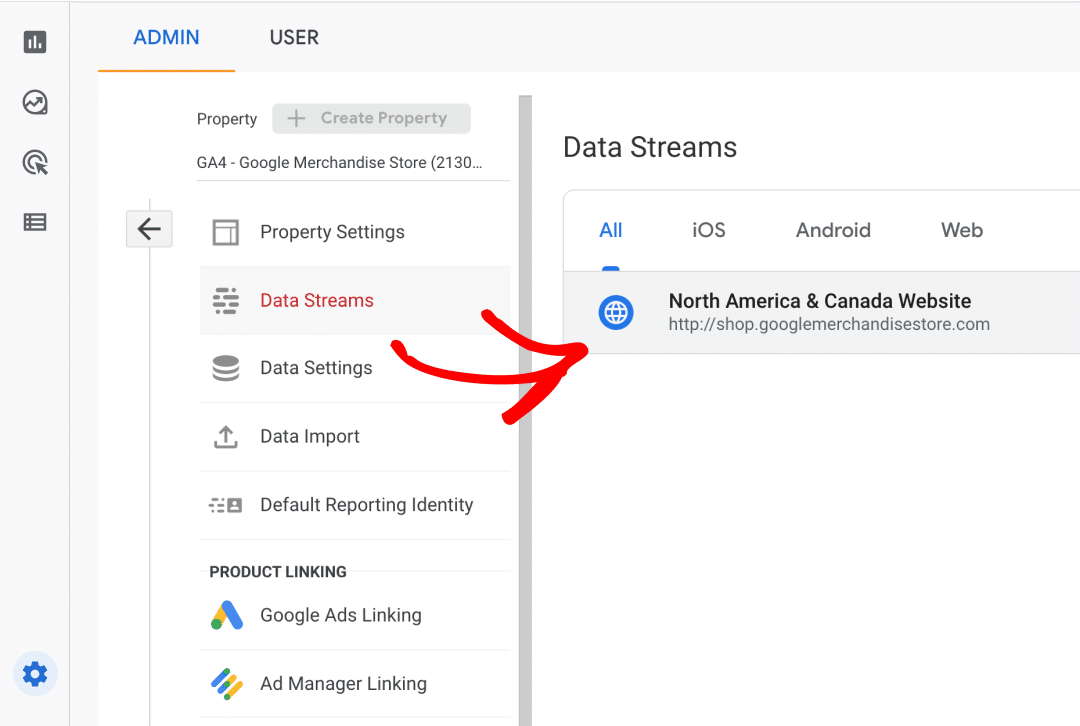
Then, scroll down and click on Configure tag settings:
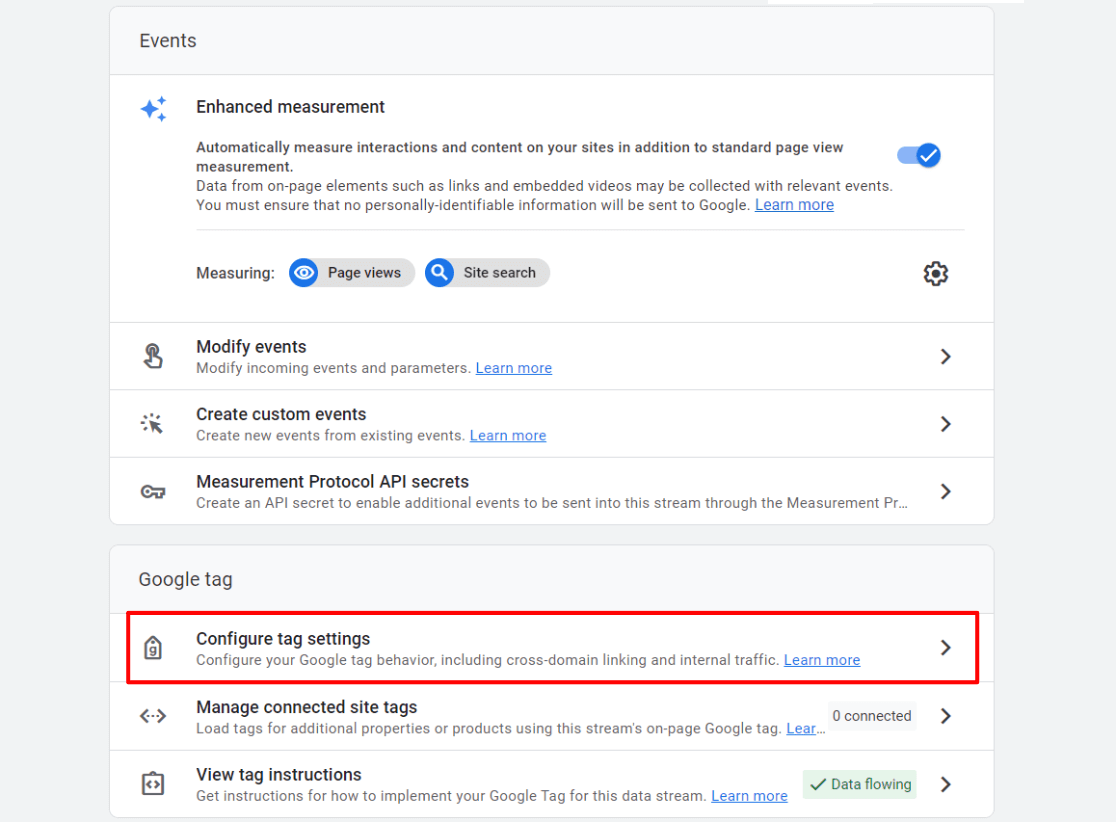
On the next screen, scroll down and click Show all:
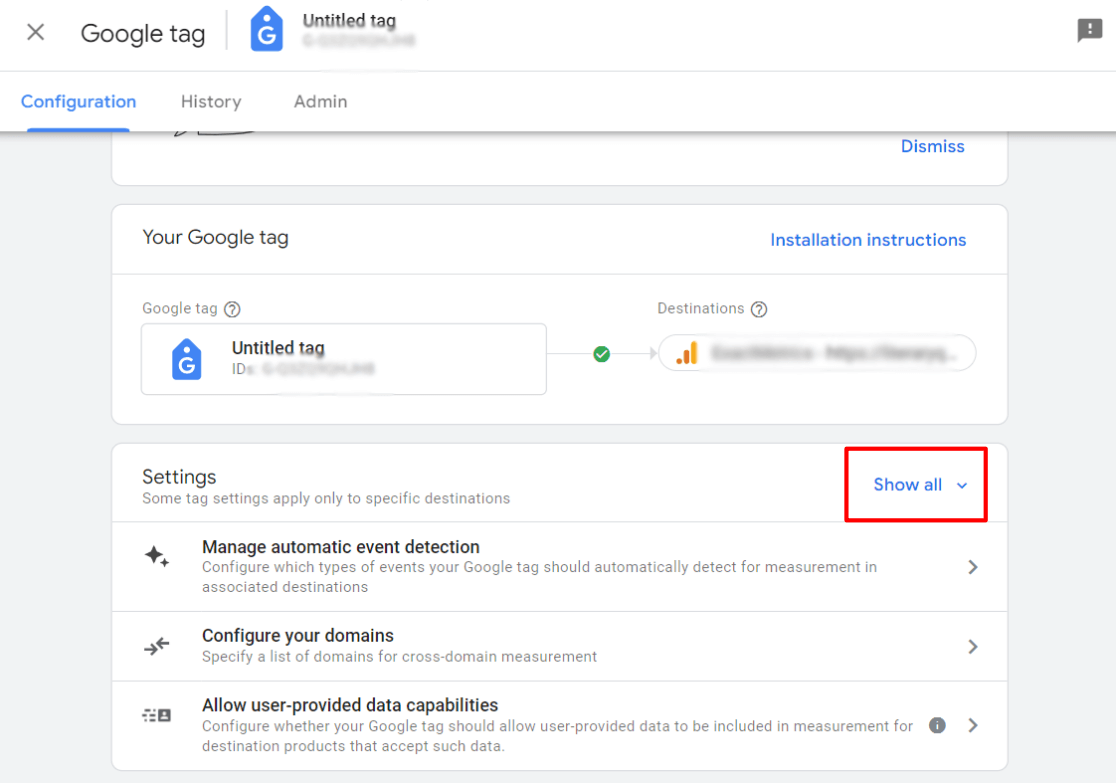
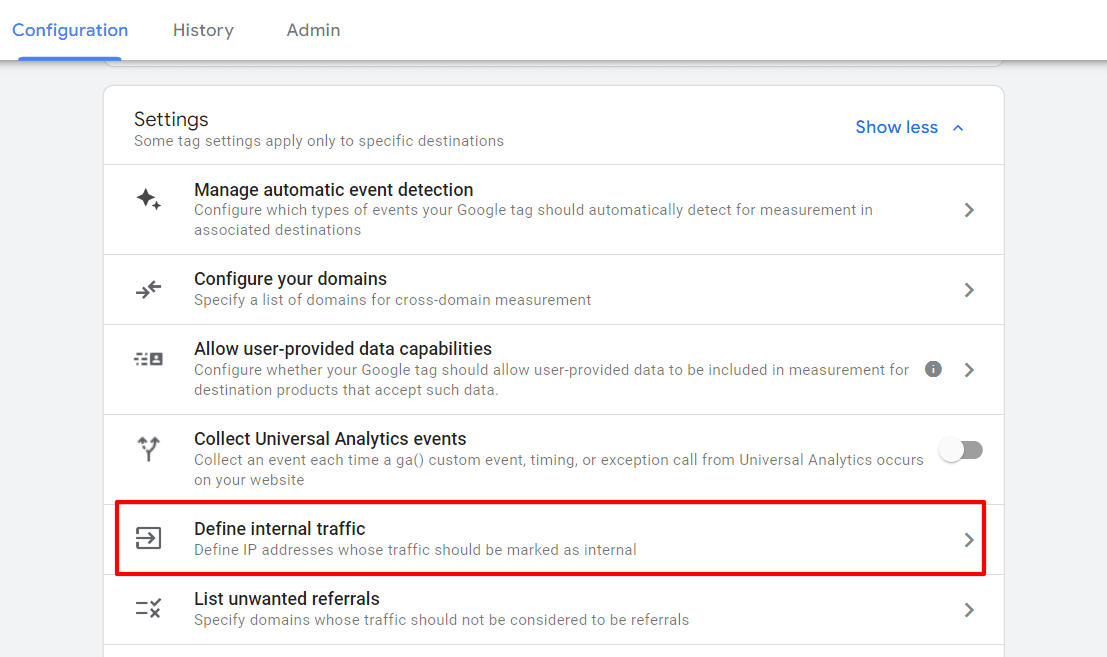
Now, click Define internal traffic:
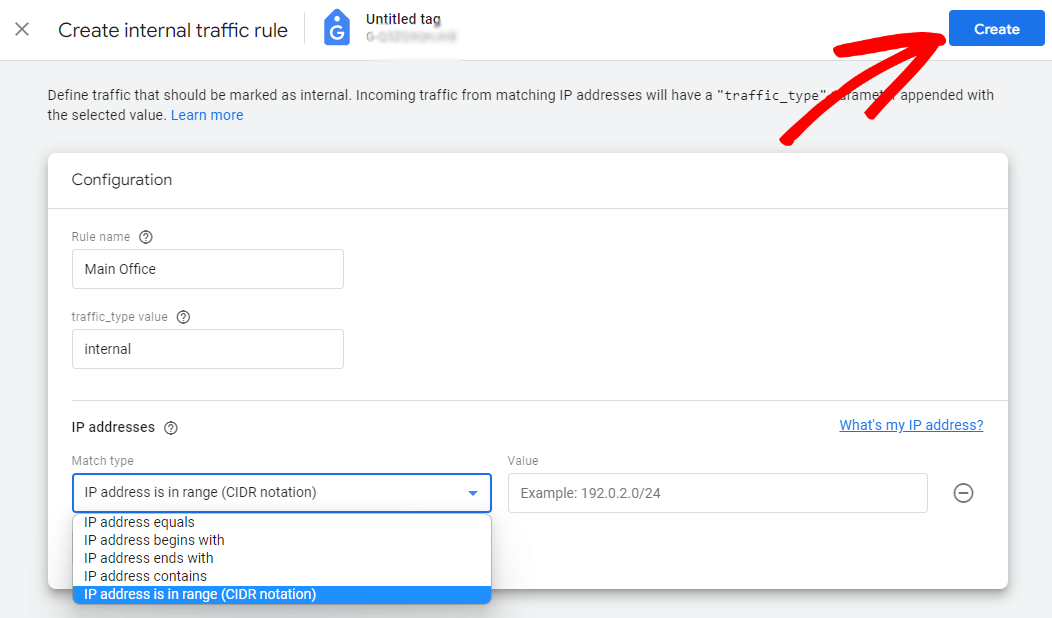
Next, you’ll want to create your internal traffic rule. To do that, click the blue Create button:

Here is where you’ll create your internal IP address rule. Give your rule a name (like “main office”). You’ll see in the dropdown down below where you have several different options for calling out your IP address or a range of them. When you have it set they way you’d like, click the blue Create button.
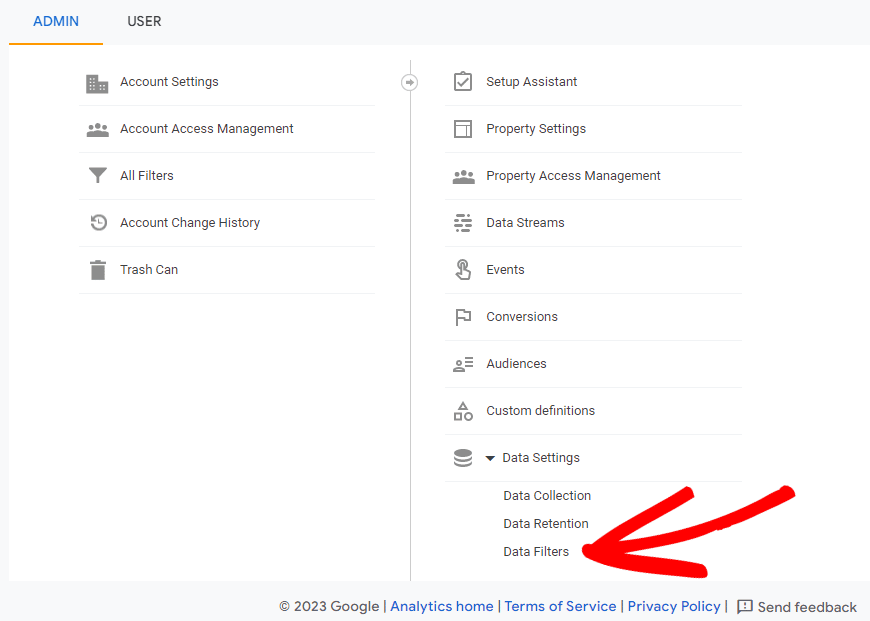
Now that your rule is created, you have to tell Google Analytics to exclude traffic using that rule. To do that, head back to the main GA4 admin screen and click on Data Settings » Data filters:
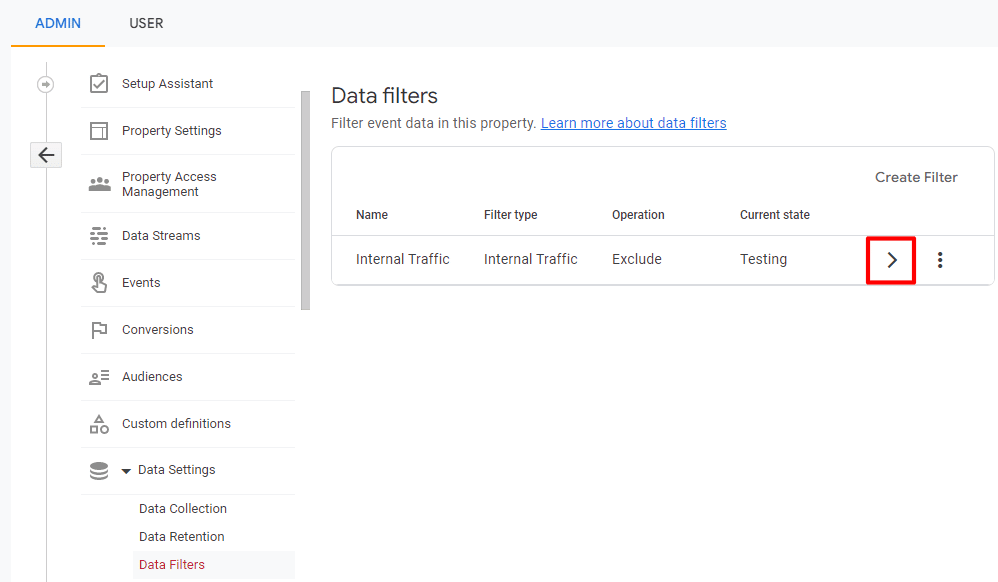
On the next screen, you’ll see a filter that was automatically created for you when you created your internal traffic rule. However, note that it’s in testing mode – it’s not excluding your internal traffic yet!
To change this, click on the arrow:
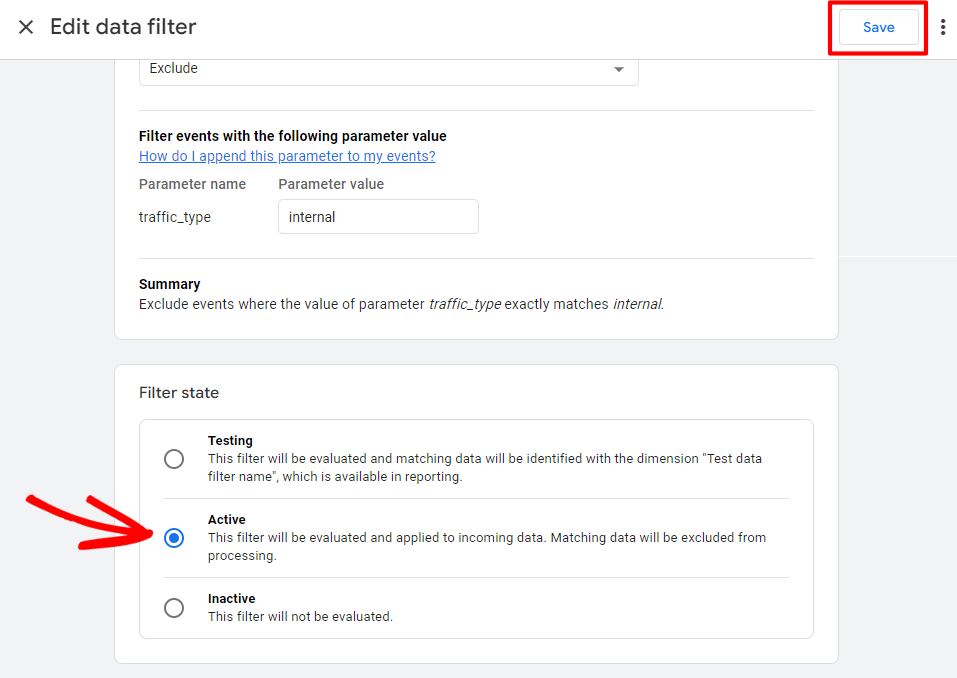
Then, scroll down and click the Active radio button. Once Active is selected, make sure to click Save.
That’s it!
You’ve successfully created a filter to prevent internal traffic from contributing to your Google Analytics data.
We hope you liked our article on how to create an IP address filter in Google Analytics. You might also like our article on How to Track Link Clicks in Google Analytics 4 and WordPress.
And don’t forget to follow us on Twitter, Facebook and YouTube for more helpful Google Analytics tutorials and tips.

Hi. Do I need to install Monster Insights in a device I am using to visit my website in order to stop Analytics counting my visits?
Hi Yurii,
Thanks for visiting our blog! If you’re a MonsterInsights user and it’s already installed on your site, sign into WordPress on your device. Then MonsterInsights will see you’re an admin of your site and filter out your visit from the device, too.
I literally just sat here and followed your instructions. I’ve spent the past two days burning the midnight oil trying to find out how to do this. Thank you so very much for sharing. May you have a wonderful day. Take care. 💻