Are you looking for a way to create amazing contact forms that work on AMP?
When you enable Accelerated Mobile Pages (AMP) on your website, it loads much faster on mobile devices.
The way that AMP does this is by removing some features of your site that cause it to slow down. This means that some features won’t work on your AMP-enabled pages on mobile devices.
Sadly, contact forms are one of these features that don’t work properly on AMP. You might face issues in page layout and design and slow loading on AMP-pages.
But what if we tell you that there’s a simple way to make AMP-friendly contact forms?
Using WPForms, a powerful and user-friendly WordPress plugin, you can build contact forms that load on AMP without any problems.
In this article, we will show you how to create an AMP contact form on your WordPress site.
Let’s start.
Create an AMP-Friendly Contact Form on WordPress
Step 1: Install AMP WordPress Plugin
Now before we explain the steps for setting up a contact form using WPForms, you’ll have to install the official AMP WordPress plugin.
The plugin is free, and it’s set up process is quick and easy. As soon as you activate the plugin, it will add AMP support to your site.
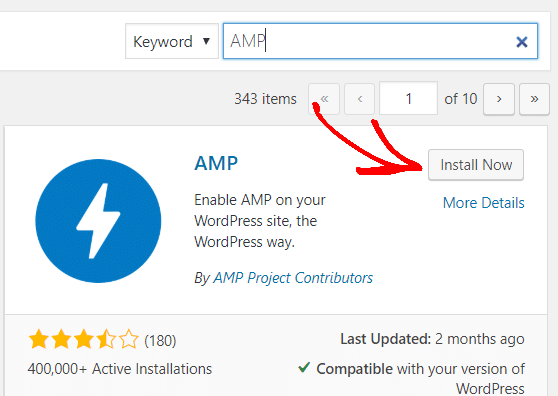
If you’re doing this for the first time, you can check out our guide on how to set up AMP on WordPress for more details.
Once the plugin is up and running, you’re ready to create AMP contact forms.
Step 2: Install WPForms WordPress Plugin
Next, go to your WordPress dashboard and access Plugins.
Click Add New, search WPForms, and install and activate the form building plugin.
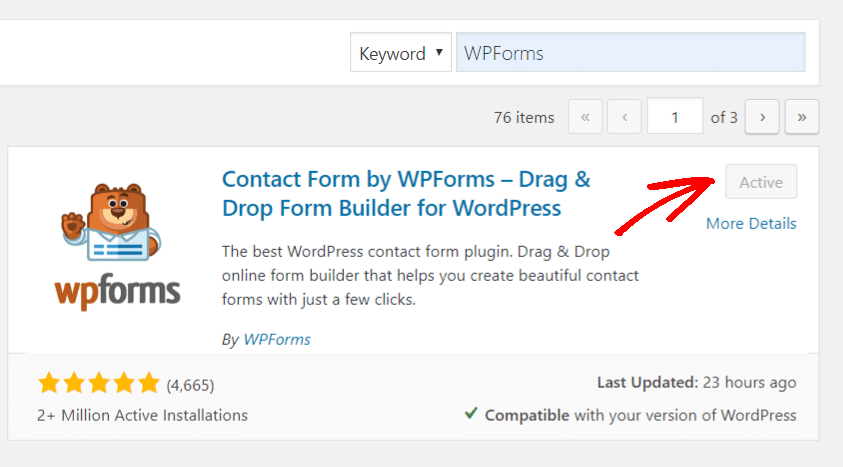
You should see WPForms on the left-hand side panel in your dashboard once the plugin is active.
We are going to use the free WordPress plugin for our tutorial. But if you are looking for more features, do check out WPForm Pro plans as it offers:
- Integration with payment services
- Bonus form templates
- Easy integration with email marketing platforms
- File upload feature
- Spam protection
- Surveys and polls
Once you have WPForms installed, it’s time to create your first form.
Step 3: Add New Contact Form on WPForms
Now click on WPForms to view the form builder. To get started, select Add New to create a new contact form.
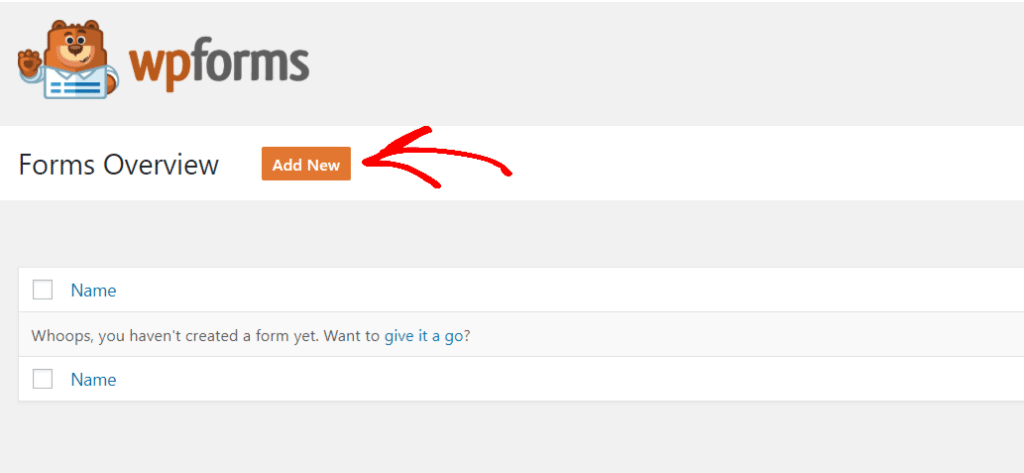
Step 4: Give a Name and Select a Template
The next step is to give a name to your contact form, like “My Awesome Contact Form,” and select a template.
WPForms offers different templates to build a form. To start, you can go with a Blank Form, Simple Contact Form, Newsletter Signup Form, or Suggestion Form.
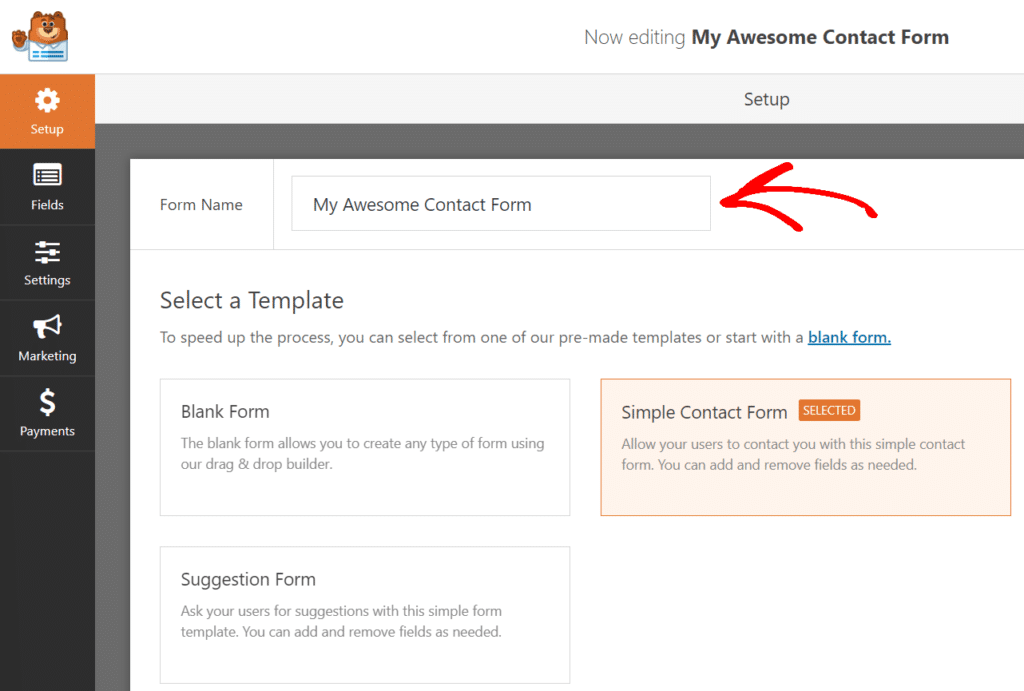
If you’re looking for more templates, then you can get your hands on WPForm’s form templates pack addon.
For our set up guide, we’ll be using a Simple Contact Form template.
Step 5: Add Fields and Customize Your Form
After selecting the template, you can select different fields for your contact form. The simple contact form template comes with built-in fields, but you can go ahead and add more fields like:
- Phone Number
- Multiple Choice
- Checkboxes
- Numbers
- and more
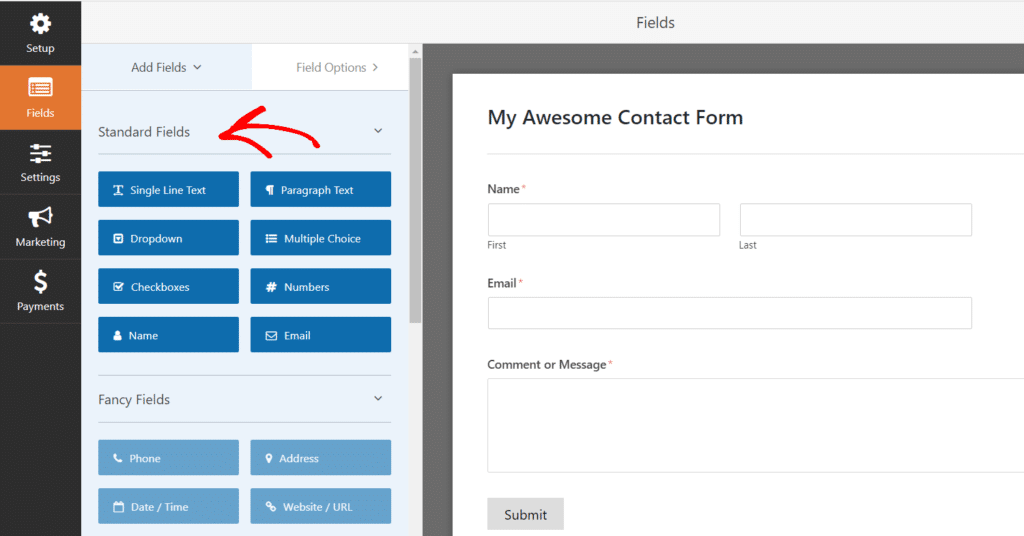
Each field has more options for customization. For instance, if you click on the field Name, you can change its label, format, add a description, or use advanced options to resize the field and add a CSS class.
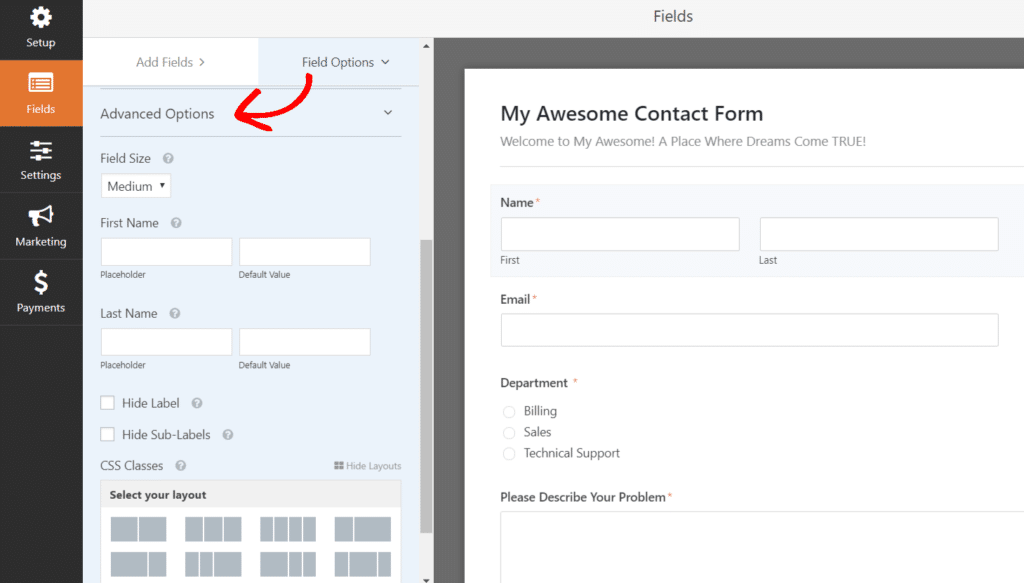
Step 6: Change Contact Form Settings
In the next step, you can change the settings of your AMP contact form for your WordPress site. There are several options in settings.
Under the General tab, you can change the name of the form, add a description, change the text of the submit button, and more.
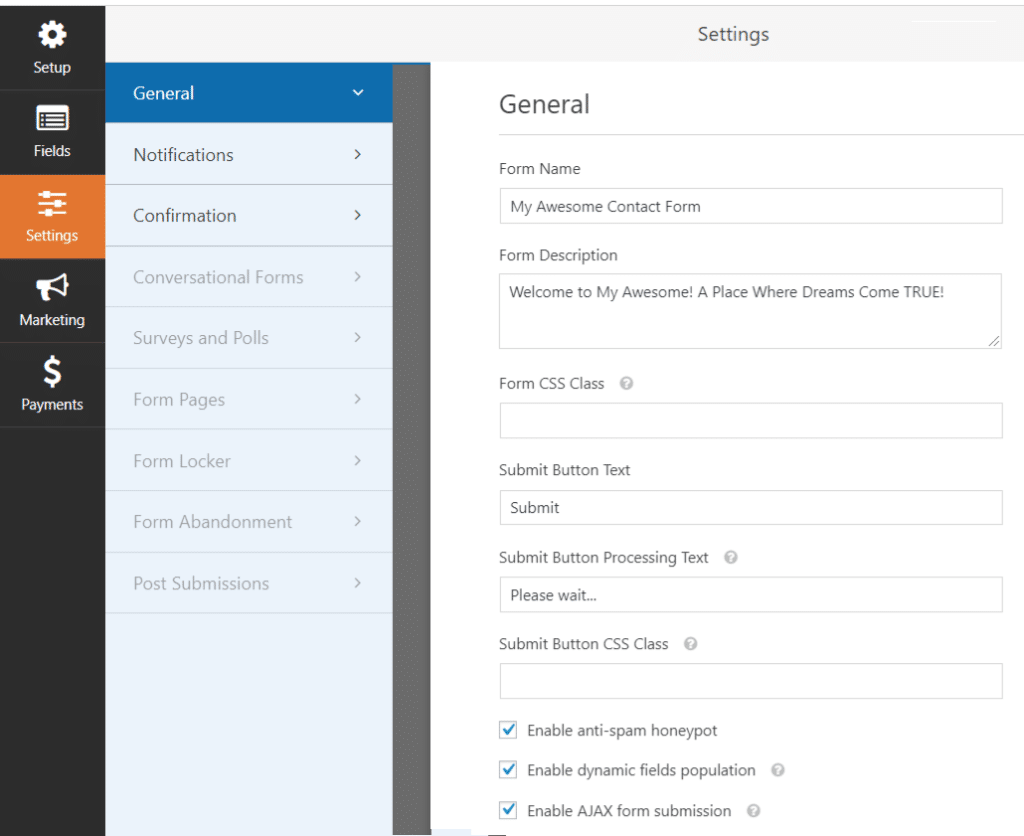
WPForms comes with a built-in anti-spam honeypot feature, which will stop pesky spammers from polluting the data. However, if you want added protection, consider using Google reCAPTCHA.
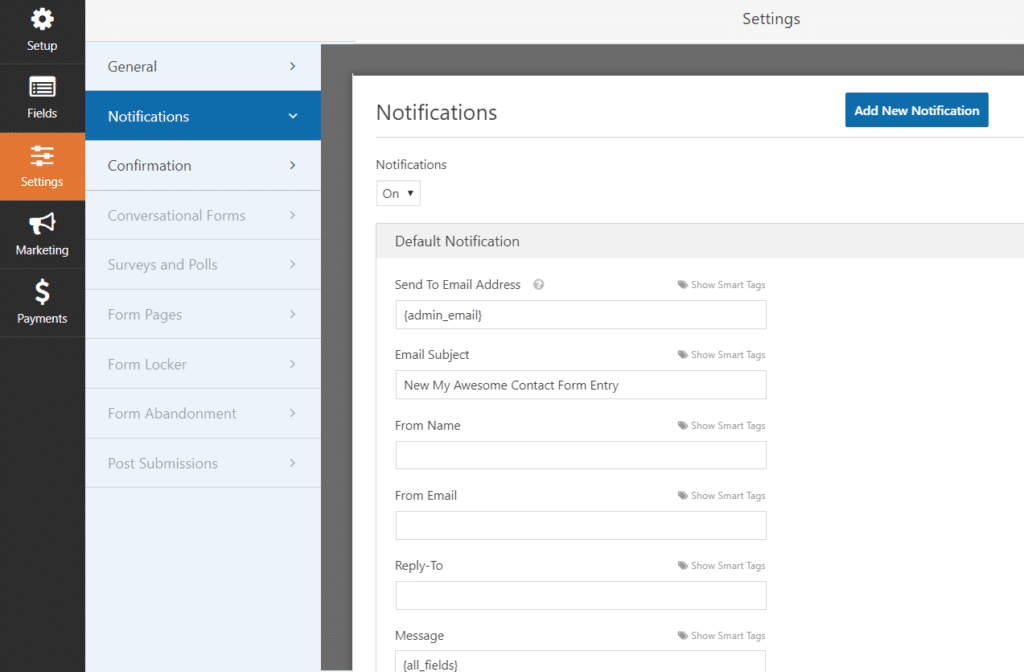
Through Notifications settings, WPForms also lets you change the way you want to receive an email once someone completes the form.
For instance, you can select the email subject line, from name and email, message, and more.
In the Confirmation tab, you can customize the message you want your visitor to receive once they submit the form.
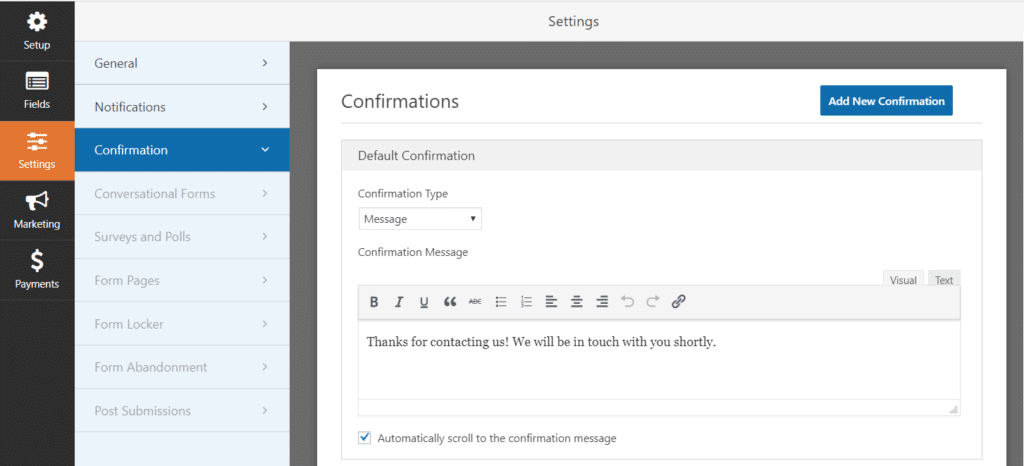
Do remember to hit the Save button at the right top corner to store all your work before moving forward.
Step 7: Publish Your AMP Contact Form
Once you’ve created a contact form, it’s time to add it to your AMP page. You can create an entirely new post or add the form to an existing AMP page.
Let’s say you add a new post, now select the Add Block icon, the small plus symbol at the top, and select WPForms.
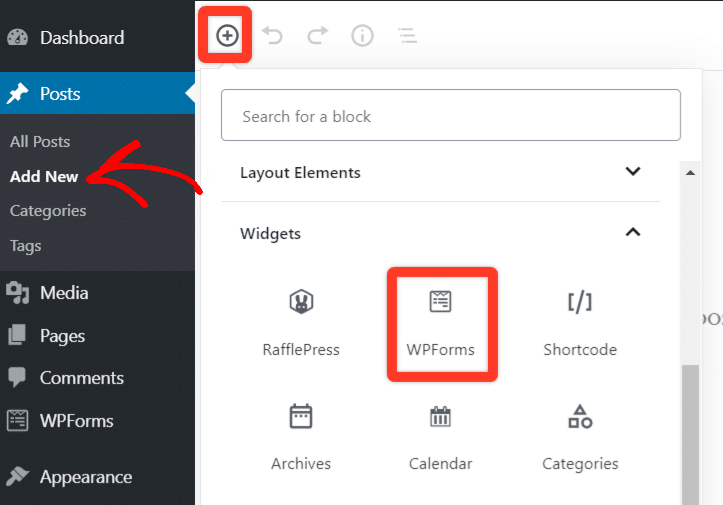
Next, you will see WPForm widget in your edit screen. Next, select the AMP-friendly contact form from the dropdown menu you created. You can also add a title and a brief description just before the form.
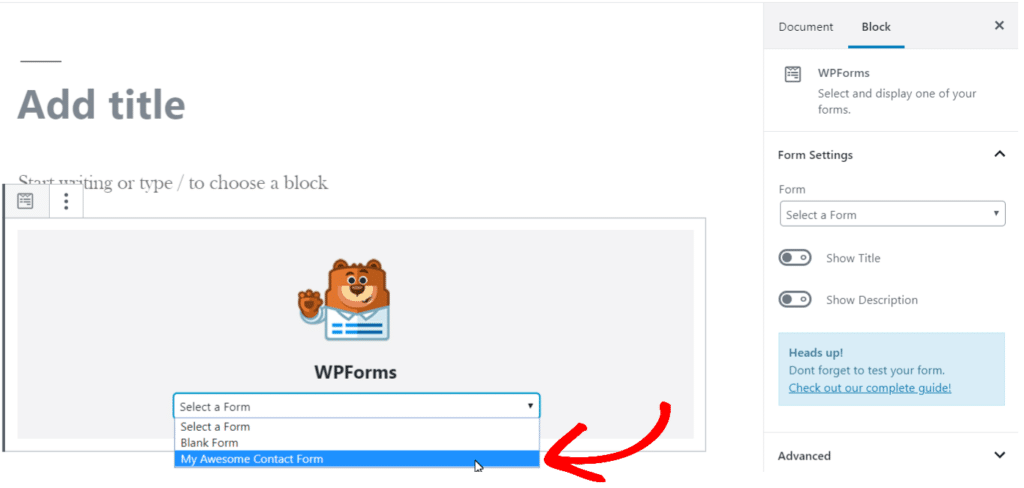
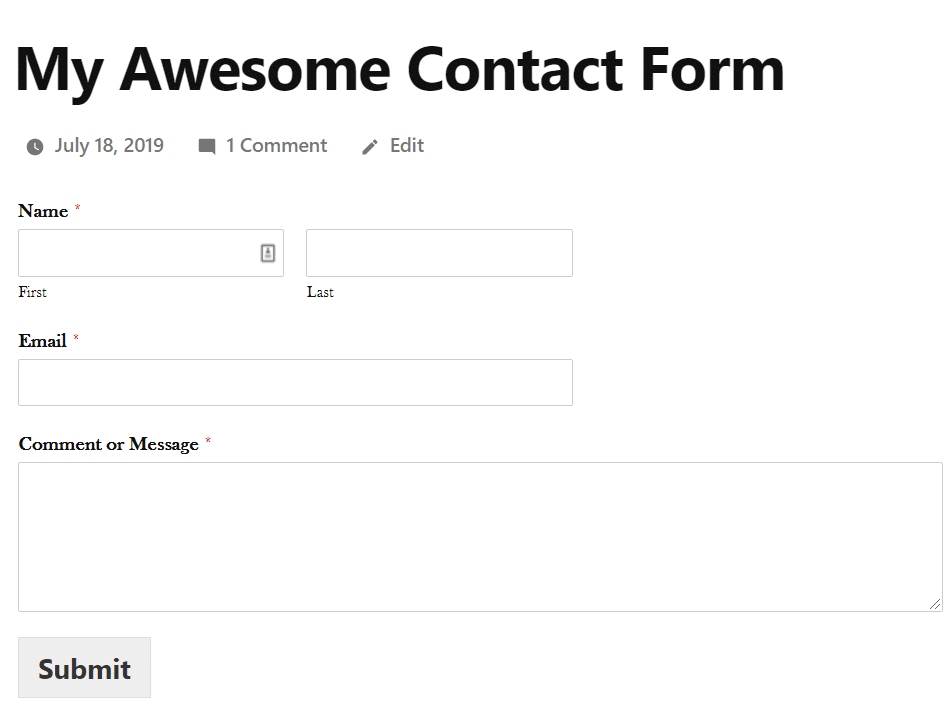
As soon as you select, the widget will load your contact form in no time. And that’s it, you’re ready to publish or update your post with your newly created contact form. With WPForms, you can even track each of your form’s performance in Google Analytics.
Verdict: Why Use WPForms to Add AMP Contact Form?
With more and more people using mobile devices to visit your site, it’s important to create AMP-friendly pages, especially contact forms.
That’s why WPForms is the most user-friendly WordPress plugin to create different contact forms that work smoothly on AMP.
You can create a wide range of forms, be it surveys and polls, contact forms, or newsletters sign-up forms, the list goes on.
WPForms offers other exciting features as well like:
- Template pack expands your options to create various form
- Entry management to view all your leads
- Integration with email marketing platforms like Drip and Mailchimp
- File upload option for users
- Spam protection and custom CAPTCHA
- Integration with different payment merchants like PayPal
That’s it!
We hope you liked our guide on how to create an AMP contact form on your WordPress site.
If you think our article was helpful, you might also want to check out how to track AMP traffic in WordPress.
And don’t forget to follow us on Facebook and Twitter for more useful guides about Google Analytics.
