Do you want to publish tweets or your Twitter timeline on your website, too? Read this article to find out how to create a WordPress Twitter feed that automatically updates your website with new Twitter content as soon as it’s posted.
When you consistently publish new content from Twitter, you help your website stay fresh and engaging for visitors. And it saves you time to re-use existing content instead of creating new material.
What Is a WordPress Twitter Feed?
A WordPress Twitter feed shows individual tweets, your timeline, or another user’s timeline, embedded in your WordPress website. Feeds can also show tweets based on hashtags, search keywords, or some other criteria.
The best way to create a Twitter feed on your WordPress site is to use a plugin built for that purpose. That makes it possible for anyone to make customized displays of all sorts of Twitter content.
In this example, we’re going to use a social media feed plugin called Twitter Feed Pro by Smash Balloon.
Twitter Feed Pro automates the job of embedding tweets and timelines in WordPress. It has a huge number of options for filtering what content to display and how it appears on your site.
And, all of that comes in an easy to use package that lets even beginners make amazing looking Twitter feeds on their WordPress sites.
These are some other advantages you’ll get when you use Twitter Feed Pro:
- Twitter feeds add SEO value to your website by adding fresh crawlable content on a regular basis
- Feed content is responsive to look great on any screen size, mobile to desktop
- You can show tweets from other users, your own Twitter account, people you follow, or by filtering hashtags or search terms
- Display as many feeds as you want, from different users, on multiple pages or widgets
- Twitter content inherits your site’s style to match your overall web design by default
You’ll see more features below as we show you how to use Twitter Feed Pro in this tutorial.
For those who use other social platforms, Smash Balloon also makes plugins to display other social media feeds on WordPress sites:
If you’d like to use more than one social feed plugin on your site, the All Access bundle is the best deal, and gets you all the social media tools you could need for WordPress.
Okay, let’s move on to creating a real feed with the Twitter Feed Pro plugin on WordPress, and see exactly how it’s done.
How to Add a Twitter Feed to WordPress (4 Steps)
We’ll start by getting the plugin, then following the rest of these simple steps:
Step 1. Install Twitter Feed Pro on WordPress
Step 2. Create a Custom Twitter Feed
Step 3. Customize Twitter Feed Layout and Display Options
Step 4. Add Twitter Feed to Your WordPress Site
Let’s get started.
Step 1: Install Twitter Feed Pro on WordPress
To get Twitter Feed Pro plugin installed on your site, go to the Smash Balloon site and select your desired plan.
After you’ve completed the checkout process, go to the My Account page on Smash Balloon’s site and click the Downloads tab.
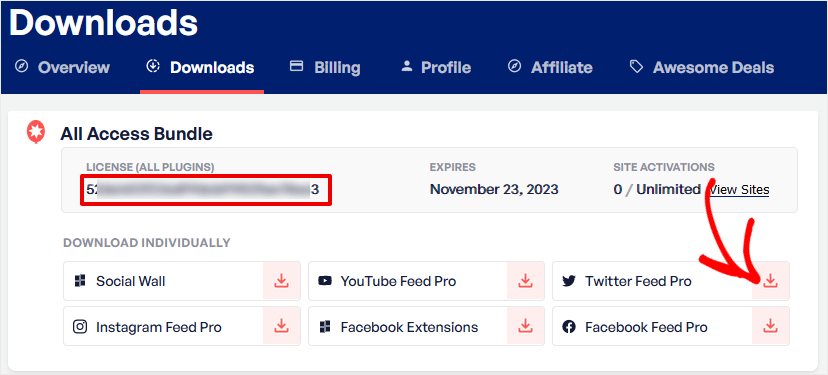
You’ll want to do two things on this page. First, click the download icon next to Twitter Feed Pro to download and save the plugin on your computer.
Second, copy the license key under the License (All Plugins) label. You’re going to input this key in the next step.
Now, log in to WordPress and click Plugins » Add New from the main dashboard menu. At the top of this page, click the Upload Plugin button.

At this point, select the ZIP file you downloaded from Smash Balloon and click the Install Now button.

After the plugin installs, click the Activate Plugin button to finish.
That’s it, Twitter Feed Pro is installed. Now you can click Twitter Feed » Settings in the WordPress menu and enter the license key that you copied from your Smash Balloon account earlier.

Click Activate to verify your account, and you’re ready to use Twitter Feed Pro. Let’s go make your first Twitter feed in WordPress!
Step 2: Create a Custom Twitter Feed
To start the process of building a new Twitter feed on your WordPress site, click Twitter Feed » All Feeds.
If this is the first feed you’re creating in Twitter Feed Pro, you’ll be directed to the new feed wizard. Click the Add New button.
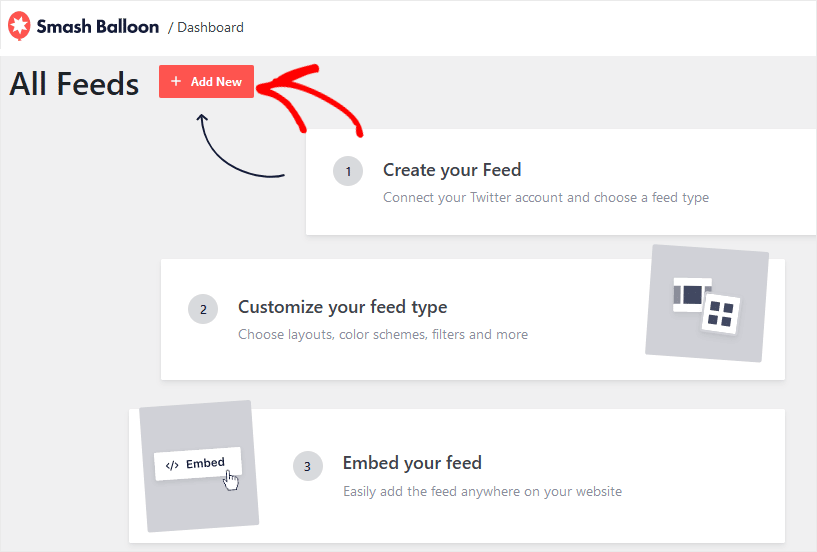
Okay, now you need to select the type of feed you’d like to show on your site.
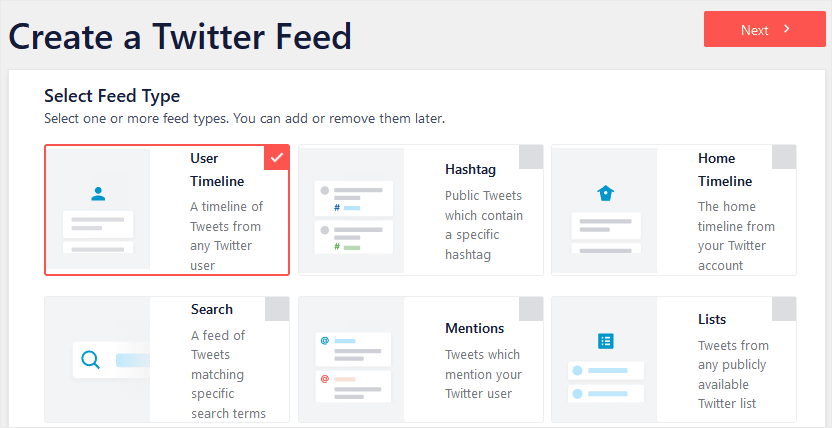
For this example, we’ll choose User Timeline. That will show a feed with the timeline of any Twitter user you’d like to display on your site. When you’ve selected the feed type, click the Next button to continue.
In order to add a Twitter timeline, now you’ll need to connect your Twitter account. Click the Connect button.
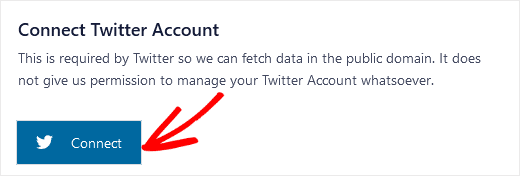
Then, enter a valid Twitter account name or handle, and a password, and click the Authorize app button. This allows Twitter Feed Pro to access content from Twitter so it can be published on your site.
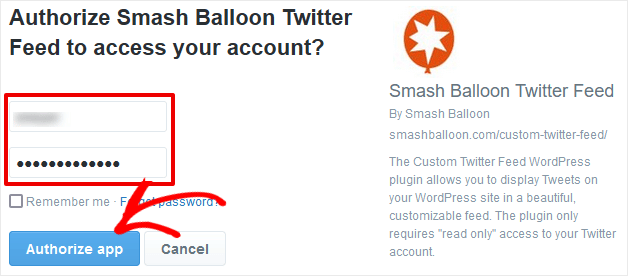
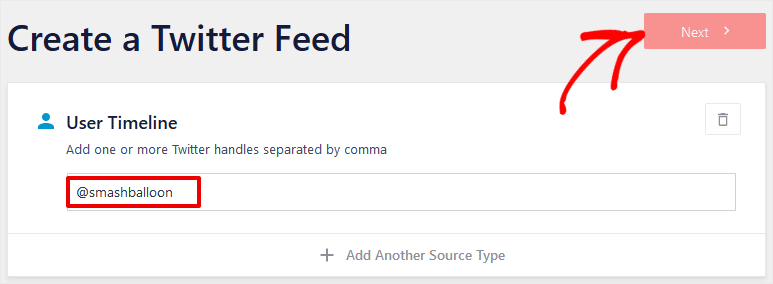
On the next screen, you’ll enter the handle of the Twitter account you want to show in your feed. Type in the handle and click the Next button once again.
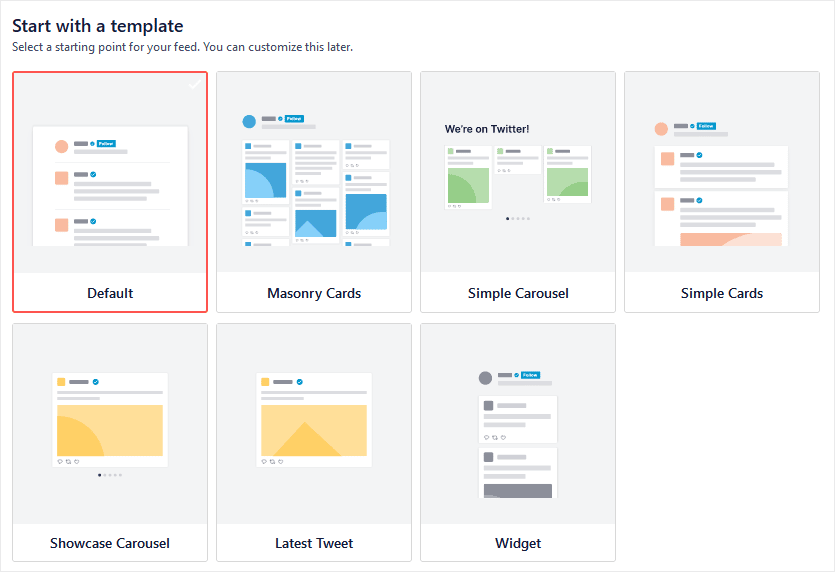
The next screen allows you to pick a template that controls the general appearance of your feed. In this step we’ll select the Default template to start with. You can customize this template in the next step of the process.
Okay, click that Next button one more time, and that’s it! Your feed is all set up.
You should see a preview of your feed now in the Feed editor screen.
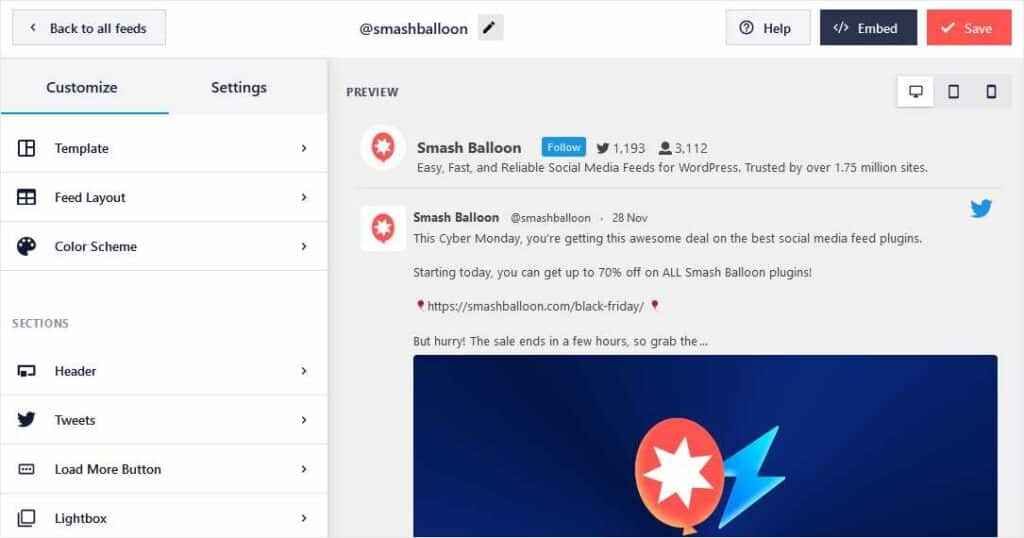
Stay on this screen, because in our next step we’re going to configure our feed layout and display.
Step 3: Customize Twitter Feed Layout and Display Options
If you’re still in the feed editor screen, great! If not, go to Twitter Feed » All Feeds to see the list of feeds you’ve created with the Twitter Feed Pro plugin.
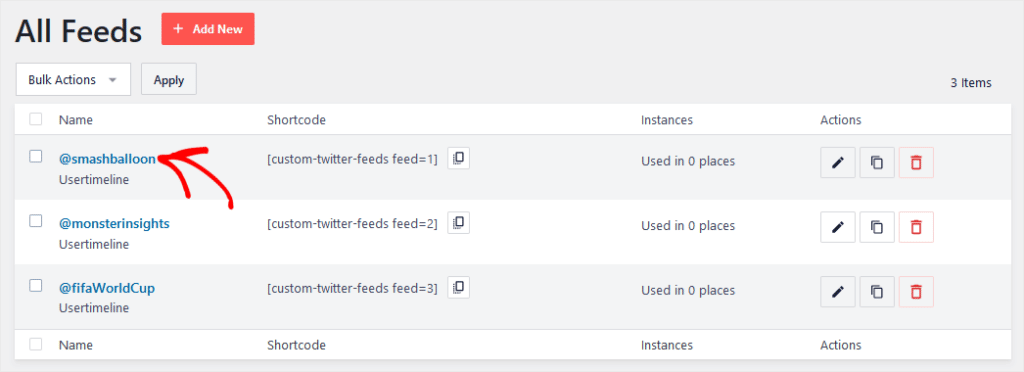
Then, click the feed you’d like to customize to go to the feed editor.
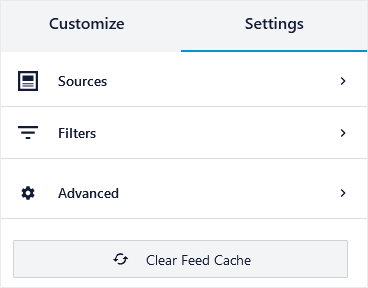
In the feed editor screen Settings tab, you can change your feed source and create filters to include or exclude tweets depending on keywords. You can also choose whether to show replies and retweets.
Under the Customize tab, you can change your feed layout, template, and color scheme.
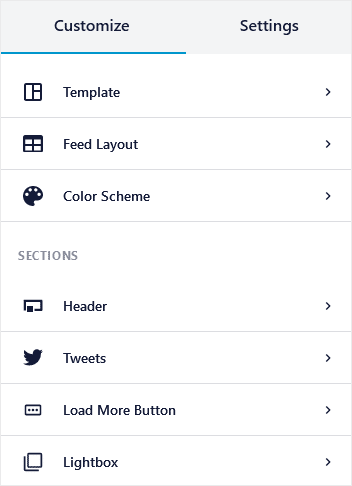
You can also modify the header content, load more button, and whether your feed appears in a lightbox. Click on the Tweets item to customize the appearance of individual tweets in your feed.
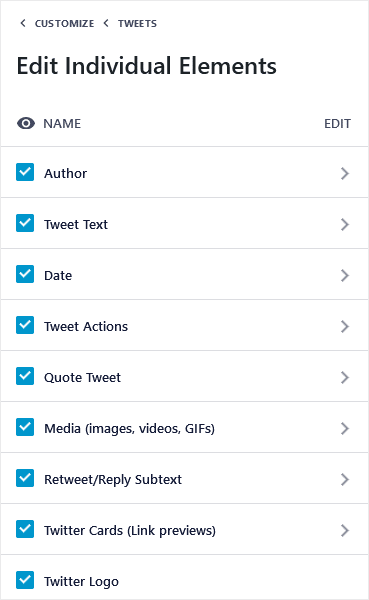
Here you’ll be able to choose whether to show media embedded in tweets, byline info, Twitter cards, and other elements. If you don’t want to show images and videos in your feed, uncheck the Media box.
You can also click the › symbol next to the menu items to see additional settings. For example, you have the option to show authors’ avatar images and text or not.
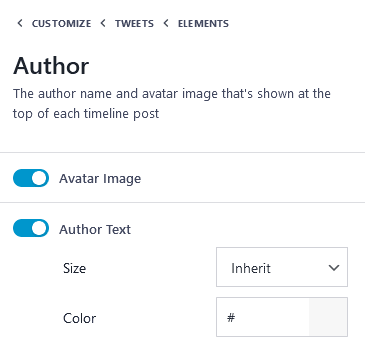
After you revise your feed according to your preferences, click the Save button at the top right.
Awesome, your feed is set up and ready to show on your website! Now, you simply need to decide where you want this Twitter content to appear.
Step 4: Add Twitter Feed to Your WordPress Site
You have a number of options when it comes to the location of Twitter content on your WordPress site. You can embed the feed on a page or post, or add a widget that contains your Twitter feed.
To add a Twitter feed to your site, first open the feed editor if you’re not already there. Then, click the Embed button next to the Save button at the top right.

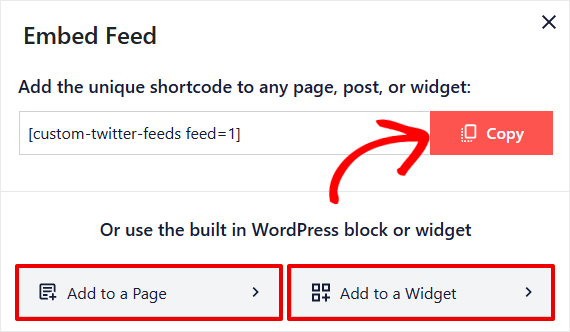
Now, you’ll see a box open up that gives you 3 options for embedding the Twitter feed on your WordPress site:
- Copy a shortcode to place feed content in any post, page, etc.
- Use the block editor to add the feed to any page
- Add a Twitter feed to a WordPress widget
How to Add a Twitter Feed With a Shortcode
To embed your Twitter feed using a shortcode, just click on the Copy button. Now, go to any page, post, widget, or other location that is enabled for shortcodes. You can either paste the shortcode into the WordPress HTML editor, or use the shortcode block in the Gutenberg editor.
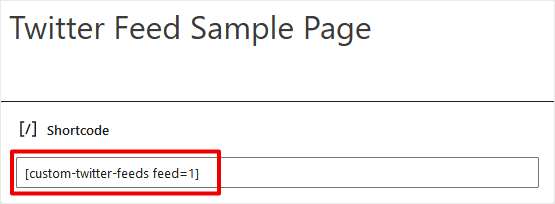
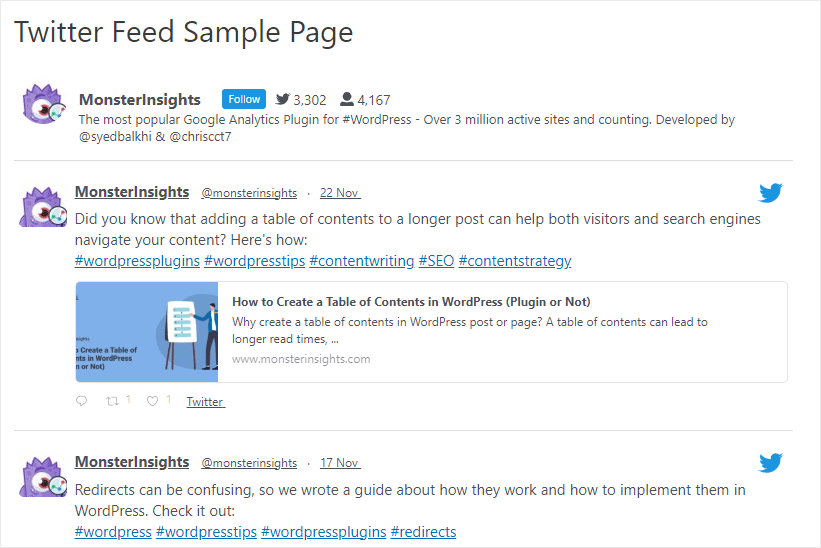
Go ahead and save or update the page and view your live feed!
How to Add Twitter Feed to a Page
Another way to add your feed to an individual page in WordPress is to click the Add to a Page button in the previous step. This opens a checklist where you’ll see all the published pages on your site.
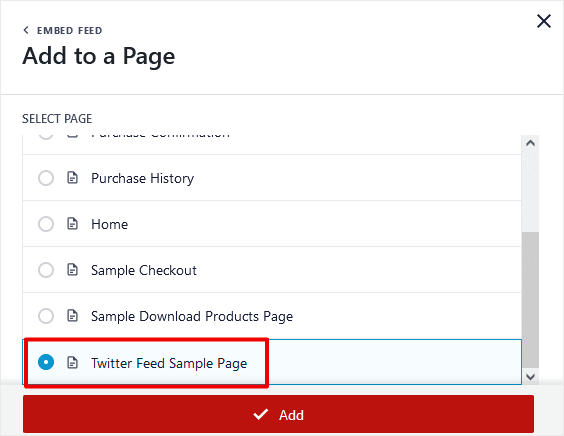
Now you can select any page where you want your feed to display and click Add. That page will open in a new tab. Click on the plus sign (+) to add a new block wherever you want your feed to show up.
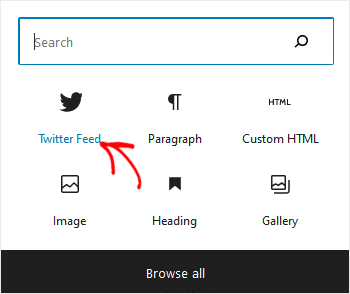
Then, click the Twitter Feed block icon and your feed will be added in the selected location. That’s it, you’re done, you can save and preview your page!
How to Add a Twitter Feed to a WordPress Widget
All right, our last example will show you how to add a Twitter feed to a widget. You can place a widget anywhere your WordPress theme allows.
To place your Twitter feed in a widget, click on Embed in the feed editor and then the Add to a Widget button. The Widgets editing screen will open in WordPress.
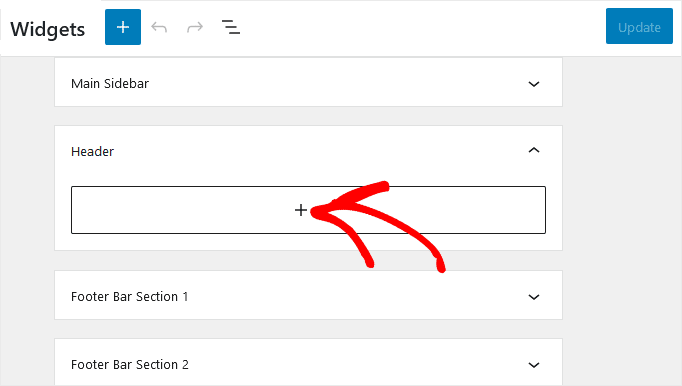
Click the plus sign (+) under the widget where you’d like your Twitter feed to display to open the block editor. Now, you can use either method that you used to place a feed earlier.
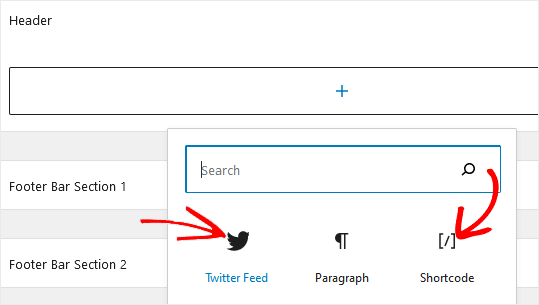
Click the Twitter Feed icon to automatically place your feed, or click Shortcode to use a Twitter feed shortcode.
When you finish, click the Update button and you’re all done! Go check out your new Twitter feed displayed in your sidebar widget, or wherever you placed it!
Can I Create Twitter Feeds on WordPress Without a Plugin?
Yes, you can show Twitter posts and timelines without a plugin. There are a couple different ways to do it by using tools built right into WordPress.
Using the Twitter Block in WordPress to Add a Tweet or Timeline
For those using the Gutenberg block editor in WordPress, you can easily add a tweet with a built-in block named Twitter.
To add a tweet with the Twitter block, go ahead and open any page or post. Place your cursor wherever you’d like the Twitter block to display and click the + to add a new block.
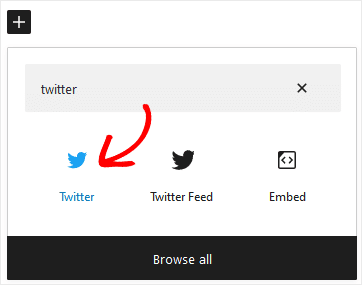
Now, browse or search for “twitter” to find the Twitter block built into WordPress’s block editor. Click the block to place it, and you’ll see this in the editor screen.
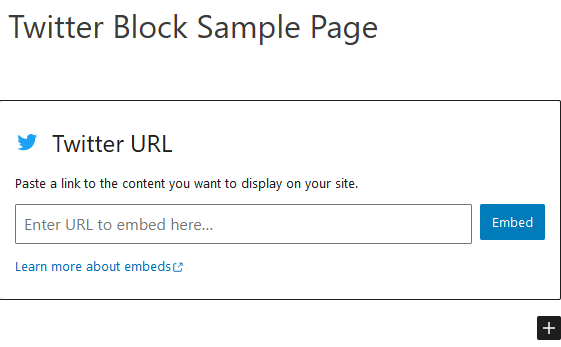
At this point, you’ll enter a URL for a Twitter tweet, timeline, or other content type.
To find the URL for an individual tweet, click on the date label next to the tweet to open in a separate tab. Then, copy the URL from the browser address bar. Now you can paste that URL into the WordPress Twitter block.
Here’s what a tweet looks like when published on a page using the Twitter block.

As you can see, the default tweet display is nice and simple. Unfortunately, you don’t have much control over the layout and display.
If you enter a timeline URL in the Twitter block, you’ll see something like this on the published page.

WordPress displays all the content on the chosen timeline, without replies, in a box. Again, you have no control over how many posts are displayed, whether images or replies are included, or other settings.
Considering the lack of display and layout options offered by the built-in Twitter block, we don’t really recommend using this method of adding a Twitter feed to WordPress.
You’ll get much better results, and many more customization options, with a dedicated social feed plugin like Twitter Feed Pro from Smash Balloon.
And now, you’re ready to enjoy the benefits of adding social content like tweets or your Twitter timeline to your WordPress site. Get more site traffic and more social followers, and refresh your site content with very little added effort!
Okay, that’s all for our tutorial on how to add a Twitter feed to WordPress.
If you enjoyed this article, you might like our post on how to set up social media tracking with Google Analytics.
And please don’t forget to follow us on Twitter, Facebook and YouTube for more helpful tutorials, reviews, and Google Analytics tips.

