Want to set up a WordPress registration form so that your users can register on your website?
A registration form is usually a pretty simple form that users can very easily and quickly fill out. It should be painless and not too long, or it’s possible that users will skip registering!
In this article, we’ll show you how to easily and quickly create a simple, great-looking registration form.
This article is about creating user registration forms for signing up new users. If you’re looking for other signup forms or custom forms, check out How to Add a Contact Form in WordPress (The Easy Way).
WordPress Registration Form Best Practices
Before we go over the steps for creating your form, let’s quickly talk about a few best practices.
- Use as few fields as possible: Nobody wants to spend a bunch of time filling out a form. It’s best to keep it as simple as possible to avoid having people decide not to register because they don’t want to fill out your form!
- Set up an email notification: Once someone fills out your form, they should receive a follow-up email right away confirming their registration.
- Make your page look pleasing: Want to delight your users? Make your login/register pages look great. You can even add an offer on your login page for easy advertising!
WordPress User Registration Form Tutorial
It’s time to get started on your new user registration form. Let’s go!
To create our form, we’re going to use the best WordPress contact (and beyond) form builder plugin, WPForms.
WPForms Pro includes a User Registration addon, which is exactly what you need for creating a custom registration form.
Alright, let’s get started on our tutorial.
Step 1: Install WPForms
Step 2: Activate the User Registration Addon
Step 3: Create a User Registration Form
Step 4: Customize Your Form Fields
Step 5: Customize Form Settings
Step 6: Embed Your User Registration Form
Step 7 (Optional): Create Custom Login and Password Reset Forms
Step 8: Set up Form Submission Tracking
Step 1: Install WPForms
To install WPForms, grab the Pro license:
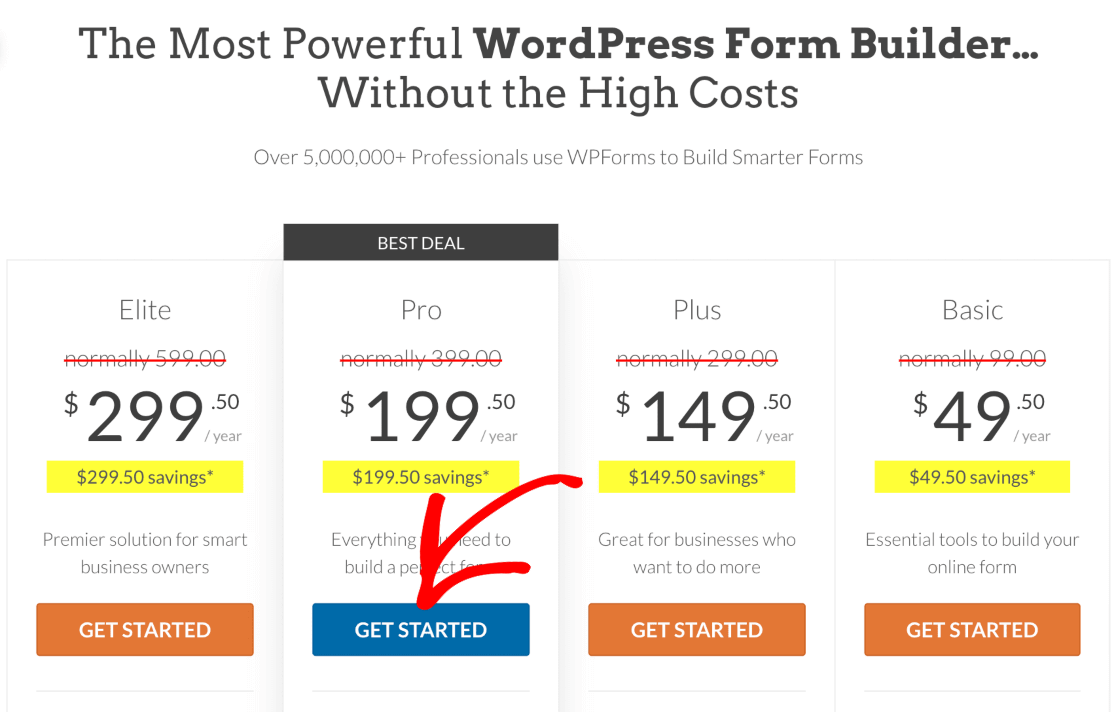
Then, head to the Downloads tab to download your plugin:
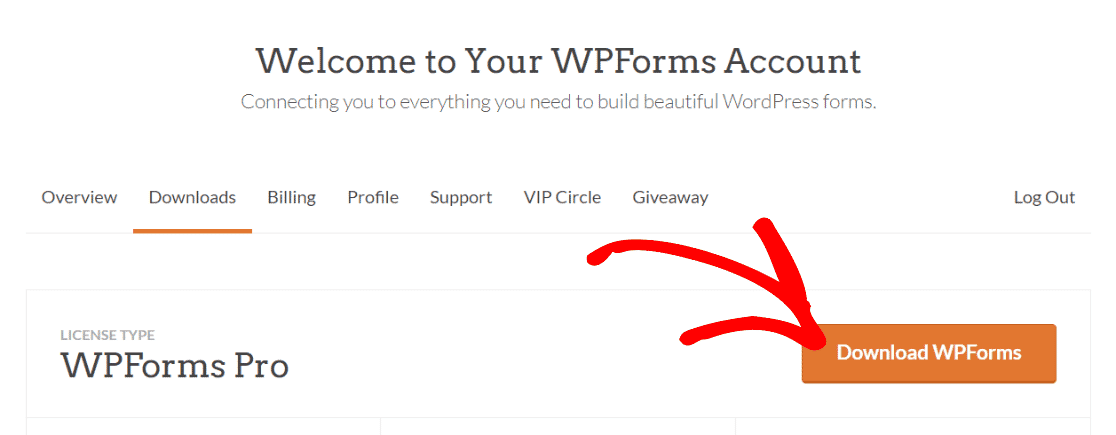
Once you have your zip file downloaded, head to your WordPress dashboard, then Plugins » Add New » Upload Plugin. There, upload your zip file:

Now, activate WPForms by clicking the blue activate button:
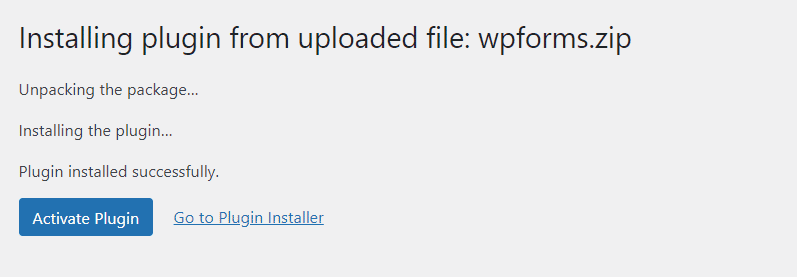
Finally, grab your license key from your WPForms account, then head to WPForms » Settings » General to paste it in:
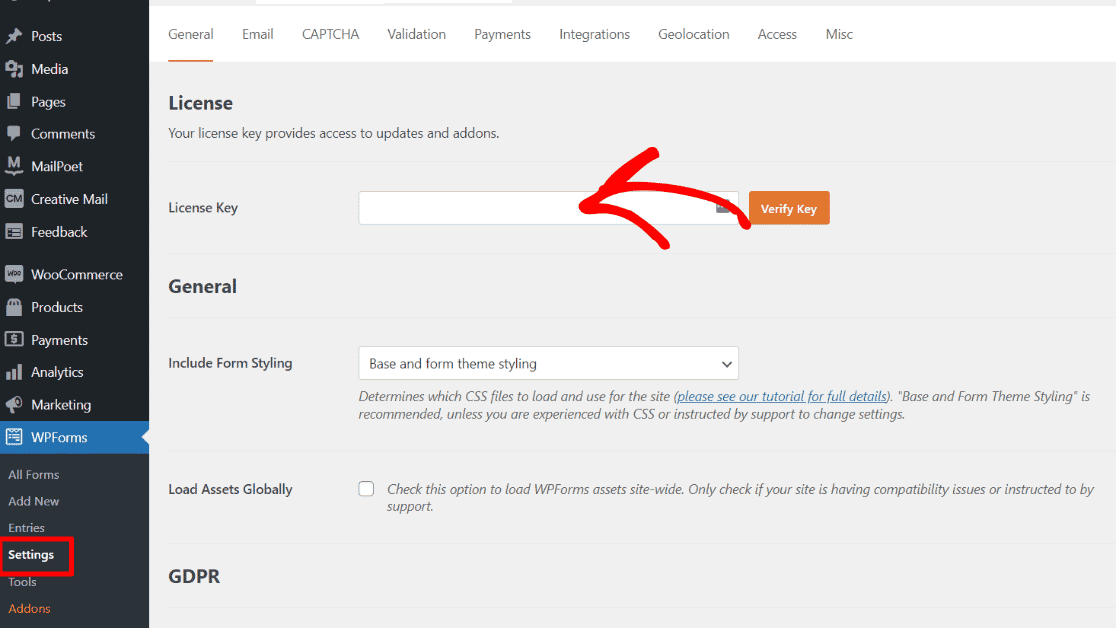
Step 2: Activate the User Registration Addon
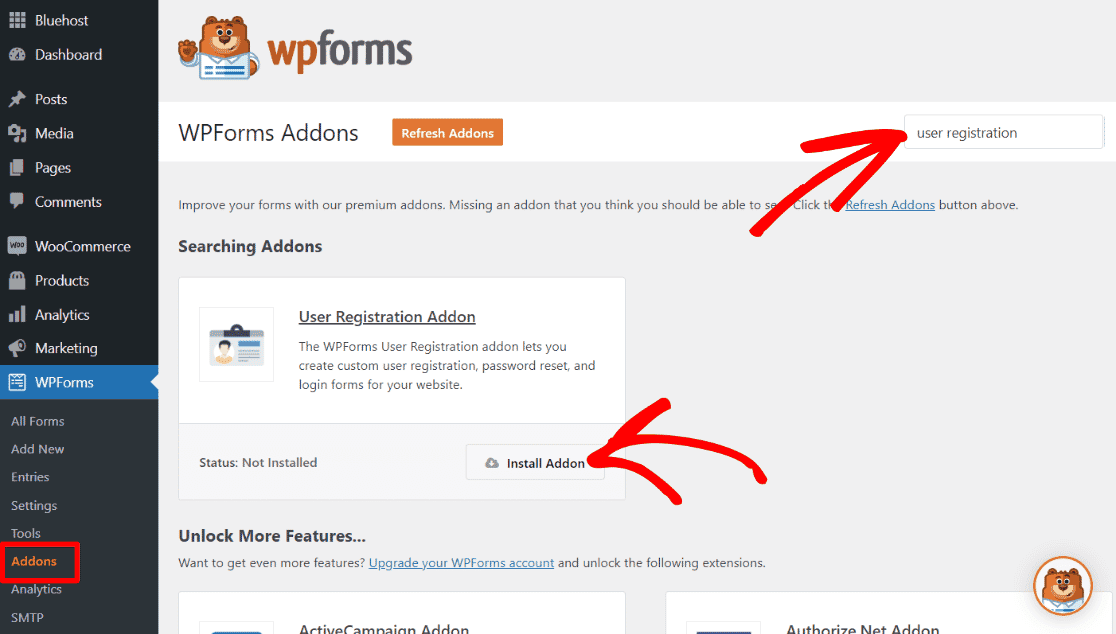
Now to create your user registration form, you’ll need the User Registration Addon. To set it up, head to WPForms » Addons, search for User Registration, and click Install Addon.
Step 3: Create a User Registration Form
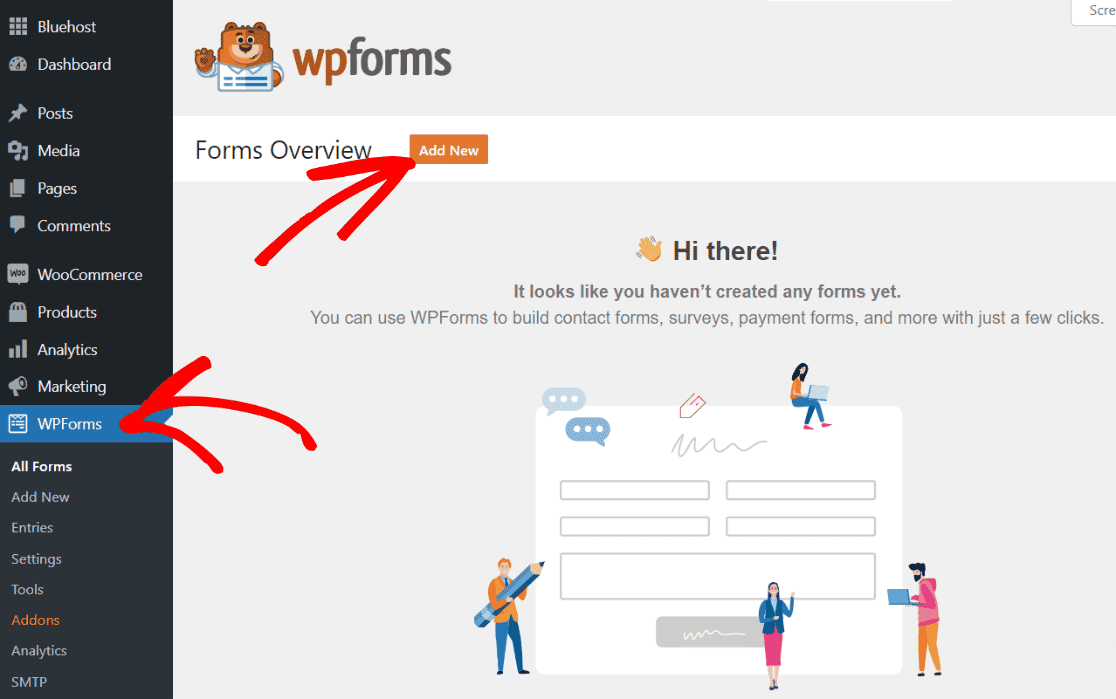
To take a shortcut on our form, we’re going to use the user registration form template. To do that, first go to WPForms » Add New:
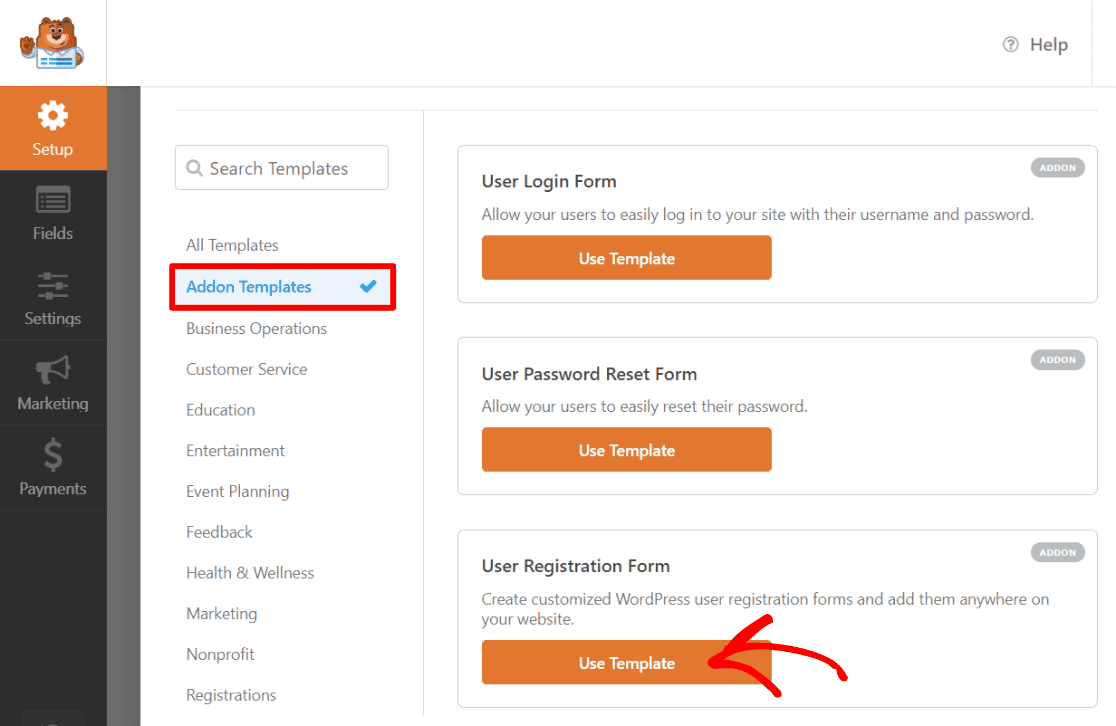
Now, click into Addon Templates to find User Registration Form. Click Use Template:
Step 4: Customize Your Form Fields
When you choose to use the User Registration Form template, it’ll automatically add some form fields to your form for you. It adds:
- Name (First & Last)
- Username
- Password
- Short bio
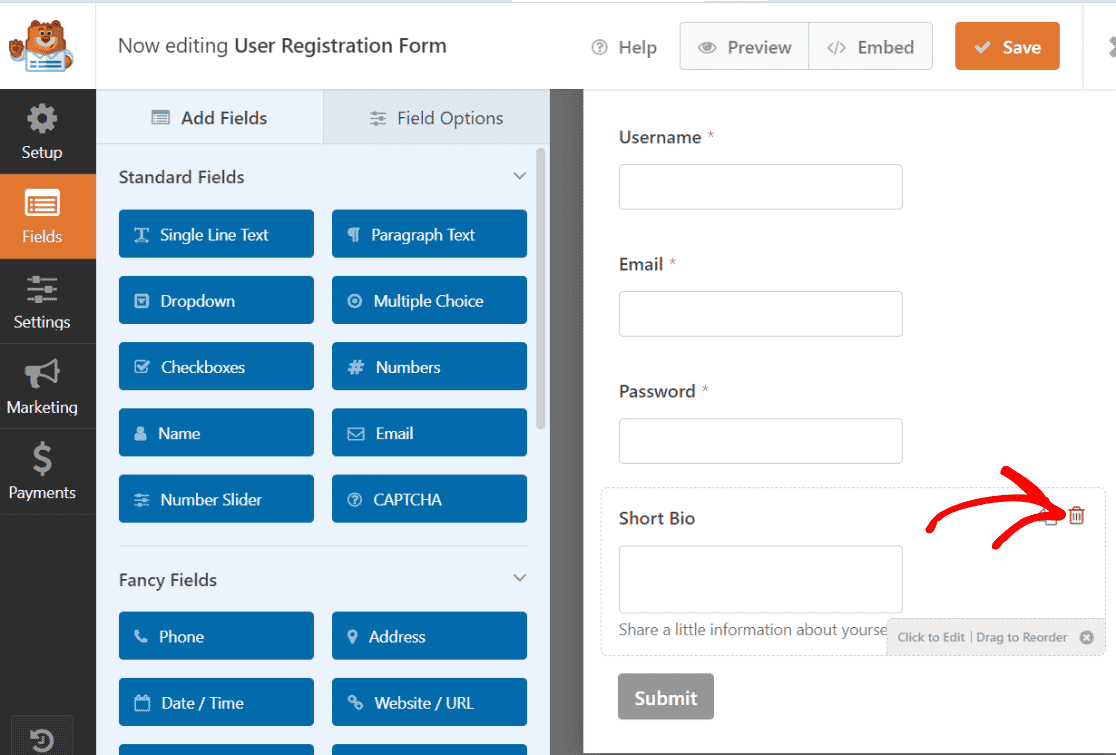
If you need other fields or don’t need the short bio, for instance, you can add and remove fields however you need in this step. To delete a field, hover over it and click the garbage can icon:
To add a field, simply search for what you need and then click and drag it onto your form.
Step 5: Customize Form Settings
Now that your form has the right fields, you can customize other aspects of how the form works.
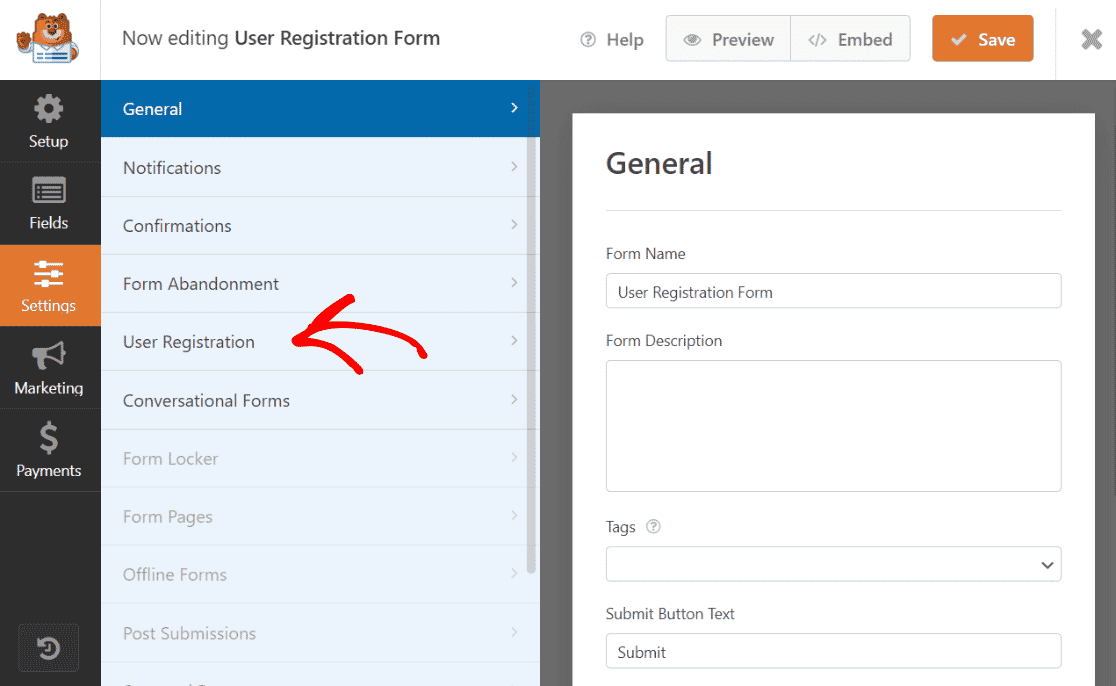
To do that, head to the Settings tab. Here, you’ll see all the different things you can customize, including notifications from the form, confirmation setup, form abandonment settings, user registration settings, and more. Different settings options will be available here based on the addons you have installed.
In the General tab, you’ll find the form name, form description, tags, button text, and more. In the Notifications tab, you’ll be able to set up the emails that send out when your form is submitted. In the Confirmations tab, you’ll set up what the user sees when he or she submits the form.
All of these settings are important! If you need help with them, check out A Complete Guide to WPForms Settings.
For the sake of this tutorial, we’re going to skip those basic settings and go over the User Registration settings.
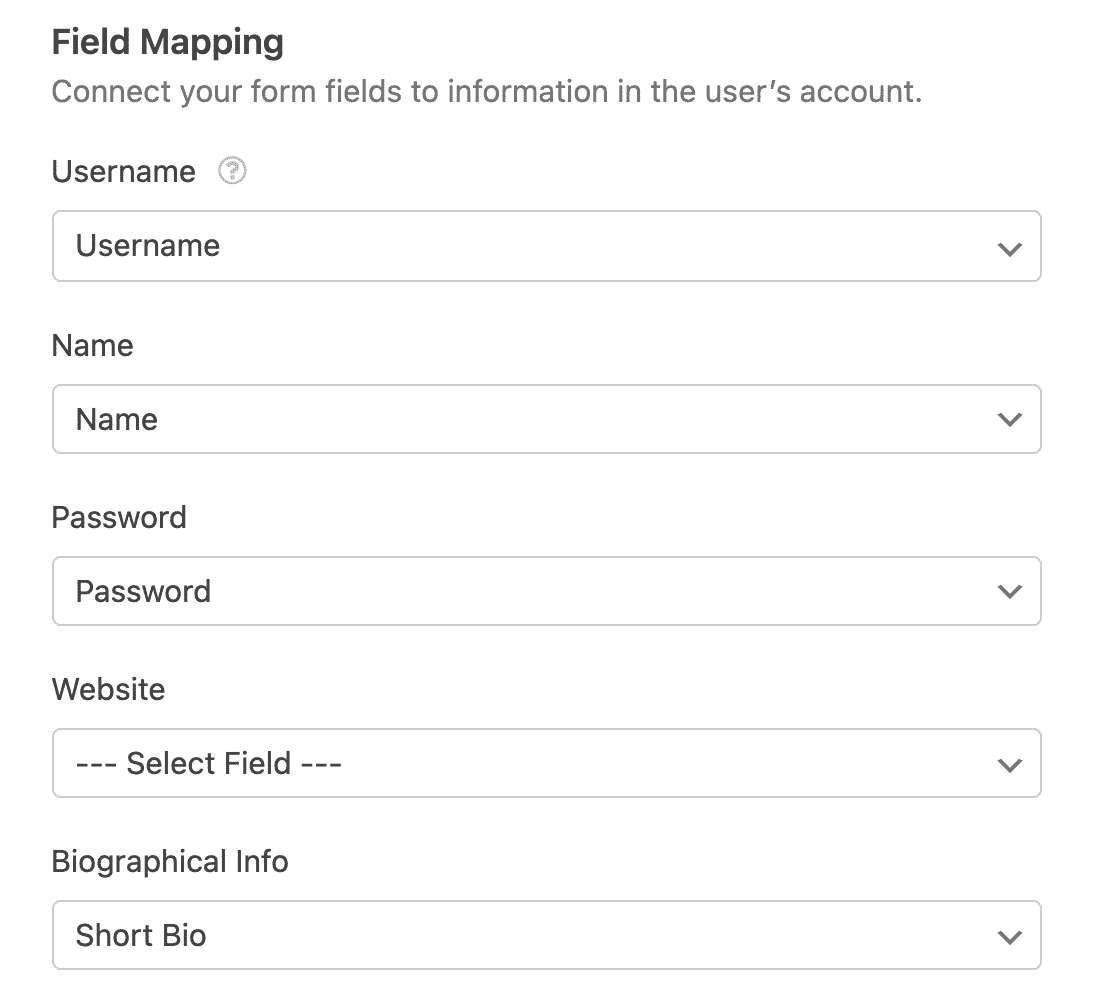
The first thing you’ll see in the User Registration settings tab is Field Mapping. This is where you can map the fields you have in your form to the new user account fields that will be created when a user signs up.
Next, you’ll see the User Roles dropdown. Here, you’ll choose what role your new users will have on your site.

Then, you’ll see the User Activation & Login options. This is where you’ll choose whether you want your new users to need to take an extra step to activate their accounts or not.
If you do want that extra step, flip the switch to enable user activation.
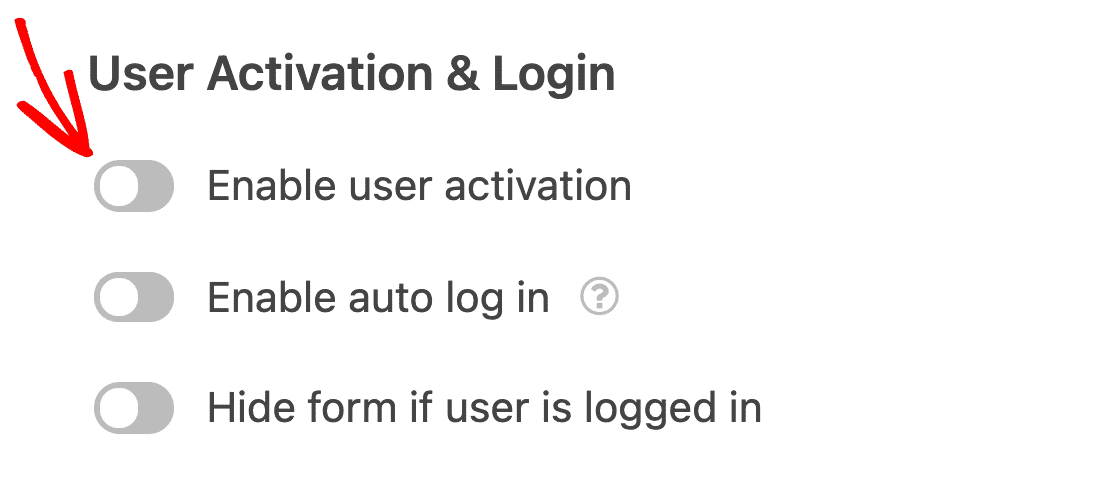
Then, choose whether you want to manually approve the account or have the user click a link in an activation email:

Now, you can customize the activation email subject and message:
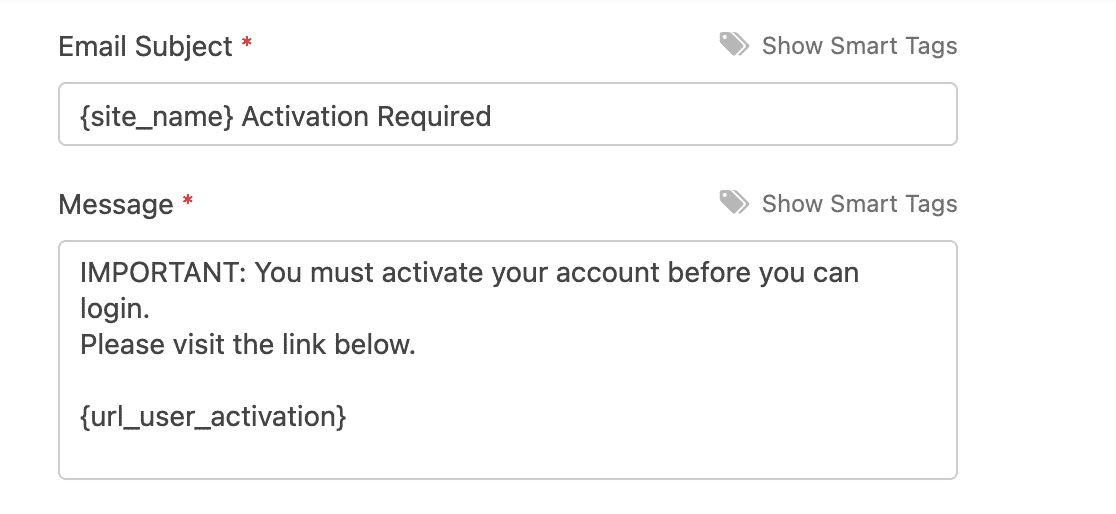
You can use Smart Tags to add the user’s name or other information:
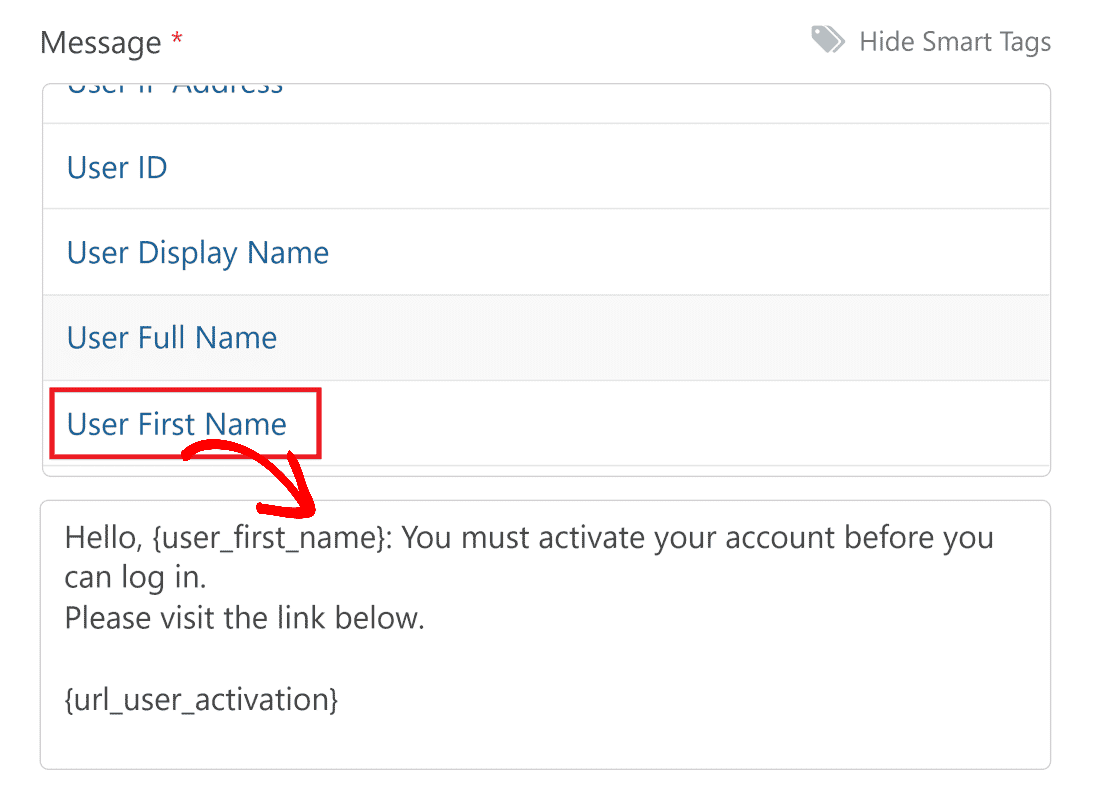
Finally, choose the page that the user should be redirected to after submitting the form.

If you do not want to enable user activation, skip those steps. You can also choose in that box to enable auto login, and to hide the form if a user is logged in.
Next, you can choose which email notifications are sent out when a new account is create or activated:

Finally, you have the option to add any Custom User Meta data.
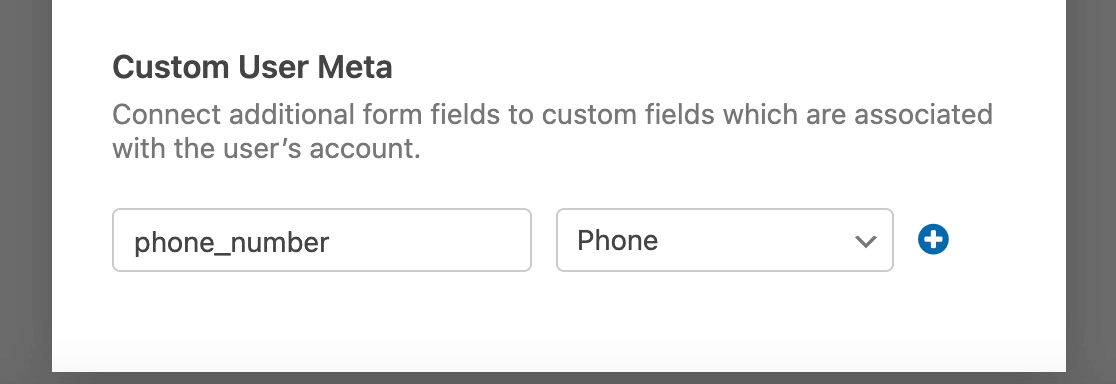
After you’ve made all your changes, make sure to click the Save button:

Step 6: Embed Your User Registration Form
Now that your user registration form is ready for use, you can go ahead and embed it on your user registration page.
Want a custom registration page that looks awesome? We recommend using SeedProd, the best WordPress landing page and custom theme builder. Use their Login Page templates to create the best registration and login pages for your users.

For instructions for designing the best registration and login pages, check out
How to Create a WordPress Custom Login Page (Easy Steps).
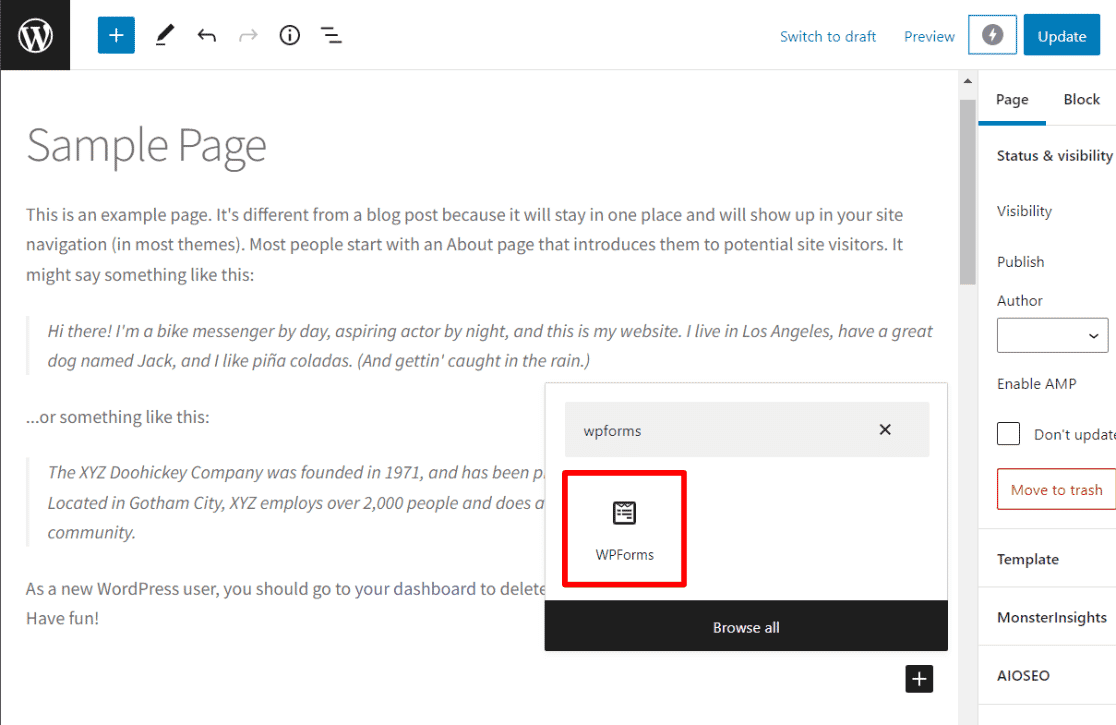
To embed your form on an existing page using the block editor, simply search for the WPForms block:
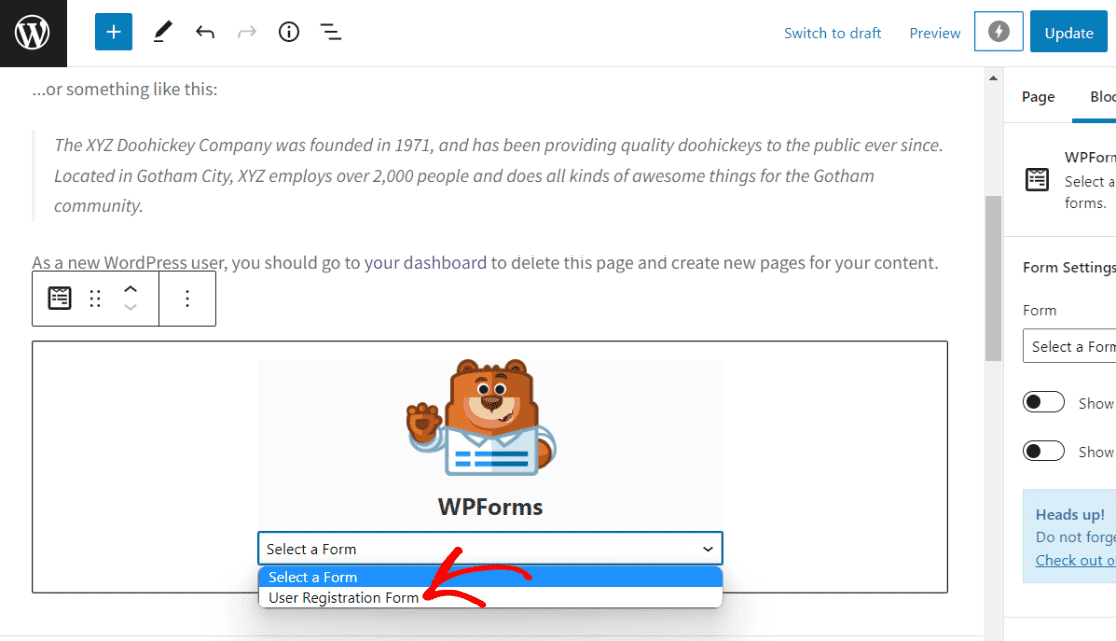
Once you add the block, you’ll be able to choose which form to embed:
Want to embed your form in your sidebar instead? Visit Appearance » Widgets and choose the WPForms widget.
Step 7 (Optional): Create Custom Login and Password Reset Forms
When you activate the WPForms User Registration addon, you not only get the ability to create a custom registration form, but you’re also given two more forms: User Login and User Password Reset.
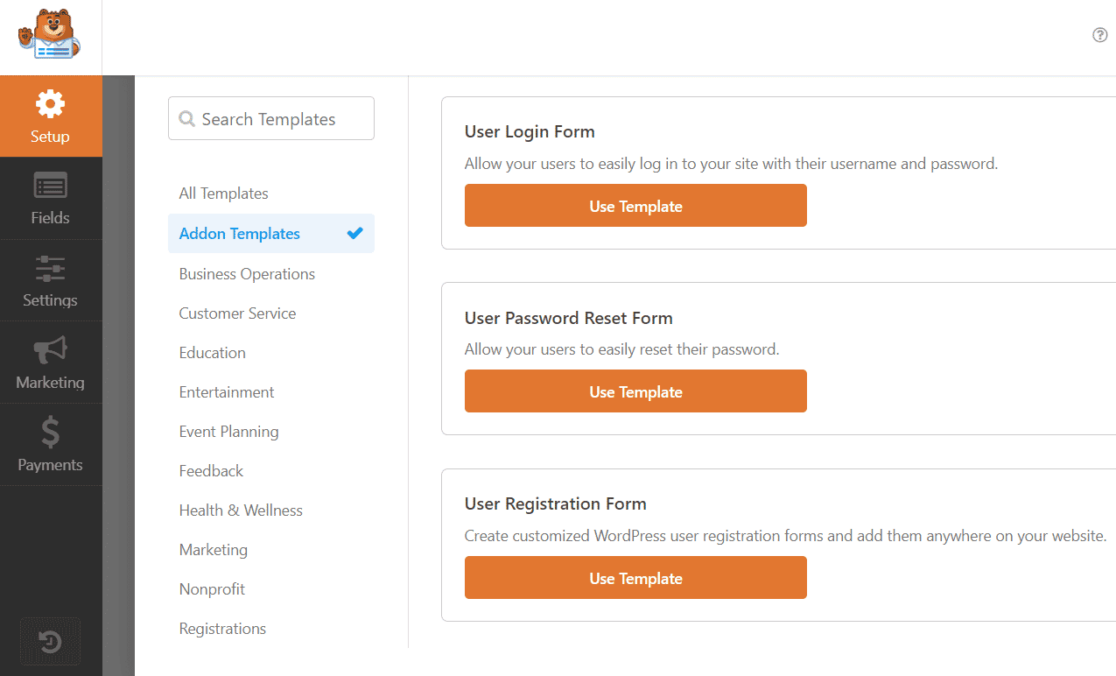
You can use these two forms to make your whole process of registration and login completely custom.
Step 8: Set up Form Submission Tracking
Having the right forms on your site is important, and so is tracking them to make sure they’re performing well on your site. That’s where MonsterInsights form tracking comes in.
MonsterInsights is the best Google Analytics plugin for WordPress. It allows you to easily connect your WordPress site with Google Analytics so you can view all the data that matters most right in your WordPress dashboard.

Plus, with the click of a button, you can set up sophisticated tracking features such as event tracking, eCommerce tracking, form tracking, custom dimension tracking, outbound link tracking, and more.
When you set up form tracking, you’ll be able to see at a glance how each of your forms is performing. Are a lot of people seeing it, but choosing not to submit it? Use these analytics to determine how you can improve your site and grow your business.
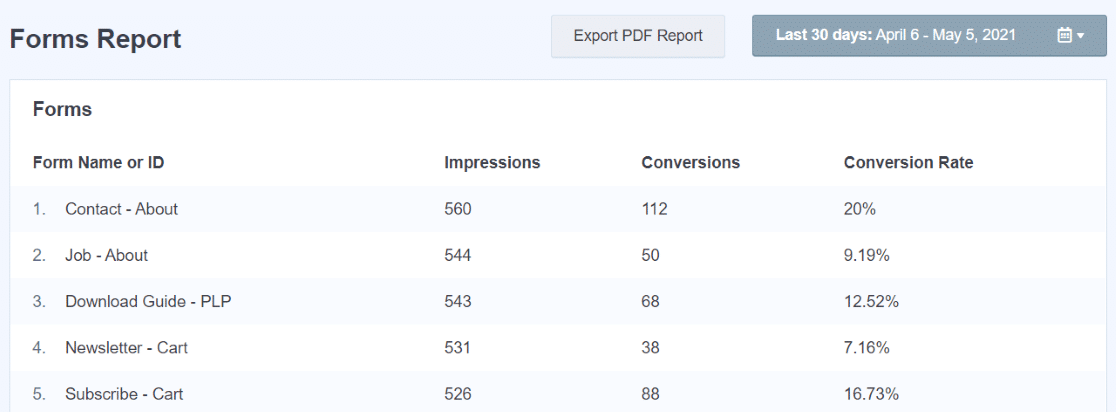
For more on form tracking with MonsterInsights, check out How to Track Form Submissions in Google Analytics & WordPress.
That’s it!
We hope you found our WordPress registration form tutorial helpful. You might also want to check out How to Track Link Clicks in Google Analytics 4 and WordPress.
Not using MonsterInsights yet? What are you waiting for?
Follow us on Twitter, Facebook and YouTube for more helpful Google Analytics and WordPress tips.

