Want to set up a WordPress event calendar on your WordPress.org site?
Adding an event calendar to your site is an awesome way to keep your audience informed about your upcoming events, and in some cases, event let them sign up, depending on your needs.
However, especially if you’re new to WordPress or don’t have a lot of experience, setting up a calendar plugin can be daunting. So, we’ve created a step-by-step tutorial for you!
In this article, we’ll go over how to install and set up our favorite WordPress event calendar plugin, Sugar Calendar. Let’s get started.
How to Set up the Best Event Calendar Plugin for WordPress
- Download and Install Sugar Calendar
- Configure Sugar Calendar
- Create a Calendar
- Create Events
- Publish Your Calendar
For this tutorial, we’re going to use Sugar Calendar.
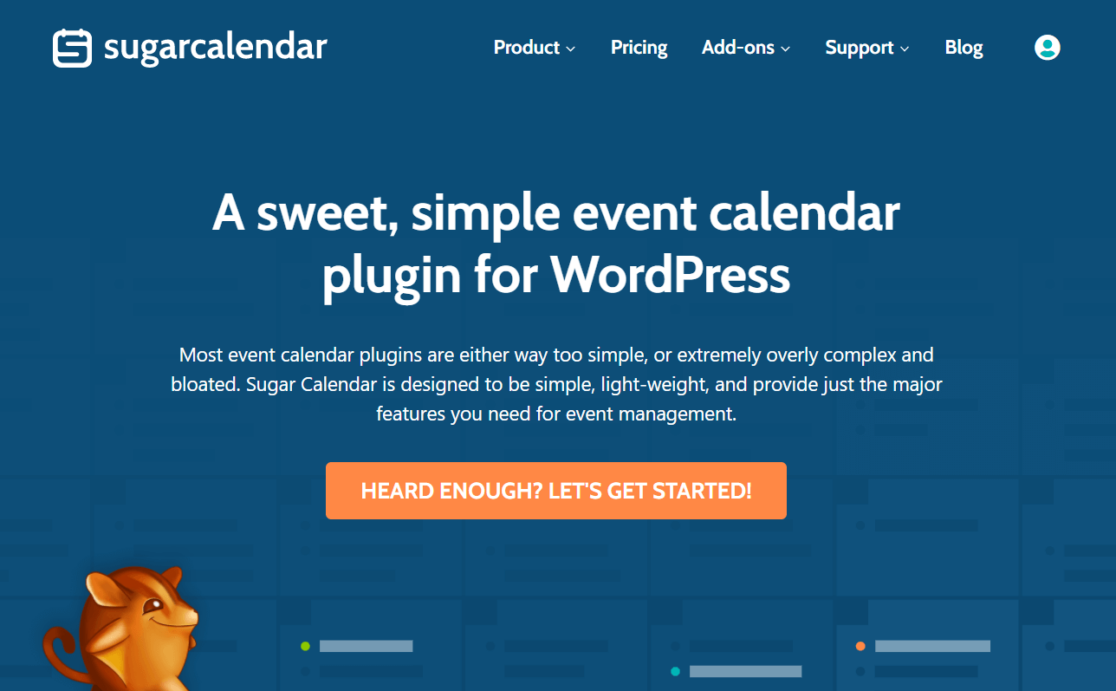
Sugar Calendar is our top favorite plugin for setting up a WordPress calendar. It’s so simple and easy to use, but also looks great and has all the major features most people need in an event plugin.
Step 1: Download and Install Sugar Calendar
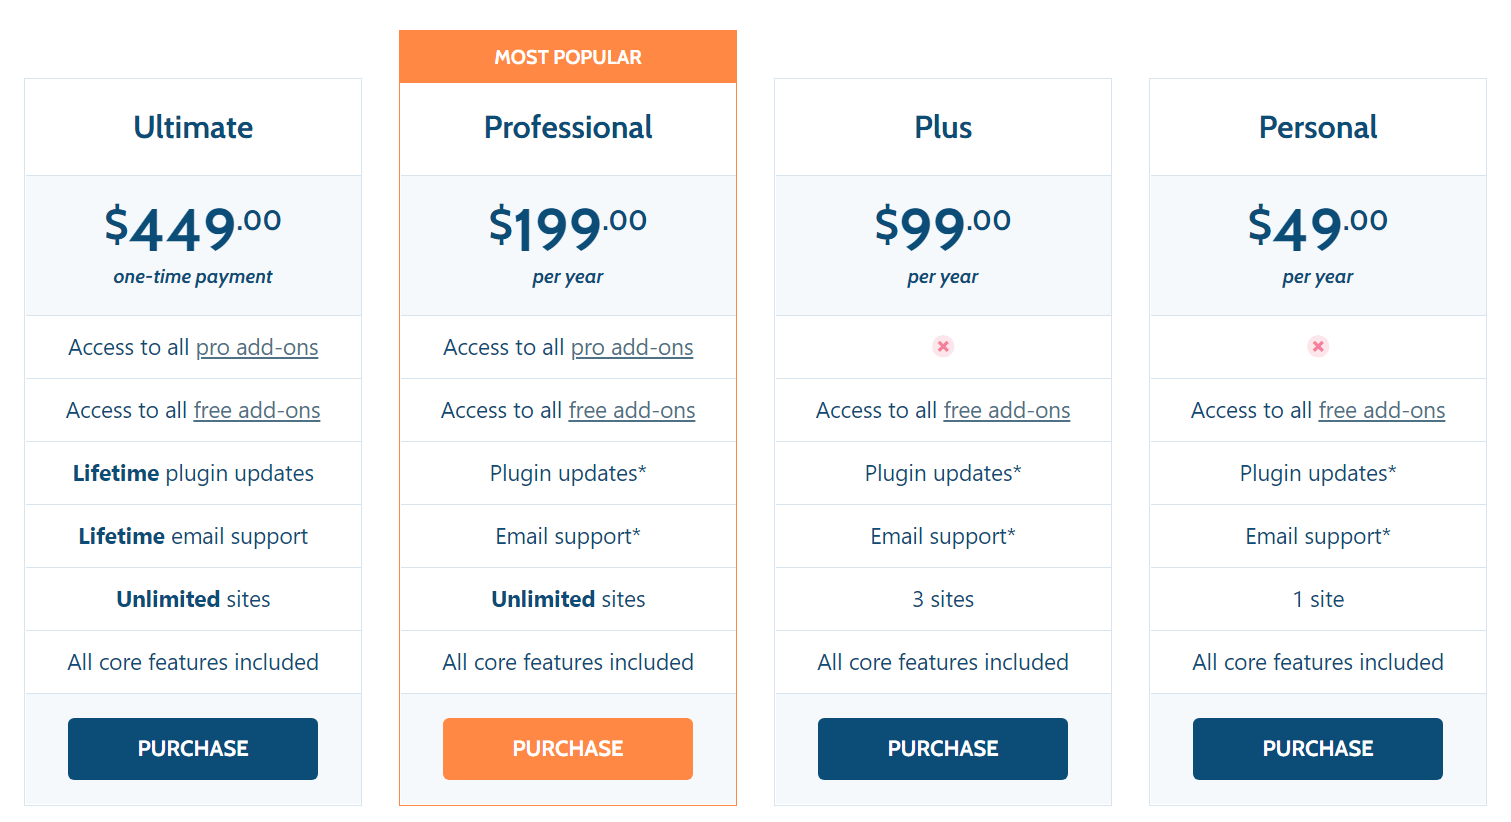
To get started, head to their pricing page and choose the license level that works for you. We’ll be using the Professional license, but we’ll show you how to set up any of them.
Once you complete your purchase, you’ll land on a Purchase Confirmation page. Scroll down the page to find your license key and copy it. You’ll need it in a minute.
Next, scroll down to the Product section and click the link to download the Sugar Calendar plugin:

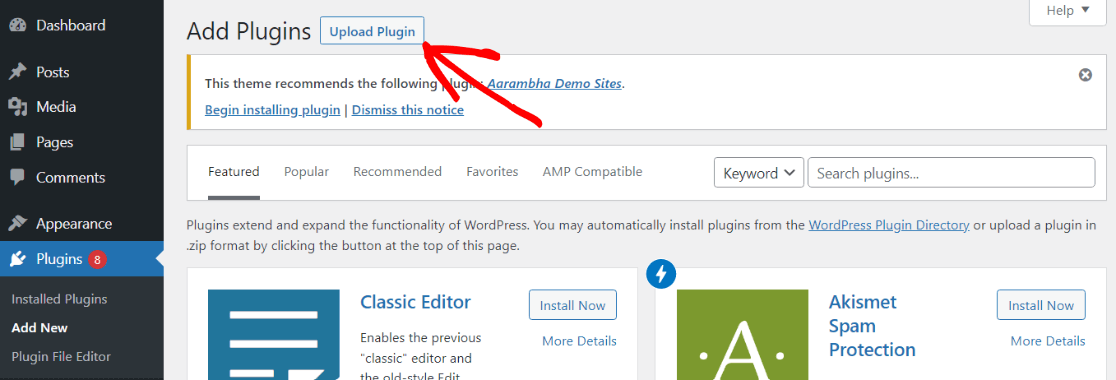
Then, head to your WordPress dashboard, go to Plugins » Add New, then click the Upload Plugin button and upload your plugin file.
Click the “Activate Plugin” button when prompted.
Great! Sugar Calendar is installed.
Step 2: Configure Calendar Settings
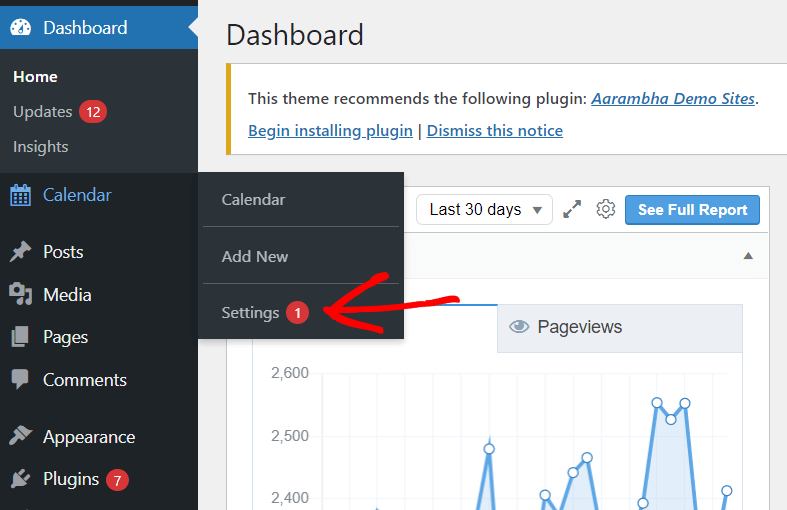
Now that the plugin is installed and activated, you’ll see a Calendar option in your WordPress navigation. Hover over it, then choose Settings.
Now, paste that license key you copied earlier into the box and click Save Changes. If you no longer have it copied, head to your purchases page.
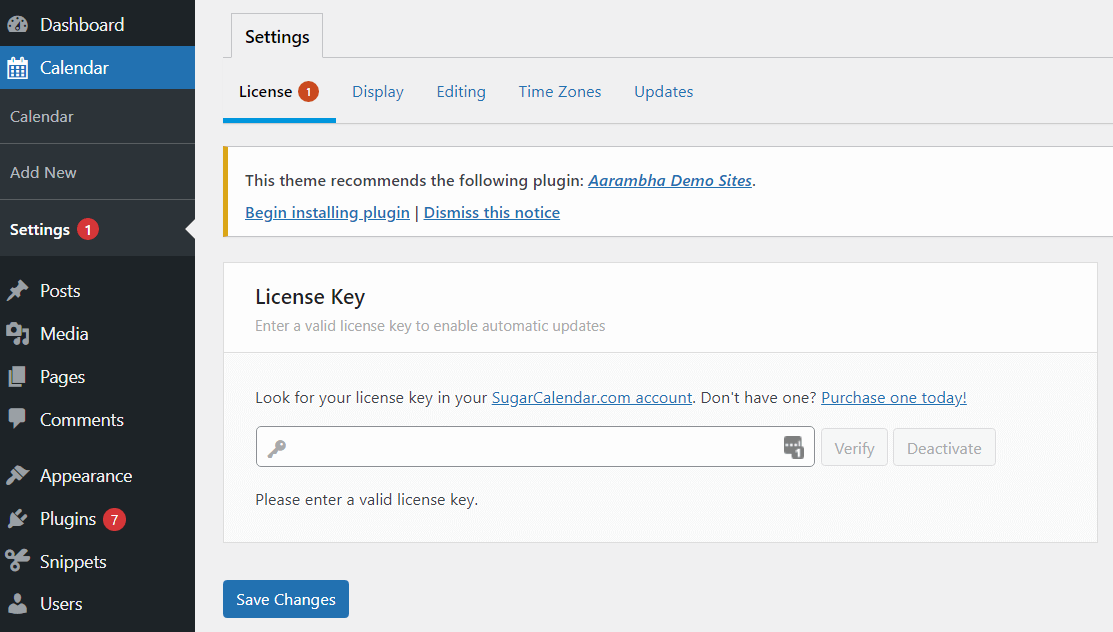
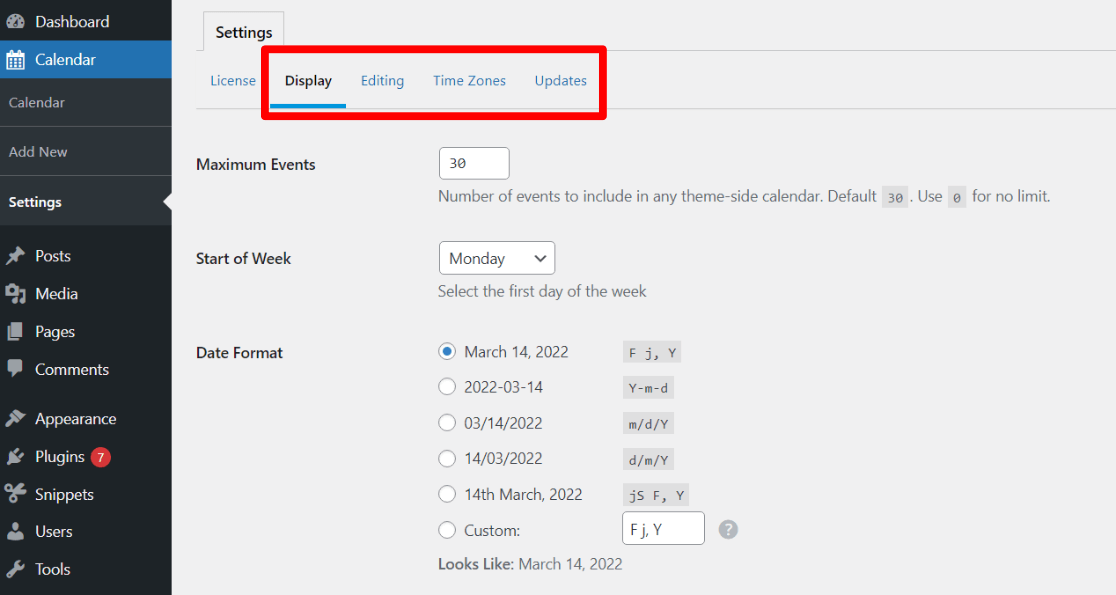
Now, make sure to go through each Settings tab to choose options like how you want your dates to look, your time zone, whether you’re using the block editor or classic editor, and more.
Step 3: Create a Calendar
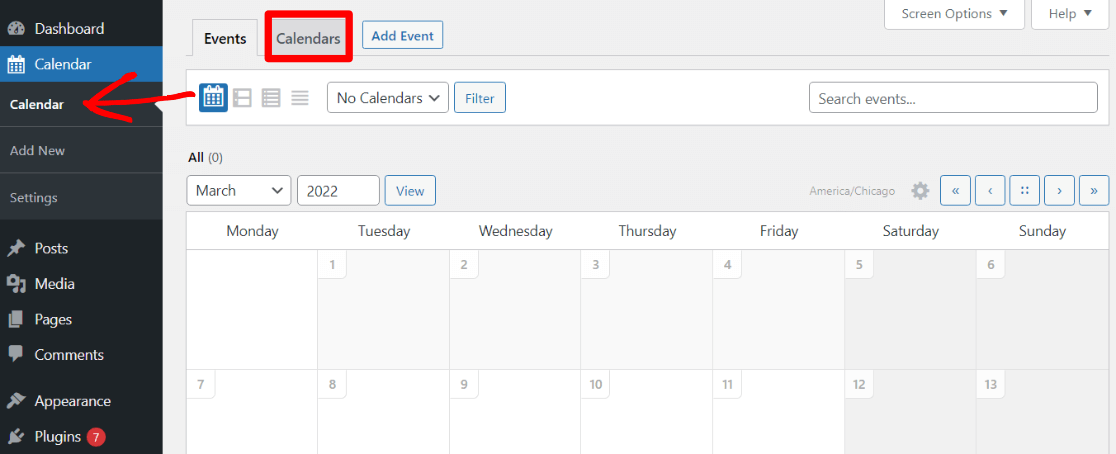
The basic navigation of Sugar Calendar is two tabs: Calendars and Events. Before creating events, you’ll need to create a calendar. To do that, click Calendar in your WordPress navigation, then toggle to the Calendars tab:
Now, click the Add Calendar button:
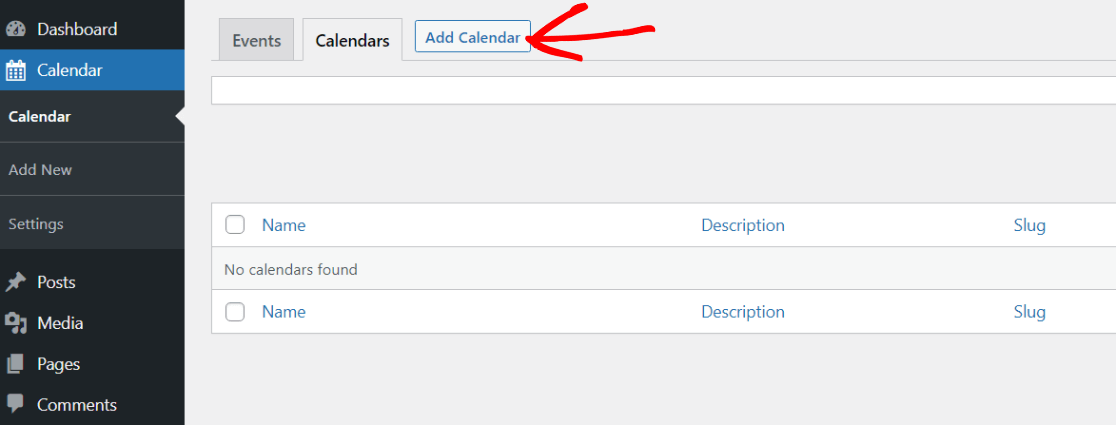
Next, fill out the calendar’s name, slug, parent calendar, description, and color.
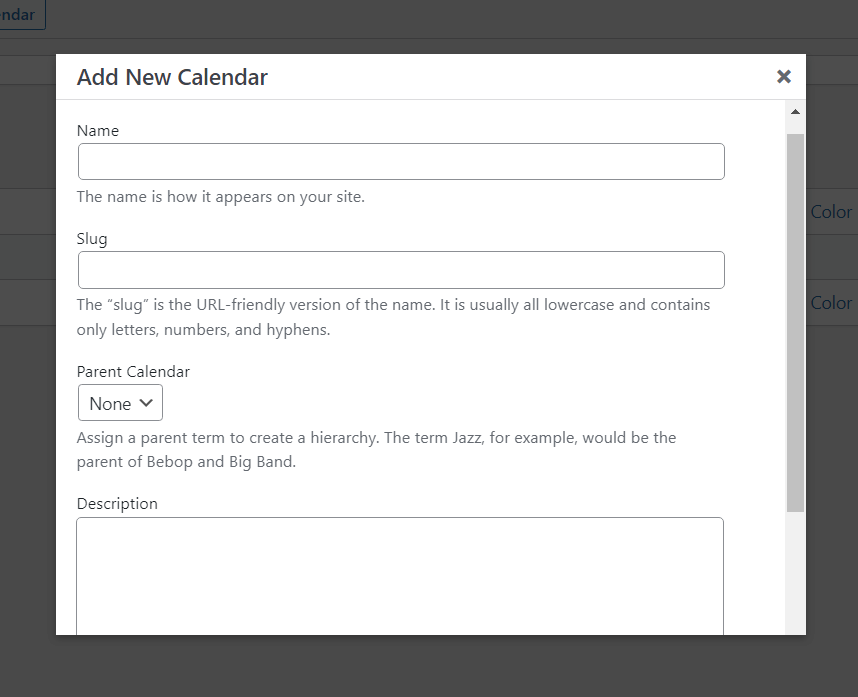
Here’s an example:
Name: MonsterInsights Google Analytics Tutorial Events
Slug: monsterinsights-analytics-events
Parent Calendar: None
Description: MonsterInsights routinely hosts Google Analytics tutorial events. Sign up for some to learn all about Google Analytics and how MonsterInsights can connect your WordPress site to it to bring you all the stats that matter to your business.
Color: MonsterInsights purple – #9378cf
Step 4: Create Events
Now that your calendar is created, head back to the Events tab and click Add Event:
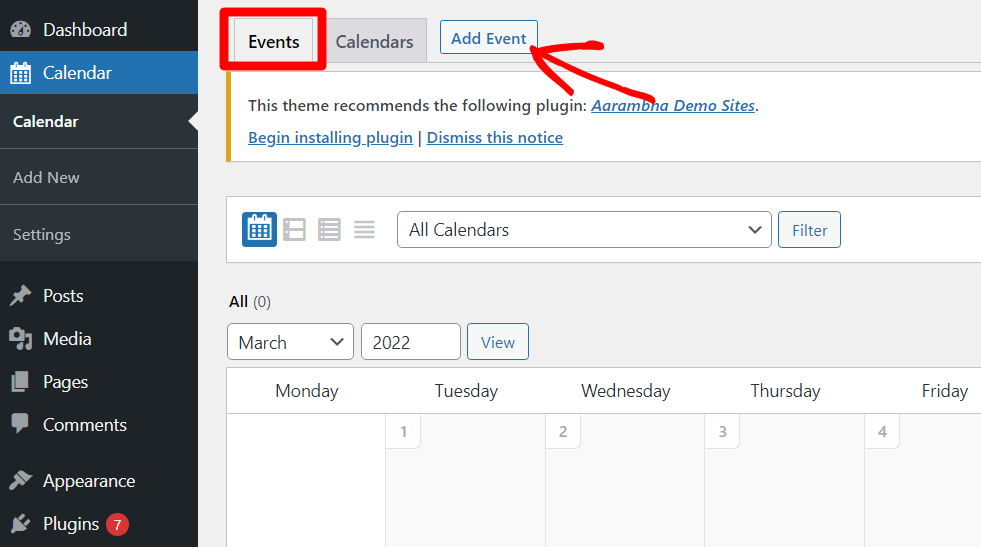
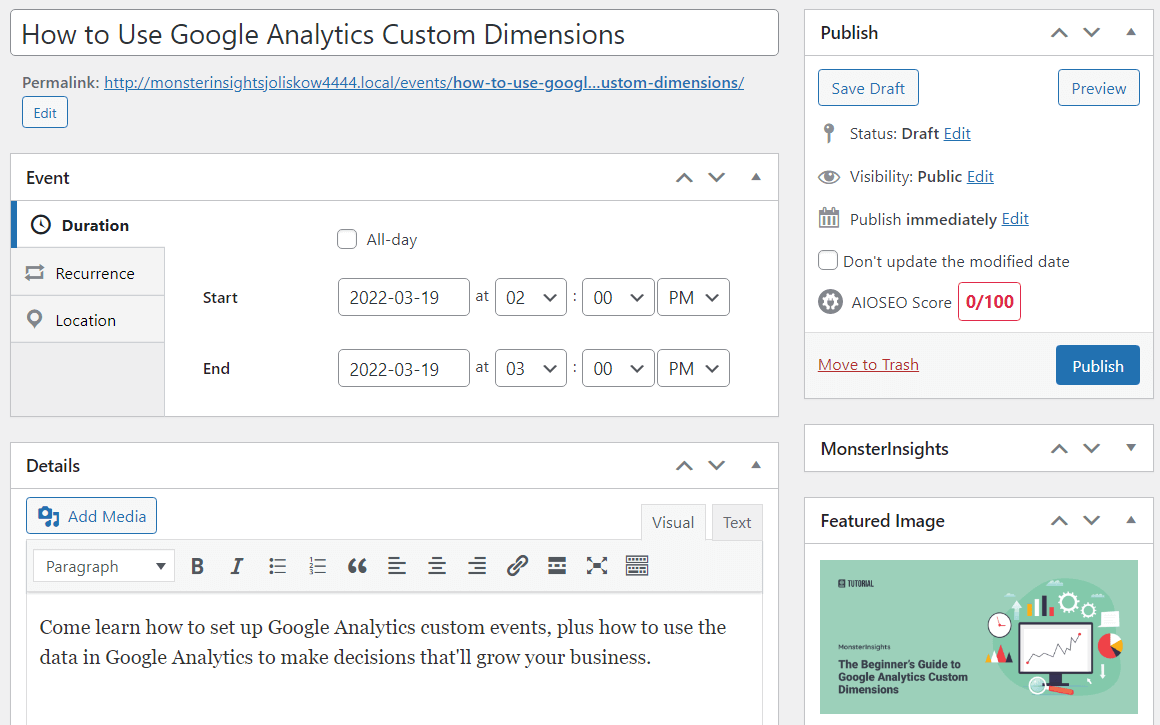
Now, you’ll be able to fill out all of your event details, including:
- Event name
- Event date & duration
- Event location
- Whether the event reoccurs
- Event description/details
- Event image
- Which calendar the event goes on
Fill out all of your information, then click the blue Publish button to add it to your calendar.
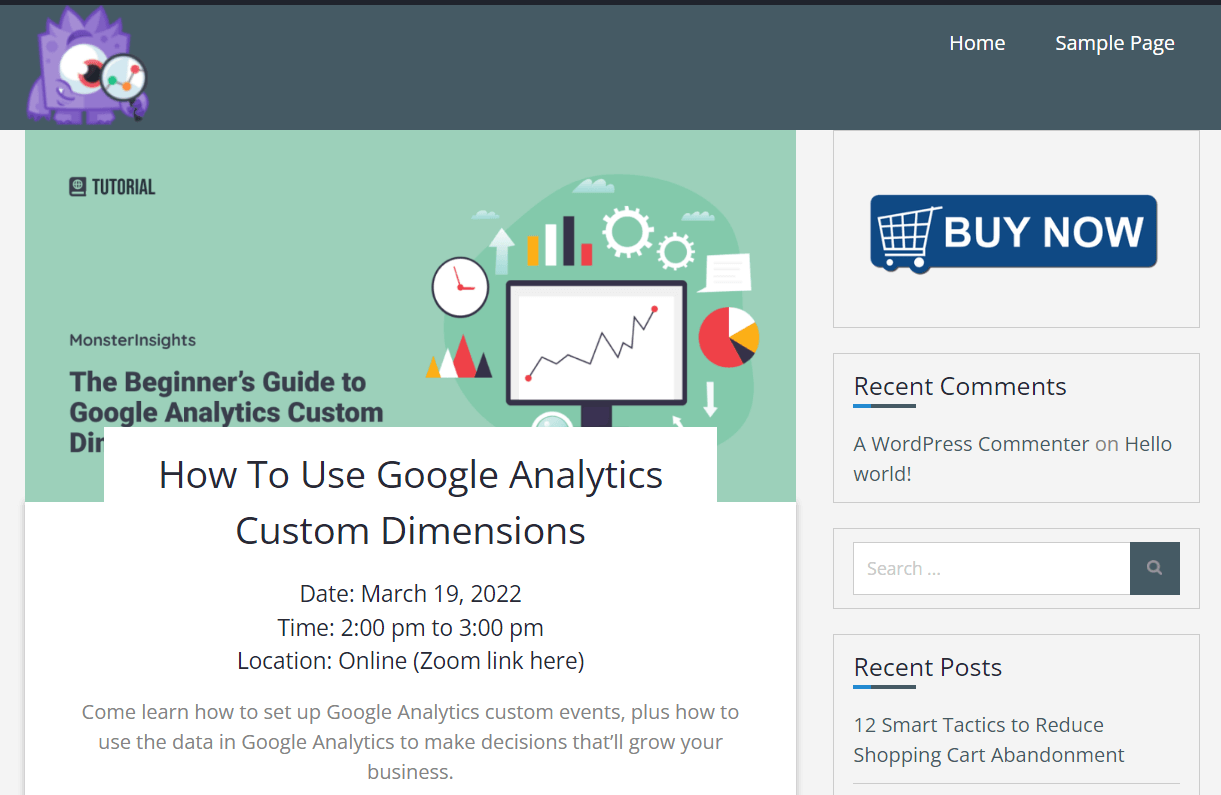
Now, you can head back to your Calendar » Events tab to see your event on the calendar. When you click on it, a View link will pop up so you can check out how your event looks.
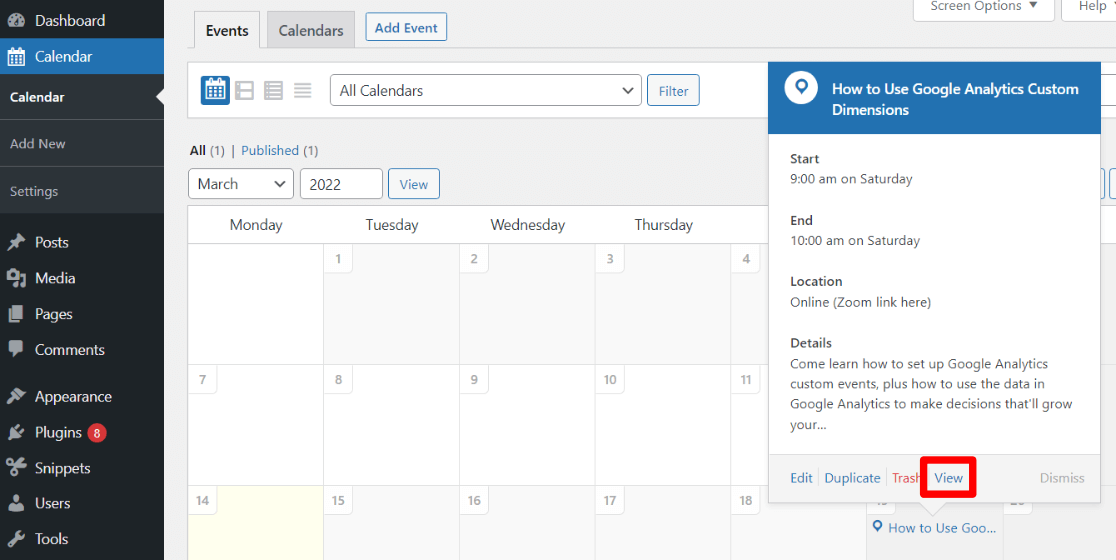
Click that link to check out how your event looks on your site:
Step 5: Publish Your Calendar
Now, it’s time to make your calendar display on your site. You can put your calendar on a page, in a post, or even in a widget. To do that, use a shortcode.
First, let’s open the page where we want to embed our calendar. Then, if you’re using blocks, hit the plus sign to add a new block, search for “shortcode” and choose the shortcode block:
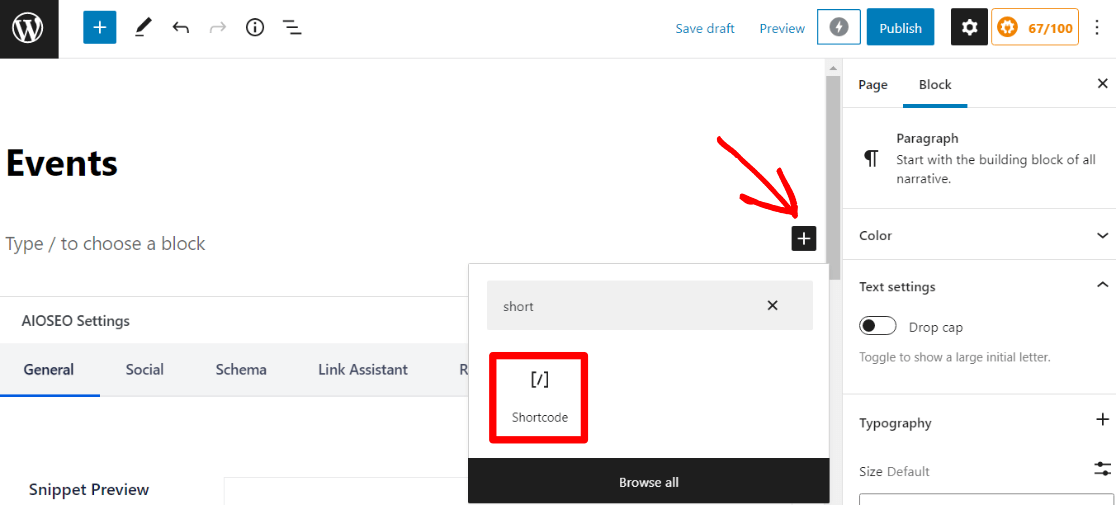
Then, copy the following code and paste it into your block:
[sc_events_calendar]
Now, your calendar will show in the page or post you just embedded it into:
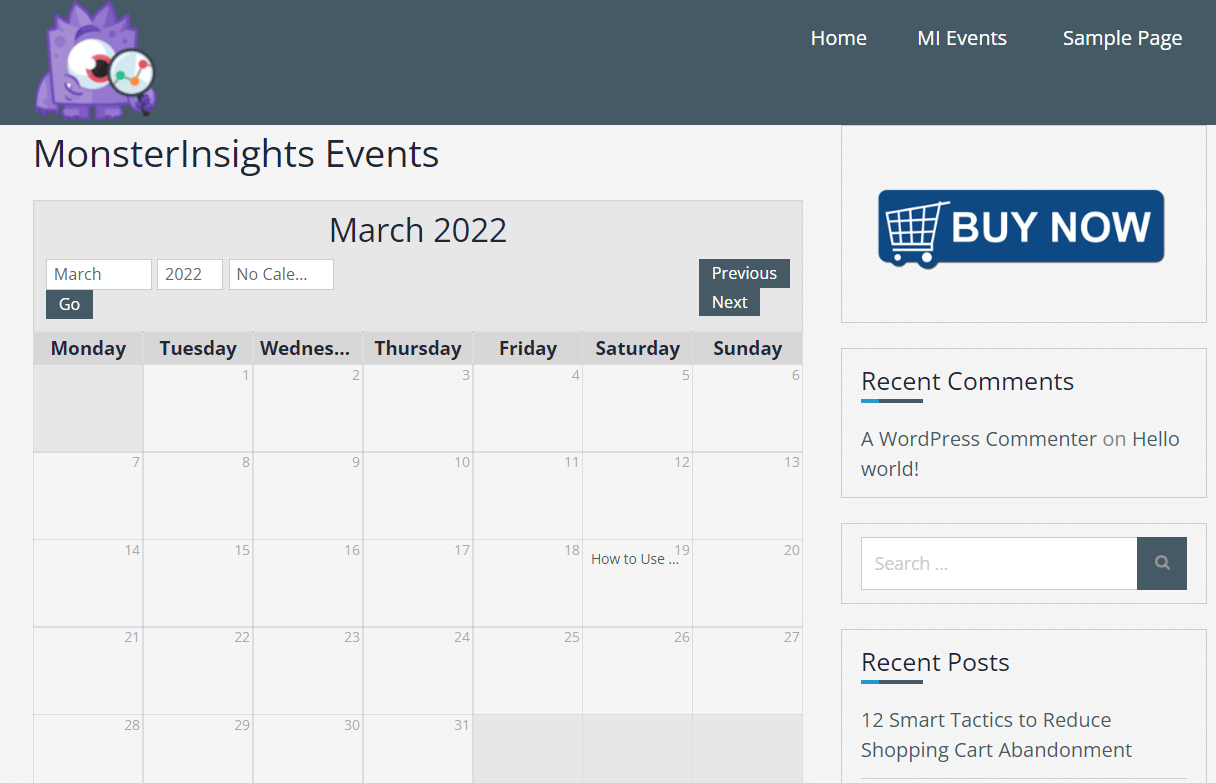
That’s it! Your calendar is ready to go.
If you want your calendar to have even more functionality, make sure to check out Sugar Calendar’s features.
Want more awesome WordPress plugins? Check out 45 Best WordPress Plugins (Most are FREE).
And don’t forget to follow us on Twitter, Facebook and YouTube for more helpful Google Analytics tips.
