Do you want to create an online store with WooCommerce? Congratulations! You’ve already won half of the battle by choosing the right platform to start your eCommerce store with.
Used by over 28% of all online stores, WooCommerce is the most popular eCommerce platform in use today.
If you’re wondering how to create a WooCommerce store, we’re here to help. In this article, we’ll show you how to start an online store using WooCommerce in 5 easy steps.
Step 1: Set Up Domain and Hosting for Your Store
To create a WooCommerce store, you’ll need 2 things first: a domain name and a web hosting account.
A domain name is your website’s address on the internet where people can access your site. It’s what internet users type into their web browser to visit your site. For example, monsterinsights.com is the domain name of this website.
Web hosting is your site’s storage space on the internet where your website files and resources are stored. If you think of a domain name as your site’s address, then web hosting is the house that address leads to.
When users enter your site’s domain name into their web browser to access your site, the hosting server delivers the site files over the internet and makes your site available for people to view online.
A domain name and web hosting account are the most basic prerequisites for building any type of website.
You can buy these 2 services from different domain companies and web hosting providers. Normally, a domain name costs $14.99 per year and web hosting costs $7.99 per month. But wouldn’t it be great if you could get both services from 1 company at a combined low price?
If you’re thinking that, we have good news! Bluehost now offers an exclusive discount to our blog readers to let you start your eCommerce store at the lowest price you can imagine.
Bluehost is one of the most popular web hosting companies available on the market. It’s one of the few companies that’s officially recommended by WordPress.
At Bluehost, you can buy WooCommerce hosting for just $6.95 per month and also get a free domain name. Not to mention, you’ll also get a free SSL certificate to secure your domain. That means you’ll get everything you need to build your online store for just $6.95. A perfect deal to grab!
Here’s how you can purchase the hosting you need at the price you’ll love:
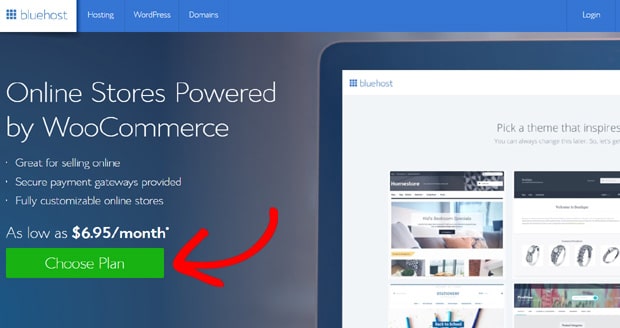
Go to the Bluehost WooCommerce hosting page and click the Choose Plan button.
Then, you’ll see the pricing section. You can review the available plans and select a plan you like. However, it’s wise to choose the Starter plan for a new site.
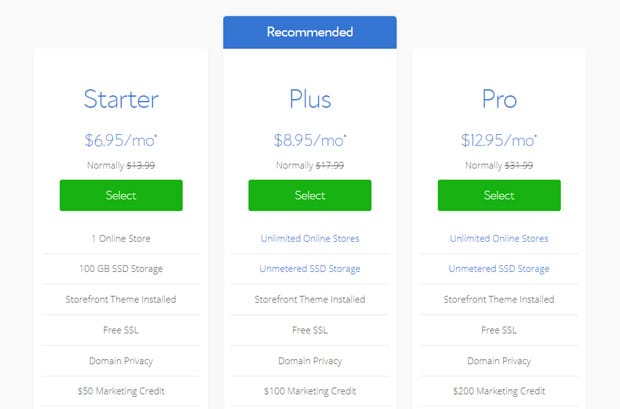
Click the Select button.
On the next screen, you’ll need to enter your new domain name.
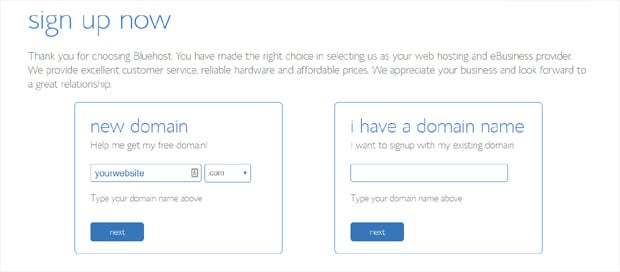
In the new domain box, you can enter the domain name you want and click next. If you already have a domain name, you can enter your existing domain name in the I have a domain name box.
Next, you’ll see the create your account page. First, you’ll need to enter your account information.
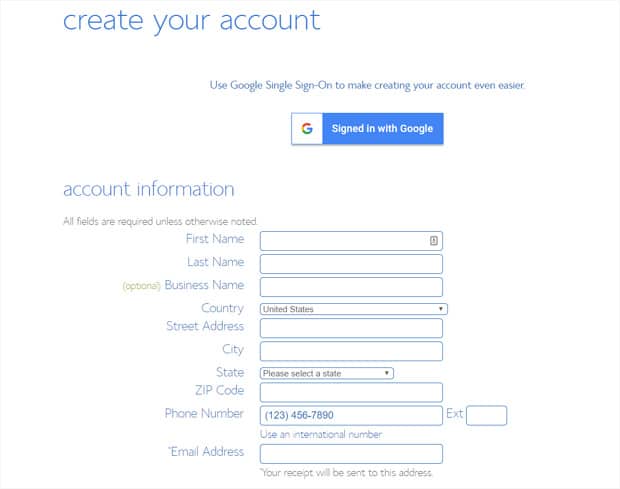
As you scroll down the page, you’ll see the package information box.
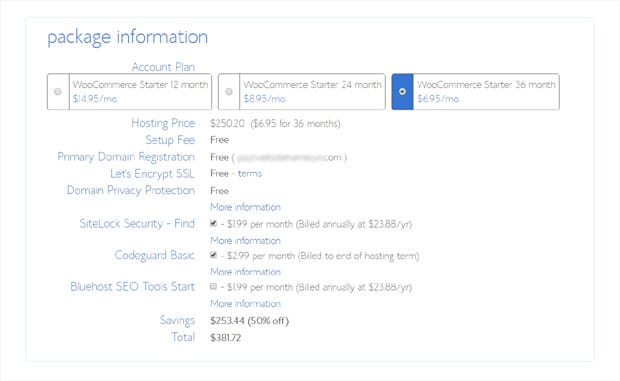
You can review the pricing options again from this page and change a plan. In addition to hosting, domain name, and SSL, there’re other additional services selected. You can remove the checkmarks if you don’t want to have them on your site.
Then, there’s a payment information section at the end.
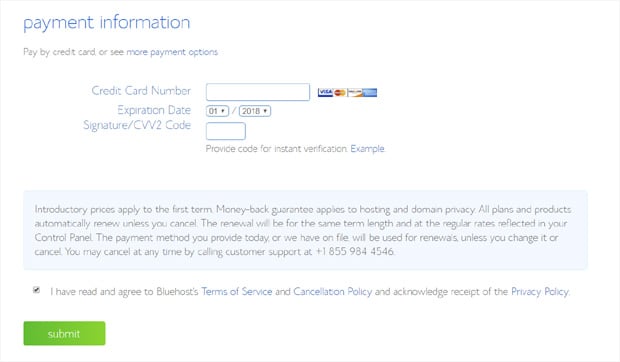
Enter your credit card details, and then check the box below to agree to Bluehost’s terms of service. Click the Submit button.
Then, you’ll receive an email with login details for your web hosting control panel (cPanel). Your cPanel is where you can manage your website files, support, emails, etc.
Now you can log into your cPanel. At first, you’ll see a popup informing you that WordPress with WooCommerce is pre-installed on your site.
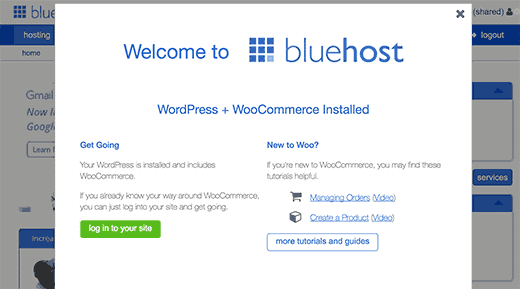
You can simply click the log into your site button. Then, it’ll take you to your WordPress dashboard.
In the next step, we’ll show you how to configure WooCommerce on your site.
Step 2: Set up WooCommerce
Since you’ve signed up for WooCommerce hosting, Bluehost has already installed the plugin on your site. So, it’s time to configure its settings.
When you log into your dashboard for the first time, you’ll see a welcome message like the screenshot below. It also asks you to choose the type of site you want to set up. You can simply click the I don’t need help link to proceed.
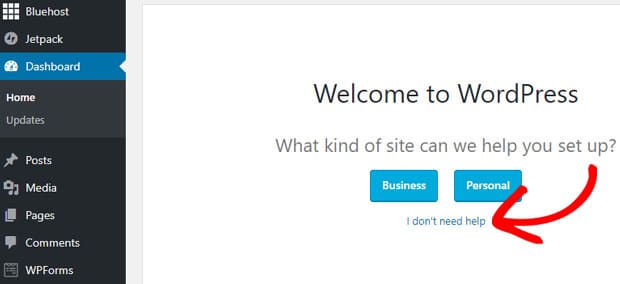
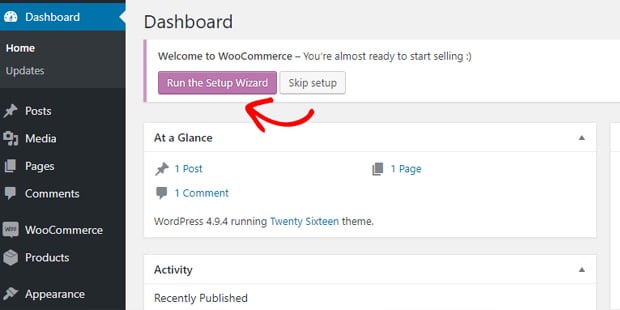
After that, you’ll see the WooCommerce setup wizard. It helps you to complete the WooCommerce setup process easily. Simply click Run the Setup Wizard to get started.
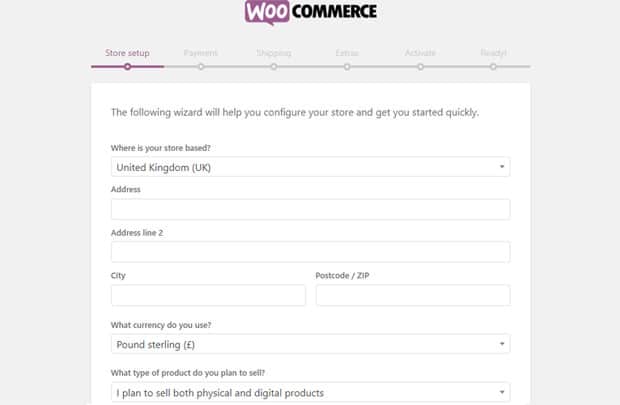
Then, you’ll see the multi-step WooCommerce configuration framework. The first step is Store setup where you’ll need to add your store’s location, the currency you want to use, and more.
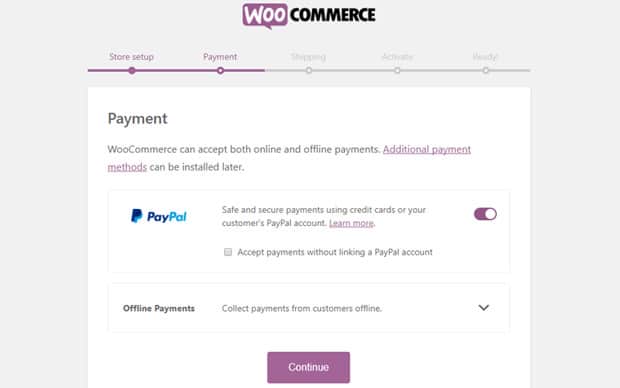
The second step is Payment where you can set up PayPal for accepting payments.
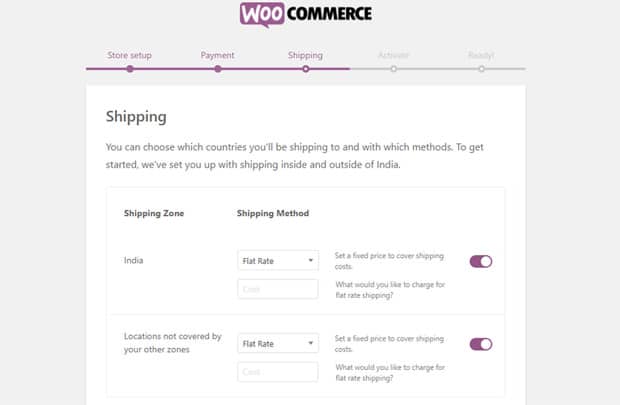
Third step allows you to set up Shipping. If you sell physical products on your WooCommerce store, you can set up shipping zones, shipping methods, fees, etc. from there.
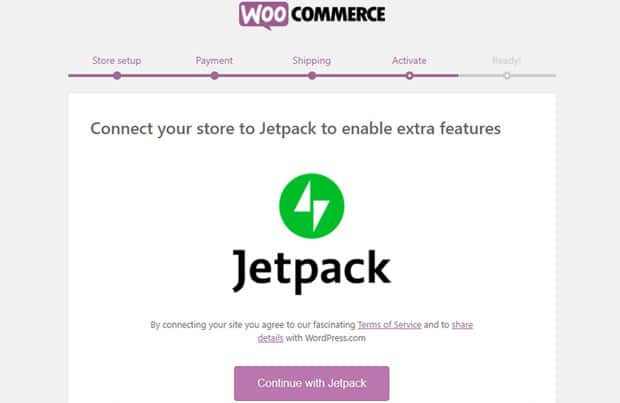
The fourth step is Activate where you’ll be asked to continue with Jetpack. However it’s not a necessary plugin for your online store, so you can skip this step by clicking the Skip this step option at the bottom of the page.
You’re ready! Which is why the final step is called Ready. If you want to receive emails from WooCommerce, you can enter your email address and subscribe to their newsletter.
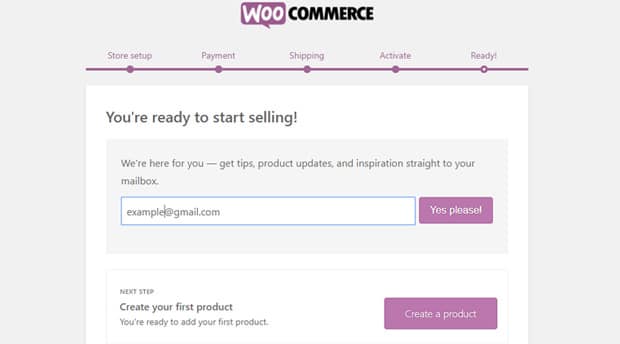
That’s it! You’re done with the WooCommerce configuration process. It’s very easy and takes just a few minutes to configure all of its settings.
Now, you’re ready to add your first product onto your WooCommerce store.
Step 3: Add Products to Your WooCommerce Store
Now that you’ve completed the WooCommerce setup process, you’re all set to add products to your WordPress store.
Go to Products » Add New from your dashboard.
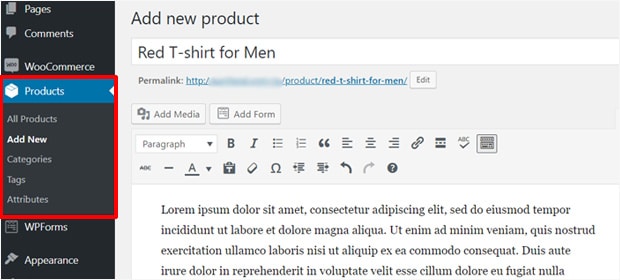
First, enter the name of the product you want to add. Then, provide a product description in the post area.
After that scroll down to the Product data box.
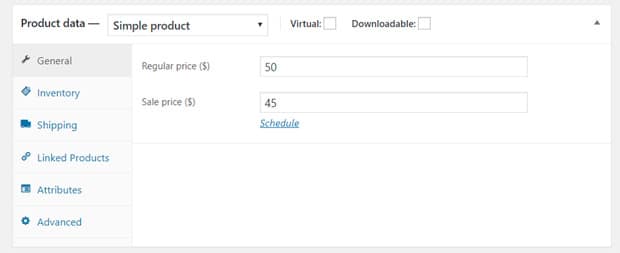
You can add regular price and sale price, set up inventory, shipping, linked products, etc. from this option.
Then, scroll down a little and add a short description of your product. If you add the product description, your customers can see this description when viewing multiple products on the same page.
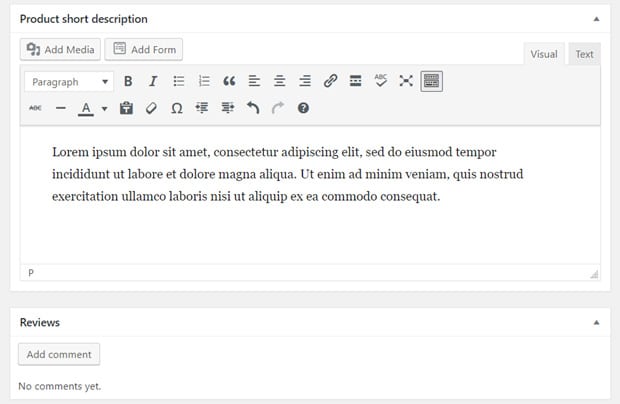
You can also add product reviews by clicking the Add Comment button below the Product short description box.
Then, navigate to the right column to set up categories, tags, and product image.
Product categories and tags work just the way WordPress categories and tags work. You can click the Add new category option to add a new category.
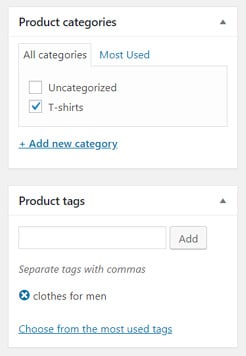
You can add suitable categories and actually categorize and organize your WooCommerce products. You can also add new tags or select existing tags.
Below Product tags, there’s a Product image option. You can add your product photo there.
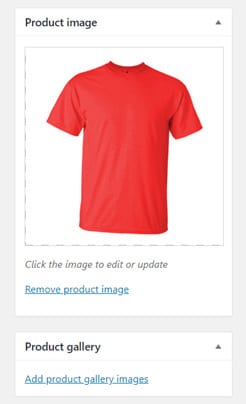
You can also add multiple images for the product from the Product Gallery option.
Once you’ve completed setting up all the options and you can publish your first product.
Now you can add more products to your store by repeating the same process.
Step 4: Customize Your Theme and Install Essential Plugins
Bluehost automatically installs the official WooCommerce theme, Storefront, for your store. It’s a free WordPress theme created by the same team that developed the WooCommerce plugin. It provides a simple and elegant shop layout suitable for your online store.
Now, you can customize the theme settings and change how your online shop looks.
You can also change your theme and use a new WooCommerce theme to improve your site’s appearance. There’re plenty of WooCommerce WordPress themes on the market by third-party theme companies.
Plus, you can install WordPress plugins to improve the performance of your WooCommerce store.
Here are some essential plugins we recommend:
- All in One SEO – Increase traffic and improve website search rankings by optimizing your site for SEO, step-by-step.
- WPForms – Easily build contact forms, order forms, registration forms, and more.
- SeedProd – Create landing pages to generate leads and customize the WooCommerce checkout page to boost conversions.
- OptinMonster – Display beautiful popup campaigns to grow subscribers and sales.
- TrustPulse – Show notifications of real-time activity on your site to boost social proof and sales.
- Sucuri – Add an extra layer of security to your site and regularly scan it for threats and vulnerabilities.
- W3 Total Cache – Increase website performance and reduce load times for a better user experience.
Step 5: Track Your eCommerce Sales and Get Insights for Growth
Once you’ve set up your WordPress eCommerce site perfectly and started selling products, you’ll want to know how your online store is actually performing.
You may want to find out your most popular products, conversion rate, total sales, total revenue, etc. just out of curiosity. However, in addition to satisfying your general curiosity, these stats are also of great importance for growing your business to be even more successful.
If you have these reports, you can understand your customers and their shopping behaviors better. Using this data, you can make informed business decisions and build highly effective marketing campaigns.
So, do you want to know how to track your WooCommerce sales? Look no further than MonsterInsights because it’s the perfect solution for tracking your WooCommerce store’s performance.

MonsterInsights is the best, most beginner-friendly Google Analytics plugin for WordPress. It has easy to use options to set up advanced tracking like eCommerce, downloads, forms, and ads.
Once you install the eCommerce addon to set up eCommerce tracking, you’ll be able to view your eCommerce reports in your MonsterInsights dashboard reports. All you need to view your eCommerce reports is to visit Insights » Reports » eCommerce from your dashboard.
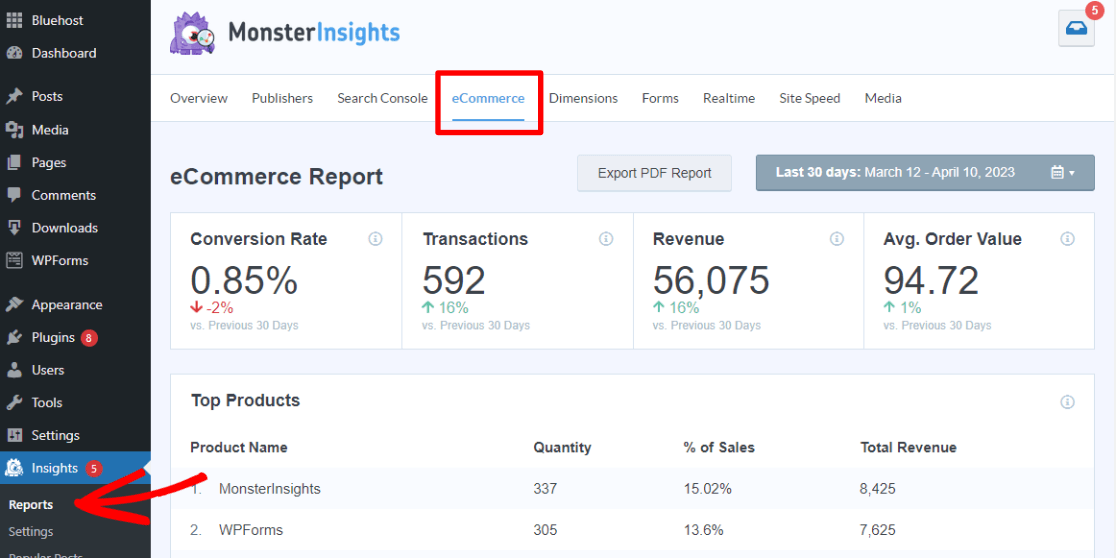
Now you can view detailed reports on your customers and their interaction with your WooCommerce store. Then, you can create strategies to grow your sales by using this data.
We hope this article helped you to learn how to create a WooCommerce store easily. You may also want to learn about conversion tracking, how to add a stats dashboard on your WordPress site and see our list of the best WooCommerce plugins to expand your store.
Don’t forget to follow us on Twitter and Facebook for more helpful Google Analytics tips.

A domain name and web hosting account are the most basic prerequisites for building any type of website. Thank you for providing commenting sites List with are very helpful for increasing my website traffic. Thank you for the commenting sites List with are very helpful for increasing my website traffic.