Want to create a WordPress sitemap quickly and easily?
Sitemaps help search engines crawl and index your website with ease. Think of them as road maps but for search engine crawler bots. And they’re important for your site’s search engine optimization (SEO).
In this article, we’ll go over what a sitemap is and why you need one, and then explain step-by-step how to create a sitemap in WordPress.
What is a WordPress Sitemap?
A WordPress Sitemap is an XML (extensible markup language) file that contains a list of all (or most of) the pages of your website. It helps search engines to navigate your site and index all of the content that you want to rank in search results.
These files are written in XML format because it’s easily machine readable, so search engine bots have no problem crawling them.
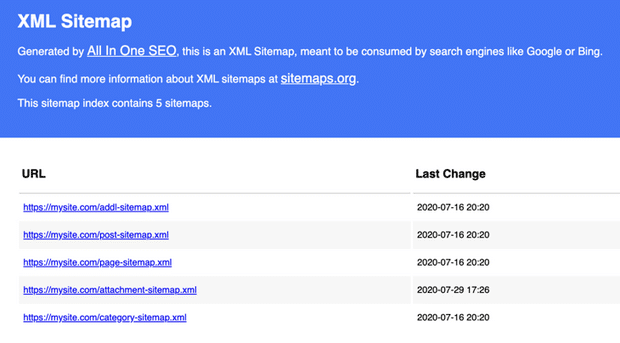
A sitemap tells Google, Bing, DuckDuckGo, and other search engines where your content is located, when the page was last updated, and more.
However, don’t confuse XML sitemaps with HTML sitemaps. A simple difference between the two is that an HTML sitemap is for your users. Some website owners add them to a “Sitemap” page because it helps users navigate the website and see all the pages.
On the other hand, XML is for the search engines, contains metadata along with your site’s URLs, and is not visible to users.
So, how important are sitemaps for your website?
Why Do You Need an XML Sitemap?
Since sitemaps assist search engine bots in finding and indexing your website pages, it helps improve your search engine visibility.
Let’s say you have a new blog that has little to no backlinks. Google will have difficulty discovering your content and might not index it. And if your site isn’t indexed, it won’t appear in Google search results.
But with a sitemap, you’re letting Google know where to find all the pages on your site. As a result, the crawler should discover all of your pages and index them.
That’s why search engines like Google and Bing provide an option for website owners to submit their sitemaps.
And if you’re an established business or have a large website, you can use the sitemap to point out the most important pages for the bots to crawl.
How to Create a WordPress Sitemap
To create a WordPress sitemap, you’ll want to use a WordPress sitemap plugin.
WordPress generates a basic sitemap on its own, but it includes absolutely everything on your site, which might end up causing errors. There’s also no way to customize the default WordPress sitemap unless you know PHP code.
That’s why, when it comes to creating a sitemap in WordPress, we recommend using a plugin.
The easiest way of setting up an XML sitemap is with All in One SEO. It’s the best SEO plugin for WordPress and offers lots of features beyond sitemaps, like schema markup, WooCommerce SEO, on-page SEO analysis, and so much more.
Just follow these steps and your sitemap will be ready in a matter of seconds.
- Step 1: Install and Activate the All in One SEO Plugin
- Step 2: View Enabled Sitemap in All in One SEO
- Step 3: Verify Your Site’s Sitemap
- Customizing Your WordPress Sitemap
Step 1: Install and Activate the All in One SEO Plugin
The first step is to add the All in One SEO plugin to your WordPress website.
Go to Plugins from your dashboard and click Add New. Now search for All in One SEO, then hit Install Now.
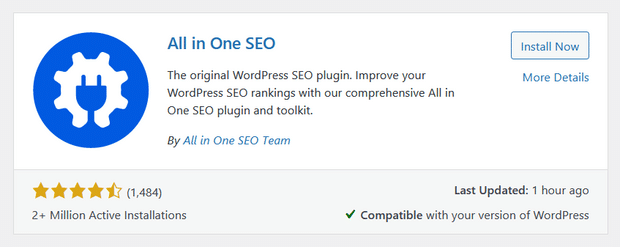
Once the plugin installs, click Activate.
If you need more detailed instructions, take a look at this tutorial on how to install a WordPress plugin.
Step 2: View Enabled Sitemap in All in One SEO
The best part of the All in One SEO plugin’s sitemap function is that the sitemap is enabled by default. So, all you have to do is install All in One SEO and you’re all set!
But to double-check that the sitemap is enabled or to customize it, go to All in One SEO » Sitemaps from your WordPress dashboard.
Then, go to the Enable Sitemap option and make sure that the button is toggled to On.
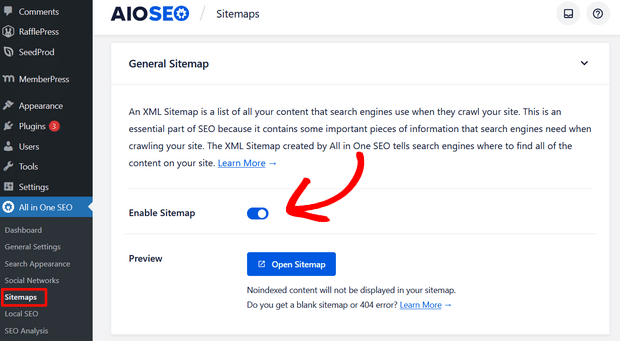
That’s it!
Step 3: Verify Your Site’s Sitemap
After making sure the sitemap is enabled, you can verify your website’s sitemap.
To do that, you can simply click on the Open Sitemap button.
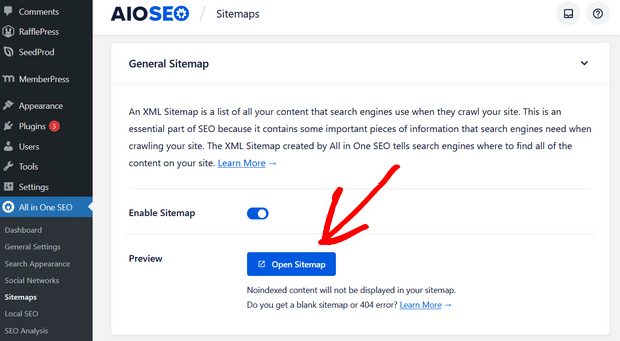
After clicking the button, you’ll see an index page for your sitemap that looks something like this:

By default, All in One SEO will create sitemaps for your posts, pages, and categories. And if you have an online store like a WooCommerce store or have any products listed, then it will set up a sitemap for them as well.
You can also manually test or view your sitemap. To do that, visit your website URL and add /sitemap.xml in the end.
For example, your URL should look something like this: https://www.yourdomain.com/sitemap.xml
Now that your XML sitemap is ready, it will automatically send all new updates to Google and Bing.
Wasn’t that easy?
If you want to customize your sitemap settings further, keep reading.
Customizing Your WordPress Sitemap
Now that you’ve double-checked that your sitemap is enabled and you know how to view it, let’s look at some settings you can configure.
- Disable the Sitemap Index Page
- Choose the Number of Links and Content to Include
- Include Date and Author Archives
Disable the Sitemap Index Page
First, you can decide whether you want to have an index page for your sitemap.
This setting is recommended for sitemaps that contain over 1,000 URLs. So, if you have a smaller site, like less than a few hundred URLs, you can disable this setting.
To do this, go to All in One SEO » Sitemaps and toggle the Enable Sitemap Indexes button to Disabled.

If you’re unsure, you can always leave it enabled.
Choose the Number of Links and Content to Include
Next, you can change the Links Per Sitemap setting if you want. Although, we recommend most users leave this setting as-is.

You can also decide which content to include in your sitemap. Here you can choose to include all Post Types and all Taxonomies by leaving the boxes checked.

However, if you uncheck these boxes, you’ll see a list of all the different post types and taxonomies.
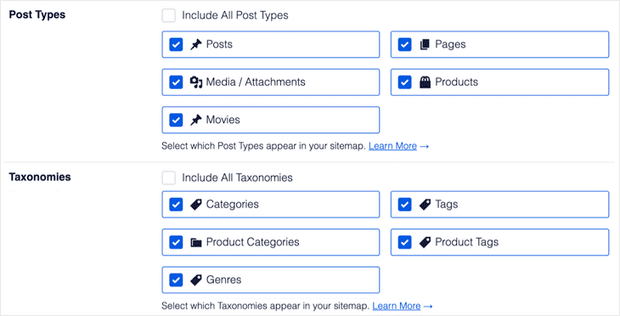
Then, you can check the individual boxes to decide exactly what content you want to include in your sitemap.
Include Date and Author Archives
Lastly, you can choose whether to include Date Archives and Author Archives in your sitemap by enabling or disabling the options below:

These are automatically created by WordPress when you publish new posts on your site.
But, we recommend leaving these options disabled because they don’t have much value in search results.
That’s it! You’ve made it to the end of the guide.
BONUS: Set up Google Analytics in WordPress Easily
Need an easy way to see how many visits your website is getting?
MonsterInsights is the best Google Analytics plugin for WordPress. Simply install the plugin to get Google Analytics metrics right inside your WordPress dashboard, track file downloads, outbound link clicks, and more.
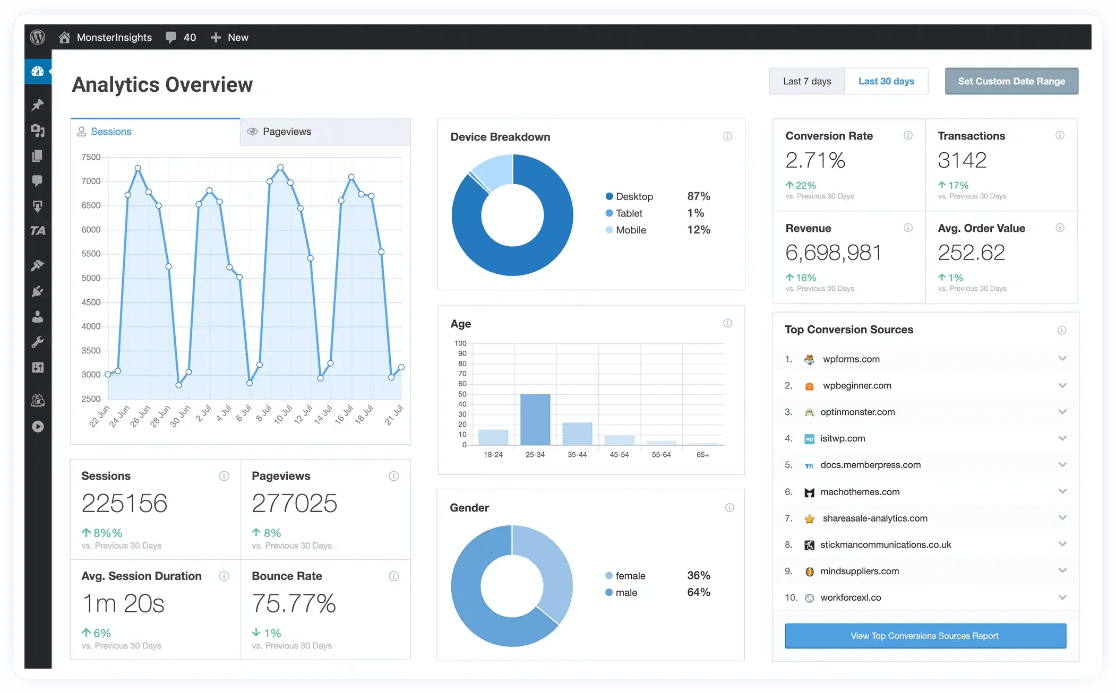
For more on MonsterInsights, check out our guide on how to properly set up Google Analytics in WordPress.
And don’t forget to follow us on Twitter, Facebook, and YouTube for more helpful tutorials, reviews, and Google Analytics tips.


Thanks bro. I learned a lot about the sitemap. Your article was awesome. Thanks again!
Nice, implementing on my website. Thankyou for good insight in AIO SEO
I was using AIOSEO but my CPU core was increasing from 20% to 80% and the site becoming very slow. presently thinking of another alternative
Hi there – I checked with the AIOSEO team and they currently have no other reports of this, but they would be more than happy to look into this for you! Reach out to their support team via the Basic Question form on their website.