Have you ever looked at your WordPress site and wished you could make it look exactly the way you want, without having to buy a new theme and try to figure out how to customize it?
Now, you can create a custom WordPress theme, no coding, development or design skills required.
How? With SeedProd’s new Theme Builder.
Today, we’re going to take a look at SeedProd’s Theme Builder to see how it works, and what kinds of websites you can create with it. We’ll talk about what skills are needed (if any) and how to track your new site in Google Analytics.
Let’s go.
How SeedProd’s WordPress Theme Builder Works: The Basics
SeedProd is the best drag-and-drop WordPress page and site builder. The plugin has been an awesome landing page builder for quite some time, and recently added the ability to build an entire custom theme using the same drag-and-drop interface.
Before we dive into the full tutorial, here are a couple frequently asked questions you might be asking:
Do I have to start my custom theme from scratch?
Nope! You can if you want to, but the SeedProd team created 11 theme templates you can use to jumpstart your design.
Do I have to know CSS or HTML?
Nope! To customize the CSS (the styles of your website, such as colors and fonts), there are simple dropdowns and color selectors. The theme builder is all drag-and-drop, so you don’t need any coding knowledge at all.
What kinds of websites can I create with the theme builder?
Any! Whether you’re a restaurant, SaaS provider, pet groomer, blogger, or any other type of site owner, you can build your site with SeedProd and WordPress.
Alright, let’s dive into the tutorial.
How to Build a WordPress Custom Theme
- Install the SeedProd custom theme builder plugin
- Choose a starting template (or start from scratch)
- Customize each theme part
- Add any necessary connections
- Publish your theme
We’ll take a quick look at each step.
Step 1: Install the SeedProd Custom Theme Builder Plugin
If you don’t have SeedProd yet, you’ll need to download and install it to use the WordPress theme builder.
To do that, head over to seedprod.com and grab the plugin at the Pro or Elite level. We’ll use Pro for our overview tutorial.
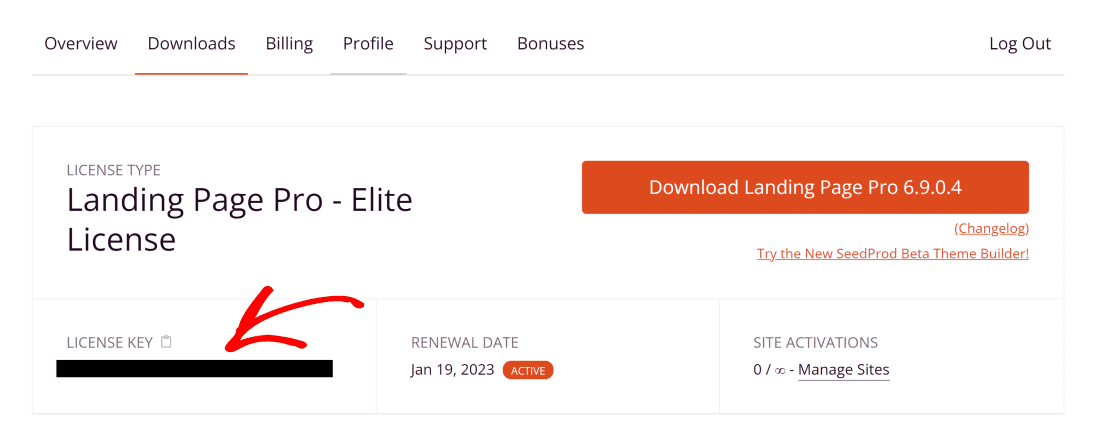
Now, open your SeedProd account area and click on the Downloads tab. Scroll down to find your license key and copy it.
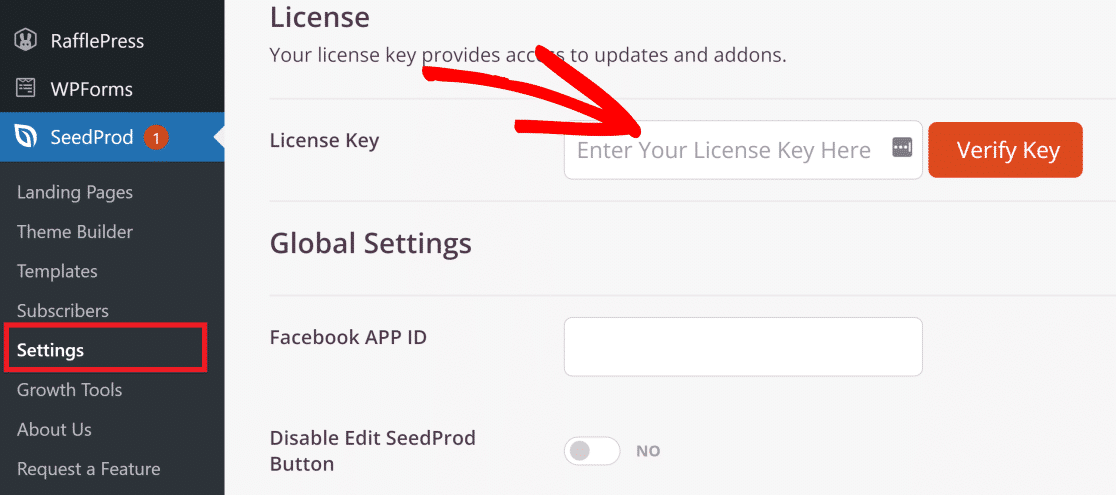
Then, head to your WordPress admin dashboard and go to SeedProd » Settings. Then enter the key you copied into the License Key box and click Verify Key.
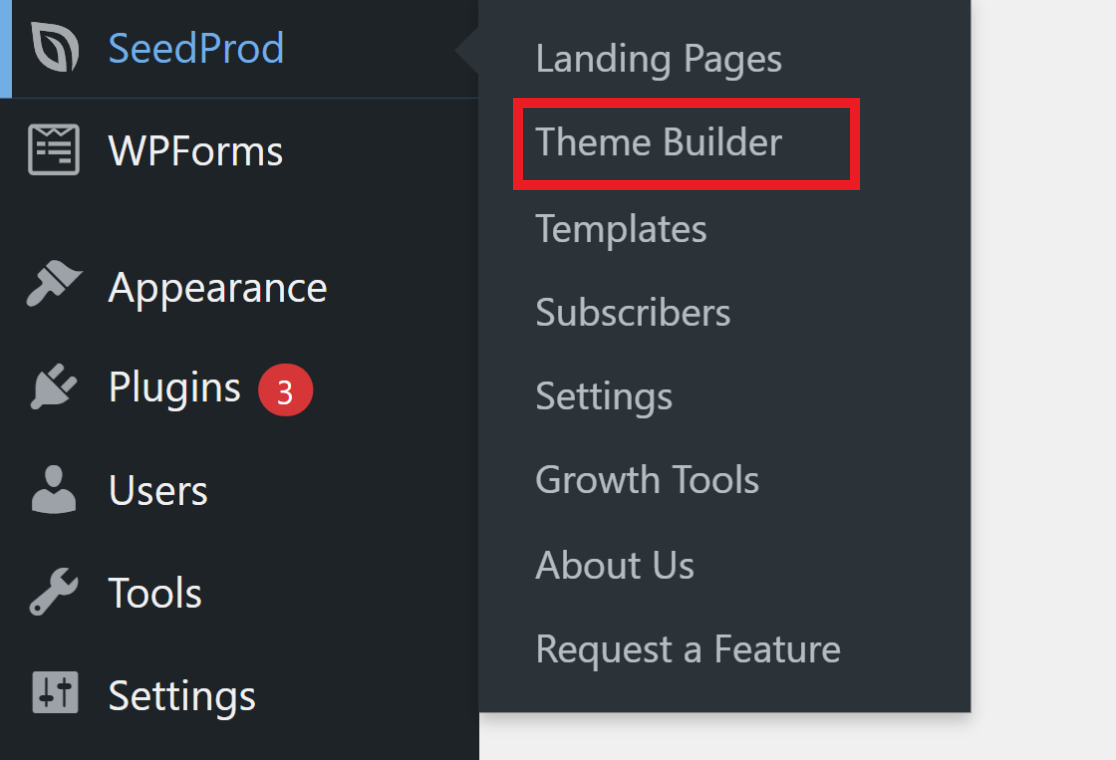
Now, go to SeedProd » Theme Builder. This is the dashboard where you’ll access and edit each element of your theme.
Step 2: Choose a Template or Start from Scratch
If you’ve created a theme before or have experience with themes, you can absolutely build one from scratch. For this tutorial, though, we’ll show you how to start with a template.
Go ahead and click the Themes button at the top of the page.
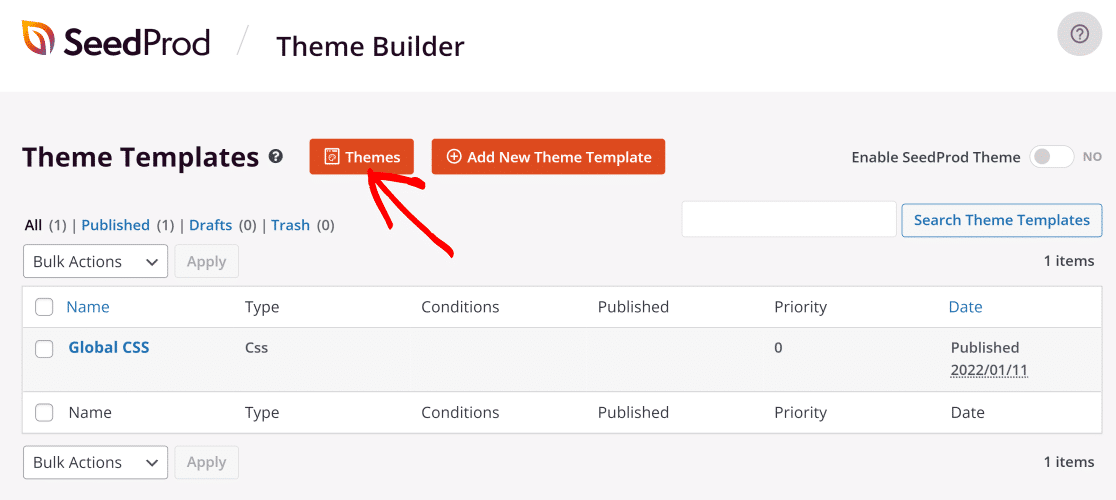
Now, you’ll have a list of templates to choose from to kickstart your design. Select whichever one you’d like to start with.
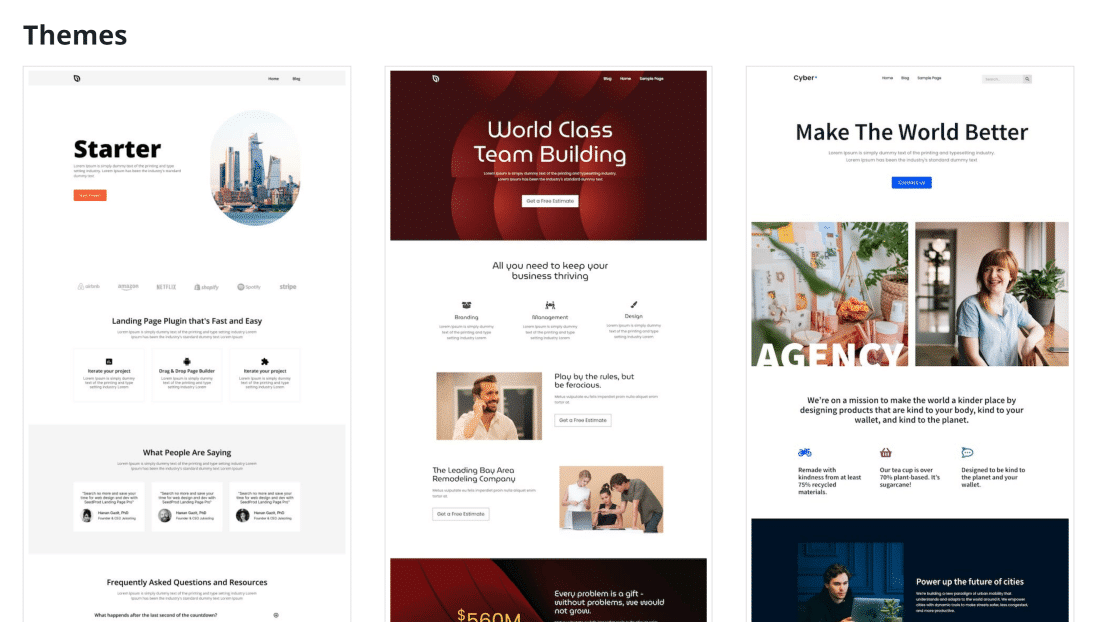
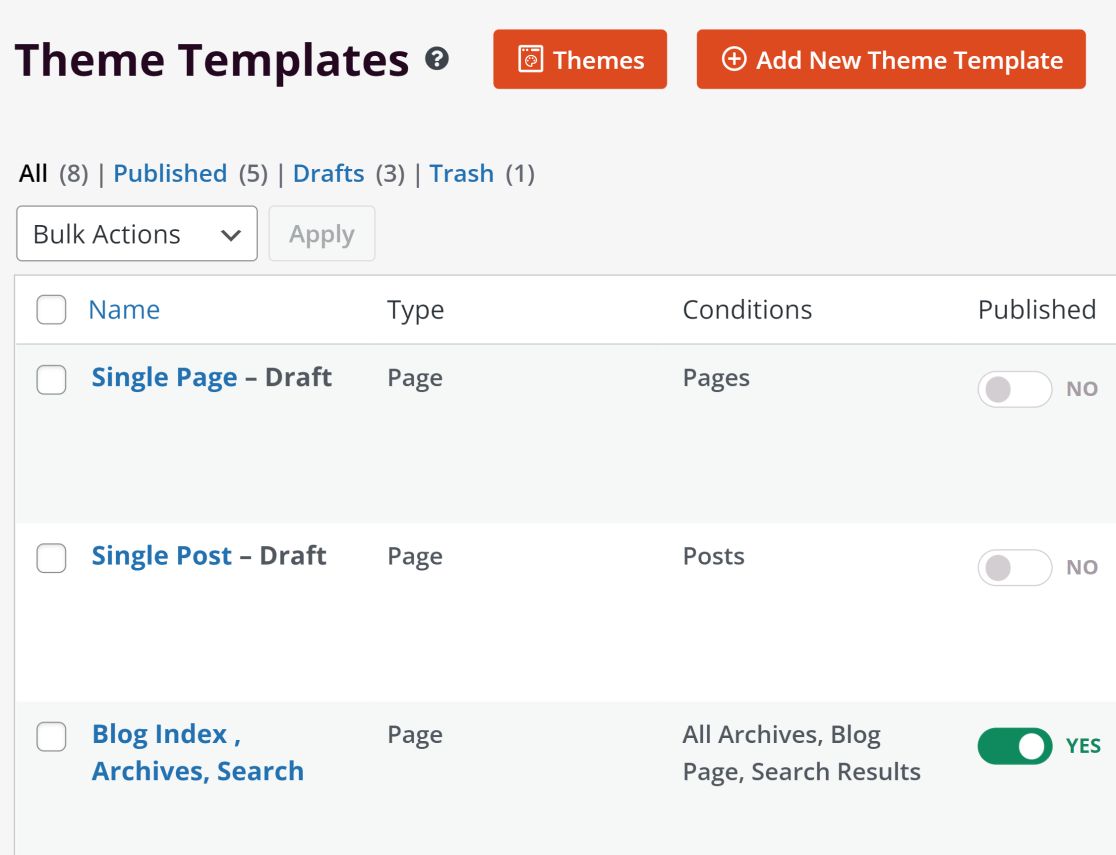
Once you choose your theme, you’ll now see each theme part or section back on your Templates page. You’ll be able to see and edit the:
- Header
- Footer
- Home page
- Single pages layout
- Single posts layout
- Blog index, archives and search pages layout
- Sidebar
- Global CSS (colors, fonts, etc.)
Step 3: Customize Each Theme Section
Editing your templates is simple with drag-and-drop modules and easy-to-understand customization options. Everything is pretty intuitive and straightforward.
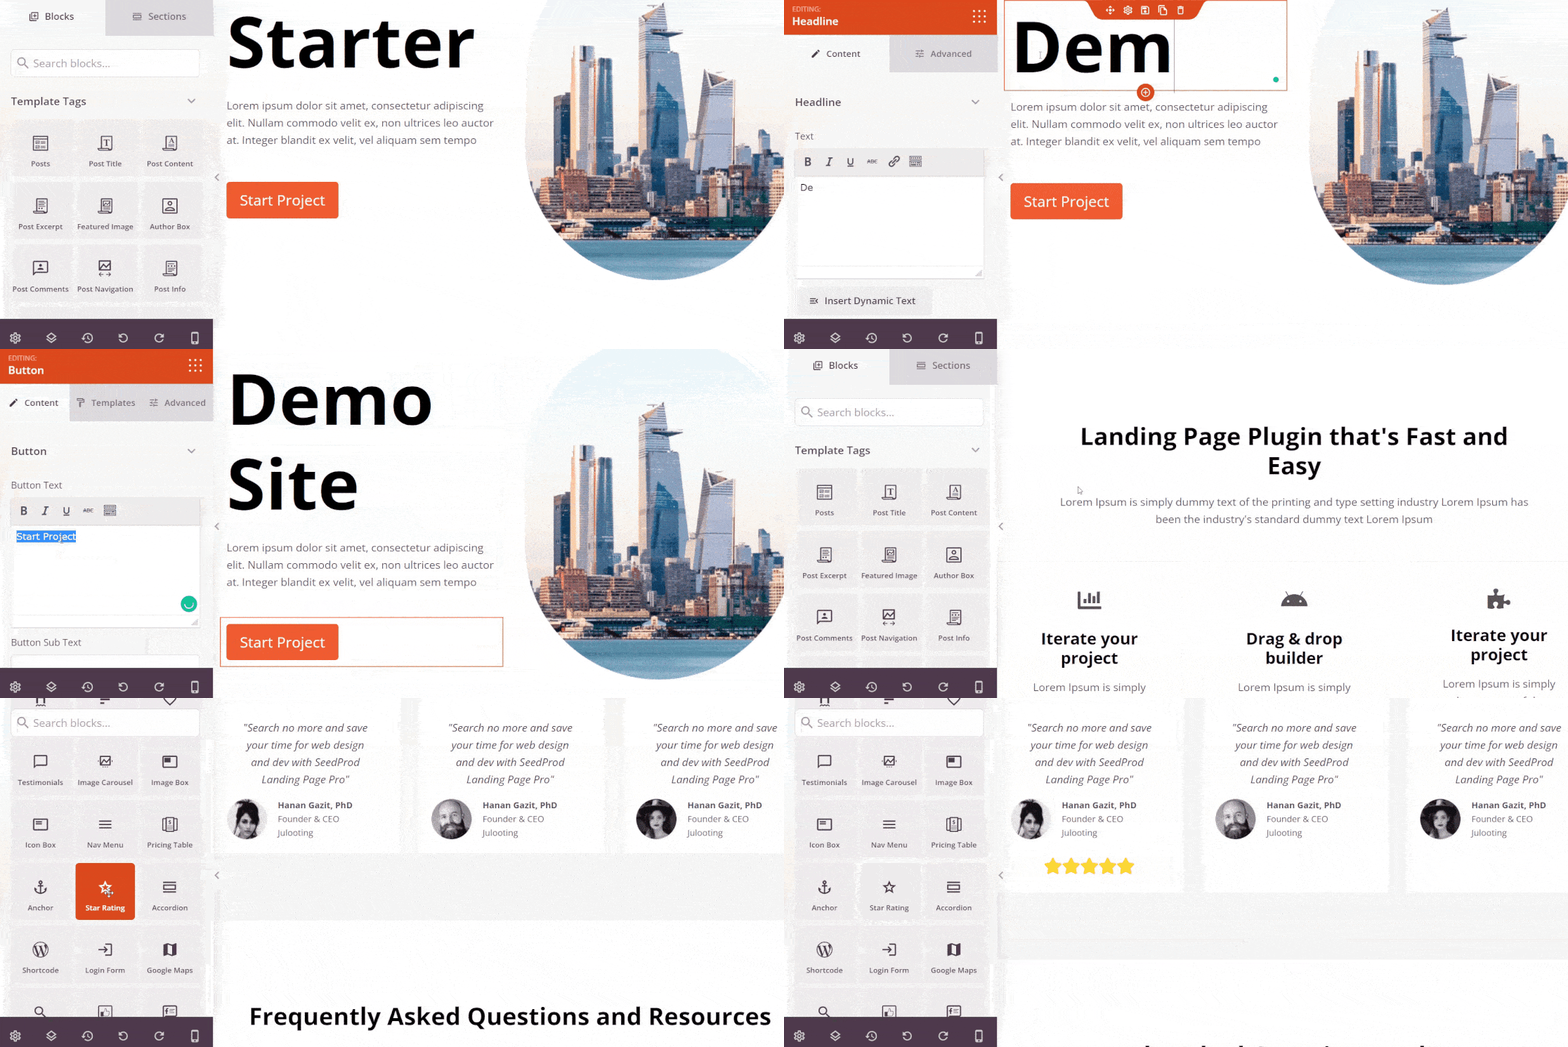
Don’t want a section in the demo template, or need another one? Add or delete as needed. You’re in control of the entire layout!
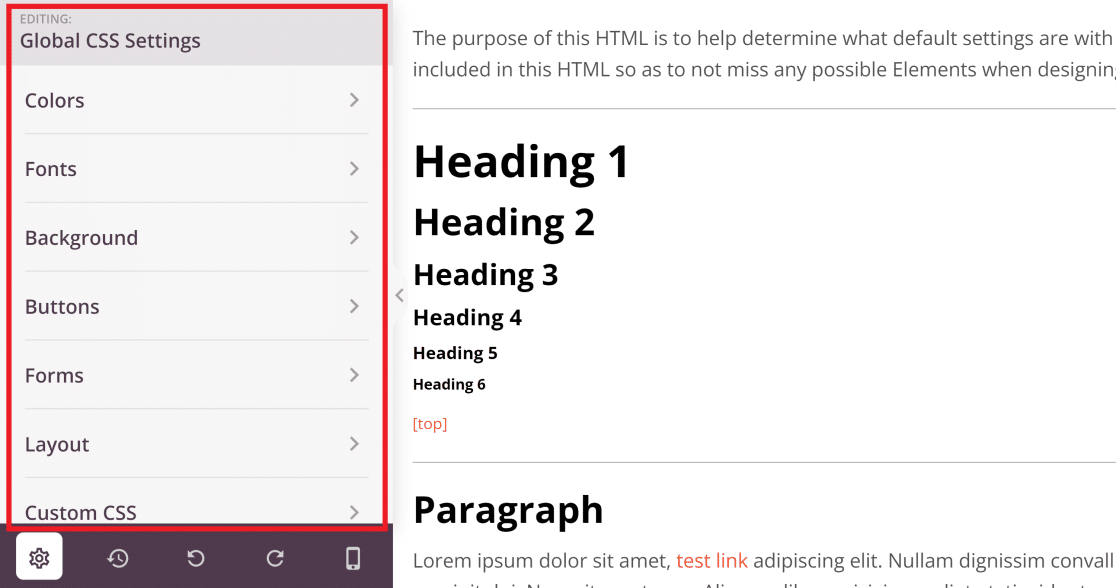
To customize the colors and fonts for the entire site, head to the Global CSS template. There, you can choose everything in simple color pickers and dropdowns. No CSS knowledge needed here at al!
Step 4: Add Any Necessary Connections
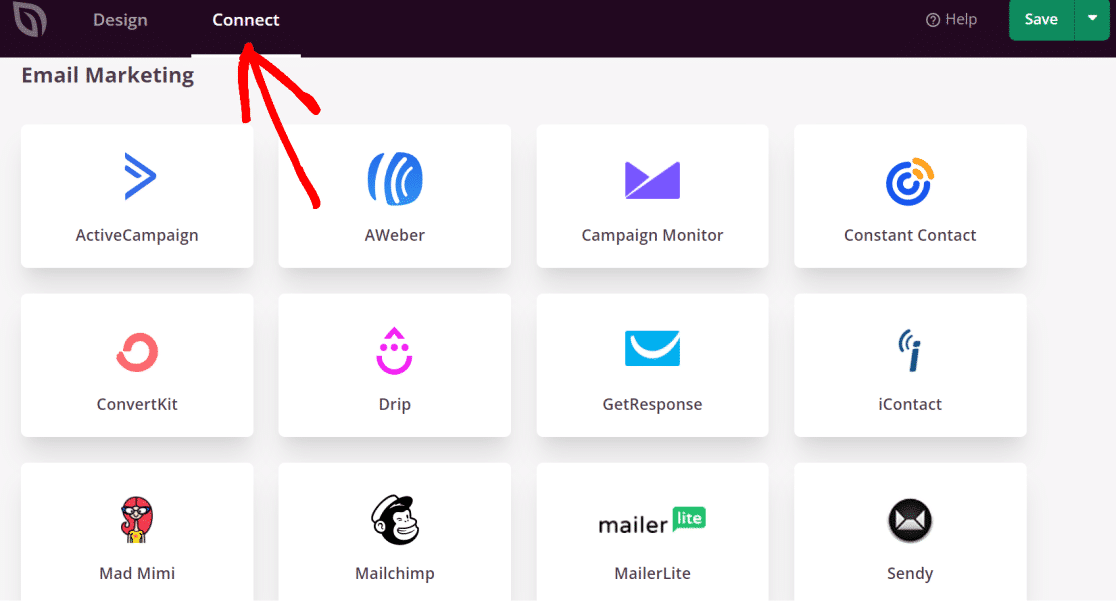
Do you use an email marketing tool for your site, like Constant Contact? You can easily connect it!
Let’s say you have an email newsletter signup form in your sidebar. Once you drag and drop the form module into your template and set it up, head to the Connect tab to link up with your email marketing service provider.
Step 5: Publish Your Theme
Once you’ve gone through each template and set it up to your liking, you’re ready to publish! To push your new theme live, simply click the Enable SeedProd Theme toggle.

That’s it! Your theme is live and your website is ready for the world to see.
Bonus: Track Your New Theme’s Traffic with MonsterInsights

How is your new theme performing? Are visitors staying on your pages for more than a few seconds? How long are they spending on your site on average? Are they submitting your forms? Are they clicking your links and buttons?
Answer all those questions and many more with the best Google Analytics plugin for WordPress.
MonsterInsights allows you to easily connect your WordPress site with Google Analytics so you can view all the data that matters most right in your WordPress dashboard.

Plus, with the click of a button, you can set up sophisticated tracking features such as event tracking, eCommerce tracking, form tracking, custom dimension tracking, outbound link tracking, video tracking, and more.
Get started with MonsterInsights today!
We hope you liked our WordPress theme builder tutorial. For a more in depth tutorial on using SeedProd, check out How to Create a Custom WordPress Theme Without Code.
For more on how to add MonsterInsights to your WordPress site, read How to Add Google Analytics to WordPress (The RIGHT Way).
And don’t forget to follow us on Twitter, Facebook and YouTube for more helpful Google Analytics tips.

