Are you wondering how to back up a WordPress site for free? Creating WordPress backups is really important if you want to make sure your content is safe! If a hacker gains access to your site or there’s another technical issue, you could lose all of your hard work.
Thankfully, it’s really pretty easy to back up your WordPress site on a regular basis! In this article, we’ll walk you through the process, step by step.
First, let’s take a look at the plugin we’ll be using: UpDraft Plus.
Our Favorite WordPress Backup Tool: UpdraftPlus
For this tutorial, we’ll be using a WordPress backup plugin that we love: UpdraftPlus.
However, please note that some hosting plans do include regular backups. So, before you install a new backup tool, take a look at your hosting plan and see if you’re already getting regular backups, or just need to flip a switch to get started. If not or you want a different option, keep on following our tutorial!
Now, let’s take a look at UpdraftPlus.
UpdraftPlus is the best WordPress backup, restore, and clone plugin. When you’ve got it installed, you can rest easy knowing that your site is safe and will never be ruined by server crashes, hacking, buggy updates or user error.
If something should happen, just restore your site from the last backup and it’s fixed!
UpdraftPlus is easy to use and has some really awesome features, which we’ll take a look at in the tutorial.
Before we jump into the tutorial, though, let’s talk for a minute about where you can store your backups.
Where to Store WordPress Backup Files
Before you install UpdraftPlus to back up a WordPress site, you’ll want to think about where you’d like to store your backup files.
We’ll be using the free version of the plugin, which gives you a few different options for where to store your WordPress backups. You could store your backups:
- On your server. While this is an option within the plugin, it’s not recommended. If a server error is what takes your site down, your backups will be lost, too. If you do choose this option, remember to log in and download the files to your computer periodically so you have them saved in another location.
- In the cloud. This is a safe way to back up your site. UpdraftPlus can connect with many different storage services, such as Google Drive or Dropbox.
- In UpdraftVault. This is an option in the premium version of UpdraftPlus. Upgrade if you want to store your files securely right inside UpdraftPlus!
In our tutorial, we’ll show you how to store your backups in the cloud.
How to Back Up a WordPress Site: Tutorial
To start, we’ll install the free version of UpdraftPlus.
Step 1: Install UpdraftPlus
Open your WordPress dashboard, then head to Plugins » Add new:

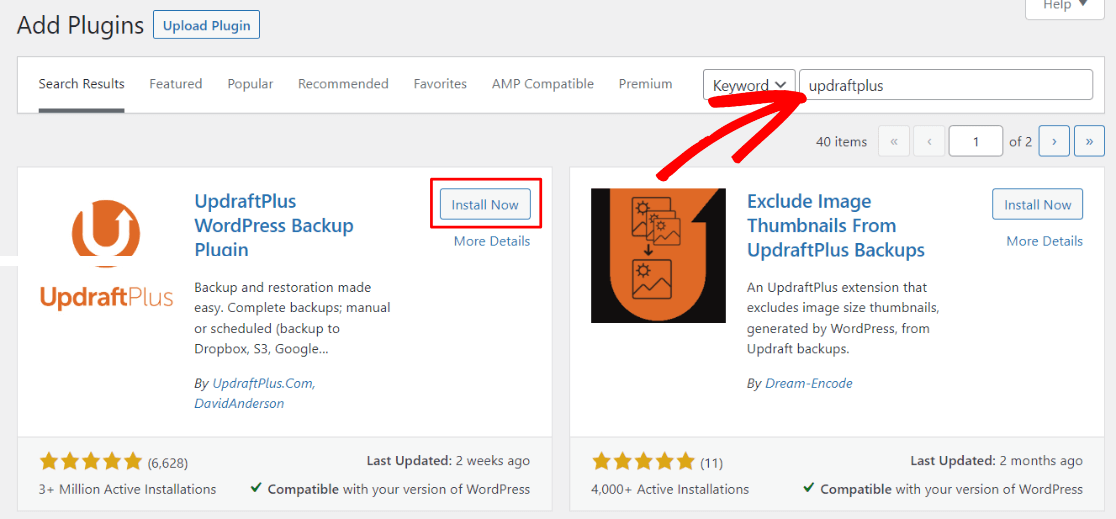
Now, search for UpdraftPlus and click the Install Now button:
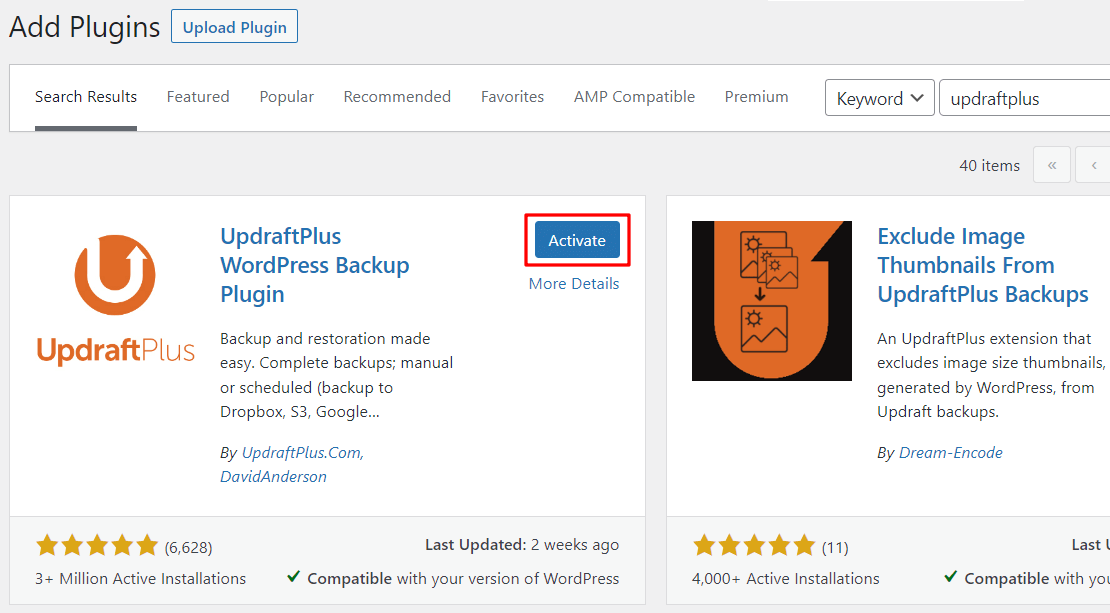
When the plugin is finished installing, the button will change to Activate. Click it:
Step 2: Configure Backup Schedule
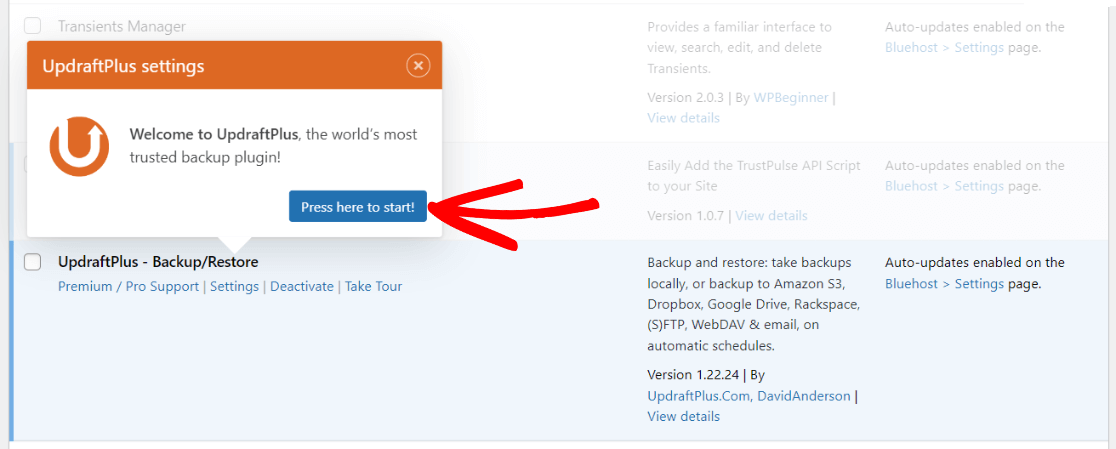
After you activate the plugin, you’ll be taken to your installed plugins list with a popup message on UpdraftPlus. Click the Press here to start button.
Now, you’ll have the chance to create your first backup.
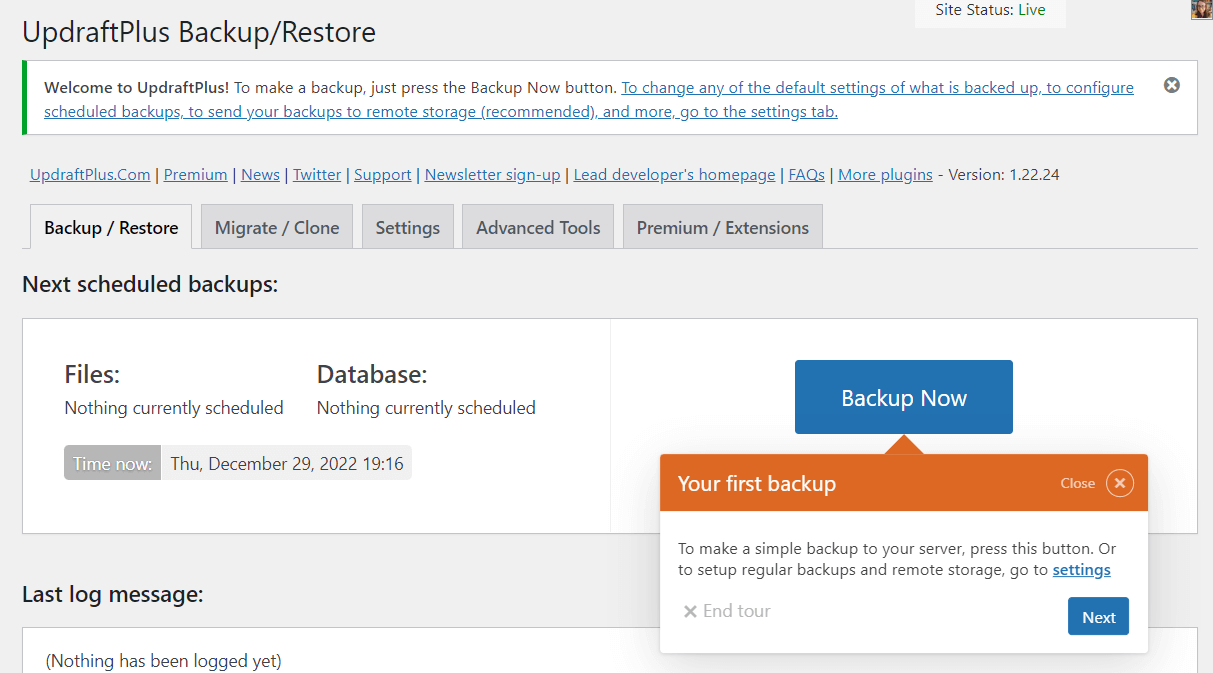
However, the Backup Now button is only if you’re backing up to your own server, which isn’t recommended. Instead, let’s head to the Settings tab.
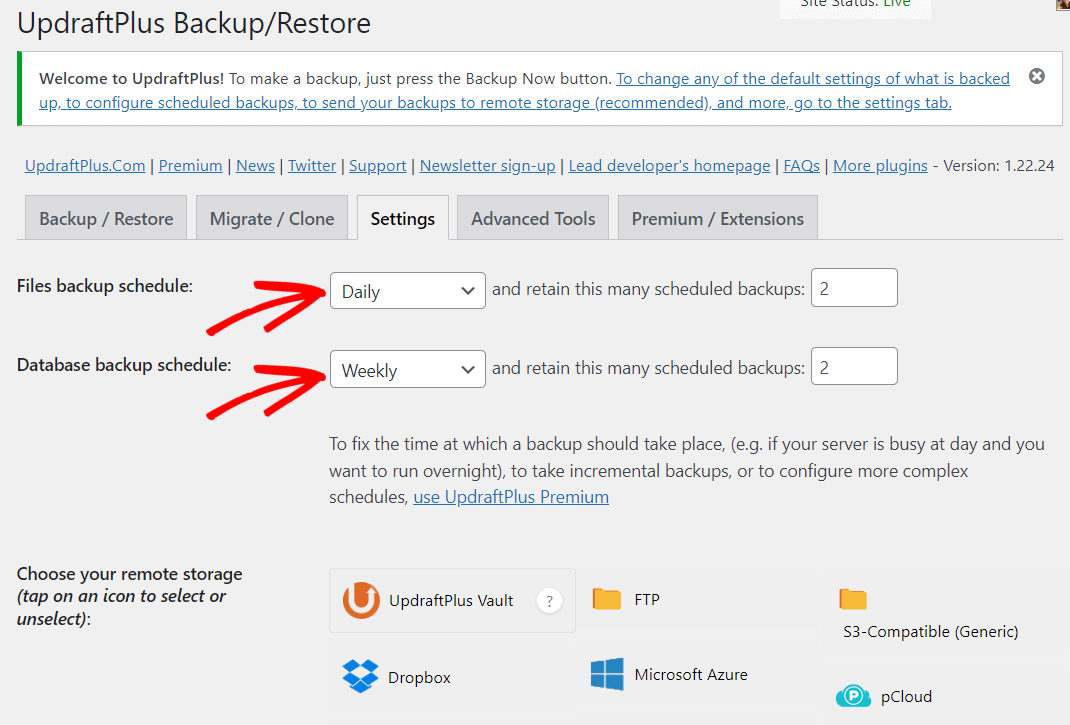
The first settings you’ll see are for how often you’d like to back up WordPress files and your database. How often you create backups is up to you, and can vary based on how often you’re making updates to your site.
Step 3: Choose/Connect a Backup Location
Now, it’s time to choose and connect with the remote storage location of your choice. For this tutorial, we’ll connect with Google Drive.
First, we’ll click the Google Drive option:
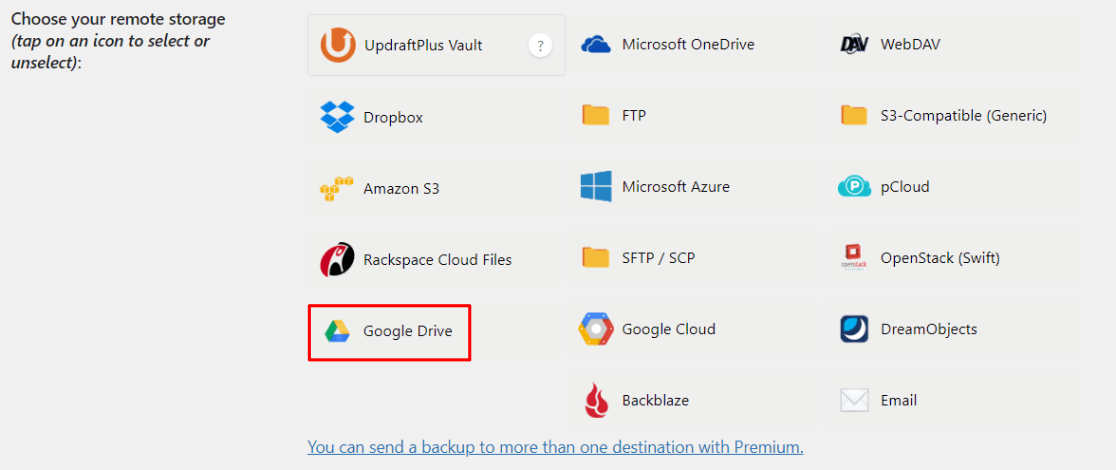
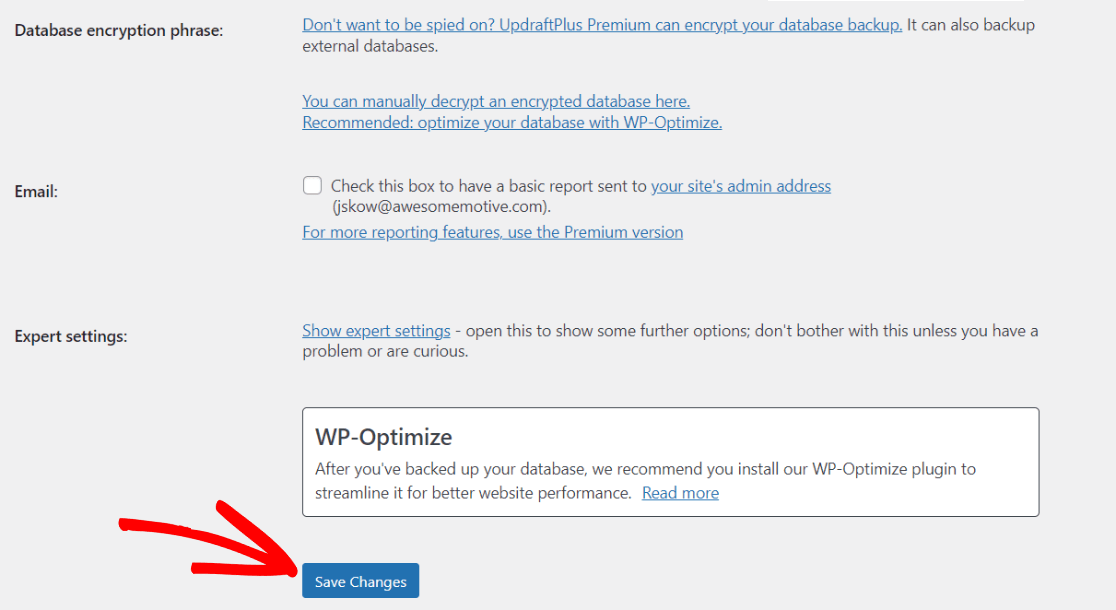
That’ll open up options below. However, instead of clicking anything there, scroll down to the bottom of the page and click Save Changes:
Now, scroll back up and click the Sign in with Google button:
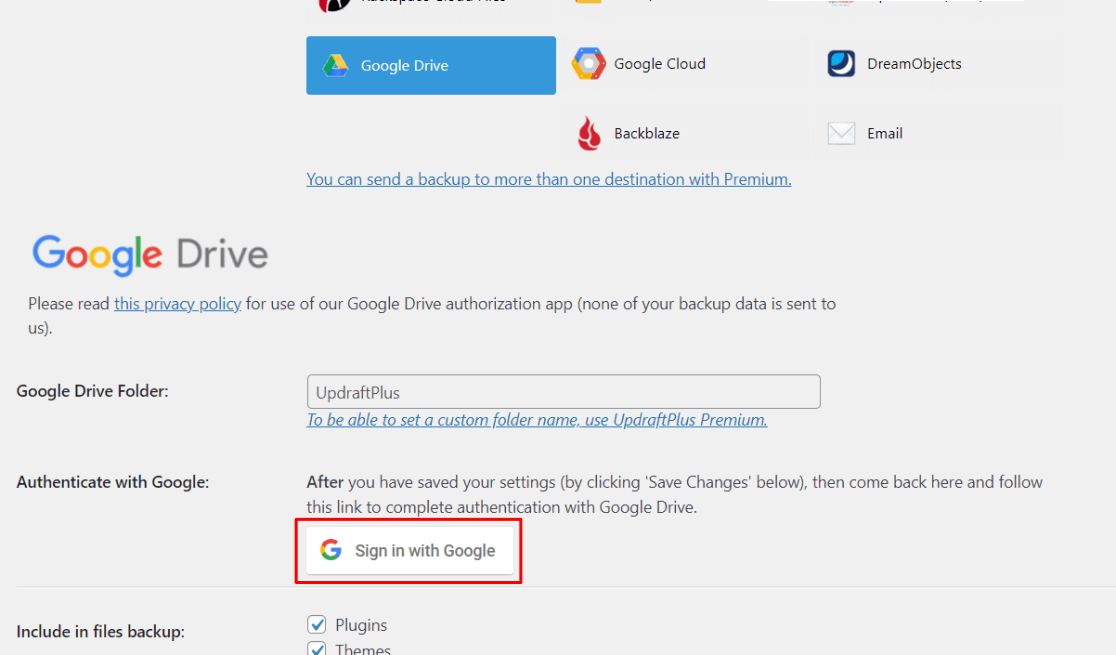
Note: If a dialogue box opens asking if you’re sure you want to leave the site, go ahead and click the Leave button.
Once you follow the prompts for choosing your Google account, you’ll land on an orange screen. Go ahead and click the Complete setup button:
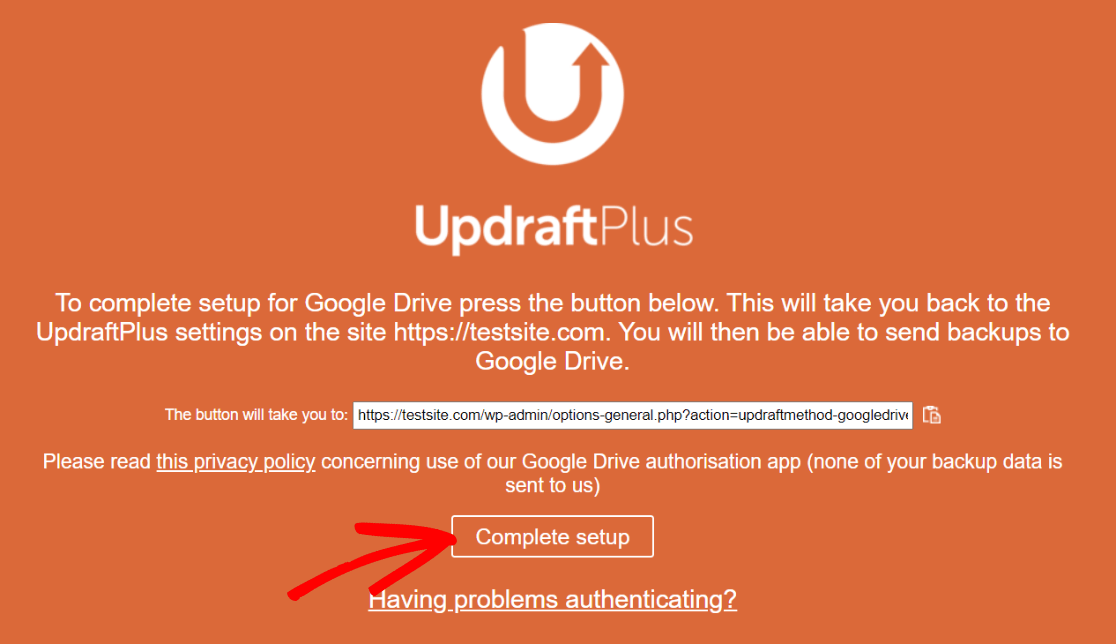
You’ll be sent back to your WordPress dashboard, and you’ll see a success message at the top:

That’s it! You’ve got regular backups scheduled.
Wasn’t that easy?
Now that you have backups under control, how about analytics? Have you set up Google Analytics on your WordPress site?
To quickly and easily connect Google Analytics and WordPress and get the metrics that matter right in your WordPress dashboard, install MonsterInsights now!
If you liked this article, we bet you’d also like to read about the Best WordPress Security Plugins to Protect Your Site.
And don’t forget to follow us on Twitter, Facebook and YouTube for more helpful reviews, tutorials, and Google Analytics tips.
