FOMO, or fear of missing out, is a marketing strategy called social proof marketing that you can use on your website. Want to encourage your website visitors to make a purchase or sign up for something by using FOMO popups? You can do that with a FOMO WordPress plugin!
FOMO popups work by showing your visitors that others are completing purchases or signups, giving them that fear of missing out feeling. If products or services are flying off the shelves or everyone is signing up for something, prospective buyers or subscribers don’t want to miss out!
The best FOMO popup WordPress plugin is TrustPulse. In this article, we’ll show you how to quickly and easily take advantage of social proof marketing by setting up FOMO popups on your WordPress site using TrustPulse.
Benefits of FOMO Popups & Social Proof
Social proof marketing uses the same marketing idea as recommendations. While FOMO popups aren’t showing recommendations, purchasing a product or service is like a vote for it. If that person is buying it, maybe you should, too!
Increase conversions. Using a FOMO popup can increase your conversions by 15%! Once you show people that social proof, they’re more likely to convert and complete their purchase.
Reduce cart abandonment. Did you know that the average cart abandonment rate is about 70%? That’s a HUGE amount of potential buyers that leave without completing their purchase. Showing social proof on your cart page can really help convince shoppers to make that purchase.
Works for any type of website. Whether you run an eCommerce website, a membership site, a news site, or a blog, you can benefit from social proof notifications.
What is TrustPulse?
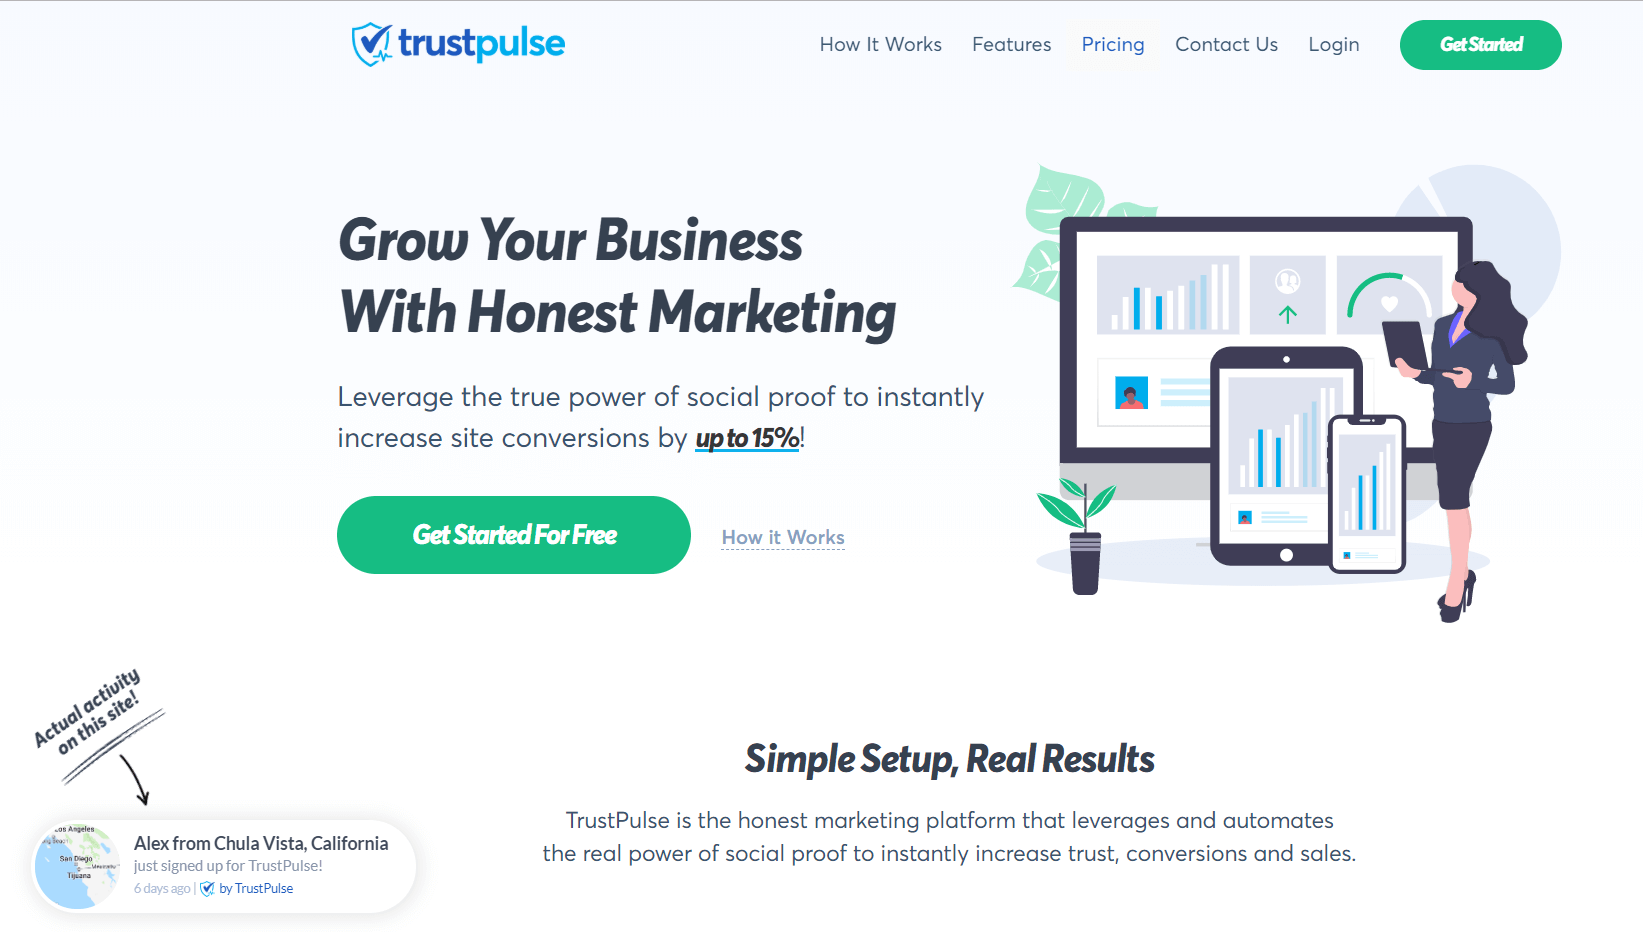
TrustPulse is the best honest marketing platform that leverages and automates
the real power of social proof to instantly increase trust, conversions and sales. While TrustPulse works with any website, they have a fantastic WordPress plugin to integrate their platform seamlessly with your WordPress site.
So, in no time, you can be showing social proof to your WordPress site visitors, totally customized to your site!

Set up WordPress FOMO Popups in 6 Simple Steps
Follow this tutorial to have FOMO popups running on your site in just a few simple steps.
1. Purchase TrustPulse
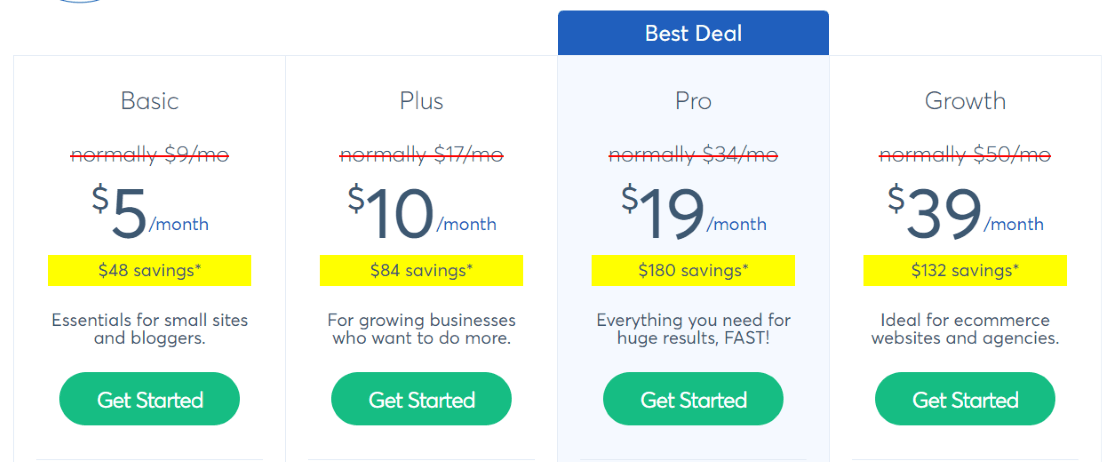
First, you’ll need to purchase a TrustPulse plan (they start at only $5/month).
Once you’ve picked a plan and gone through checkout, you’ll be prompted to enter your site’s name and domain:

2. Select a Campaign Type
Next, you’ll be prompted to create your first campaign. There are 5 campaign tabs that you’ll be guided through.
The first tab is Campaign Type. You’ll enter a name for your campaign, choose the site to run it on, then choose from 4 different types of campaigns:
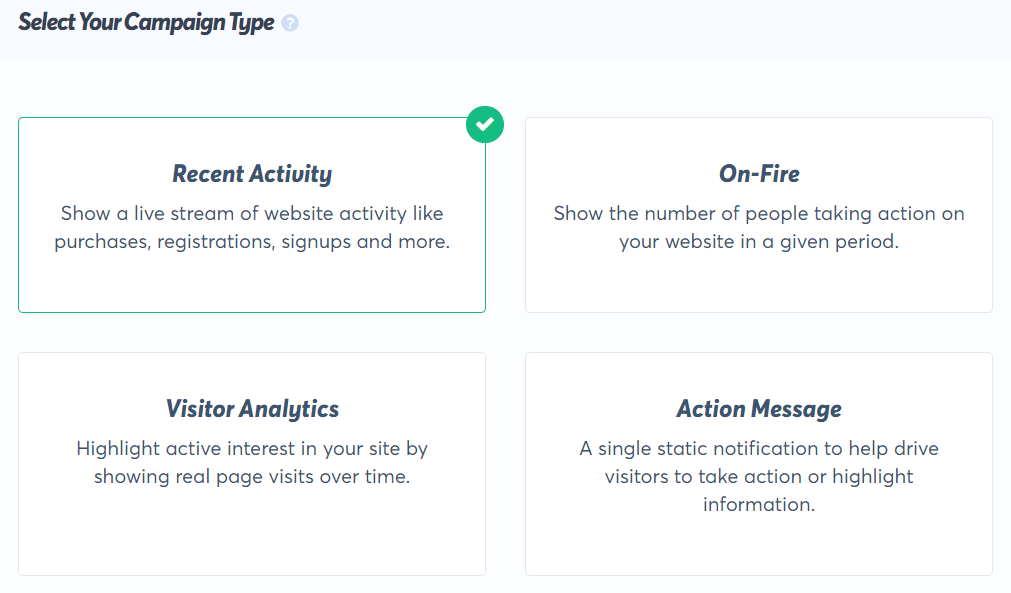
For the sake of this tutorial, we’ll stick with the Recent Activity campaign type.
3. Customize Your Appearance & Design
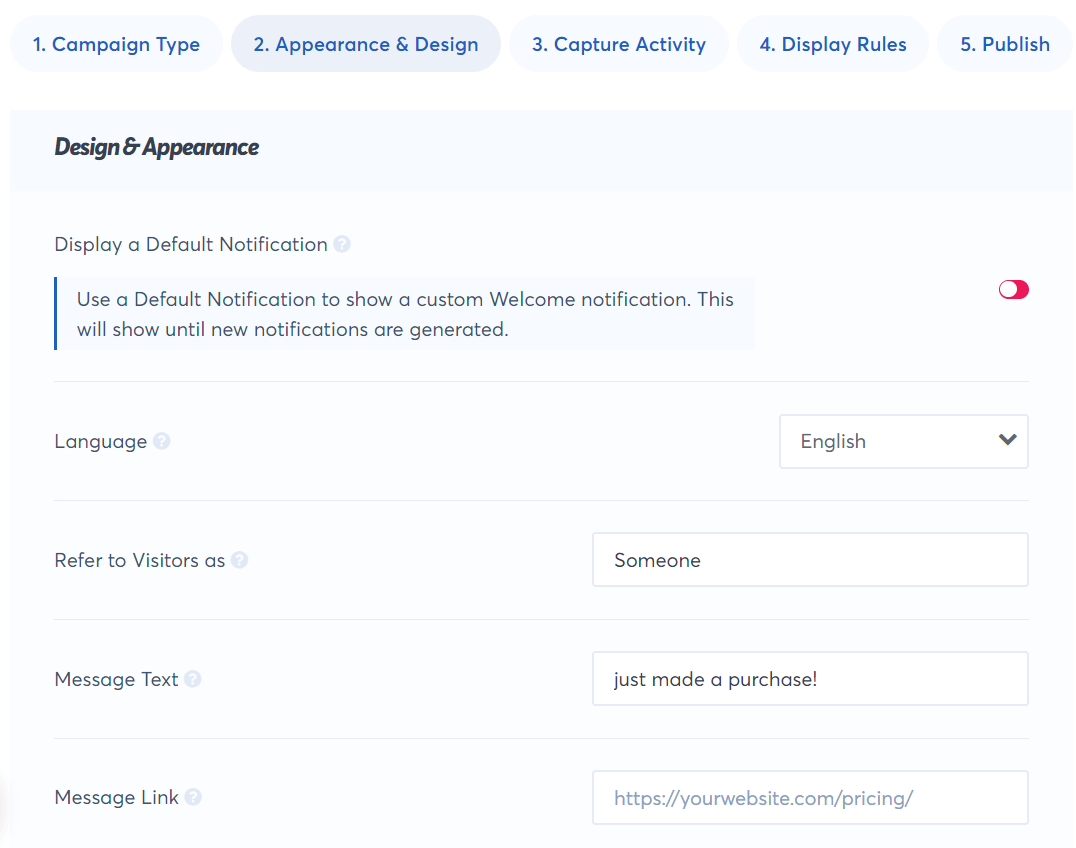
The next tab is Appearance & Design. In this tab, you’ll choose what your popups say, whether they link to anything, the image on your popups, what they look like, and how they show up (slide in or fade in). If you have a question about any of the settings, hover over the question mark to read more about it.
4. Choose Capture Activity Settings
The third tab is Capture Activity. This is where you’ll tell TrustPulse what user activity you want other visitors to be notified of. If you have a WooCommerce site, click on the dropdown to select WooCommerce. If you want another type of activity to be broadcast to other visitors, try AutoMagic. Or, if there’s a specific other tool you’re needing to connect with, you can choose Zapier.
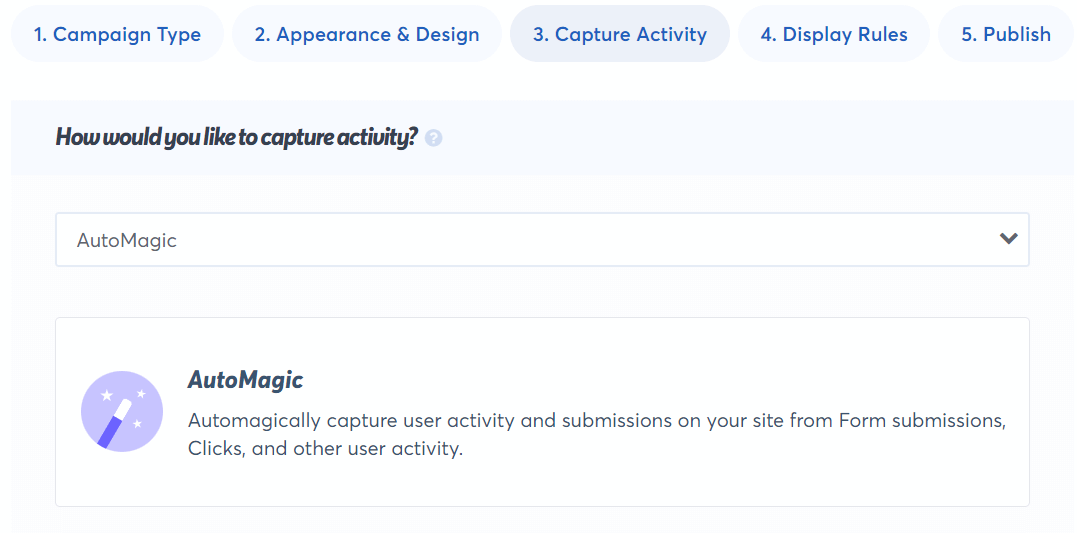
The choice you make will automatically update the options you get below. For the sake of this tutorial, we’ll connect with the AutoMagic option. If you’re connecting a WooCommerce site, follow TrustPulse’s specific WooCommerce instructions.
The questions below are where you’ll really dial in exactly when you want your popups to show up. What action that users take on your site will make the popups happen?
Let’s say we want our notifications to appear after someone signs up for our newsletter.
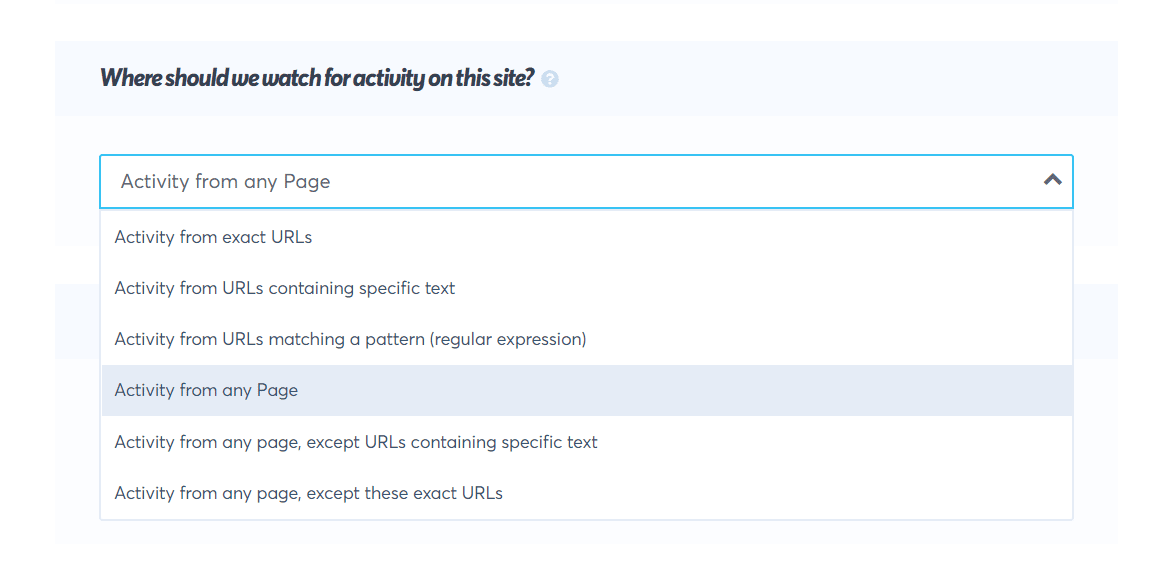
The first thing we’ll do is choose which page(s) TrustPulse should watch. Since our newsletter signup form is on all of our pages in the sidebar or footer, we’ll leave it set to Activity from any Page. If you want to watch a specific page, though, this is where you’d set that up:
We’ll leave the Activity Type dropdown on Form Activity, but this is where you could also choose a click on a specific button or link for TrustPulse to track:

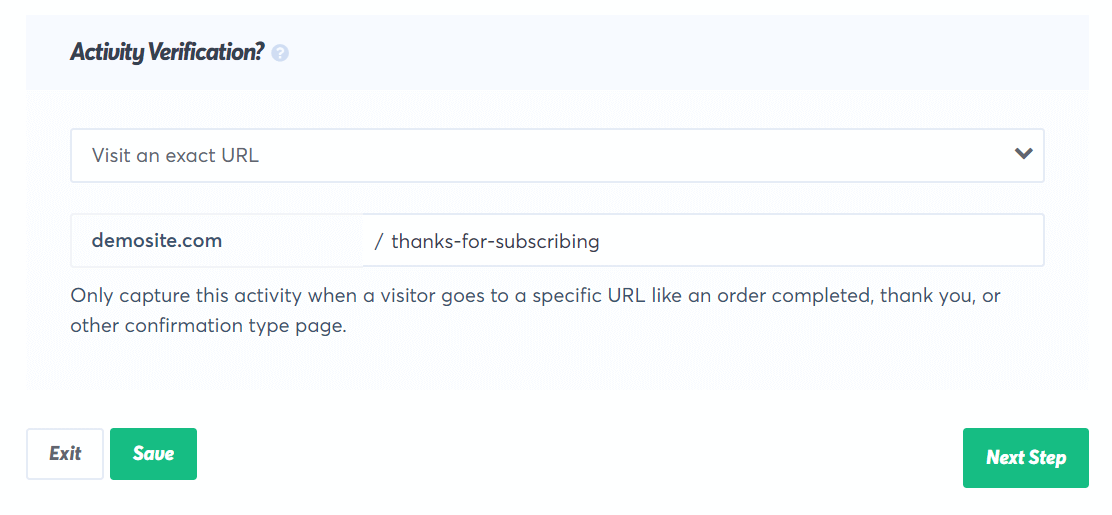
Finally, you can set up Activity Verification. This is great for making sure you’re only alerting visitors to real conversions! We’ll pretend that, after subscribing to our newsletter, visitors go to a thank you page. So, we’ll choose the Visit an exact URL option and input our thank you page.
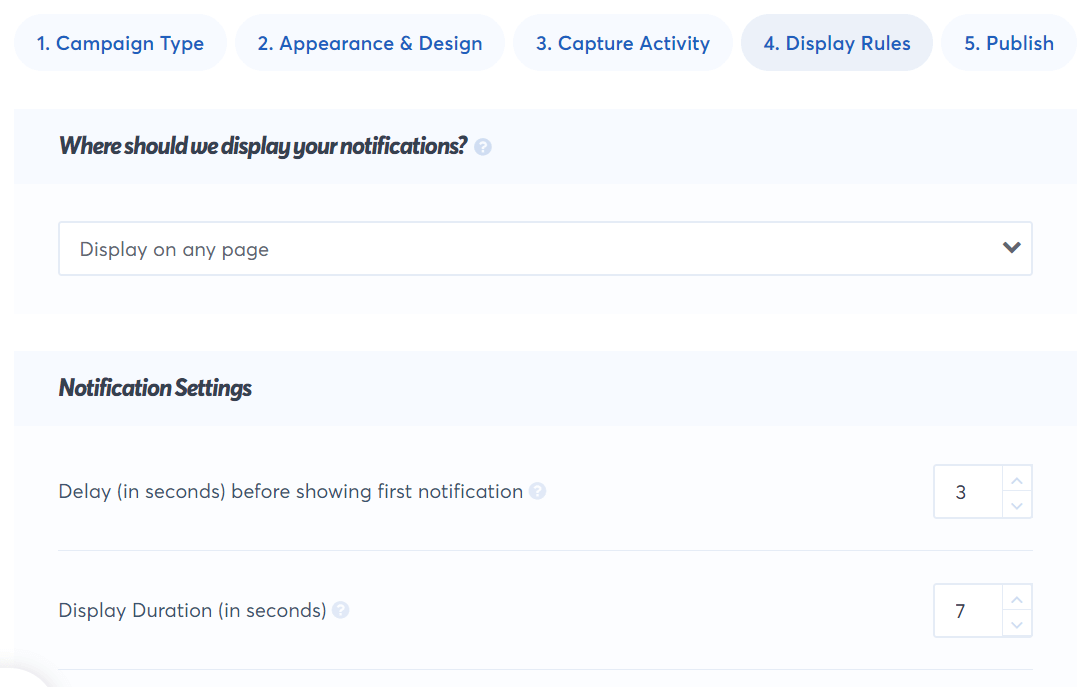
5. Choose Display Rules
The fourth tab is Display Rules. This is where you’ll choose when and how often you want your FOMO popups to show up.
6. Install TrustPulse on WordPress
Finally, you’ll reach the Publish tab:
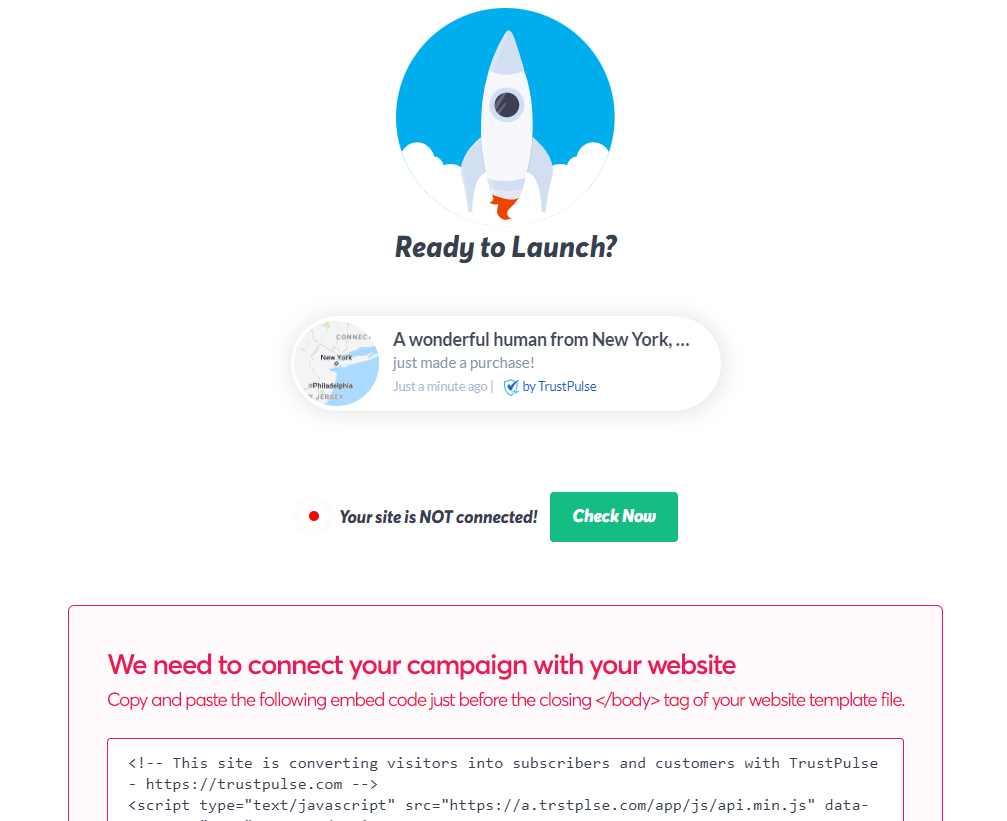
If you chose to connect your WooCommerce site, you’ll have already been walked through this step. If not, let’s go ahead and install.
Head to your WordPress admin and navigate to Plugins » Add new. Search for TrustPulse and click Install now.
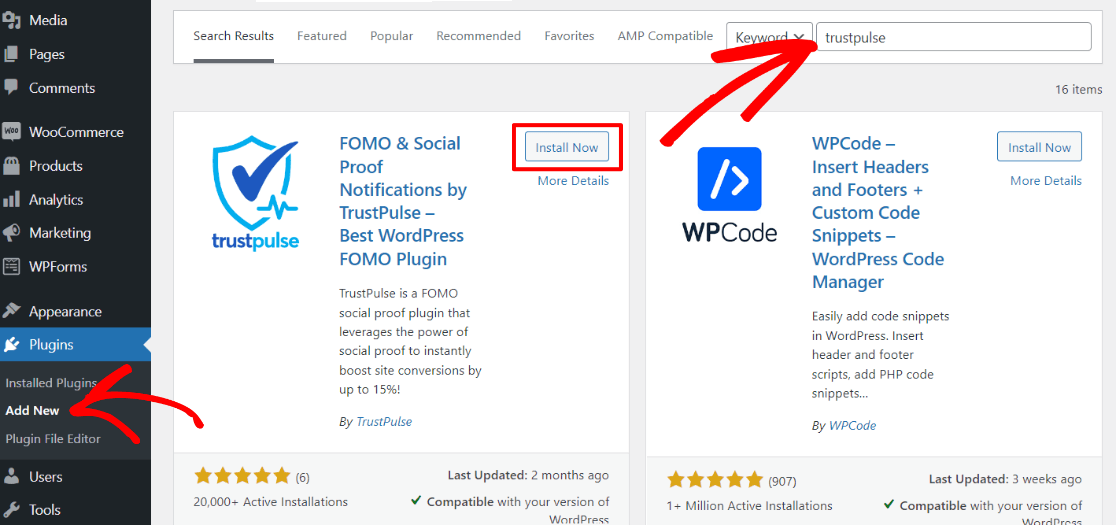
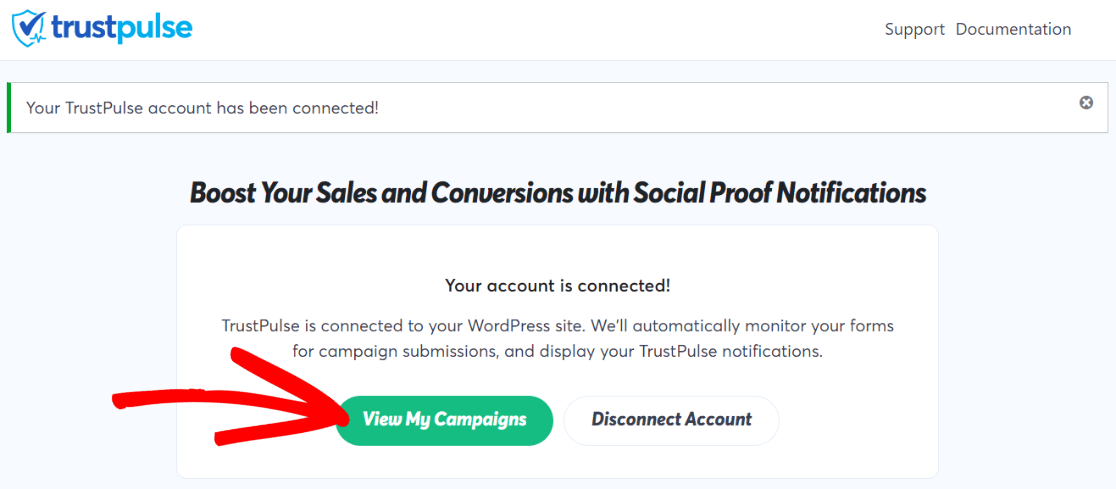
When it’s done installing, click Activate. Then, you’ll land on the main TrustPulse screen, where you can click the button to Connect Your Existing Account:
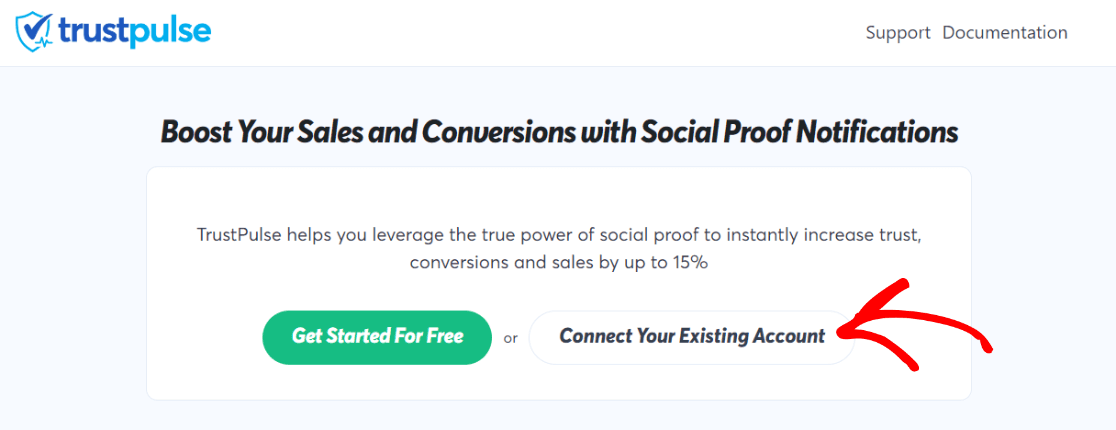
If you’re signed into TrustPulse in the same browser, you’ll automatically be connected.
Now, go ahead and click the View My Campaigns button:
Finally, toggle your campaign on:

That’s it! You just created your first FOMO popups campaign.
We hope you found this tutorial helpful. Now that you’ve created FOMO popups, did you know that there’s another way you can increase conversions on your website? Check out What are Web Push Notifications? Beginner’s Guide.
Not using MonsterInsights yet? What are you waiting for?
And don’t forget to follow us on Twitter, Facebook and YouTube for more helpful tutorials, reviews, and Google Analytics tips.
