Want your stats to identify logged-in users by their WordPress user IDs? It’s easy with MonsterInsights. In this guide, we’ll show you how to enable user tracking in MonsterInsights and in Google Analytics, so you can start tracking individual logged-in users.
Before starting, you’ll need to have MonsterInsights Pro installed and your Google Analytics account connected.
Step 1: Enable User Tracking in MonsterInsights
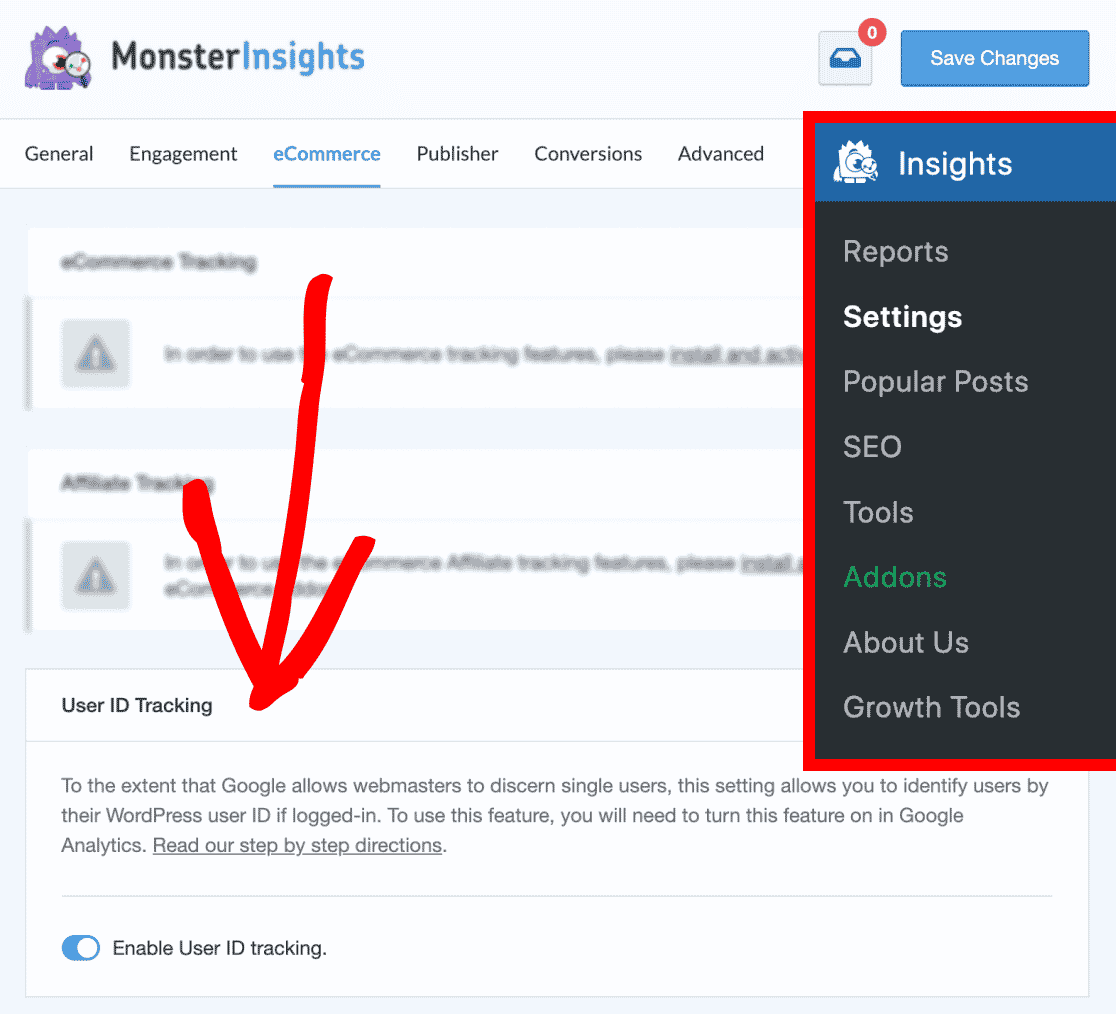
The first step is quite easy. You’ll need to navigate to Insights » Settings » eCommerce in your WordPress dashboard.
From here, you can check the Enable User ID tracking toggle to turn it on. The panel will auto-save your new setting as soon as the toggle is adjusted, but you can also click on Save Changes.
Step 2: Enable User Tracking in Google Analytics
Tracking is automatically set to utilize a supplied User ID by default at Admin » Reporting Identity.
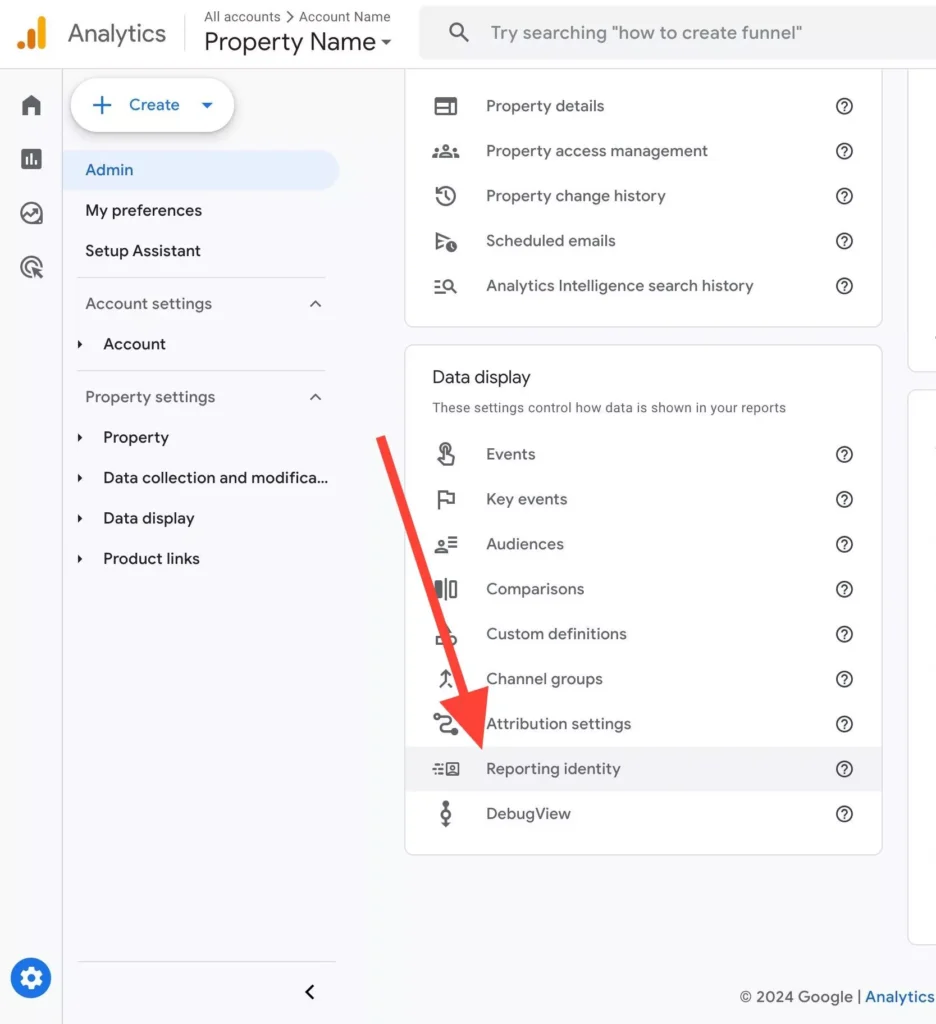
You’ll see two options Blended and Observed.
The Blended option (recommended) will be selected by default.
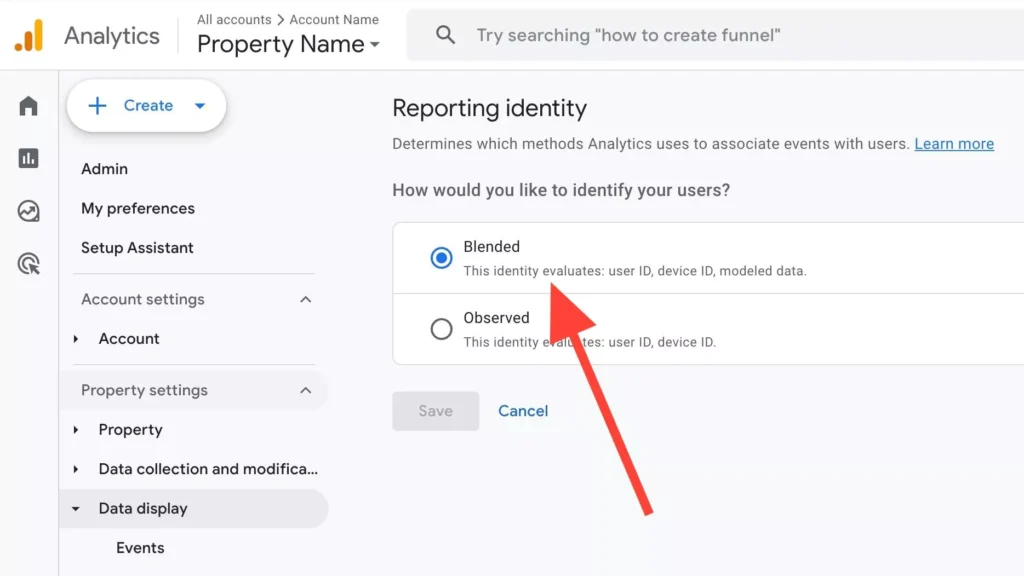
This means your property will try to use User ID if it’s available. If there isn’t any User ID to use, client ID will be used as a fallback.
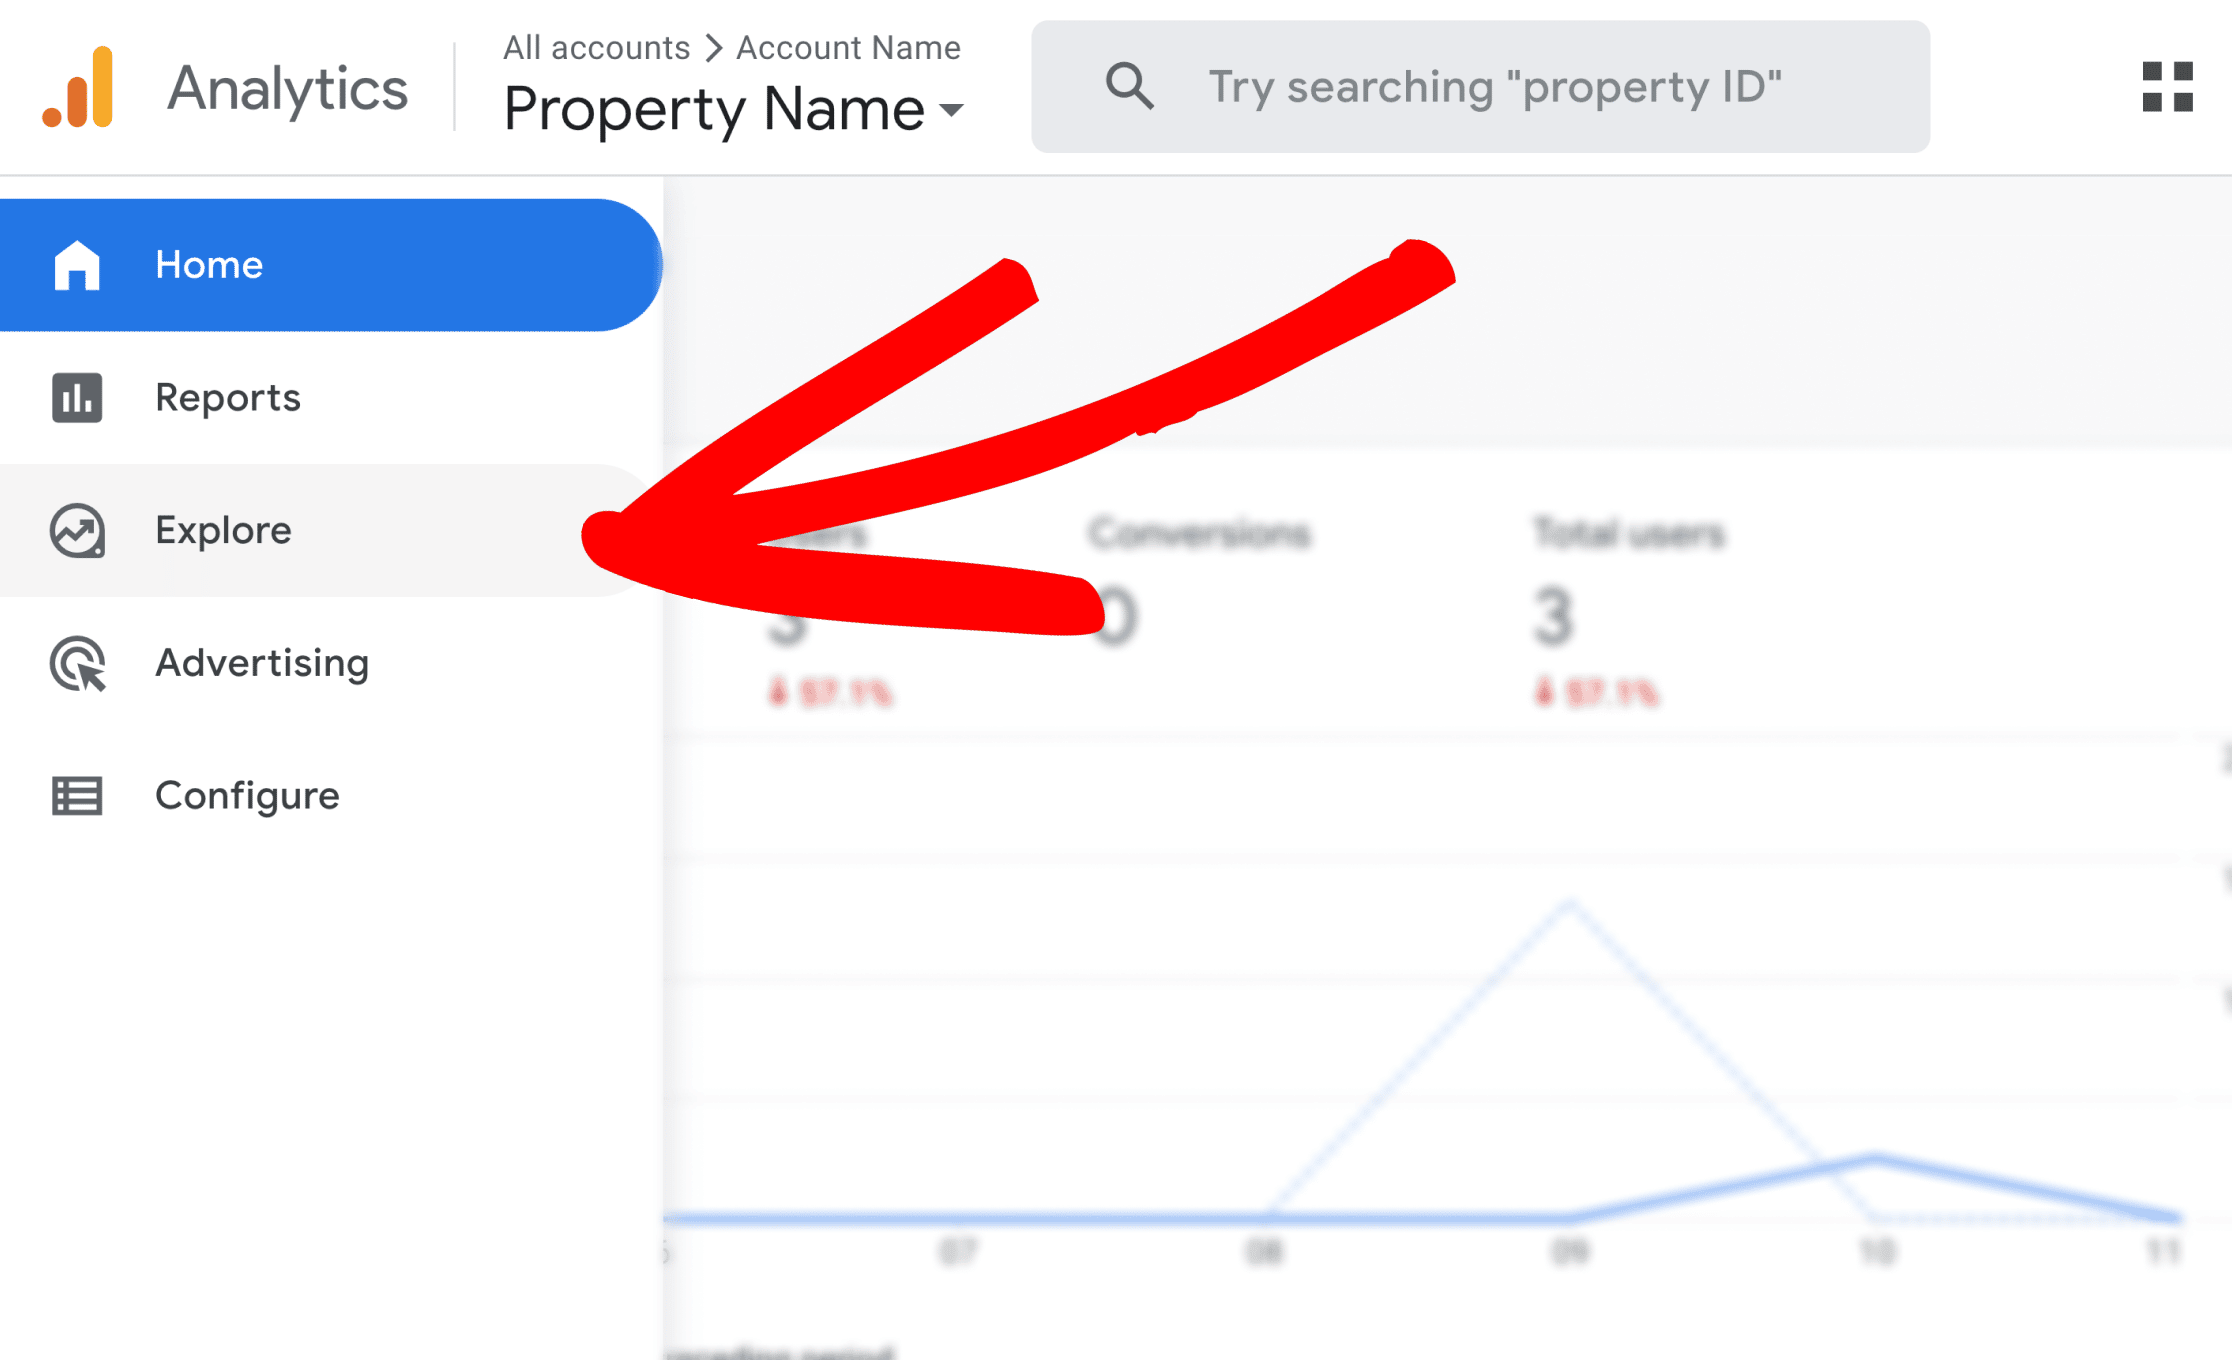
To see your data, go to Explore and create a User Explorer custom exploration.
Within this custom report, typically you’ll see a client ID.
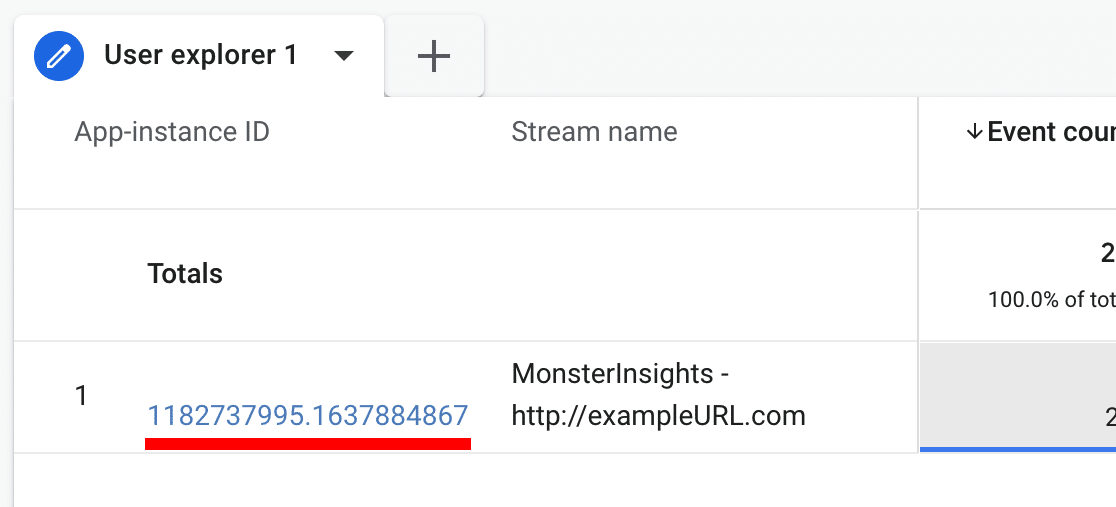
But with User ID tracking enabled, it will be replaced with a WordPress User ID.
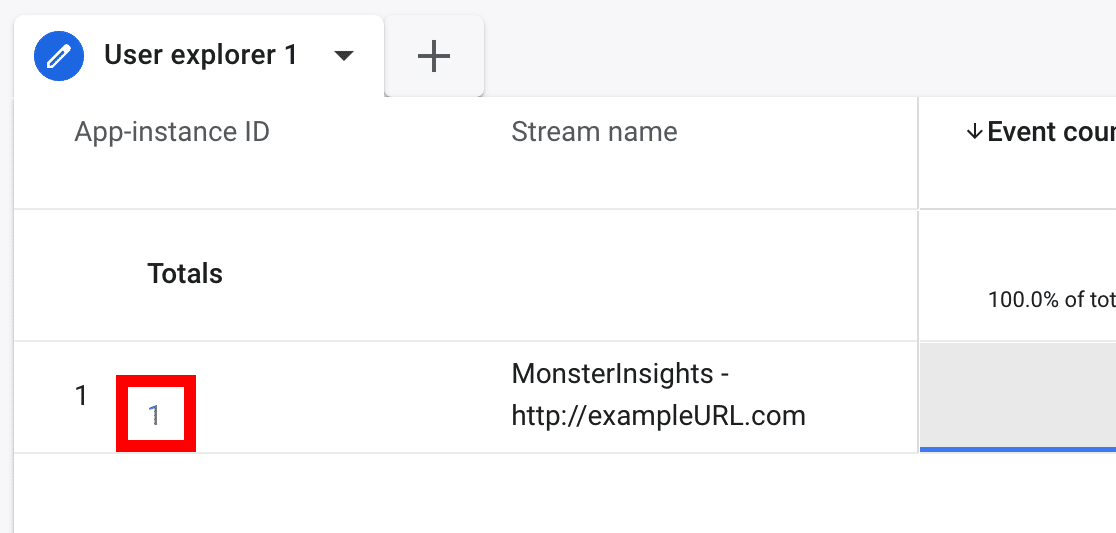
Wondering how to tell which WordPress user belongs to which ID? To find out, just go to your WordPress dashboard and click on Users » All Users.
Then, hover your cursor over the user you want to find the ID for. You’ll see a URL appear at the bottom of your browser. In the middle of the URL, it will say “user_id=”. The number after that is the user’s ID number.
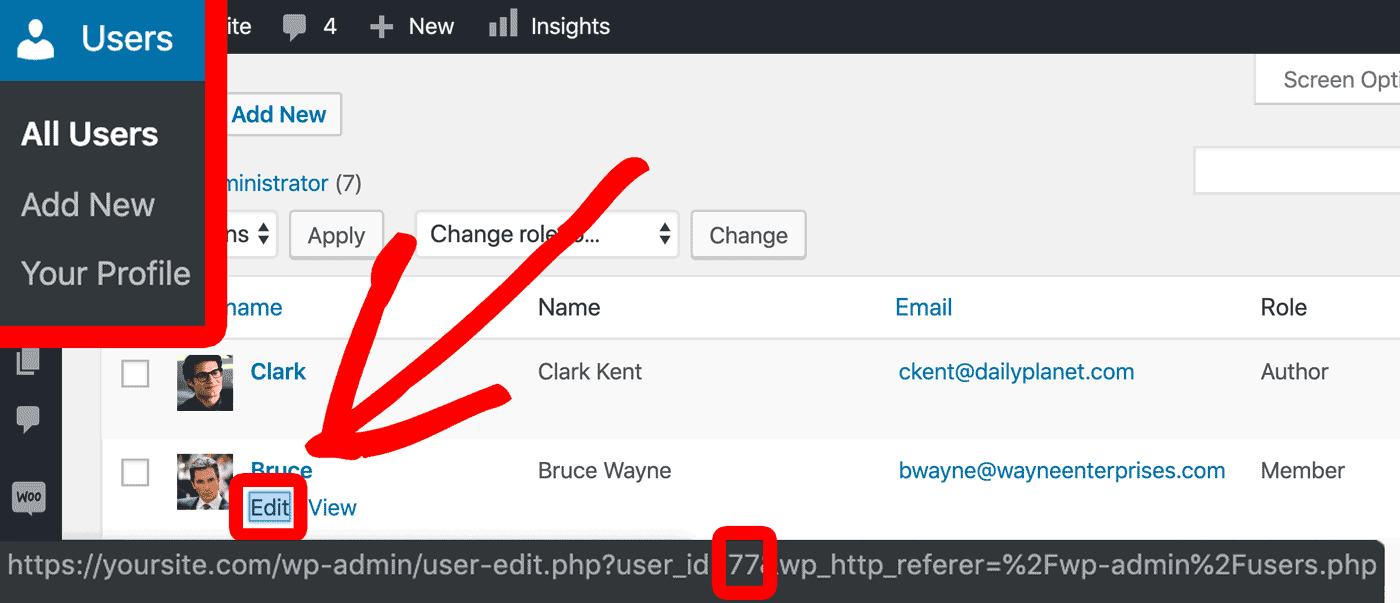
You can click the Edit link under the username to make sure. You’ll see the user ID in the web address on the edit page.

That’s it! Now you can track each WordPress user who has an account on your site.
Want to track even more data? Check out our guide on how to get started with the MonsterInsights eCommerce addon.

