Do you need to set up Google Ads conversion tracking for WooCommerce? MonsterInsights easily sets up your eCommerce Analytics tracking for WooCommerce, and also makes setting up your Google Ads conversion tracking a breeze! Follow this guide to learn more.
Prerequisites
- You’ve already set up a Google Ads account.
- MonsterInsights Pro is installed and connected to Google Analytics.
- eCommerce tracking is enabled.
- The Ads Addon or PPC Tracking Addon is installed and activated.
- Finally, you’ve connected your Google Analytics account to your Google Ads account.
Now That You’ve Completed the Prerequisites, We’ll Show You How to Set Up Google Ads Conversion Tracking with WooCommerce.
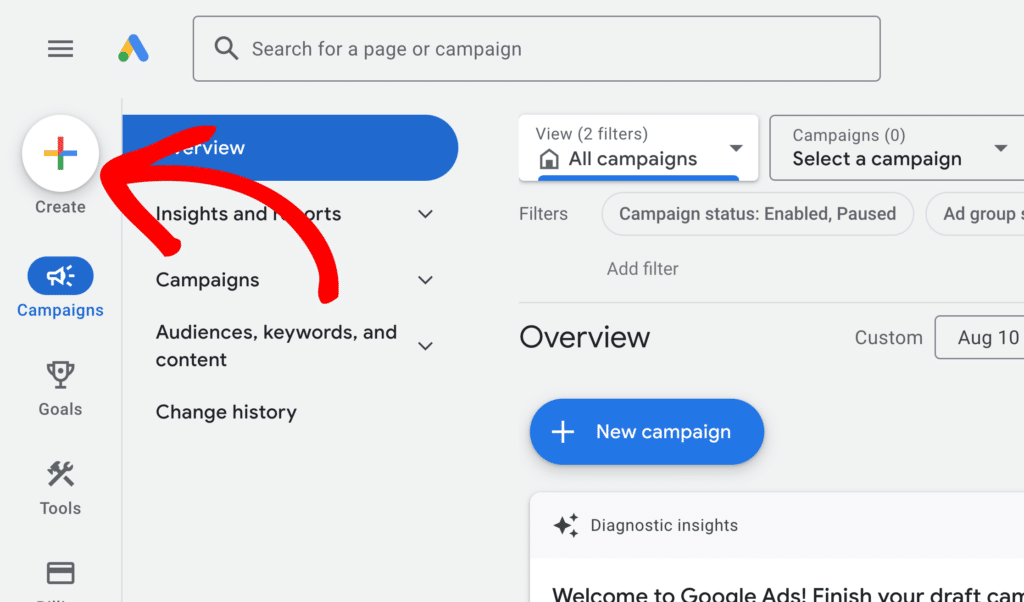
Step 1: Navigate to ads.google.com, login to your account and click on the Create button.
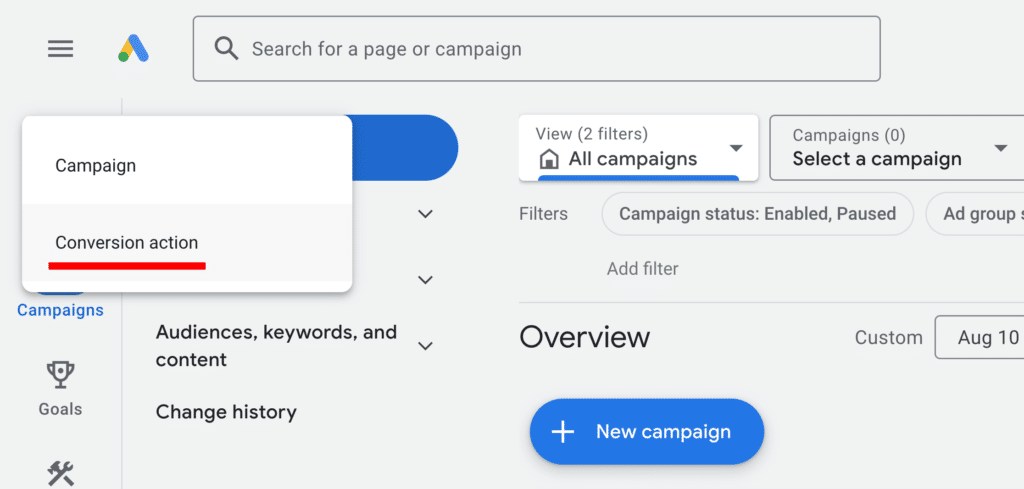
Step 2: Click Conversion action.
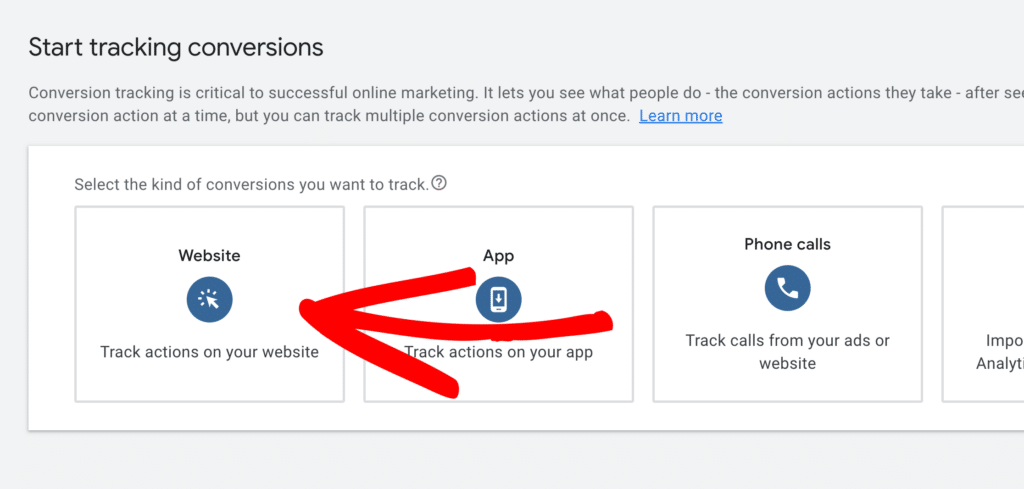
Step 3: Click Website as the type of conversion to track.
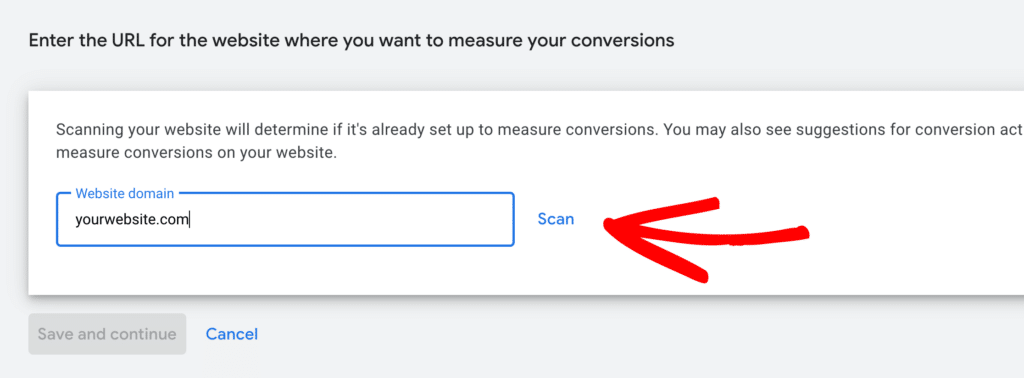
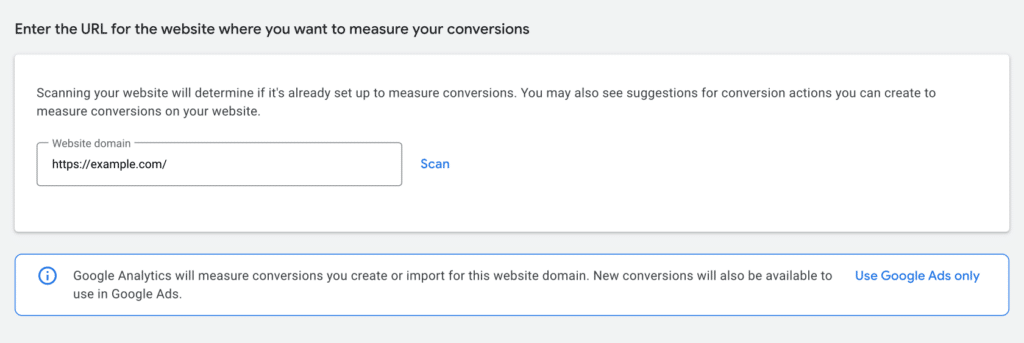
Step 4: Enter your website’s URL to be scanned.
If prompted “Which address do you want to use?”, choose which works best for your purposes and then click Apply.
Note: If your Google Ads account is set to create conversions based on Google Analytics key events, please click on the link Use Google Ads only before continuing.
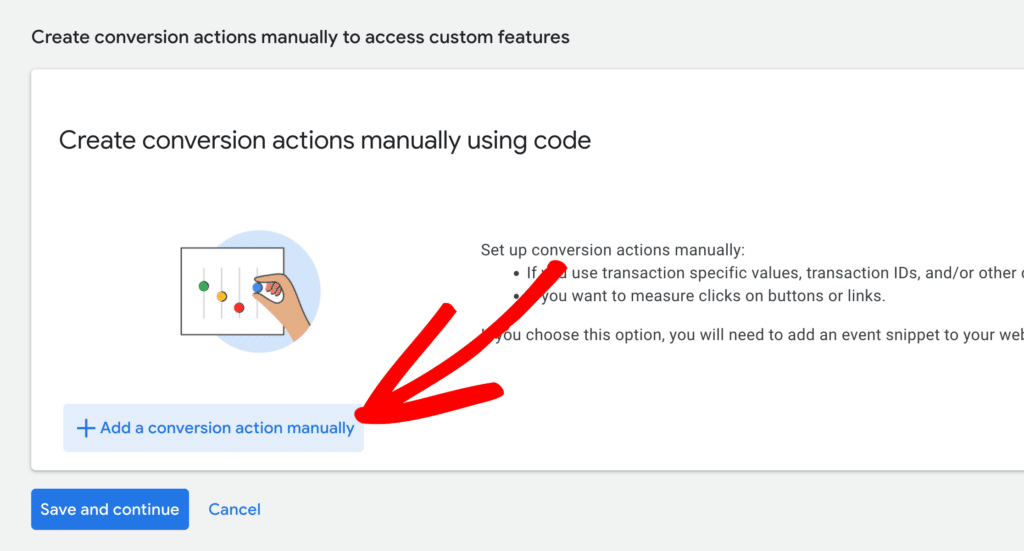
Step 5: Next, click on Add a conversion action manually.
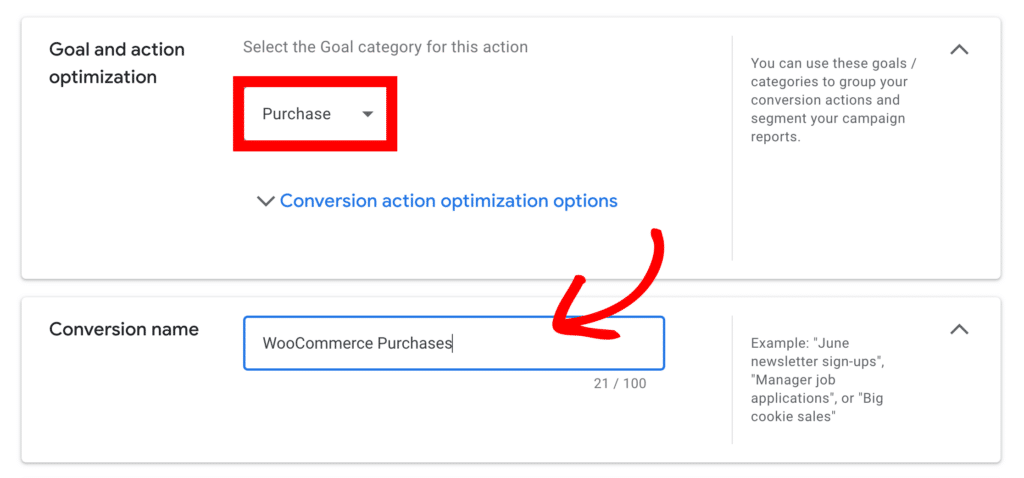
Step 6: Set the goal category to Purchase and set the conversion name to something obvious.
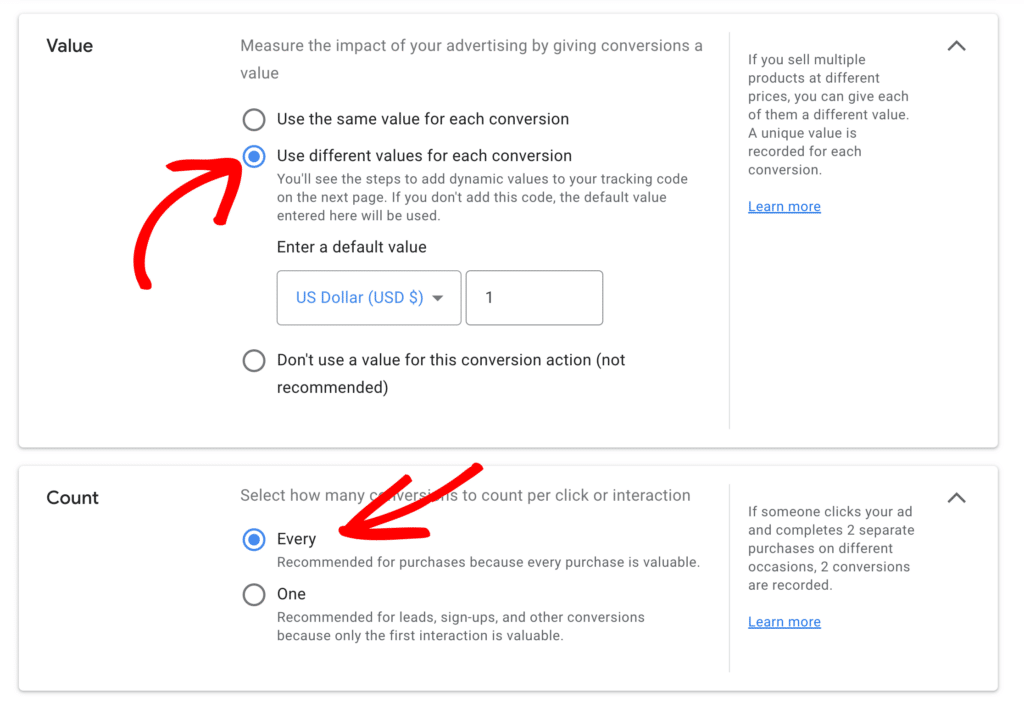
Step 7: Set the Value to Use different values for each conversion and set the Count to Every.
Step 8: Click on Done to create your conversion action.
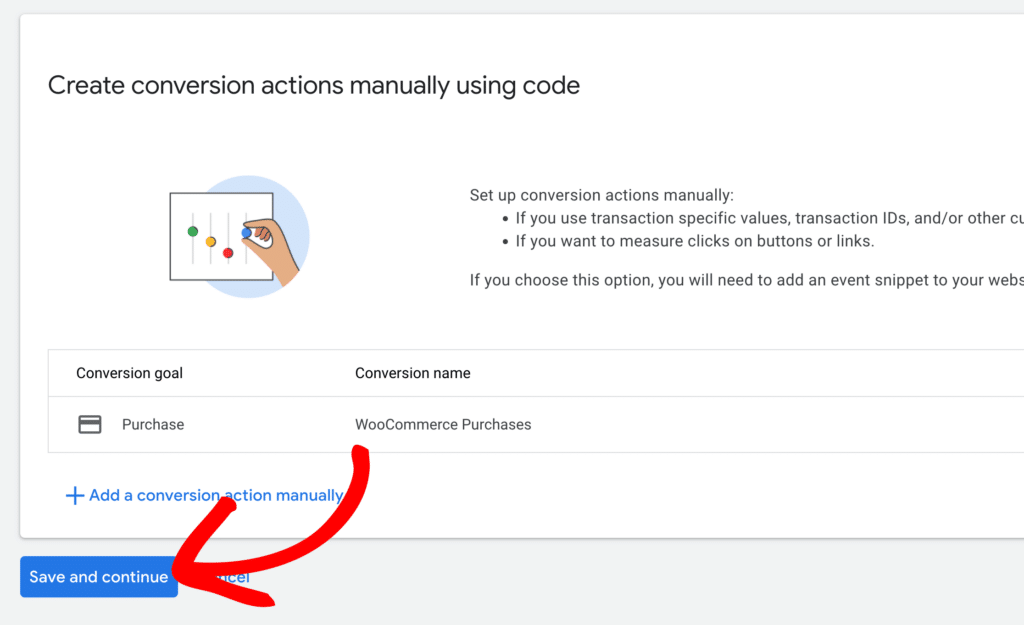
Next click on Save and Continue.
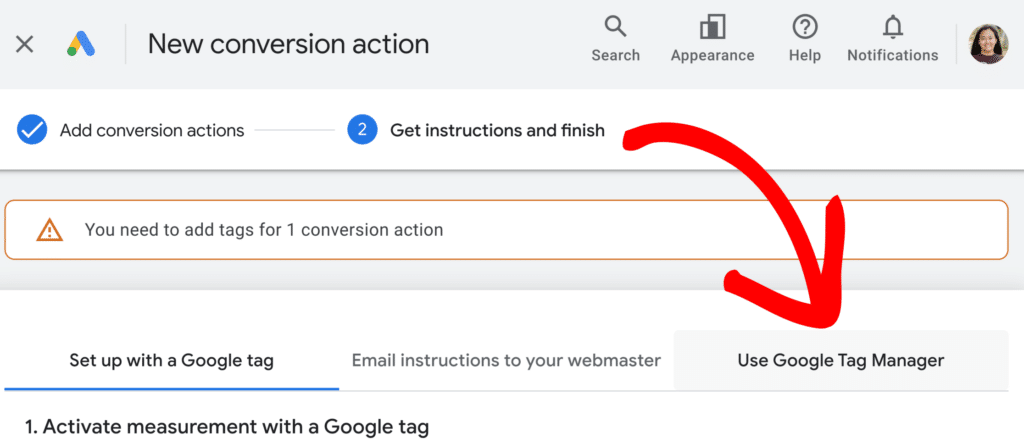
Step 9: On the next page click Use Google Tag Manager to easily locate the information you need to insert into your MonsterInsights settings.
Step 10: Make note of the Conversion ID and Conversion Label for your conversion action.
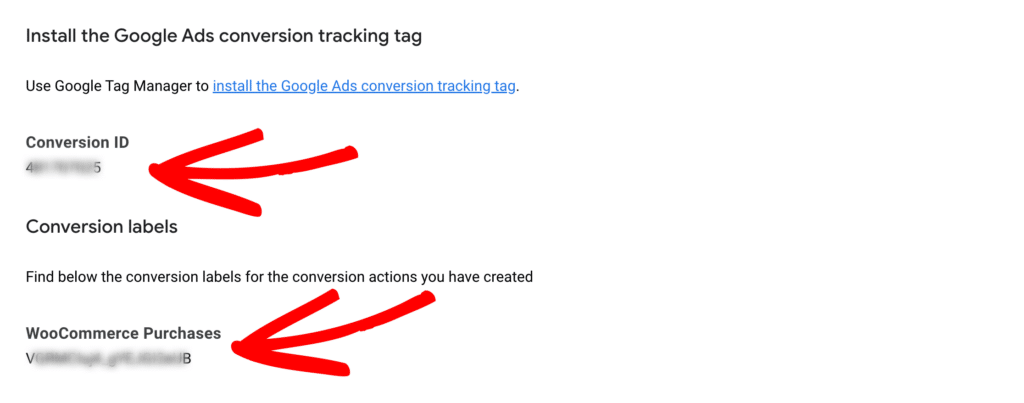
Note: MonsterInsights only supports the Conversion ID format of AW-123456789 at this time.
So if you have a Conversion ID that’s only numbers such as 123456789, when inserting this into MonsterInsights, please preface the number with AW-.
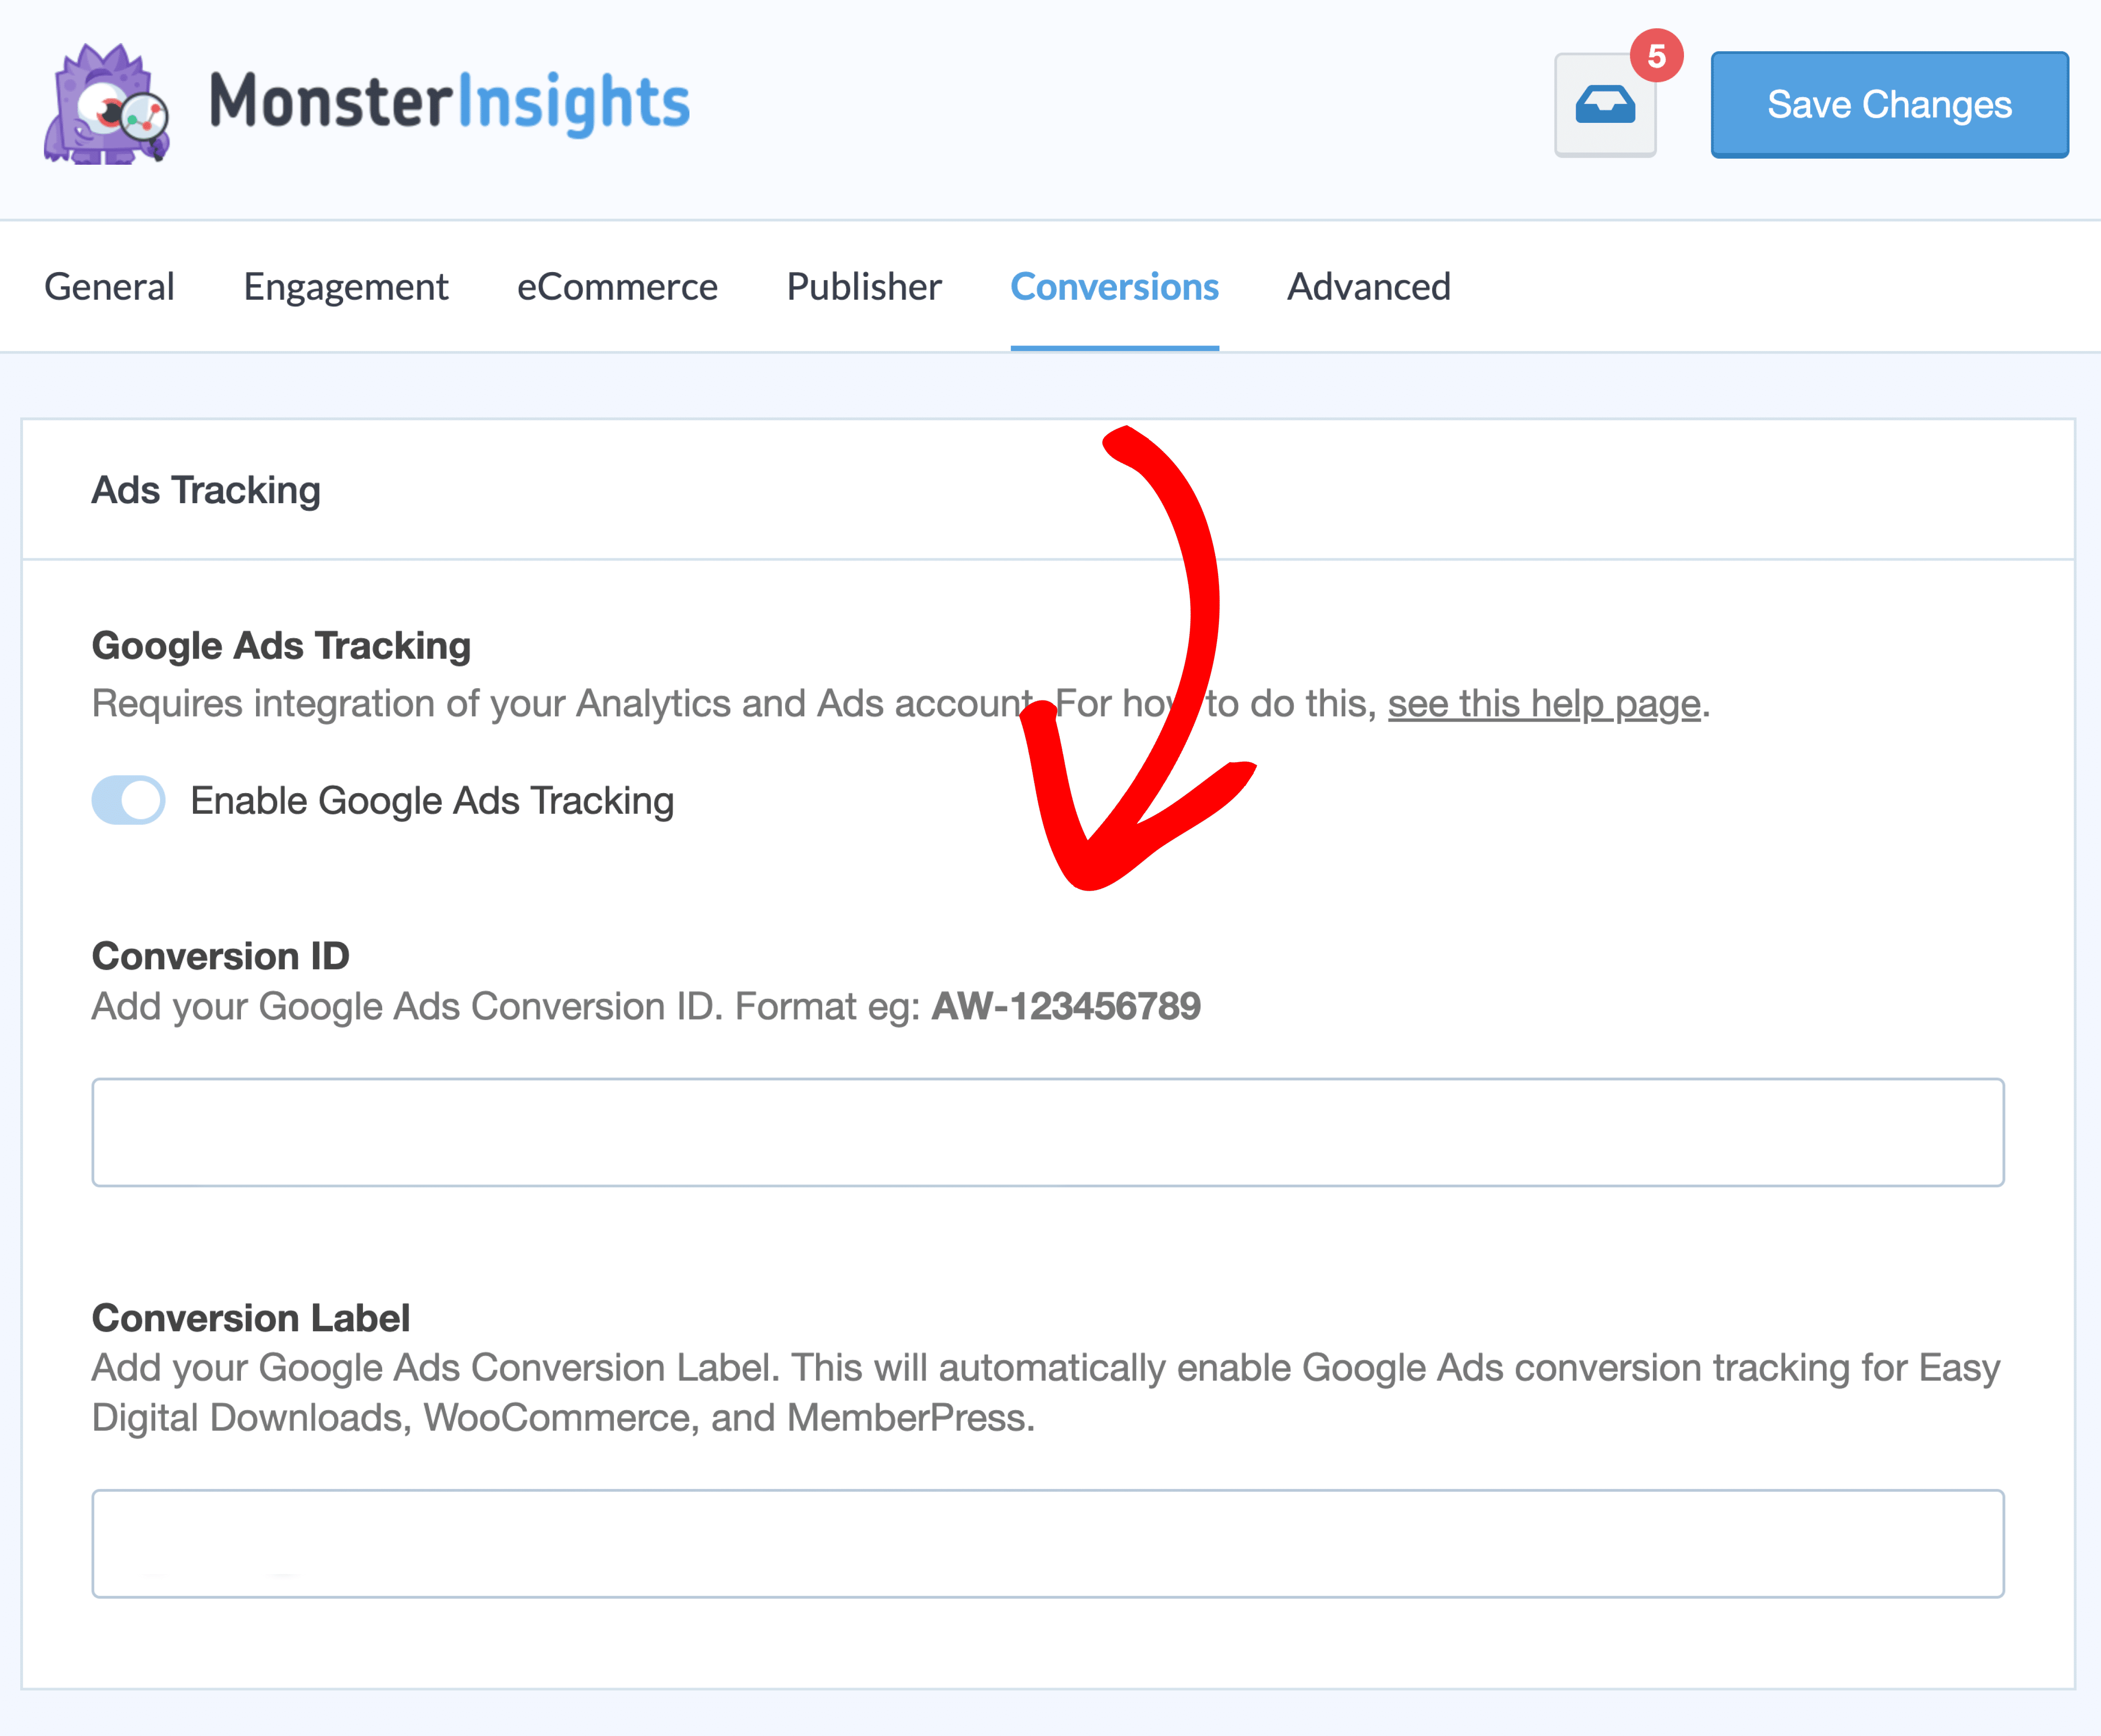
Step 11: Now that you have your Conversion ID and Conversion Label, log into your WordPress site and navigate to Insights » Settings » Conversions » Ads Tracking.
Here you will add your Conversion ID and Conversion Label.
If you would like to also insert additional pixel tracking for Bing Ads and Meta Ads, please activate the PPC Tracking addon instead of the Ads addon.
Step 12: Save your settings.
That’s it! Now you know how to set up Google Ads conversion tracking for WooCommerce. Are you interested in learning how to link Google Analytics with Google Ads Reports? Please see our Step by Step Guide.

