The PPC Tracking addon automatically integrates with WooCommerce, EasyAffiliate, Easy Digital Downloads, GiveWP, LifterLMS, MemberPress, and Restrict Content Pro, to help track the effectiveness of your ad conversions.
If you’re using any of the following platforms:
- Google Ads
- Bing Ads
- Meta (Facebook) Ads
- TikTok Ads
- Pinterest Ads
You’ll be able to easily insert each tag or pixel into your WordPress site after a few clicks. Follow this guide to get started.
Before getting started…
- You have a MonsterInsights Pro or higher license.
- You have installed the MonsterInsights plugin.
- You are connected to your Google Analytics account.
- You do not have the Ads addon active.
For a quick walk through, check out the video below.
Installing the PPC Tracking Addon
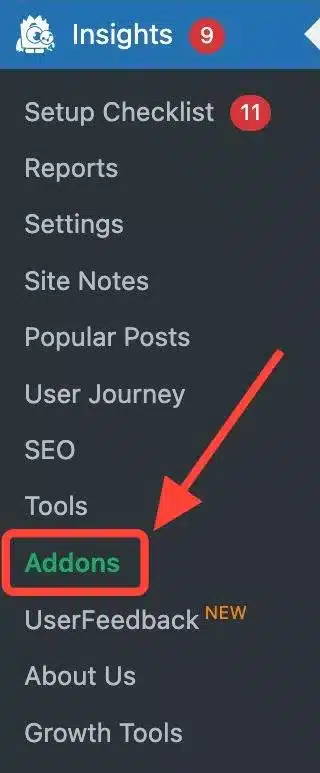
First, go to Insights » Addons.

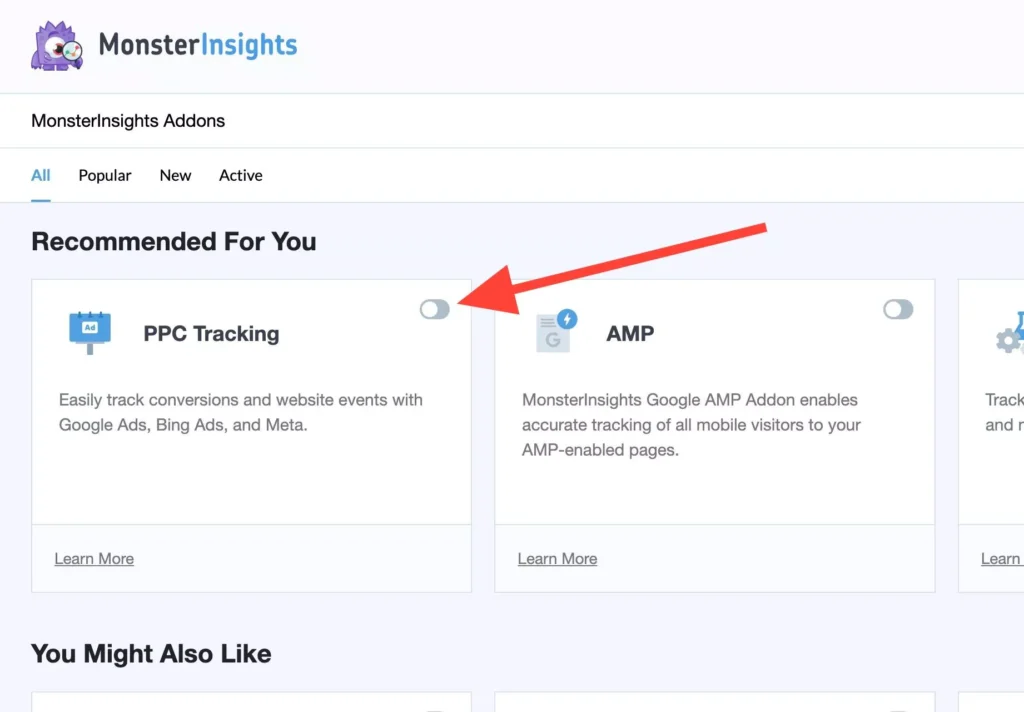
Then toggle the PPC Tracking addon to install and activate it.

Note: If you are using the PPC tracking addon, you do not need the Ads addon enabled. Only one or the other should be active.
Ads Conversion Tracking Inside MonsterInsights
Now that the PPC Tracking Addon is enabled, and you have the following ready:
- A Google Ads conversion ID and conversion label
- A Meta (Facebook) pixel
- A UET tag from Bing
- A TikTok Pixel
- A Pinterest tag ID
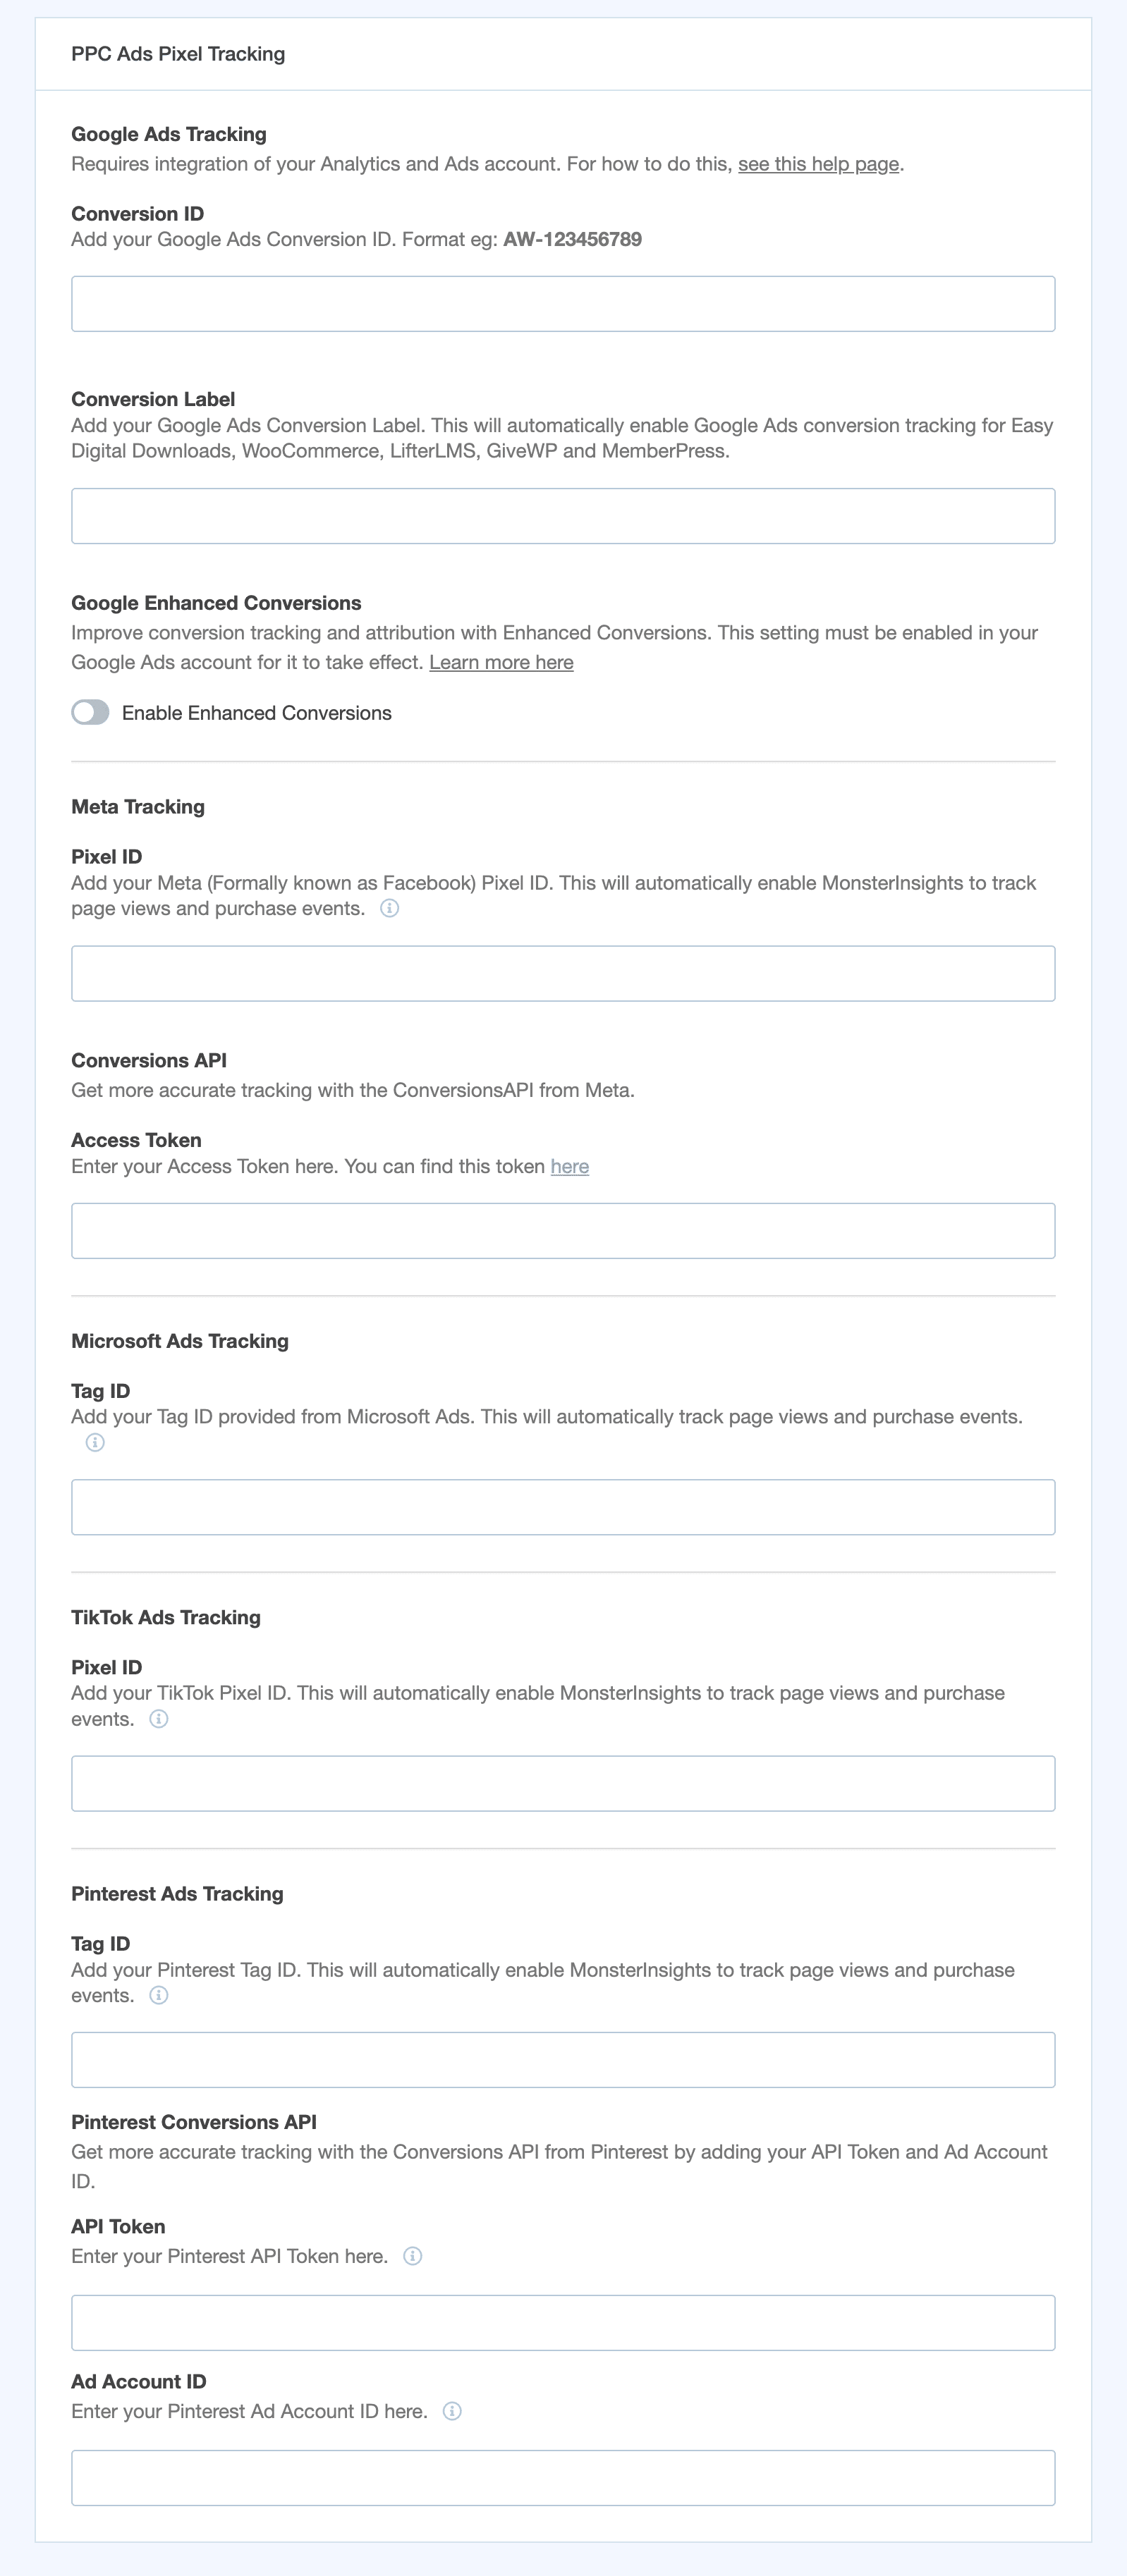
Navigate to Insights » Settings » Conversions.

Then, scroll down and insert your pixels or tags into the appropriate fields within the PPC Ads Pixel Tracking section.

For Google Ads Tracking
Please ensure you enable the MonsterInsights eCommerce Addon, this will allow you to insert a Conversion Label. Once a conversion ID and a conversion label are inserted, you’ll automatically begin Google Ads conversion tracking for your transactions.
That’s it! No further configuration is required.
What’s next? Check that your newly added tracking codes are working by using the Google Tag Assistant tool.

